• Notice for iPhone users: DO NOT use the image size reduction option when uploading photos to the forum. This causes portrait images to post as landscape. We have added a warning to the image insert pop-up as well.

Taking Built CJ7 apart to make CJ8 For Winter Use

jammer1

Scrambler Junkie
Lifetime Member
City
Maple Hts.
State
Oh
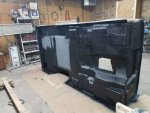
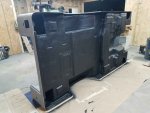
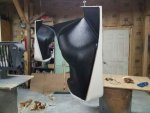
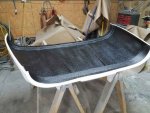
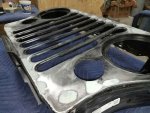
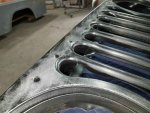
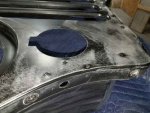
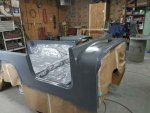
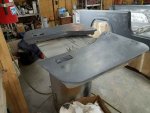
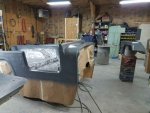
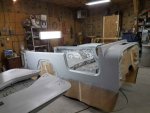
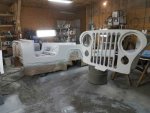
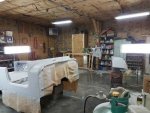
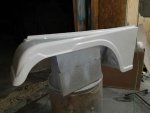
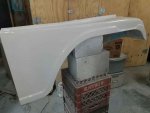
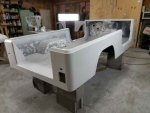
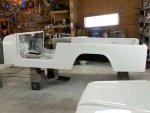
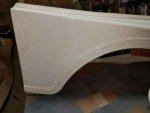
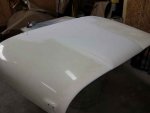
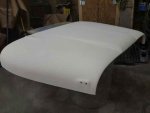
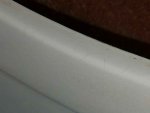
After I test fit the body on the frame I cleaned the fenders and hood. Found the fenders were from 09-04-2009. Also found the fenders had stress cracks. Sanded the fenders and hood to get to fresh gel coat. Also sanded some of the stress cracks to see if they were into the fiberglass. Most were in the gel coat. A few were into the fiberglass. For a daily driver they'll work. Seems these fiberglass fenders have a habit of flexing but being brittle.
 

Attachments

  • 20180202_135051_resized.jpg
    20180202_135051_resized.jpg
    24.4 KB · Views: 101
  • 20180202_135114_resized.jpg
    20180202_135114_resized.jpg
    20.9 KB · Views: 101
  • 20180202_150429_resized.jpg
    20180202_150429_resized.jpg
    20 KB · Views: 101
  • 20180202_154955_resized.jpg
    20180202_154955_resized.jpg
    20.7 KB · Views: 101
  • 20180202_141859_resized.jpg
    20180202_141859_resized.jpg
    13.6 KB · Views: 100
  • 20180202_134923_resized.jpg
    20180202_134923_resized.jpg
    12.8 KB · Views: 100
  • 20180202_134855_resized.jpg
    20180202_134855_resized.jpg
    15.6 KB · Views: 99

jammer1

Scrambler Junkie
Lifetime Member
City
Maple Hts.
State
Oh
Sanded the underside of the tub, hood and fenders. Sprayed epoxy on these parts then when they flashed off sprayed bed liner. They're all ready for tape and primer. Probably going to paint white. I have 3 quarts of centari gloss white enamel. White will show less of the wave that's in the fiberglass tub. Also have the paint so that's covered.
 

Attachments

  • 20180126_154051_resized.jpg
    20180126_154051_resized.jpg
    40.2 KB · Views: 101
  • 20180126_161944_resized.jpg
    20180126_161944_resized.jpg
    33.8 KB · Views: 100
  • 20180203_151147_resized.jpg
    20180203_151147_resized.jpg
    37.5 KB · Views: 104
  • 20180203_151154_resized.jpg
    20180203_151154_resized.jpg
    45.3 KB · Views: 96
  • 20180203_151204_resized.jpg
    20180203_151204_resized.jpg
    39.3 KB · Views: 100

jammer1

Scrambler Junkie
Lifetime Member
City
Maple Hts.
State
Oh
While doing the fenders I sanded the grill, smoothed out the spot welds some with body filler then epoxy primered the grill. When dried wet sanded the primer, ready for filler primer. Not trying to get grill completely straight, just make it so the spot welds weren't as deep and grill wasn't as wavy. It was as if they used a ball peen hammer and hit where they were going to put the spot weld, then did the spot weld. Put a straight edge across and they are approx. 1/4 inch deep dishing out the size of silver dollar. If this would have been the other cj8 I would have sent it back.
 

Attachments

  • 20180202_175216_resized.jpg
    20180202_175216_resized.jpg
    45.6 KB · Views: 99
  • 20180202_162422_resized.jpg
    20180202_162422_resized.jpg
    41.8 KB · Views: 97
  • 20180202_162416_resized.jpg
    20180202_162416_resized.jpg
    42.1 KB · Views: 102

jammer1

Scrambler Junkie
Lifetime Member
City
Maple Hts.
State
Oh
Crown Automotive. Didn't expect a great product. Didn't expect that bad though. Even had to hammer the bottom edge so it matched the other side (other side of body mount). Wanted something that I could use the epoxy primer and get into all seams to minimize rust.
 

Kane

CJ-8 Member
City
Berlin
State
ct
Bouncing around on the order of work done. I finished straightening out the cowl where the windshield gasket sits. Ruffed up the fiberglass and used Dura Glass to level out the cowl both from side to side and also front to back. Did it in two passes. Most people can't believe how far off the fiberglass bodys are off. When done it's flat at the ends where the windshield hinges sit, leveled out across. Also the front is about 3/8" thick in the center and 1/8" thick at the cab side (deepest is where the center of the defrost holes are. This is after the inside cab dash lip was raised to about 1/8" low. Wanted to get enough for dura glass for strength. Dura glass is waterproof so leaks or condensation won't be absorbed and dura glass gets a better bond than filler (which absorbs water).

I had this exact problem but went about it in a different manner. I made a sub frame to go under the cowl and force it straight. I tapped the subframe for the dashboard mounts and made mounts on it for behind the window hinges. It is very strong and eliminates having to reach up inside the dash for the bolts when ever the dash or the window frame needs to be removed.
 

jammer1

Scrambler Junkie
Lifetime Member
City
Maple Hts.
State
Oh
That's a good idea. I was going to drill a extra hole where the dash mounts (but not through the dash) and use a grind most of the head off. This would give me a mounting point to drop a bracket down to catch the front of the vintage air unit that I have in the cj7. Your subframe would make that and other mounting points move secure and easier to tie into. Good idea.
 

jammer1

Scrambler Junkie
Lifetime Member
City
Maple Hts.
State
Oh
Shot 2 coats of epoxy on the tub and parts. Then shot 2 coats of filler primer. Half doors have been repaired and sitting in epoxy so shot them with 2k filler primer with the other parts. Half doors are going to get painted and used on other cj8 build.
 

Attachments

  • 20180213_115738_resized.jpg
    20180213_115738_resized.jpg
    40.1 KB · Views: 66
  • 20180213_162030_resized.jpg
    20180213_162030_resized.jpg
    37.2 KB · Views: 67
  • 20180213_162035_resized.jpg
    20180213_162035_resized.jpg
    40.1 KB · Views: 68
  • 20180213_184040_resized.jpg
    20180213_184040_resized.jpg
    35.8 KB · Views: 69

jammer1

Scrambler Junkie
Lifetime Member
City
Maple Hts.
State
Oh
Thanks, not great, just hopefully good enough. Today wet sanded primer, exposed some of deeper blemishes I knew I couldn't sand out. Did glazing putty, sanded, washed and ready to shoot seal coat (hopefully I get everything).
 

bigwalton

Alaskan Postal nutjob
FORUM MANAGER
SOA Member
City
Dexter
State
MI
This thread makes me itch for some reason :eek:

Awesome stuff!
 

jammer1

Scrambler Junkie
Lifetime Member
City
Maple Hts.
State
Oh
Your not kidding. During the 2 weeks I itched. Every night came home, took a cold shower which helped. When I was in my 20,s I did my first fiberglass body. Didn't know better and did in the heat of summer in a tank top. When I got home I took a hot shower. That was a huge mistake, Itched non stop for weeks.
 

jammer1

Scrambler Junkie
Lifetime Member
City
Maple Hts.
State
Oh
Yesterday finished the primer and sanding. Washed the parts , turned the heat up to 75 degs. Today finished prepping the shop and parts for paint. Used a new gun. Not bad, just going to have to get use to it. Ended up with 3 runs and a sag in the tub (only had maybe 4 or 5 runs in paint before this project). Also rested my let against the side of the hood (never done that before). Touched it light enough that I wasn't sure I did till I looked at it. Enough paint stuck to the suit that I decided to blast it heavy, try to fill and let the run go off the hood (about 3 - 4 inches up from the edge). Worked some but since it pulled some of the 1st coat all I could do it try to get enough to hopefully wet sand it out. Discouraging day. Should be able to clean it up, next problem is only around 10 ounces of unmixed paint left (not able to find any more, discontinued). Hopefully enough for repairs.
 

Attachments

  • 20180216_130753_resized.jpg
    20180216_130753_resized.jpg
    39 KB · Views: 100
  • 20180216_115431_resized.jpg
    20180216_115431_resized.jpg
    43 KB · Views: 100
  • 20180213_184040_resized.jpg
    20180213_184040_resized.jpg
    35.8 KB · Views: 96
  • 20180216_130757_resized.jpg
    20180216_130757_resized.jpg
    26.8 KB · Views: 98
  • 20180216_130806_resized.jpg
    20180216_130806_resized.jpg
    27.6 KB · Views: 98

jammer1

Scrambler Junkie
Lifetime Member
City
Maple Hts.
State
Oh
Single Stage Dupont Centari Acrylic Enamel White 817a. I had just over 1/2 gal. left. Whits hides the waves in the fiberglass body, had the paint, might as well use it before it goes bad. Glad I took the paint and filled qt. containers. Don't think it would have lasted with any air in the can.
 

bigwalton

Alaskan Postal nutjob
FORUM MANAGER
SOA Member
City
Dexter
State
MI
That's the kind of thing that makes folks fear painting their own Jeeps :eek: hope it works out.
 

jammer1

Scrambler Junkie
Lifetime Member
City
Maple Hts.
State
Oh
It will, I know I was going to be short on paint for dash, tailgate and windshield. But was thinking if I couldn't get more paint I would use urethane instead of enamel. If color a hair off wouldn't bother me since the object is to not go crazy and be afraid of driving in winter and the other cj8 would be the trailer queen. Just discouraged with my self. I can do better.
 

jammer1

Scrambler Junkie
Lifetime Member
City
Maple Hts.
State
Oh
Better pics. Paint continued to flow together. Sag is not as bad (half the size it was after 2 hrs.). Found 2 dryer spots, so looks like I get to sand out runs and sag then color sand the tub. Feel much better than after it was done.
 

Attachments

  • 20180217_143610_resized.jpg
    20180217_143610_resized.jpg
    30 KB · Views: 93
  • 20180217_154527_001_resized.jpg
    20180217_154527_001_resized.jpg
    34.5 KB · Views: 91
Top