• Notice for iPhone users: DO NOT use the image size reduction option when uploading photos to the forum. This causes portrait images to post as landscape. We have added a warning to the image insert pop-up as well.

This one is for the wife

Junkie

Active member
Member
City
Venice
State
FL
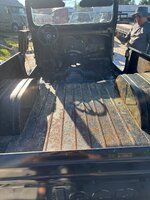
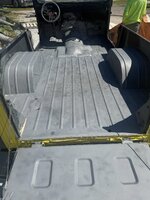
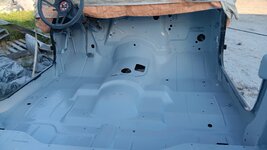
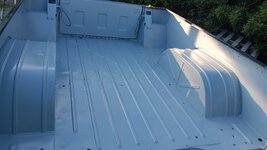
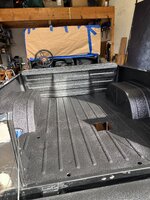
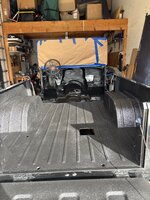
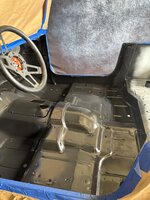
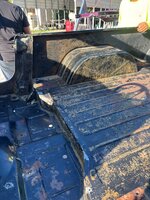
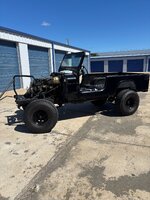
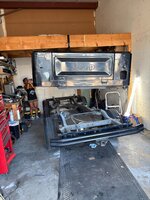
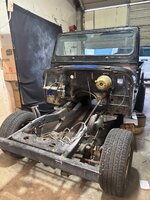
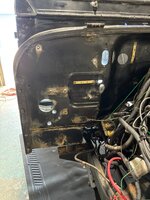
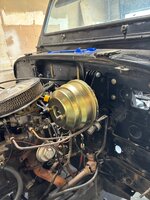
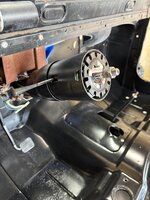
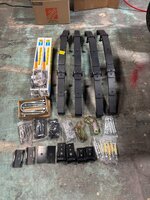
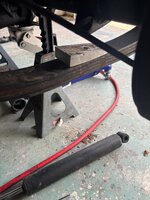
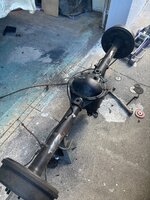
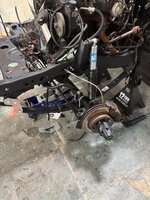
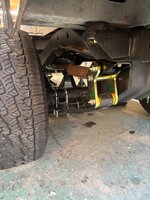
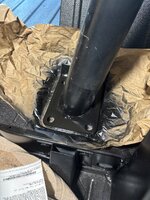
Hey all. Here is my next build. I am very fortunate to have a dope a*s wife that never, ever complains about me spending money on my projects. With that being said, she has been asking me to build her a jeep for awhile. She saw a Scrambler one day and said "that's what I want". I actually bought a chassis from a guy upgrading to a TDK frame with TJ suspension, Rubicon axles and an LS. The chassis is super clean with a stock 4.2, auto, dana 30, 86' Dana 44 (sweet) 4.11gears, 33" tires,20 gal tank, P/S, etc. The plan was to buy a tub locally from a guy on FB but I hesitated and missed out. I put a request out in the wanted section here and got some responses. A long time member CJ7PILOT gave me great deal on a roller from Cali. Here are some pics from before delivery.
 

Attachments

  • 83 CJ8 - 3.jpeg
    83 CJ8 - 3.jpeg
    153.4 KB · Views: 33
  • 83 CJ8 - 4.jpeg
    83 CJ8 - 4.jpeg
    174.4 KB · Views: 32
  • 83 CJ8 - 6.jpeg
    83 CJ8 - 6.jpeg
    248 KB · Views: 35
  • 83 CJ8 - 9.jpeg
    83 CJ8 - 9.jpeg
    173 KB · Views: 35
  • 1c6b47ce-e236-4b31-920b-9a6a9e12d42f.jpg
    1c6b47ce-e236-4b31-920b-9a6a9e12d42f.jpg
    426.4 KB · Views: 35
Last edited:
Here are some shots after delivery. Then after an hour wash and 6.5 hours of compounding and polishing. She cleaned up nice. I was very fortunate to score a half cab top and bulk head of FB 2 days after delivery.
 

Attachments

  • trailer.jpg
    trailer.jpg
    1.2 MB · Views: 43
  • pre wash.jpg
    pre wash.jpg
    673.1 KB · Views: 40
  • IMG_3590.jpg
    IMG_3590.jpg
    716.8 KB · Views: 41
  • cut n buff.jpg
    cut n buff.jpg
    1.1 MB · Views: 44
  • IMG_3553.jpg
    IMG_3553.jpg
    1.2 MB · Views: 43
Looks like a great starting point. Be careful telling the wife that you’re building it for her, I’ve done that and, unfortunately, she believes it occasionally. It can become an issue.
 
Looks like a great starting point. Be careful telling the wife that you’re building it for her, I’ve done that and, unfortunately, she believes it occasionally. It can become an issue.
:ROFLMAO: She def made me promise it was hers prior to buying. Its all good tho. I get to work on it plus sneak some parts for me in on her orders.
 
Pulled the dash, wiring and heater. Ordered all new switches, cables, bezels, knobs, gauge cover, lamps, etc to rebuild the dash. Ordering up a painless kit and jeep air setup so we can have AC for hot summers here in Florida. Also, a rebuilt column is on the way. Next, off to sandblasting for the interior.
 

Attachments

  • IMG_3725.jpg
    IMG_3725.jpg
    1.3 MB · Views: 22
  • IMG_3723.jpg
    IMG_3723.jpg
    804.3 KB · Views: 22
  • IMG_3721.jpg
    IMG_3721.jpg
    803.5 KB · Views: 23
The interior is sandblasted and metal looks really good except for a few small issues, but no replacement panels needed. Epoxy primer shot, including the bulkhead. Next weekend I will prep and shoot raptor liner. I know some love it and some not so much. If you prep everything the right way, it is a great product that will hold up a long time.
 

Attachments

  • IMG_3777.jpg
    IMG_3777.jpg
    679.4 KB · Views: 20
  • IMG_3202.JPEG
    IMG_3202.JPEG
    541.4 KB · Views: 20
  • 711062125332219801.JPEG
    711062125332219801.JPEG
    264.3 KB · Views: 20
  • 8183633670337452184.JPEG
    8183633670337452184.JPEG
    232.1 KB · Views: 20
  • 4698727531730783206.JPEG
    4698727531730783206.JPEG
    447.2 KB · Views: 20
Dang, you're not wasting any time... that looks great! :cheers:
 
I decided to paint the front floors as I will be adding HushMat and carpet. The rear I shot Raptor Liner. Very pleased how it turned out. Glad to have this part of the project behind me. As I am sure a lot of you know, it is just a lot of prep work to do it right. The results were worth the effort though. I will be moving into a new shop over the next week or so and then I will be pulling the body to put on my other chassis. Here are some before and after shots.

Can anyone provide the type of hardware used to mount the bulkhead?
Thx!
 

Attachments

  • IMG_3970.jpg
    IMG_3970.jpg
    937.9 KB · Views: 40
  • IMG_3971.jpg
    IMG_3971.jpg
    558.5 KB · Views: 39
  • IMG_3968.jpg
    IMG_3968.jpg
    877.6 KB · Views: 38
  • IMG_3966.jpg
    IMG_3966.jpg
    520.5 KB · Views: 38
  • IMG_3777.jpg
    IMG_3777.jpg
    679.4 KB · Views: 37
  • IMG_3775.jpg
    IMG_3775.jpg
    878.8 KB · Views: 39
  • 83 CJ8 - 6.jpeg
    83 CJ8 - 6.jpeg
    247.9 KB · Views: 40
The wife and I swapped the chassis today. Shout out to harbor freight for this cheap a*s badlands electric winch. I have used this thing like 30 times in the last year, which equates to about 3 bucks a job. Slow, but reliable as hell. Not a bad tool in the arsenal. Next we will tackle the drivetrain.
 

Attachments

  • IMG_4031.jpg
    IMG_4031.jpg
    752 KB · Views: 46
  • IMG_4012.jpg
    IMG_4012.jpg
    660 KB · Views: 43
  • IMG_4008.jpg
    IMG_4008.jpg
    445.7 KB · Views: 45
  • IMG_4009.jpg
    IMG_4009.jpg
    587.3 KB · Views: 44
  • IMG_4007.jpg
    IMG_4007.jpg
    675.7 KB · Views: 45
Not a ton to report. Been moving the shop for the last couple of weeks in our free time. Yesterday, finally finished getting everything organized in its place. I was able to get a few small things done this morning. Installed a rebuilt column from Columns Galore. Very nice piece and reasonably priced (less than half the price of eBay ones). Put in a new PB booster, cleaned up the firewall and painted battery tray.
 

Attachments

  • IMG_4136.jpg
    IMG_4136.jpg
    559.3 KB · Views: 16
  • IMG_4135b.jpg
    IMG_4135b.jpg
    541.5 KB · Views: 16
  • IMG_4137.jpg
    IMG_4137.jpg
    551.3 KB · Views: 16
  • IMG_4134.jpg
    IMG_4134.jpg
    455.9 KB · Views: 16
When we swapped the tub, we also swapped the 1" urethane body lift. I had to align the body still since we just slapped it on there before the move. I decided to pull the 1" body lift and replace with stock height crown rubber body mounts. Not against a small urethane body lift, I have one on our Bronco. Just decided I didn't want one on this build. Starting the Ol' man 2.5" lift. I ended up piecing it all together so I can get everything I wanted. First order of business was to pull the rear and ditch the aluminum degree shims. I am not sure what degree, but the biggest I have ever seen. Not only that, they are just sitting on top of the springs over the pins. So basically the axle is just floating on top of the shims. Sketchy as hell. I cut off the old perches so I can redo correctly.
 

Attachments

  • IMG_4199.jpg
    IMG_4199.jpg
    813.8 KB · Views: 18
  • IMG_4191.jpg
    IMG_4191.jpg
    597.1 KB · Views: 18
  • IMG_4198.jpg
    IMG_4198.jpg
    1 MB · Views: 18
Ran into a few snags along the way that slowed me down a bit. I bought all the pieces to hang the springs from Mountain offroad. I bought bushing for 2.5" wide springs but the OME springs are aprox 2.375" wide, so none of them worked. I had to end up buying OME bushing kits. Next I bought front spring plates for a YJ that someone suggested. The pass fit fine, but the driver was also different size u-bolt holes. I ended up ordering up a rear CJ spring plate for front driver side. Front is mostly done except installing new stock pitman arm and steering links. Rear is installed but need to set pinion angle and pull rear to fully weld and then final install, trim u-bolts, install shocks. The Boomerang shackles are 4.75", which I got the shortest available, but still may swap out to shorter straight shackles. Also, painted the feet of the roll bar (including the bottom side). Ordered factory style torx bolts off eBay to reinstall.
 

Attachments

  • IMG_4325.jpg
    IMG_4325.jpg
    829.9 KB · Views: 18
  • IMG_4326.jpg
    IMG_4326.jpg
    649.6 KB · Views: 18
  • IMG_4328.jpg
    IMG_4328.jpg
    750.4 KB · Views: 18
Back
Top