

You are using an out of date browser. It may not display this or other websites correctly.
You should upgrade or use an alternative browser.
You should upgrade or use an alternative browser.
Voodoo Blue 82 Complete Refresh
- Thread starter gpassida
- Start date
- Featured

- City
- Redding
- State
- Ca
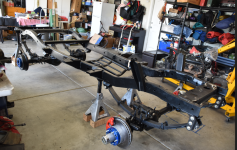
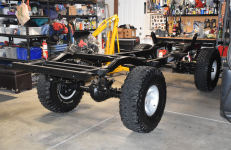
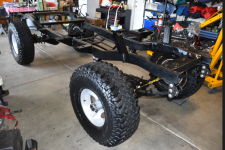
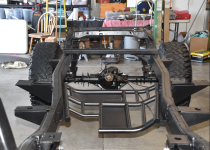
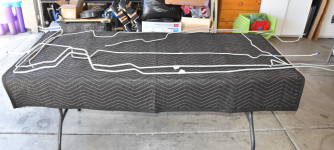
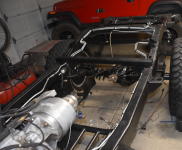
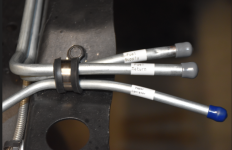
Here are the new brake and fuel hard lines. I used kits from Inline-Tube for Chevy V8 conversions.
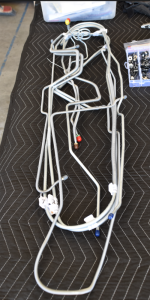
After carefully removing the bends:
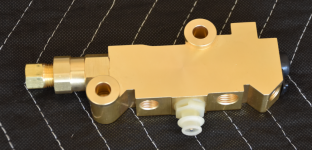
New Proportioning valve:
After mounting to the frame:
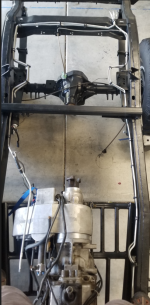
You can see the new fuel pump on the passenger frame rail:
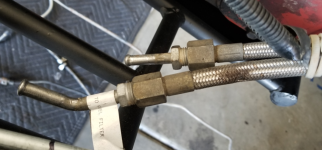
I decided to replace the existing Chevy TBI fuel lines going into the throttle body with some Earls braided lines. These will connect the engine to the new frame mounted hard fuel supply and return lines.
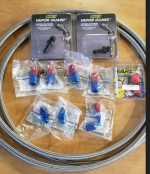
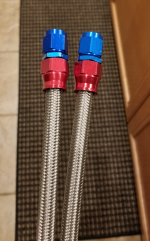
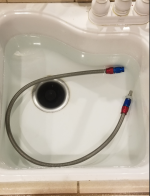
Pressure testing under water before installing them:
After carefully removing the bends:
New Proportioning valve:
After mounting to the frame:
You can see the new fuel pump on the passenger frame rail:
I decided to replace the existing Chevy TBI fuel lines going into the throttle body with some Earls braided lines. These will connect the engine to the new frame mounted hard fuel supply and return lines.
Pressure testing under water before installing them:
- City
- Redding
- State
- Ca
Rebuilt, painted and balanced the drive shafts.
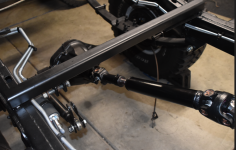
Mounted up to the Atlas II Transfer Case. (4.3 low range) I was an early purchaser of the Atlas II.
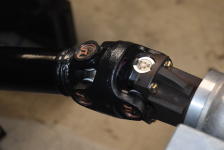
Front shaft is a Chromoly skinny one: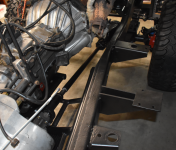
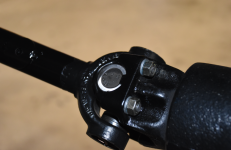
Cleaned up and reinstalled the Tie-rod/drag link:
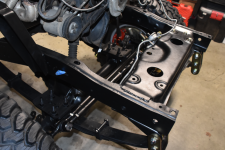
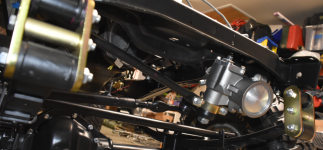
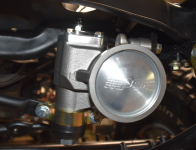
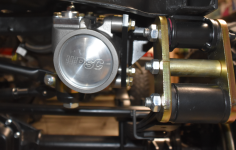
Upgraded to a PSC Big Bore steering box. (variable ratio) And used a MORE HD Mount:
Mounted up to the Atlas II Transfer Case. (4.3 low range) I was an early purchaser of the Atlas II.
Front shaft is a Chromoly skinny one:
Cleaned up and reinstalled the Tie-rod/drag link:
Upgraded to a PSC Big Bore steering box. (variable ratio) And used a MORE HD Mount:
- City
- Redding
- State
- Ca
Here is my old TrailQuest steel 23 gallon gas tank. It has been abused for 20+ years. Gave it a little love and also cut the tabs off and welded new thicker ones down 1" to move the tank up 1" since I have a 1" body lift. A little more clearance is always a good thing!
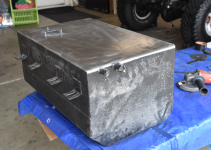
Multiple Rubicon and Moab trips left their mark:
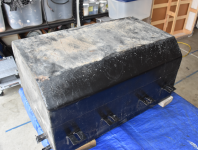
Here is the thicker angle iron for the new mounting tabs:
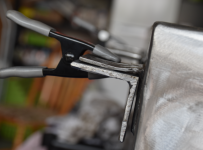
Mounting the tank:
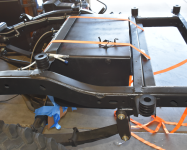
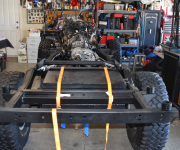
Moving the tank up 1" created an issue with the body mount. I could not get to the bolt head to tighten it up. So I had to make a 1" riser and use a standard height body mount in that position. That allowed me to get to the bolt head to tighten it up. The overall height is the same as the other body mounts.
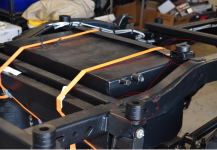
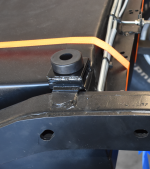
Multiple Rubicon and Moab trips left their mark:
Here is the thicker angle iron for the new mounting tabs:
Mounting the tank:
Moving the tank up 1" created an issue with the body mount. I could not get to the bolt head to tighten it up. So I had to make a 1" riser and use a standard height body mount in that position. That allowed me to get to the bolt head to tighten it up. The overall height is the same as the other body mounts.
Last edited:

- City
- Redding
- State
- Ca
While I was working on the chassis and getting that all done, "Charlie" my body guy in Carmel Valley was working on the tub and body parts. He lives next to my father-in-law. He's retired and restores cars on his ranch. He has a paint room and had great pictures of other work he has done. He sandblasted the parts and repaired the minor rust areas then used epoxy primer and single stage paint. I know nothing about paint and took his word that the single stage was the way to go.
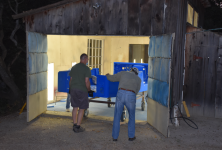
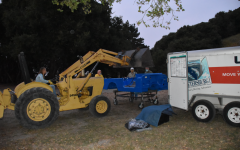
He was mostly done with everything including my full hard doors and YJ steel half doors. Then a fire broke out and was heading his way. For three days the fire was expanding and the mandatory evacuations were 1/2 mile from his property. So he kept working on the last parts: my replacement windshield frame and custom dashboard. I rented a U-haul trailer and drove the 5 hours down to get my Scrambler body parts. Luckily the fire never made it to his ranch and I got everything out of there in one trip.
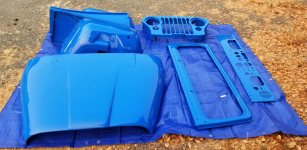
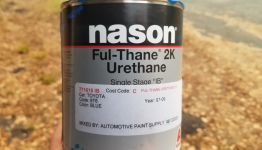
Here is the paint. You can see the Toyota paint code for "Voodoo Blue":
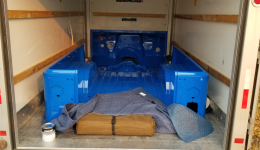
I got everything out of there. The fire eventually got to the other side of the hill in the background. Then the weather cooled down and let the fire fighters get a handle on it.
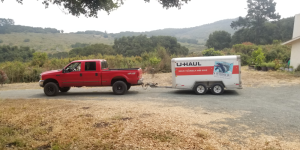
He was mostly done with everything including my full hard doors and YJ steel half doors. Then a fire broke out and was heading his way. For three days the fire was expanding and the mandatory evacuations were 1/2 mile from his property. So he kept working on the last parts: my replacement windshield frame and custom dashboard. I rented a U-haul trailer and drove the 5 hours down to get my Scrambler body parts. Luckily the fire never made it to his ranch and I got everything out of there in one trip.
Here is the paint. You can see the Toyota paint code for "Voodoo Blue":
I got everything out of there. The fire eventually got to the other side of the hill in the background. Then the weather cooled down and let the fire fighters get a handle on it.
- City
- Redding
- State
- Ca
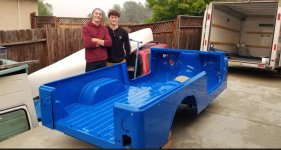
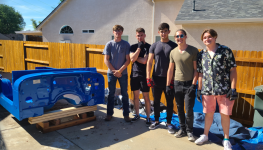
Then I got it home and unloaded on my side yard. My son is a Marine was deployed to the Pacific so I got a few of his buddies to come over to help get it out of the trailer:
A few months later, my Son was home for a week after his deployment and I took advantage of that and he got some muscle over to help get the tub back on the frame. My son is the middle one:
The tires are my old ones that are getting replaced. It was handy to pull the valve cores to lower the frame to make it easier to get the tub on:
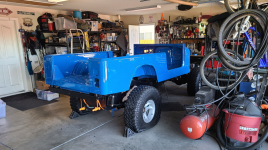
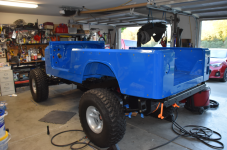
This was a HUGE milestone for me!
We're getting close to catching up to my current status. A couple more updates and we'll be real-time.
A few months later, my Son was home for a week after his deployment and I took advantage of that and he got some muscle over to help get the tub back on the frame. My son is the middle one:
The tires are my old ones that are getting replaced. It was handy to pull the valve cores to lower the frame to make it easier to get the tub on:
This was a HUGE milestone for me!
We're getting close to catching up to my current status. A couple more updates and we'll be real-time.

- City
- Suwanee
- State
- GA
I love the color. I had an FJ Cruiser that same color!Then I got it home and unloaded on my side yard. My son is a Marine was deployed to the Pacific so I got a few of his buddies to come over to help get it out of the trailer:
View attachment 103990
A few months later, my Son was home for a week after his deployment and I took advantage of that and he got some muscle over to help get the tub back on the frame. My son is the middle one:
View attachment 103991
The tires are my old ones that are getting replaced. It was handy to pull the valve cores to lower the frame to make it easier to get the tub on:
View attachment 103992
View attachment 103993
This was a HUGE milestone for me!
We're getting close to catching up to my current status. A couple more updates and we'll be real-time.

- City
- Redding
- State
- Ca
I was dreading the process to clean up the pedal hangar assembly. I think they forgot to paint mine at the factory. It was rusting pretty good.
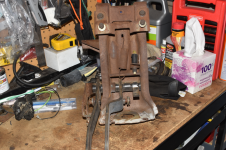
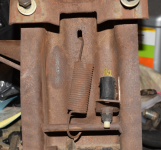
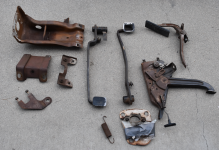
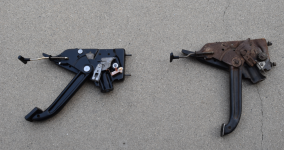
Sourced a new parking brake assembly on Ebay from a guy in Greece who has a jeep parts business.
Nothing like a little front yard painting...
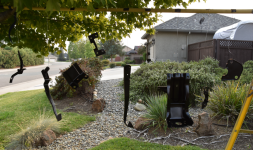
Lookin a lot better...
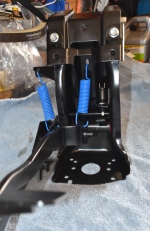
Sourced a new parking brake assembly on Ebay from a guy in Greece who has a jeep parts business.
Nothing like a little front yard painting...
Lookin a lot better...
- City
- Redding
- State
- Ca
The writeups you guys created REALLY helped me with the fresh air and heater box rebuilds.
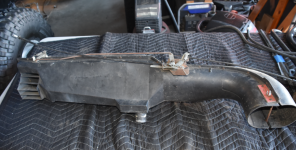
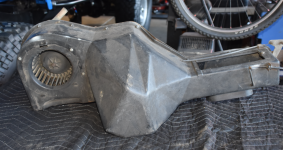
I also did the Blazer blower motor upgrade. Made a huge difference in air volume.
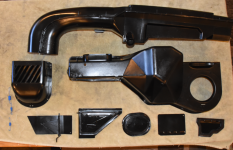
Got everything mounted up:
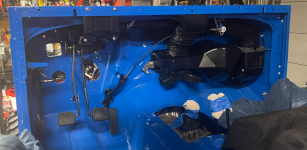
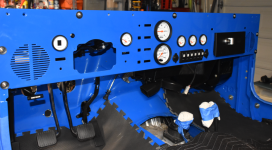
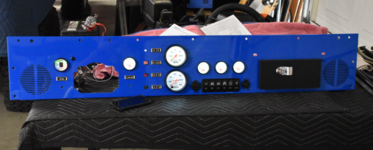
Did a quick test fit of the custom dashboard. Needed to make sure the gauge layout didn't hit the ducting. It was close but it worked.
I have a Double D Fab dashboard. I came up with the layout. I wanted to move the passenger speaker to the outside so it would be behind the roll cage down bar. And I will be able to open the Tuffy glove box in the new position:
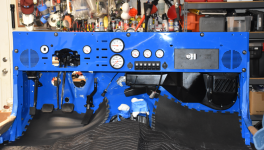
Put some Kicker speakers in. Had to space them out to prevent the cones from hitting the dashboard face.
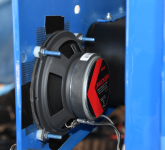
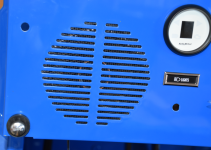
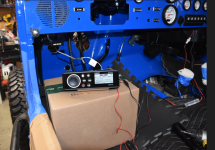
I'll be running this Fusion Media Player. It is a Marine radio and will live in the Tuffy Center Console. Wanted to see how the speakers sounded and get them spaced back from the dash properly. They sound pretty good. I will be putting two in a soundbar as well and maybe a power amp to get them more juice. I got the Tuffy Console and Glove Box keyed the same as the under seat storage for the back seat that I already had. Gotta keep the key count down.
The Fusion has Bluetooth of course and I love the big volume knob, and easy to read and press buttons. 90% of the time all I need is volume, play/pause and next track. This unit makes that easy to see and hit while on a bumpy trail.
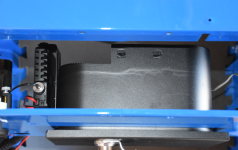
I also test fit the Midland MXT-275 GMRS radio to the side of the Tuffy glove box. This unit has all controls and a speaker in the handset. You can actually turn on both speakers - the one on the handset and the one on the unit. It was pretty loud which is great.
And I can still drop it out the bottom if I need to.
I also did the Blazer blower motor upgrade. Made a huge difference in air volume.
Got everything mounted up:
Did a quick test fit of the custom dashboard. Needed to make sure the gauge layout didn't hit the ducting. It was close but it worked.
I have a Double D Fab dashboard. I came up with the layout. I wanted to move the passenger speaker to the outside so it would be behind the roll cage down bar. And I will be able to open the Tuffy glove box in the new position:
Put some Kicker speakers in. Had to space them out to prevent the cones from hitting the dashboard face.
I'll be running this Fusion Media Player. It is a Marine radio and will live in the Tuffy Center Console. Wanted to see how the speakers sounded and get them spaced back from the dash properly. They sound pretty good. I will be putting two in a soundbar as well and maybe a power amp to get them more juice. I got the Tuffy Console and Glove Box keyed the same as the under seat storage for the back seat that I already had. Gotta keep the key count down.
The Fusion has Bluetooth of course and I love the big volume knob, and easy to read and press buttons. 90% of the time all I need is volume, play/pause and next track. This unit makes that easy to see and hit while on a bumpy trail.
I also test fit the Midland MXT-275 GMRS radio to the side of the Tuffy glove box. This unit has all controls and a speaker in the handset. You can actually turn on both speakers - the one on the handset and the one on the unit. It was pretty loud which is great.
And I can still drop it out the bottom if I need to.
Attachments

- City
- Redding
- State
- Ca
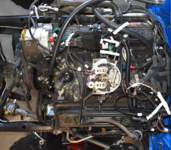
I replaced ALL of the GM engine sensors with new AC Delco parts then I installed two new wiring harnesses. The Chevy Engine side was the Howell H243 EFI harness. And the rest of the Jeep is the Painless 10150 harness.
Here are some pics of the Howell harness. I put my own labels on then pulled their floppy tags.
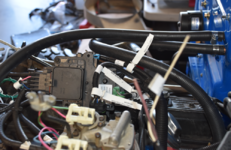
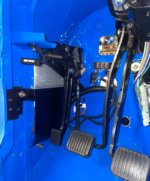
I cleaned up and mounted the GM ECM inside to the left of the parking brake:
Here are some pics of the Howell harness. I put my own labels on then pulled their floppy tags.
I cleaned up and mounted the GM ECM inside to the left of the parking brake:
- City
- Redding
- State
- Ca
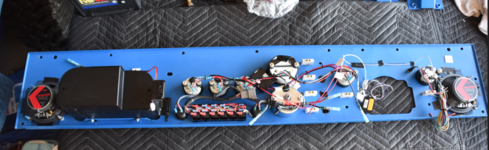
The Painless harness went in pretty straight forward. The manual they provided was amazing. Helped me out a lot because I'm using a custom set of AutoMeter gauges. I had to cut off the connectors that go to the stock jeep gauge cluster and put connectors on for my dash setup.
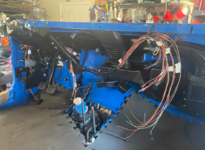
Here is the dashboard as I wired everything up and tested what I could:
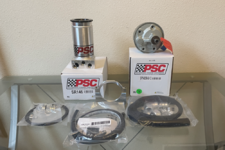
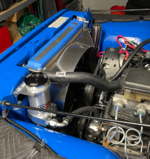
Then I put the grill/fenders on and finished the front section wiring. I used an Advance Adapters aluminum radiator designed for GM to CJ conversions. I also installed my PSC Big Bore steering box, pump and remote reservoir. Found a good location and made a simple bracket for the reservoir. It's attached at the top and bottom. I also installed a radiator overflow bottle from Amazon on the other side.
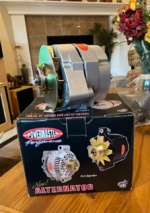
I used a PowerMaster GM 12Si 150 amp alternator:
Here is the dashboard as I wired everything up and tested what I could:
Then I put the grill/fenders on and finished the front section wiring. I used an Advance Adapters aluminum radiator designed for GM to CJ conversions. I also installed my PSC Big Bore steering box, pump and remote reservoir. Found a good location and made a simple bracket for the reservoir. It's attached at the top and bottom. I also installed a radiator overflow bottle from Amazon on the other side.
I used a PowerMaster GM 12Si 150 amp alternator:
93_Fummins
CJ-8 Member
- City
- Edmond
- State
- OK
I really like your switches and outlets in place of the stereo. Everything looks nice! Well done!
- City
- Redding
- State
- Ca
With it all wired up, it wasn't firing up. It would crank and had spark but it would not fire. Wasn't getting fuel to the injectors. Doh! I reversed the fuel pickup and fuel return lines at the tank! Fixed that in about 5 minutes and it started right up. This was not a new engine. Same 350 TBI I was running before the teardown. Just all new sensors, wiring, radiator, alternator, steering pump etc.
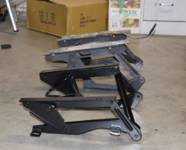
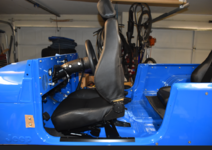
Got the seats I had cleaned up with 303 protectant and bolted in with new Rugged Ridge seat brackets and sliders. Both sides will now tilt forward.
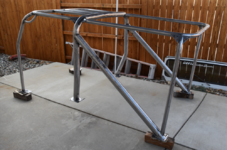
Time to get the roll cage cleaned up and painted black.
Took a while getting all the white paint off.
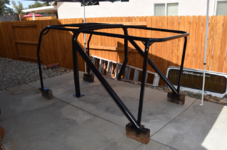
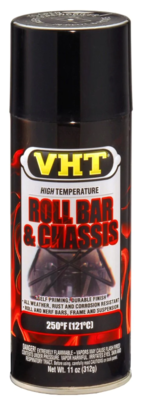
And shot three coats of VHT Roll Bar &Chassis paint:
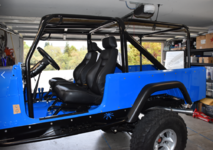
Got a few other strong guys and installed the cage back in place.
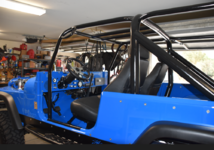
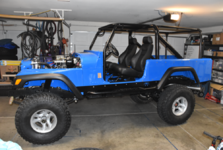
Got the seats I had cleaned up with 303 protectant and bolted in with new Rugged Ridge seat brackets and sliders. Both sides will now tilt forward.
Time to get the roll cage cleaned up and painted black.
Took a while getting all the white paint off.
And shot three coats of VHT Roll Bar &Chassis paint:
Got a few other strong guys and installed the cage back in place.
- City
- Redding
- State
- Ca
Mounted the bump stops and Bilstein 5125 shocks.
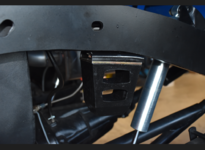
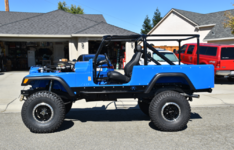
Took it outside to get some pics in the sun and drive it around the block a few times.
I installed the Warn front bumper.
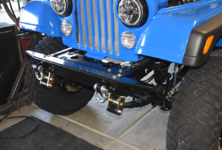
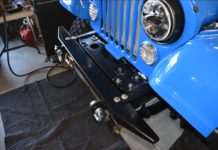
The normal mounting process is to use the four front frame holes. I added a little additional strength buy also mounting it to the second set of frame holes. The bumper does not reach those holes so I cut some 1/4" steel and connected the front hole to the second hole under the frame rail:
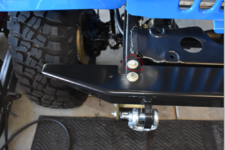
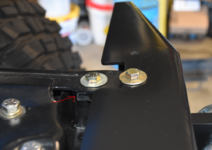
That will provide some extra strength when I get pulled out of a stuck situation with a tow strap or kinetic rope.
Took it outside to get some pics in the sun and drive it around the block a few times.
I installed the Warn front bumper.
The normal mounting process is to use the four front frame holes. I added a little additional strength buy also mounting it to the second set of frame holes. The bumper does not reach those holes so I cut some 1/4" steel and connected the front hole to the second hole under the frame rail:
That will provide some extra strength when I get pulled out of a stuck situation with a tow strap or kinetic rope.
- City
- Redding
- State
- Ca
Here are some pics of the TJ Flares I installed. My body guy reshaped the stock fenders to fit the steeper curve of the front TJ flares and opened up the back too.
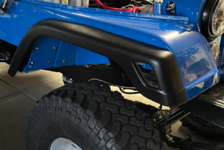
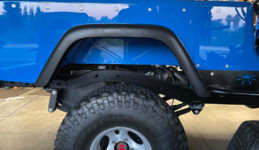
I would love to run 37's instead of the 35's. But I don't think I would be able to get in my garage with the soft top on. The bows add some height and it barely fits in now.
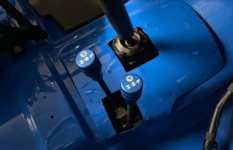
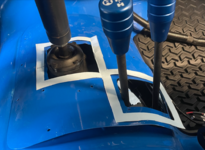
I installed some blue Advance Adapter Atlas II shift knobs on the transfer case. Jason at Stronghold is making me new shift boots with blue stitching. I sent him the template below.
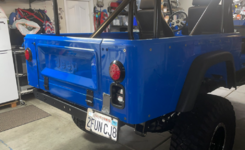
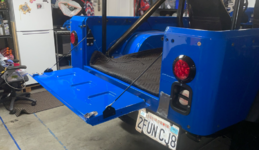
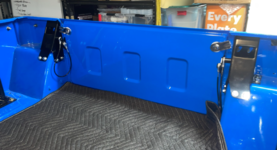
Put the tailgate on and added the awesome Fairchild tailgate seal (not pictured):
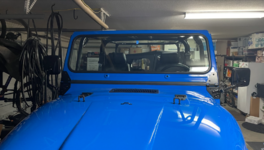
Mounted the hood and windshield with all new Kentrol black hardware:
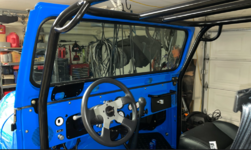
Used the Kentrol TJ style hood latches. Much stronger than the stock type and they eliminate the dam squeaking. You can also see the new BFG KM3's in 35x12.50x15 on 15x8 Vision fake beadlock wheels:
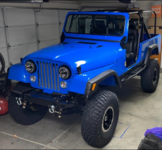
I would love to run 37's instead of the 35's. But I don't think I would be able to get in my garage with the soft top on. The bows add some height and it barely fits in now.
I installed some blue Advance Adapter Atlas II shift knobs on the transfer case. Jason at Stronghold is making me new shift boots with blue stitching. I sent him the template below.
Put the tailgate on and added the awesome Fairchild tailgate seal (not pictured):
Mounted the hood and windshield with all new Kentrol black hardware:
Used the Kentrol TJ style hood latches. Much stronger than the stock type and they eliminate the dam squeaking. You can also see the new BFG KM3's in 35x12.50x15 on 15x8 Vision fake beadlock wheels:
- City
- Redding
- State
- Ca
Okay. Enough of this catching up on my build. I am now posting real-time as it happens. These pics are from today.
Got the half soft doors and custom bikini top I had made in 2017 cleaned up with a lot of 303 Protectant and installed. It's looking like a REAL JEEP now! I am more than thrilled on how it is turning out!
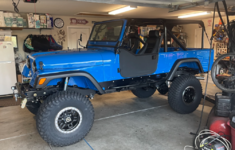
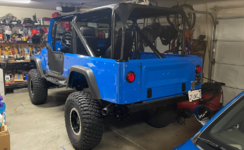
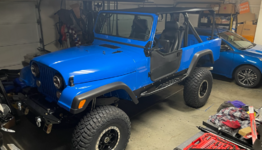
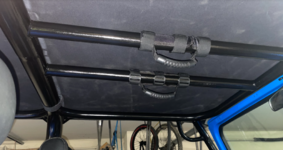
Got the half soft doors and custom bikini top I had made in 2017 cleaned up with a lot of 303 Protectant and installed. It's looking like a REAL JEEP now! I am more than thrilled on how it is turning out!