• Notice for iPhone users: DO NOT use the image size reduction option when uploading photos to the forum. This causes portrait images to post as landscape. We have added a warning to the image insert pop-up as well.

World Cab and standard CJ doors

jscherb

CJ-8 Member
City
Elmira
State
NY
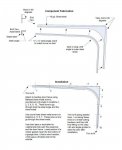
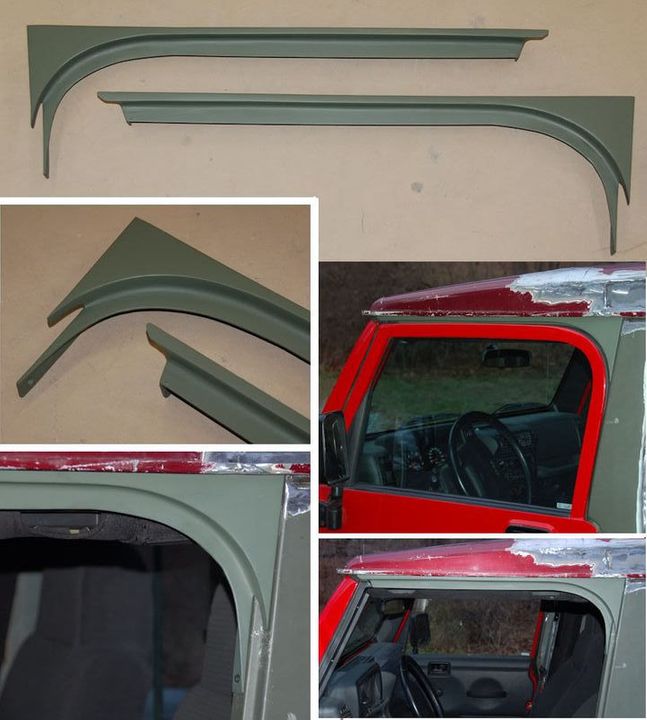
Several people have asked me about how I used standard CJ doors with my World Cab - World Cabs came from the factory with "square" doors (the upper rear corner of the door and window is squared off).

When I restored my World Cab hardtop I made some "corner fillers" so I could use stock CJ "round corner" doors and they've worked out extremely well. PDF instructions for making these are posted on the hardtop page of my Scrambler project site if anyone is interested.
 
Any chance you have similar drawings/dimensions on the plates you made up to attach it to the windshield frame? I'll be putting mine back on here before too long for the winter and might want to take a shot at those.

It would be easy enough to freehand based on your photo, but I was just curious. Did you start with flat plate and bend it up or angle and just tweak it?

Somehow I missed that you did that when i checked the site last. Great job with the site/instructions!

Also, what electric lock did you use for the rear door? How is that set up?

Sorry to get off topic...
 
The plates to hold the top down were made from steel angle.

The top bracket I think started as 3/4" inch angle, and I bent it to an acute angle. It's got three holes for self-tapping screws to attach it to the window frame, and two holes tapped 1/4-20 for the bottom bracket screws to go into.

The bottom bracket started life I think as 2" angle. The top leg was cut a bit narrower to match the top bracket and the bottom leg was bent a bit so it could follow the angle of the windshield frame and also have the top leg parallel to the leg on the top bracket. It is attached to the windshield frame with two self-tapping sheet metal screws, either #10 or 1/4", can't remember right now.

I used to sets of these, each one about 1 foot from the side of the windshield frame.

I can get you dimensions and/or a drawing late next week if you'd like more information than what's above. You can check the photo on the hardtop page of my site (link in my signature) and see the photo of the brackets, maybe with this explanation and the photo that's all you'll need.

Having done this project I have to say it worked out much better than the stock "screws up through the windshield frame" method. It's much less awkward to attach, and you can apply a lot more clamping force to pull the top down onto the windshield frame.

The electric lock in the rear door is a standard electric lock solenoid, I think I got it at a surplus place for less than five bucks. I know JC Whitney sells them. Pretty simple to install. Then I ran wiring to the dash and I got a small electric window switch from AtuoZone or somewhere and for now it is mounted in a small plastic under-dash switch panel. I also put a door jamb wiring loom in between the door and the frame so the wires are concealed in a plastic tube at when the door is open.

Here's the loom I used:

http://www.julianos.com/door_jamb_wire_looms.html

The lock actuator is like the one in the link below, altough I found one in a surplus place for maybe 5 bucks. Can't remember the surplus place, it is online, if I can remember I'll let you know:

http://cgi.ebay.com/Power-Door-Actu...ryZ14932QQssPageNameZWDVWQQrdZ1QQcmdZViewItem

Lock actuator is very easy to install and screws to the inside of the inner door panel. Actuating rod attaches to rod from the door lock lever to the lock mechanism. Very easy and very handy to have!

 
Last edited:
jscherb said:
I can get you dimensions and/or a drawing late next week if you'd like more information than what's above. You can check the photo on the hardtop page of my site (link in my signature) and see the photo of the brackets, maybe with this explanation and the photo that's all you'll need.

Having done this project I have to say it worked out much better than the stock "screws up through the windshield frame" method. It's much less awkward to attach, and you can apply a lot more clamping force to pull the top down onto the windshield frame.

Cool, thanks. No need for drawings, I just wondered if you already had them made up, this and the photo is plenty for me.

I've never had leaking problems on the top of the windshield or anything, but it's a PITA to get those stock screws in and dis/reassembling it each spring/fall had me worried that I'd wear the holes out sooner than later.

Thanks again.
 
Actually it was less about leaking than squeaking! Mine never leaked either but with the new brackets I could put enough clamping force on it to stop a sqeak where the top moved slightly against the windshield frame when driving on really rough roads.
 
Several people have asked me about how I used standard CJ doors with my World Cab - World Cabs came from the factory with "square" doors (the upper rear corner of the door and window is squared off).

When I restored my World Cab hardtop I made some "corner fillers" so I could use stock CJ "round corner" doors and they've worked out extremely well. PDF instructions for making these are posted on the hardtop page of my Scrambler project site if anyone is interested.
@jscherb do you still have the pdf available?
 
I saved it a while back, as I'll be doing something similar in 2020. ;)
 

Attachments

  • DoorCorner.jpg
    DoorCorner.jpg
    88.2 KB · Views: 34
Sorry for not responding, I didn't get a notification from the forum that there was something to respond do.

The design in the DoorCorner.jpg file is a fairly simple version, there's a different version the looks a little more factory documented somewhere in my Retro Wrangler pickup thread.

UpperJambs6a_zpsf8f4oo3s.jpg
 
Back
Top