
You are using an out of date browser. It may not display this or other websites correctly.
You should upgrade or use an alternative browser.
You should upgrade or use an alternative browser.
1983 Scrambler resto
- Thread starter Craner8
- Start date
Robert Slone
Legacy Registered User
- City
- Spring Hope
- State
- NC
Very nice.....do mine next! 
Craner8
CJ-8 Member
- City
- Orlando
- State
- FL
Thanks for the comments. I'll post some more pics of the progress. Next week or so off to Line-X. Then re-assemble. It'll have 1982 stripe package-- yellow, terracota and brown stripes down side and up the back. Spice interior, 2 bucket, 2 bench seats. It had a tan safari-- like top when we bought it. I'm going to re-use it because you can't buy them any more.
Craner8
CJ-8 Member
- City
- Orlando
- State
- FL
JohnN, got the 3M caulking. Also picked up all of the hinges from powdercoat this afternoon. Next, need to paint the underside of the front fenders, body color, as well as the hinges. Body and parts are being buffed now. When body is off again will address the fuel lines and finally remount body for final time. Will take and add pics.


Craner8
CJ-8 Member
- City
- Orlando
- State
- FL
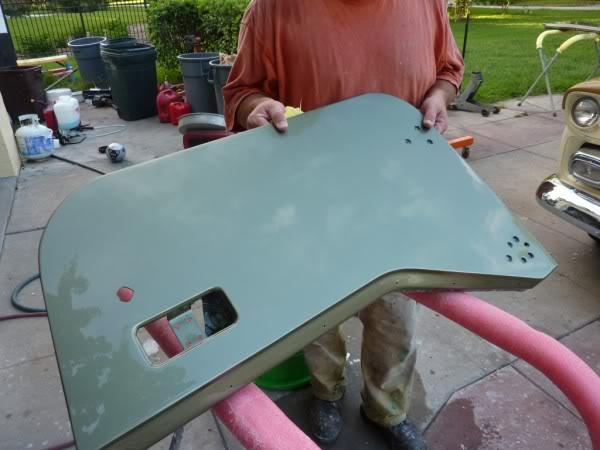
Body has been buffed.

Cowl.

Passenger Quarter.

Passenger rear corner.

Drivers front.

Next, remove body, plumb fuel lines and replace body. Then, to Line-X. Bought parts today for dash, steering wheel (Grant Mahogany), seals, rubber for doors and tailgate, cables, flares for wheelwells, and paintable dashpad, etc.
Cowl.
Passenger Quarter.
Passenger rear corner.
Drivers front.
Next, remove body, plumb fuel lines and replace body. Then, to Line-X. Bought parts today for dash, steering wheel (Grant Mahogany), seals, rubber for doors and tailgate, cables, flares for wheelwells, and paintable dashpad, etc.
Craner8
CJ-8 Member
- City
- Orlando
- State
- FL
Been in Argentina Hunting for a week. Took a pic of this Jeep in Buenos Aires. It was moving so couldn't get a good pic.
 And going.
 . Is it a 6? How 'bout that hardtop. Saw one CJ5 in Santiago Del Estero that was so broken down, and still running. Nothing is wasted there; they just repair and keep going.
Anyway, the 8 is at the Line-x shop tonight and when its back tomorrow, will take pics; then in its back together.
Anyway, the 8 is at the Line-x shop tonight and when its back tomorrow, will take pics; then in its back together.
Will_Texas
Legacy Registered User
- City
- Longview
- State
- TX
Yes, thats a cj6. Looks like an export model, with a little aftermarket bodywork. Not sure about that top, never seen it before. Probably a south-american made top designed for the cj6's. The majority of the cj6 production went to south America anyway, up here they're pretty rare. In the past few years I've only seen a couple for sale.
Gary R
Legacy Registered User
- City
- Arlington
- State
- TX
Craner8
Very nice work thusfar! I read that like me, you are on again and off again with the tub throughout the process. What method are you using to move the tub back and forth- as to not screw up the new pretty paint?
I was thinking maybe some hooks on the bottom fo the tub, and then use the old faithful engine hoist?
Thanks-
Craner8
CJ-8 Member
- City
- Orlando
- State
- FL
Manpower! Three of us do it. Yes we've scratched the paint on the frame but I'll touch that up before final install. Will remove it one more time for fuel lines and electrical to gas tank, then re-install. Just got back from Line-X so I'm sure its a whole lot heavier now. Will add pics tonight! A buddy of mine used the seat belt bolts and lifted it with those with an engine hoist though.
Craner8
CJ-8 Member
- City
- Orlando
- State
- FL
Back from Line-X tonight.

The rollbar was done too.

The front floorboards.

Front floorboards again.

Tailgate.

Tailgate with top edge Line-Xed.
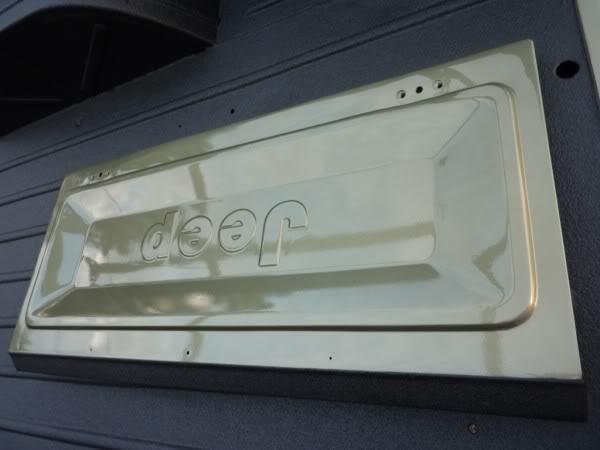
Tailgate on inside.

The guy that did it laid it on thick--200 mils up front, for sound deadening and heat protection. Came out good. On to fuel line plumbing and re-assemble the rest!
The rollbar was done too.
The front floorboards.
Front floorboards again.
Tailgate.
Tailgate with top edge Line-Xed.
Tailgate on inside.
The guy that did it laid it on thick--200 mils up front, for sound deadening and heat protection. Came out good. On to fuel line plumbing and re-assemble the rest!
B
bigred1969
Guest
Wow, I love it. That is the very close to color I have picked for my build and the line-x looks excellent. Keep us updated.
Keep us updated.Craner8
CJ-8 Member
- City
- Orlando
- State
- FL
A pic of the tattoo: (its almost gone thank goodness):

Little progress today: E-brake, Master Brake Cylinder and dash:


Started on the back of the dash:

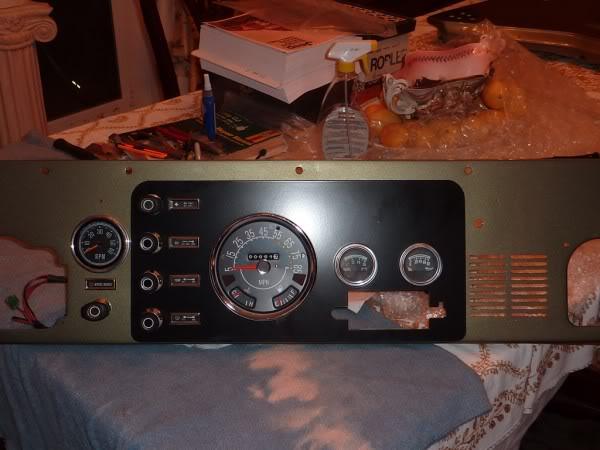 . OK, I put in all together only to realize that I forgot the black overlay, so I took it all apart and did it right. Came out good. Dining room table- wife not real happy but she understands. Plus, its a/c'd. Garage is 100 degrees. With the overlay, it looks like I need to cut it out larger for a radio, or move the radio to the console.
Need 2 fittings for the brake lines; someone installed a later model power booster and master cylinder that has the brake lines on the passenger side. Bent the stainless lines to fit but need fittings now.
Little progress today: E-brake, Master Brake Cylinder and dash:
Started on the back of the dash:
Need 2 fittings for the brake lines; someone installed a later model power booster and master cylinder that has the brake lines on the passenger side. Bent the stainless lines to fit but need fittings now.
Craner8
CJ-8 Member
- City
- Orlando
- State
- FL
Took the body off today for the final time. Needed to plumb fuel lines and install the nerf bars.

Used an engine hoist which made it alot easier. Set it off to the side to work on the frame.
Gas tank needed fuel line to engine. Ran it thru frame; ran electrical to it. Thru trial and error, removed gas tank and replaced three times. I can remove and re-install now in about 4 minutes.
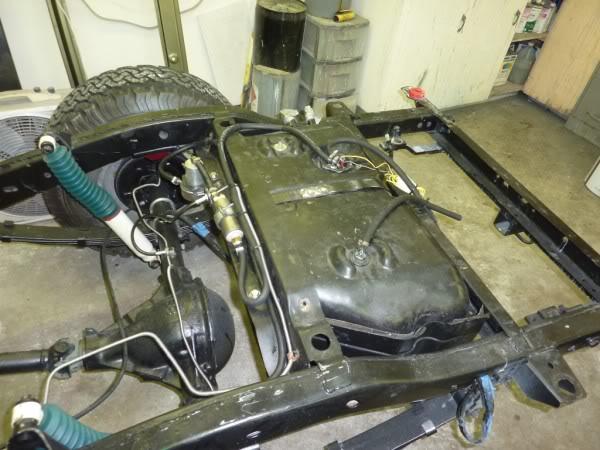
While the body was off we welded the nerf bars on. Started to rain so we rolled frame inside.

Repainted parts of the frame that had been scratched. The final product; we towed it home.

Used an engine hoist which made it alot easier. Set it off to the side to work on the frame.
Gas tank needed fuel line to engine. Ran it thru frame; ran electrical to it. Thru trial and error, removed gas tank and replaced three times. I can remove and re-install now in about 4 minutes.
While the body was off we welded the nerf bars on. Started to rain so we rolled frame inside.
Repainted parts of the frame that had been scratched. The final product; we towed it home.