• Notice for iPhone users: DO NOT use the image size reduction option when uploading photos to the forum. This causes portrait images to post as landscape. We have added a warning to the image insert pop-up as well.

Retitled: 83 Scrambler resto-mod finally gaining momentum

well, after two sets of u-joints and quite a few hours of frustration, I finally got them installed... the lesson learned: if the joints are binding up when you get them installed, particularly after you get the second c-clip in there, wack the yoke (pretty darn hard) with a BFH until they start to free up... you'll want to hit the heavy part of the yoke where it's curve down toward the shaft, not the upper parts (lest you compress them). I had to install some of them (and uninstall and resintall) a two of them several times but eventually got them secured and moving freely after a few good wacks on each side...

happily I moved on to installing my driveshaft to fine (yet another) *** moment.. I didn't realize the yoke on my D44 rear had been modded to accept the u-joint style straps (not the conventional bolt/strap kit).. so I can't intall it yet :d'oh:
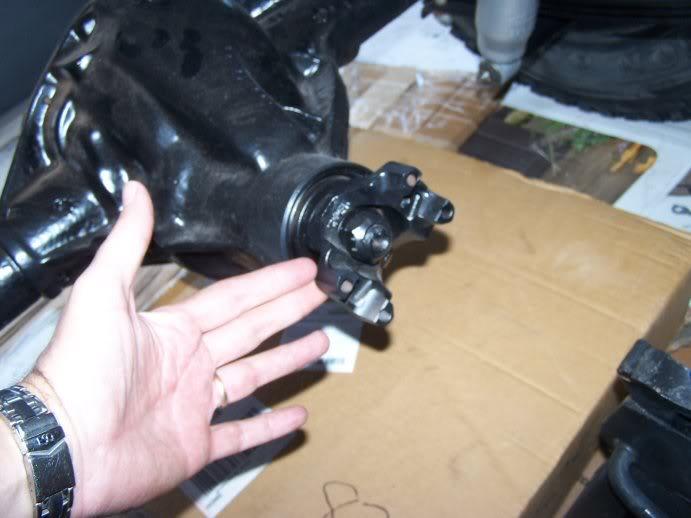
100_2975-1.jpg


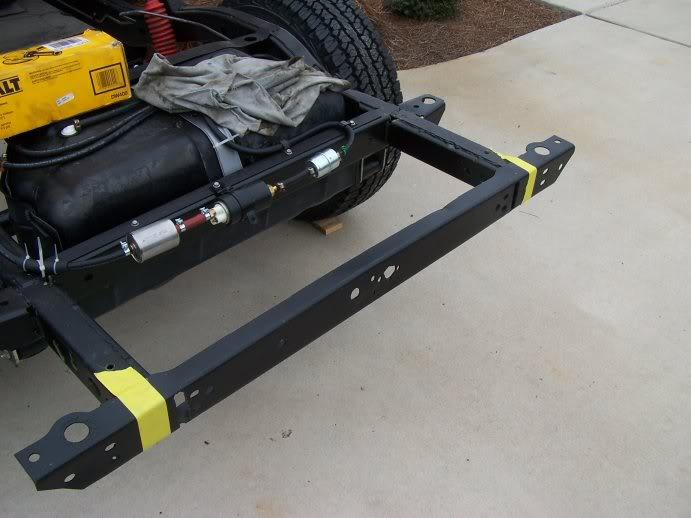
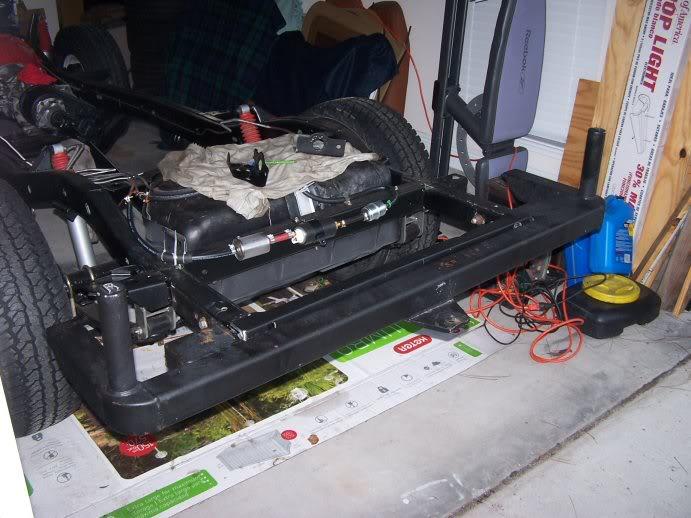
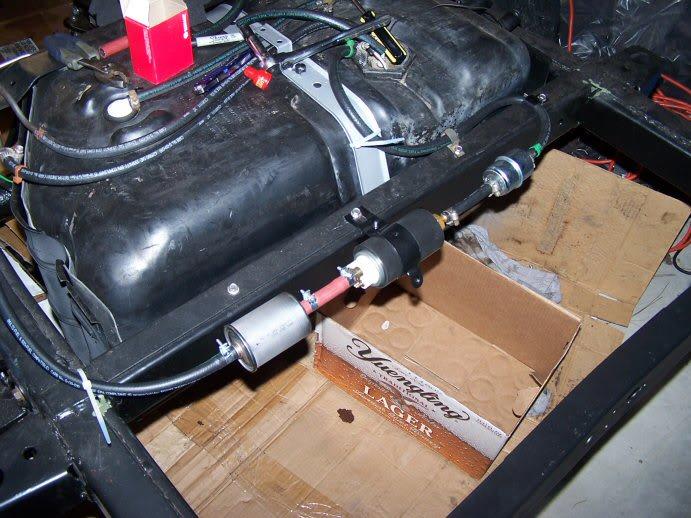
also installed my external fuel pump (Airtex E2000) with some pre and post pump filters..
2011fuelfiltersande2000pump-1.jpg

I used an old 4.2 coil bracket to mount the fuel pump, slightly modified (bending the mounting brackets on it) to get one of them to secure via the rear cross member piece (haven't figure out what the purpose of that cross brace is, it's just an angled piece of steel with 4 or 5 bolts holding it in place?)
the fuel line is held in place via a couple of recycled brake line brackets from inside the frame, and all the post-pump rubber fuel lines are EFI grade with EFI hose clamps (they're different.. more torque)

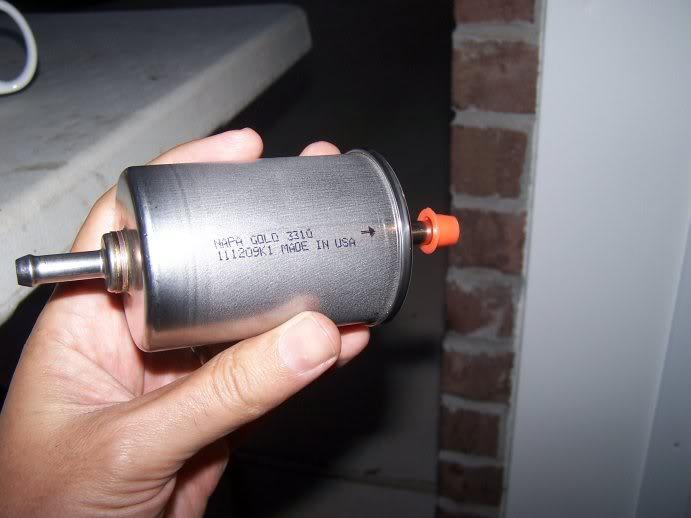
to get a fuel filter that had 5/8 fittings on both side, my local NAPA guy procured this part for me.. see part number on the side.. it's a generic that fits a few different imports and is roughly the same size as the fuel pump.. another coil bracket would probably hold it fine
2011inlinefuelfilter-1.jpg
 
Last edited:
my other "d'oh"! moment of this weekend..

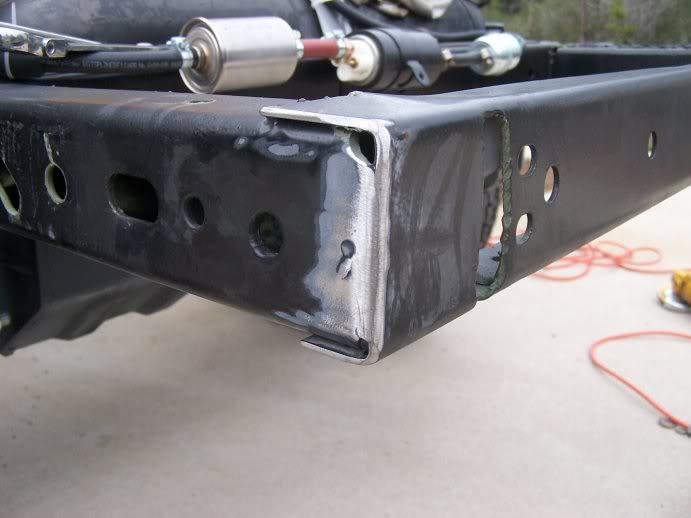
I have a used Runck rear bumper that I planned to install before I put the tub back on.. my rear x-member already had two holes punched through it to accept a homemade rear bumper that came with it when I bought it (see pics of that boat anchor back in my body lift install update).. see the two messy looking vertical holes on the inside of the frame rails here:
2011rearxmember-1.jpg


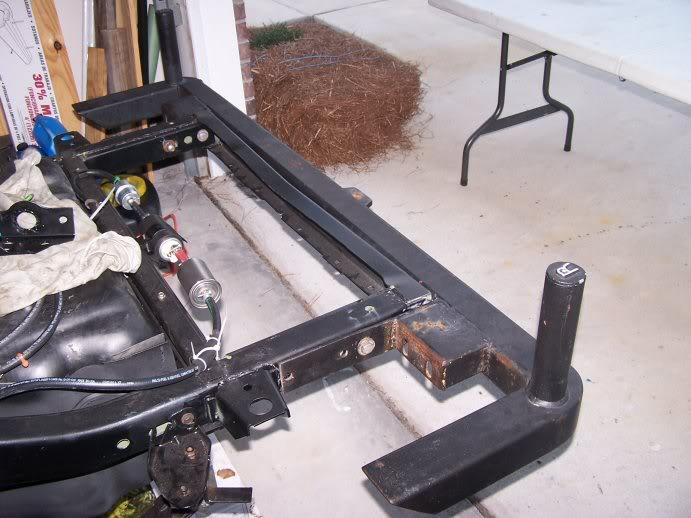
so I never bothered to get them repaired or to replace the slightly damaged rear x-member because I figured the Runck bumper need the the two holes for mounting.. well, in the YEAR that I"ve owned the bumper, I never bothered to check if the mounting tabs and the holes line up.. and they don't.. the Runck mounting tabs go on the OUTSIDE edge of the frame rails, see here:
2011runckvsrearxmember-1.jpg


so now I have to cut/drill two more vertical pass-thru holes in the x-member to get it mounted.. :banghead:
 
Last edited:
and my final "D'oh!" for today...

I finally realized why my fresh 4.0 fan belt seemed waaay too long even though I triple-checked the part application.. turns out I forgot to install the "bell" that goes behind the cooling fan and in front of the water pump.. and I can't find the d-mn thing in my garage.. turned the place upside down today looking for it with no luck.. it's odd because everything I pulled off the motor I put into one box, and I emptied the box part by part to rebuild the motor.. when I had nothing left in the box, I figured I'd had all the parts.. never realized I was missing such an obvious one :banghead:
 
I used an old 4.2 coil bracket to mount the fuel pump, slightly modified (bending the mounting brackets on it) to get one of them to secure via the rear cross member piece (haven't figure out what the purpose of that cross brace is, it's just an angled piece of steel with 4 or 5 bolts holding it in place?)

I believe the angled piece of steel is there to prevent the tank from coming in contact with the metal edge of the crossmember if the Jeep were in a collision from the rear. The piece of angle iron is supposed to help the tank from getting ruptured by the metal edge.

Judging from the size of the holes cut into your cross member, you may want to consider replacing the piece before you get it all back together completely. It wouldn't be to tough to cut the old one off and get the new one welded on and painted since you are still at a point where the body isn't on the frame.

What type of liner did you use on your tub inside and on the underside? I am pretty sure d'oh moments come standard when working on CJ's! Keep up the progress!!! :cheers:
 
Last edited:
Judging from the size of the holes cut into your cross member, you may want to consider replacing the piece before you get it all back together completely. It wouldn't be to tough to cut the old one off and get the new one welded on and painted since you are still at a point where the body isn't on the frame.

I agree 100%. That factory cross member is flimsy. I replaced mine with one of the Adams' 3/16" heavy duty units. Fit was fantastic, one of the better investments.
 
do you think the Runck bumper would/would not compensate for some or all of the flimsiness in the rear x-member? it's pretty heavy duty and bolts both to the frame and the x-member, kind of like a large brace?
 
do you think the Runck bumper would/would not compensate for some or all of the flimsiness in the rear x-member? it's pretty heavy duty and bolts both to the frame and the x-member, kind of like a large brace?

Probably would. I just like my beef with a side of beef.:D
 
If I may express my opinion after such a job that you're doing with this scrambler mounting that ugly bumper would be a crime...
I would just replace the rear crossmember and either find a set of bumperettes or some sort of other bumper. That thing is ugly as hell...
 
As someone who happily rehabbed and mounted one of these "ugly as hell" bumpers, which I love for the incomparable corner protection it offers, I suggest taking a look at how I mounted mine to see if it gives you any thoughts.

I butted the bumper against the stock crossmember after cutting the ends of the crossmember off (where the body mounts are) and hole drilled appropriate holes in the "flats" that end up perfectly positioned to replace the stock body mount holes. We stitch welded the bumper to the crossmember for extra security and to basically super-beef it since it is so flimsy and I figured if it ever came out, it would be getting replaced with one of the Adams' units anyway.

Post 97 starts it in my build thread: https://www.cj-8.com/forum/showthread.php?t=10119

(killed the picture, go to the thread, it was to damn big)
 
Last edited:
I butted the bumper against the stock crossmember after cutting the ends of the crossmember off (where the body mounts are) and hole drilled appropriate holes in the "flats" that end up perfectly positioned to replace the stock body mount holes.

thanks Eric.. so you redrilled three holes in the two big tabs on the bumper to align them to the three factory holes on the frame (now offset by the fact that the boxes on the Runck bumper were moved inboard)?
 
I didn't, I cut off the long "tabs" and went with one big bolt through the side of the "boxes" as you called it along with the welding on the crossmember. Your suggestion would be a great way to go though.
 
ah.. I see what you did (photos were on the next page after you painted it)... I think I may try some variation on what you did, and if it doesn't work out, I can always change it out for Jason's x-member.

I have the factory tailights and spare tire carrier.. do you think the two vertical posts would interfere with either of them (I noticed you ahve the aftermarket LEDs which are flat)?
 
ugh, sorry the photo is so dang big... just noticed.

Exactly, if it's not to your liking, the HD crossmember is an option, but I just don't like the idea of cutting the slots for those "tabs" in either one.

This bumper was sold for the CJs, so I can't see how it would cause trouble with the carrier, if anything mounting it up closer to the body should help I would think. Same on the taillights (I got mine off a CJ-5 I parted out that had stock lights), the posts are so far out to the side, I can't see them causing any issue. You can just search for pics of Runck rear bumpers mounted up. I think they still sell them, though I think the company has changed hands. The design was pretty much the same IIRC.
 
concerns, setbacks, disasters...?

well, I was starting to get some nice momentum going this month, primarily by completing what I considered to be the last "must do" items before I put the tub back on the chassis, to the point that I thought I MIGHT be able to mount the tub today.. and I know that getting the tub on enables alot of assembly, even that which isn't in a logical sequence..

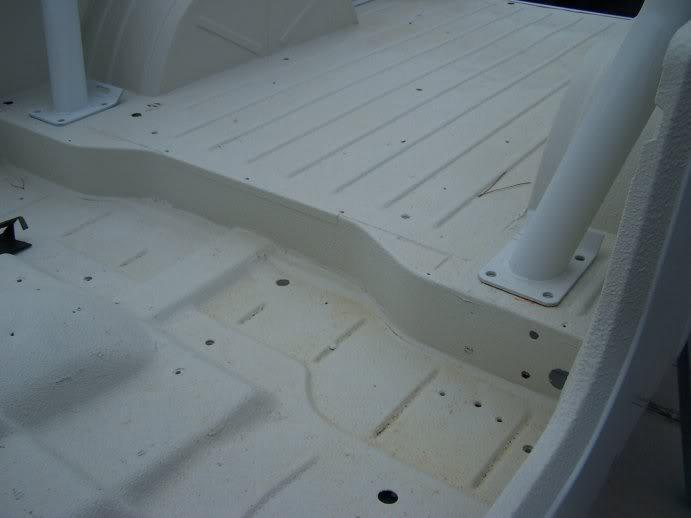
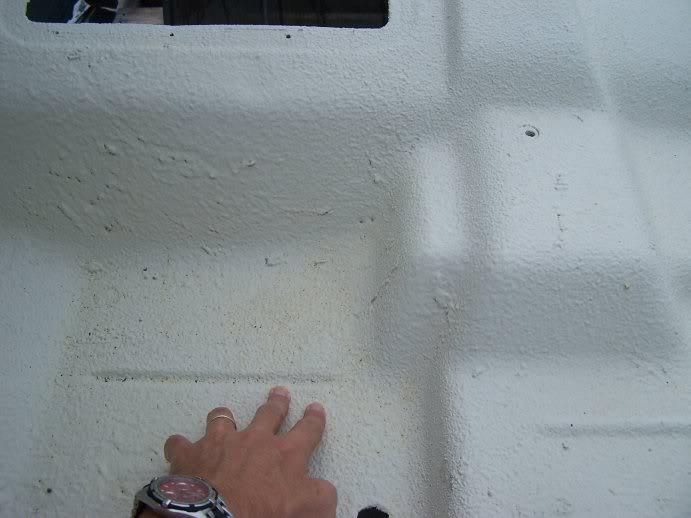
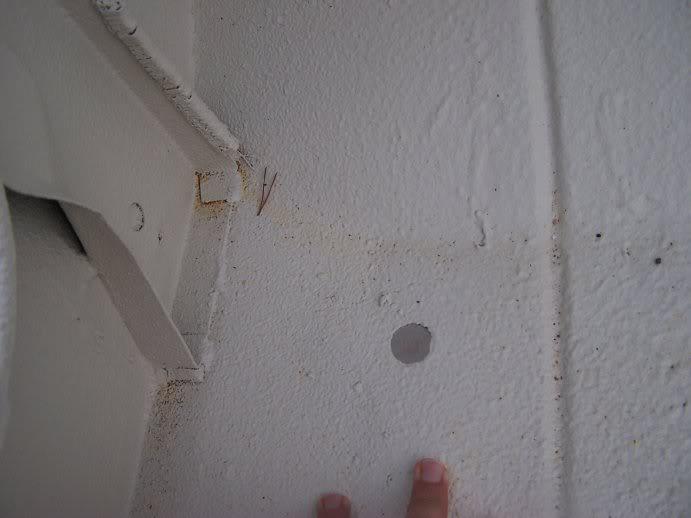
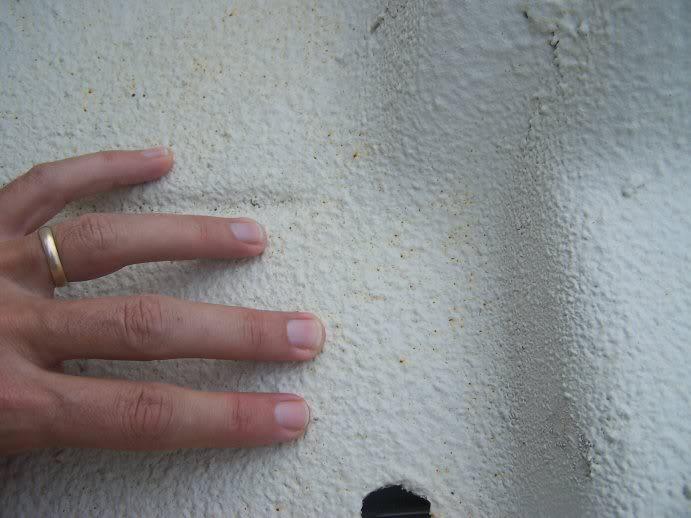
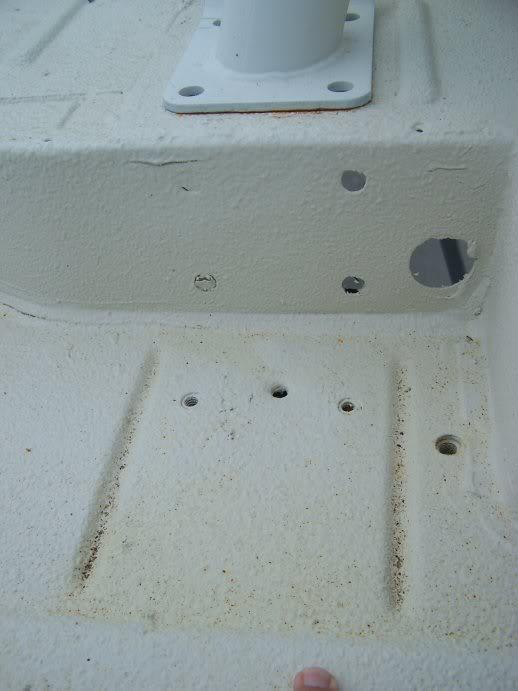
over the last few days I started to wonder if it was "just me" or if the bedliner (color matched) in my recently painted tub was fading or going off color.. this morning over my early AM brew, I walked outside to check it out, and discovered THIS:
100_3033-1.jpg

100_3034-1.jpg

100_3035-1.jpg
 
what you're seeing is the off-color from a thousand little points of what appears to be rust embedded in the bedliner.. for about an hour I thought it was the result of the fact that the liner is painted directly over a primed (not painted) tub, and that pin-holes were allowing moisture in and the tub is "flash" rusting underneath... after discussing with my neighbor/bud who's got a good engineering mind.. we think that it might actually be bits of metal embedded in the surface of the liner that are rusting in place (ie: if you imagine the micro-sized shavings of a grinder had fallen on the surface and subsequently rusted due to the moisture in the air/dew each day
100_3036-1.jpg

100_3037-1.jpg


I'm not sure what it is, but it doesn't look right, and I'm not happy about it.. have a call in with the body shop (weekend voice mail) to see if I can get the owner to look at it this week.. problem is, the shop is a two hour drive away and I don't own a trailer, so every time I go there, it's a serious ordeal..

sad face
 
so, in the meantime, even if I have to wait to install the tub (for what I assume what NOT be an easy job if I have to get the bedliner UN-installed), potentially a few more weeks... I've got lots of "to do" to get odds/ends ready for installation..

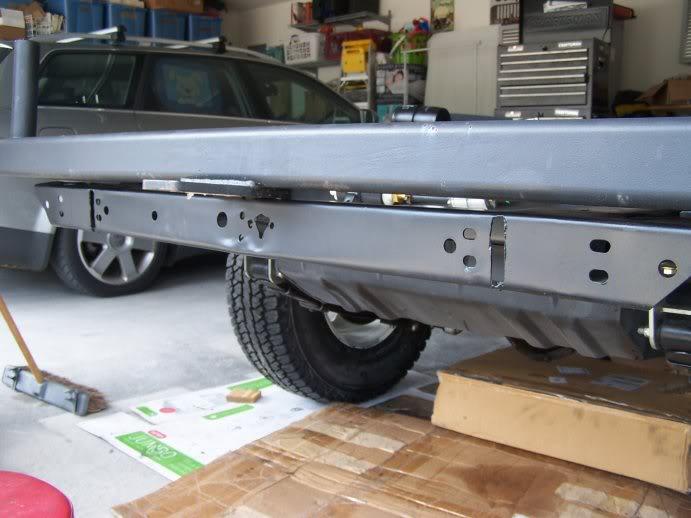
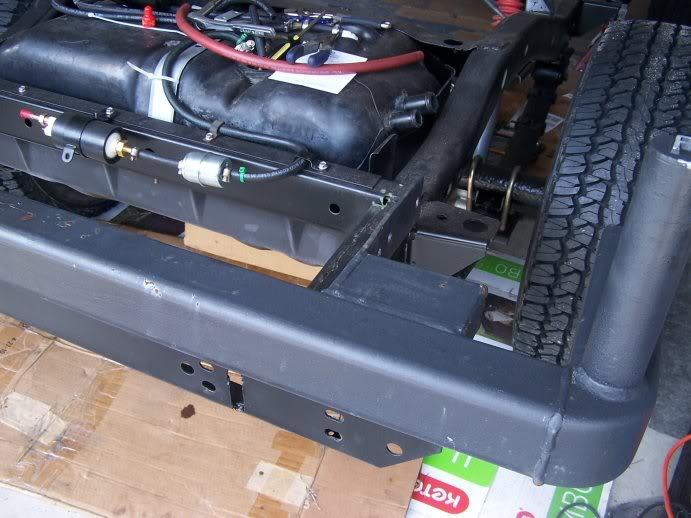
first project this weekend was an attempt at Eric (BigWalton's) Runck bumper solution to my FUBAR'd rear x-member
I lopped off the ends of the existing factory x-member:
100_3027-1.jpg

100_3029-1.jpg

I did prime/paint what was exposed in this project... in the meantime, test fitting the Runck:
100_3030-1.jpg

100_3031-1.jpg


the bumper looks dirty/rusty here (because it is), but once I determine that this is FOR SURE what I'm going with, I'll grind and refinish it.. it was painted in a Duplicolor bedliner spray on product before and it looks pretty sharp like that.. I've already painted my swing out spare tire carrier to match and will do some of my other trim the same way
 
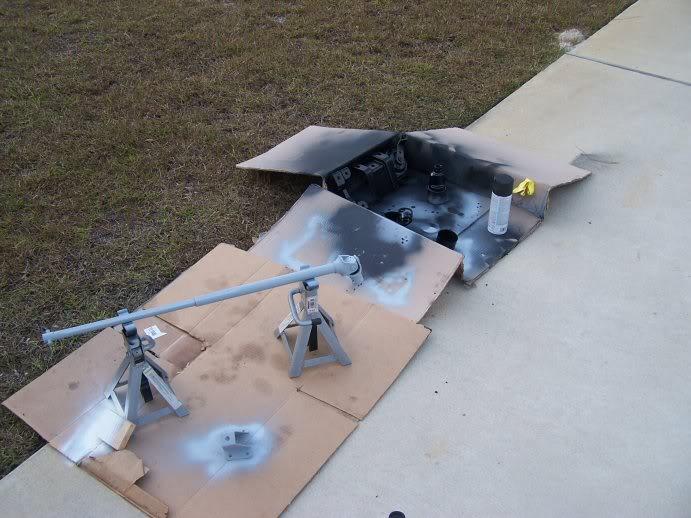
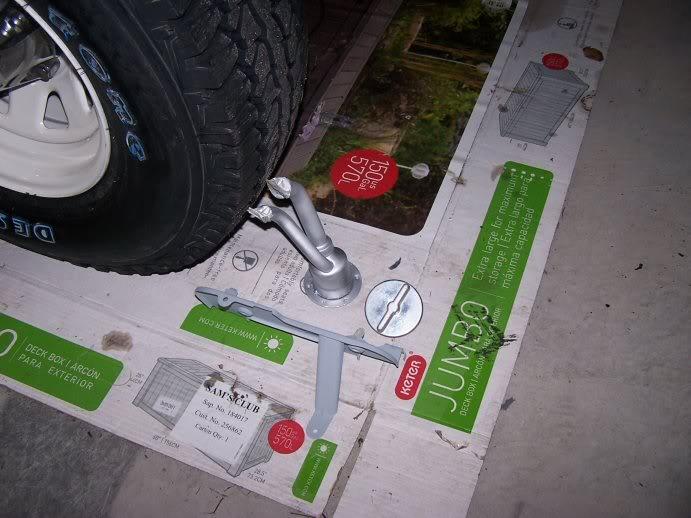
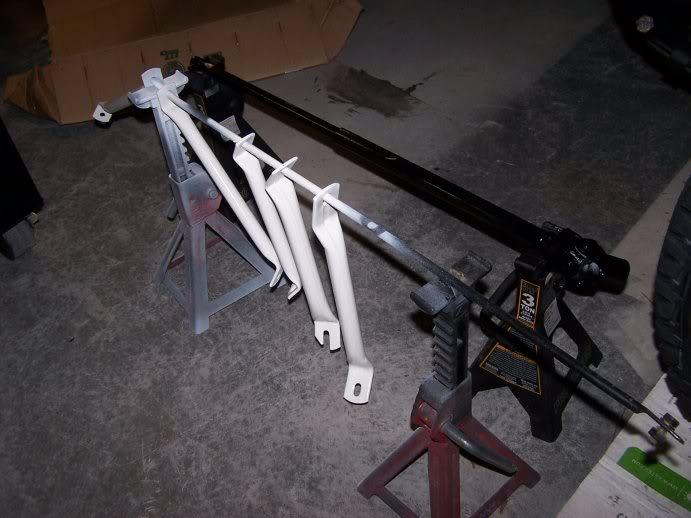
on to cleaning and painting bolt-ons...

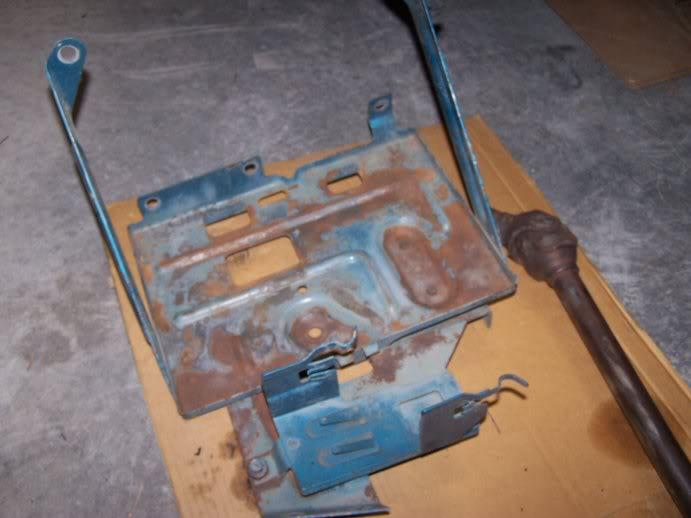
playing with phosphoric acid as a rust treatment.. not sure I'll do it again, but my available sandblaster pretty much sucks and grinding via wire wheel is getting old.. here's the YJ battery tray with the PCU holder for the YJ harness that I hope to mod onto my CJ firewall
100_3026-1.jpg

steering shafts, bump stops, enging bay brackets, etc etc etc..
100_3032-1.jpg

100_3045-1.jpg

I found an off-white rattle can Rustoleum product at Lowes.. color called "biscuit" and it's intended for home appliances.. it's a pretty close match to the factory alpine white
100_3044-1.jpg


and on, and on, and on the buckets of parts go...

fingers crossed that I get good support from my body guy on this bedliner problem... hate to turn it into a fight
 
Never seen a bedliner do that before. Looks like it's worse at the seam where the roll bar plate is, and where the body seams are. Could metal shavings have blown in there? If it's metal embedded in the liner, why isn't there rust on the vertical surfaces? Keep us posted...
 
Back
Top