• Notice for iPhone users: DO NOT use the image size reduction option when uploading photos to the forum. This causes portrait images to post as landscape. We have added a warning to the image insert pop-up as well.

Retitled: 83 Scrambler resto-mod finally gaining momentum

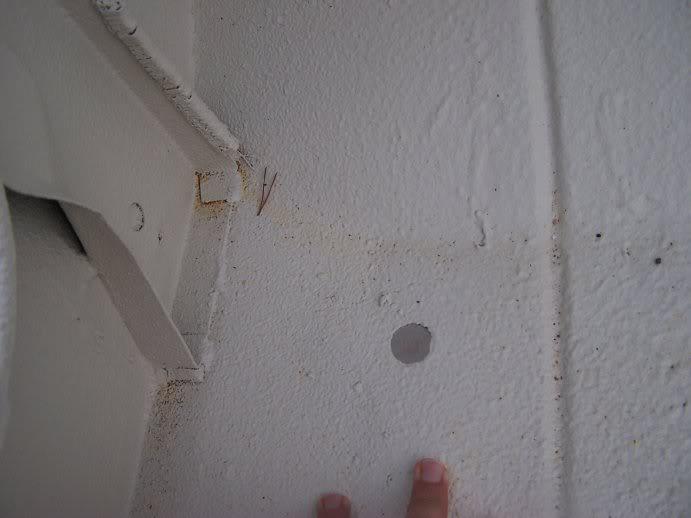
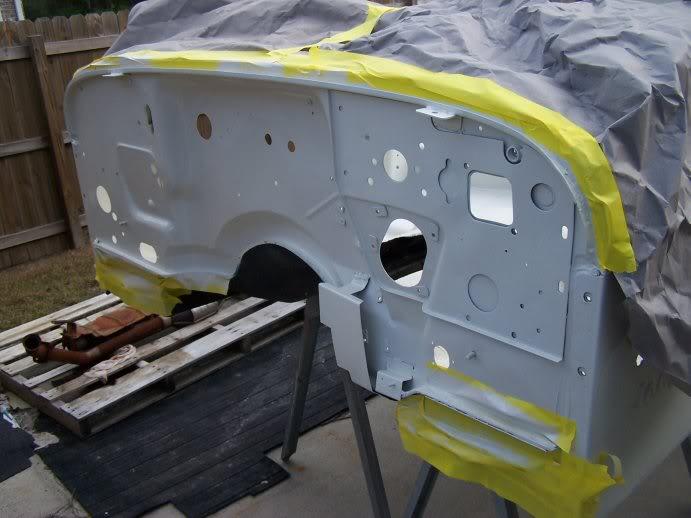
Looks like more of it settled into the recesses to the floor. My very first thought when I saw it was that someone had showered it with metal. I had an issue with our first new car, a Chevy Malibu that had spots like that show up after we brought it home. They claimed it was rail dust from the car coming on a train that embedded in the paint. They did a number on it in their body shop and got rid of it and it never came back. I also had this happen on the epoxy finish on my garage floor where it got wet after I'd grinded on something and I didn't think to clean it up immediately.

The way it looks to have settled down and isn't on the vertical surfaces makes me think that it got on when the stuff was close to or completely dry. Have you tried to take a heavy brush to any of it? Might be stained in to the color and do nothing, but curious if any of it would come off...

Hoping you can get it figured out without a ton of headache :fingerscrossed:
 
It looks like some grinding shavings got into the liner:(. Do the rust spots wipe off, or are they "stuck"?

Have you been doing any grinding near the body tub since you got it home? My green Scrambler's rear bed looked like this when I was grinding a bunch of rusty parts in the garage when I was redoing my red Scrambler. Hopefully that is all it is.
 
100_3035-1.jpg


Did they spray the liner over the rubber protector that is on the A-pillar support and not remove it? (Top left corner of the above picture.)

What kind of liner is it?
 
Did they spray the liner over the rubber protector that is on the A-pillar support and not remove it? (Top left corner of the above picture.)

What kind of liner is it?

yep, they sure did.. I was just looking at that this morning myself.. another head scratcher among head scratchers... bottom line, if you want it done to your standard, you've got to... do it yourself.. I think there's an aspect to being a "jeep guy", you just look for/notice thing that a non "jeep guy" might not notice so easily..

I'm now fully in the same camp as Raymond (Spankrjs) in the idea that the "overpriced" rigs via places like Collins Brothers are NOT overpriced..

as for the liner... I can't remember the brand name off my head.. I think it's something like Raptor liner, but I know that's not it.. the shop is a dealer for a specific brand, but I can't recall the name at the moment

truck is going back to the shop on Friday to get re-shot:banghead:
 
I'll start this update with a :thumbsup: to Raymond.. in my time without the body, I've been going through my piles-o-parts and cleaning, stripping, priming, and painting "stuff" so that when I do get the tub, back, I've got stuff ready to go... and re-reading Raymond's thread has triggered me to get after some stuff I wouldn't have thought of if he hadn't already posted about it.. what an incredibly valuable reference!
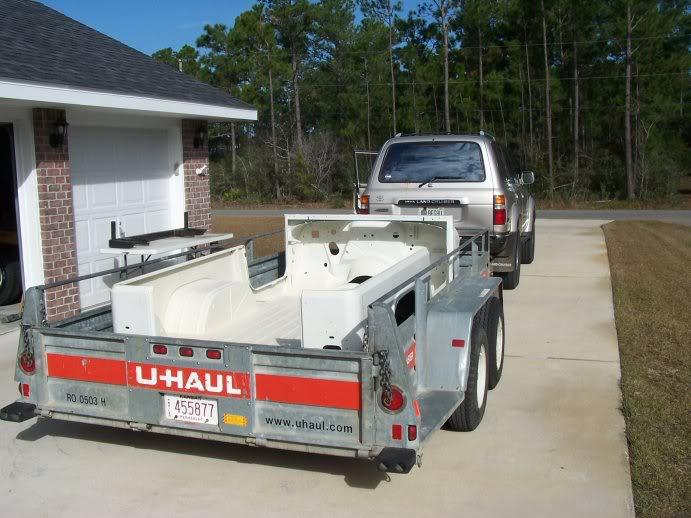
in the last two weeks, I returned the tub back to the body shop:
100_3052-1.jpg
 
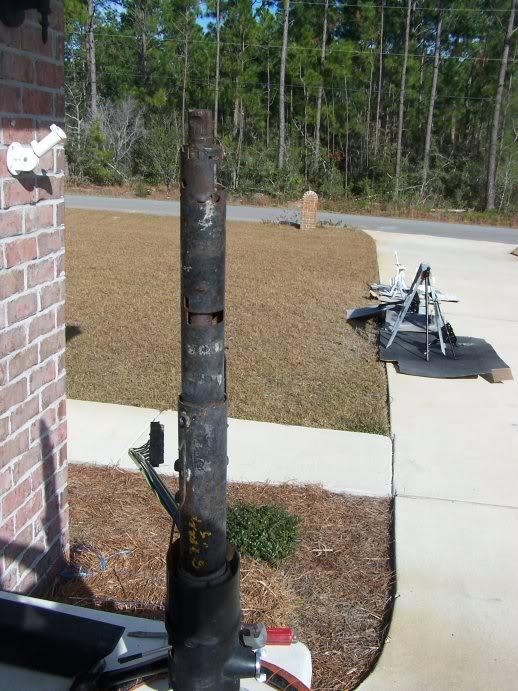
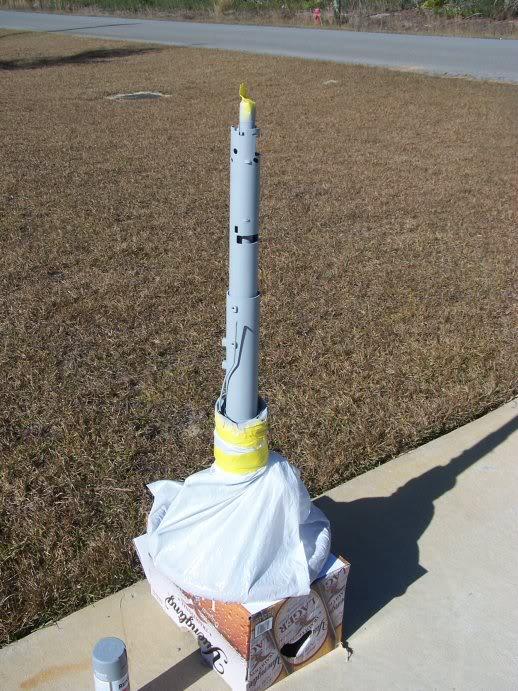
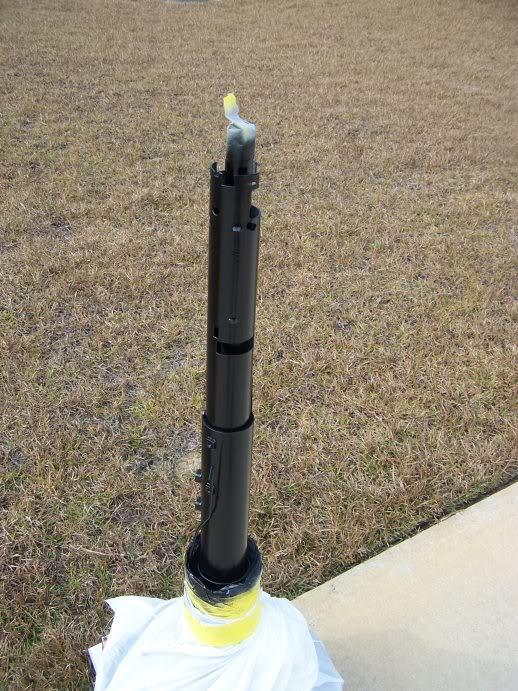
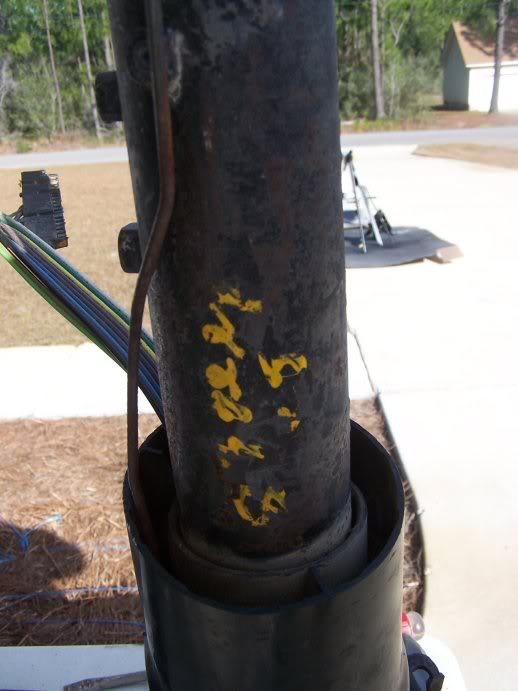
steering column

My steering column has lots of rust/funk on it so, I decided to do some clean up on it.. my guess is that it was a junkyard part as well since it had this part reference painted on it (I think it reads "83 Jeep CJ" but it's wearing off:
100_3056-1.jpg


I brushed it down with some phopho acid a few weeks ago and then used my drill/wire brushes and the 3M paint stripper wheels to clean it up (no after pics):
100_3057-1.jpg


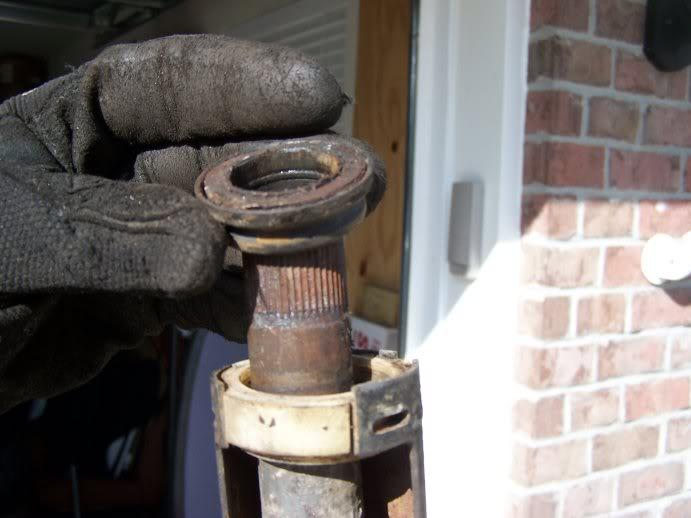
after I saw Raymond's details on this I decided to pull the shaft bearing and inspect it.. here's how it comes out:
100_3053-1.jpg

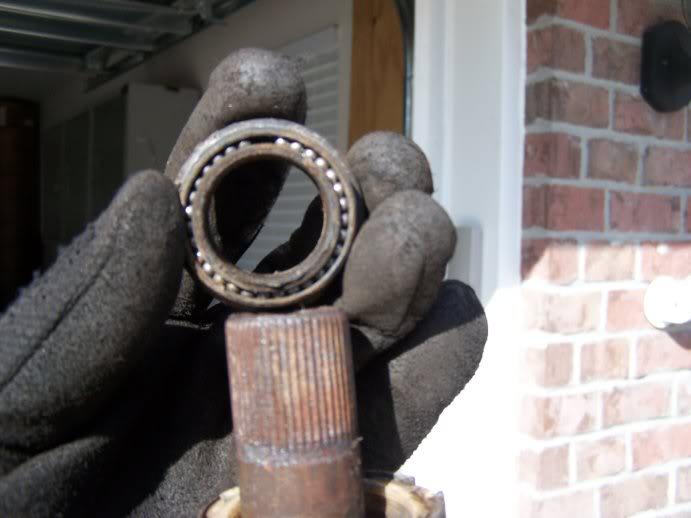
it was rotating, but felt rough to the touch as it turned.. probably because it's missing 2 or 3 ball bearings:
100_3054-1.jpg

so I'll have to order the replacement one of these days..

then did some priming/painting.. I chose not to paint the plastic bits that come out of the dash panel, just from where the metals is exposed to the base of the shaft:
100_3065-1.jpg

first two coats of black are on and I ran out of paint, will probably put a few more on next week:
100_3068-1.jpg


Tip: I'd removed the steering wheel to clean it, but it works well as a temporary holder while you're cleaning/sanding/painting the shaft
 
Last edited:
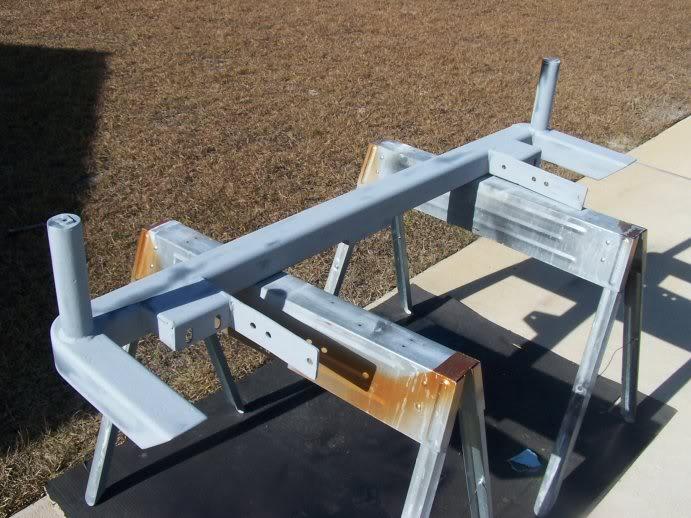
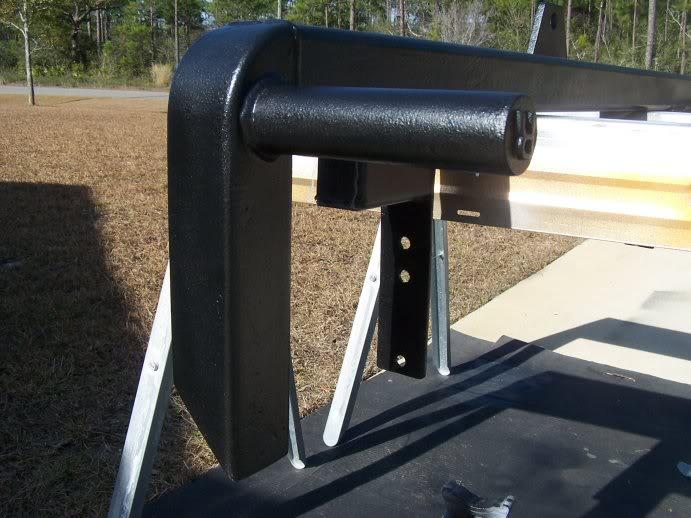
Runck bumper

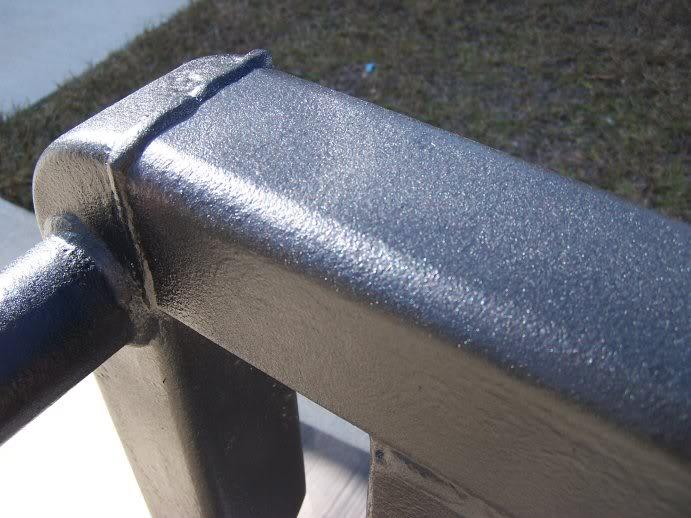
I bought the bumper with a coating of Duplicolors rattle can bedliner on it, but it has chipped off in many places and there was a bunch of surface rust on it...

I spent about two hours with a set of 3M stripper wheels and then primed it as that left a bunch of bare metal:
100_3072-1.jpg


here's the first coat of the Duplicolor bed liner.. it's not cheap (8 bucks a can) but you get pretty good coverage with it and it's pretty forgiving to use (it looks like it blisters when you spray it on the surface, but the bubbles all pop leaving you this textured surface).. it's basically a spray on vinyl (?) and makes a pretty hard surface, and I like the look of it
100_3076-1.jpg

100_3078-1.jpg


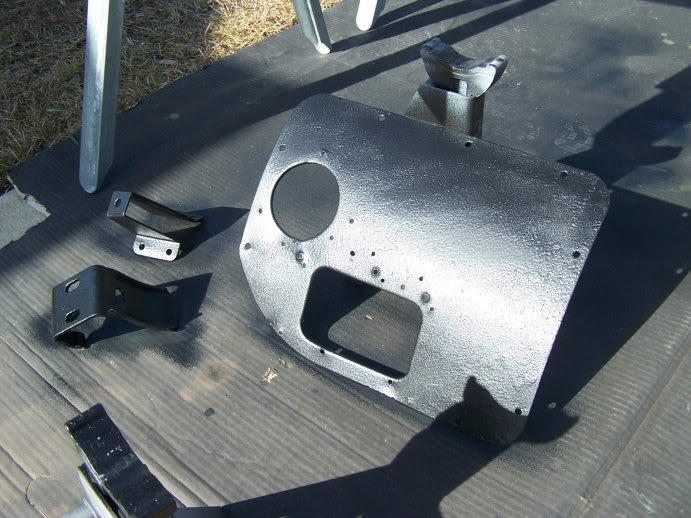
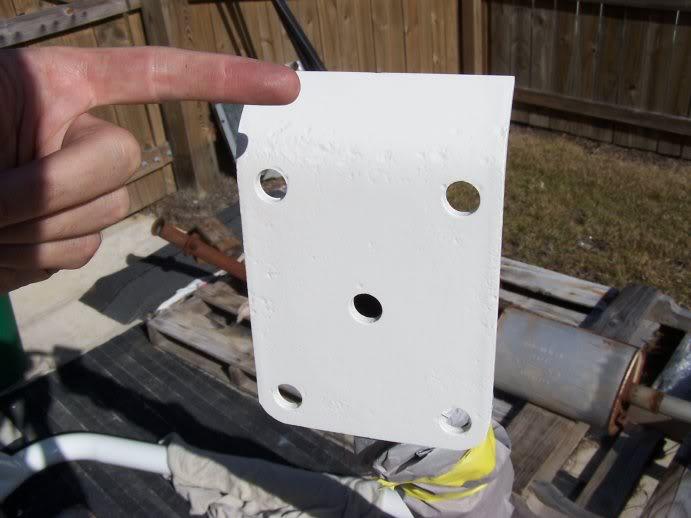
To match it, I've painted my spare tire carrier, and the spare tire hinge/catches/bumpstop to match, as well as my tranny tunnel cover, which is pretty "hole-y" already so I consider it basically disposable until I get another to replace it:
100_3077-1.jpg
 
Last edited:
roll bar details

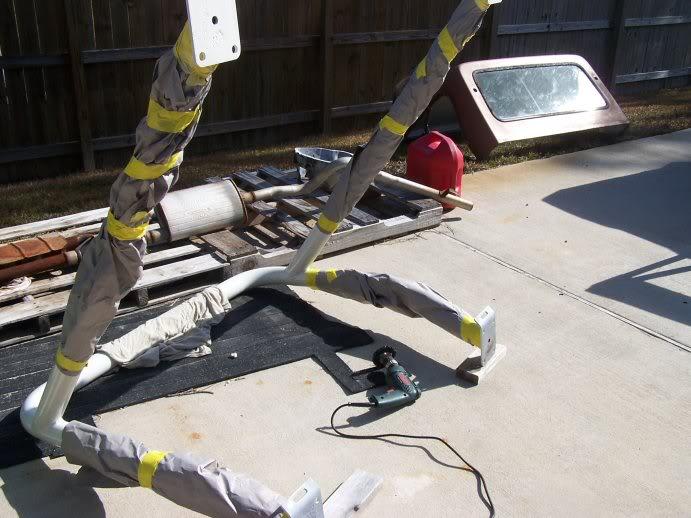
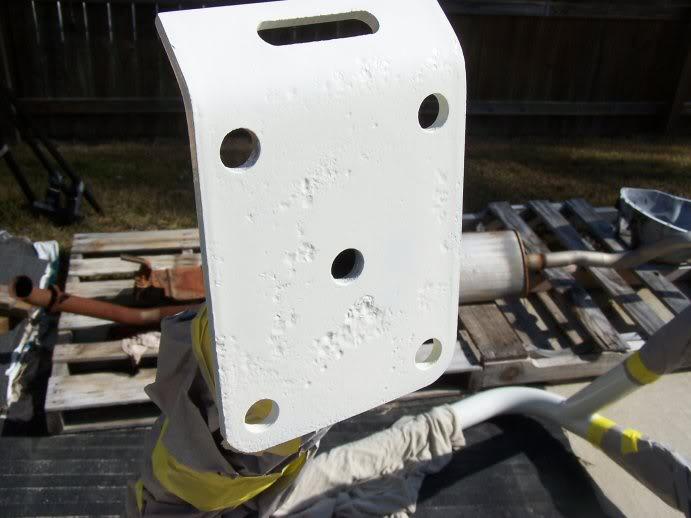
when I brought the entire truck back from paint last time, I noticed that the areas under the roll bar feet were already rusting again so... masked, ground, and painted the feet bottoms in an effort to delay that from happening again:
100_3073-1.jpg

you can see the effects of the last 28 years of no paint in the texture of the feet:
100_3074-1.jpg

I also noticed, as a curiosity, that 3 of the 4 feet have a hole/space in them for tie-down points, but one does not.. it simply has the raised/bent up lip? Not sure what the logic is on that. :shrug:
100_3079-1.jpg
 
engine bay stuff

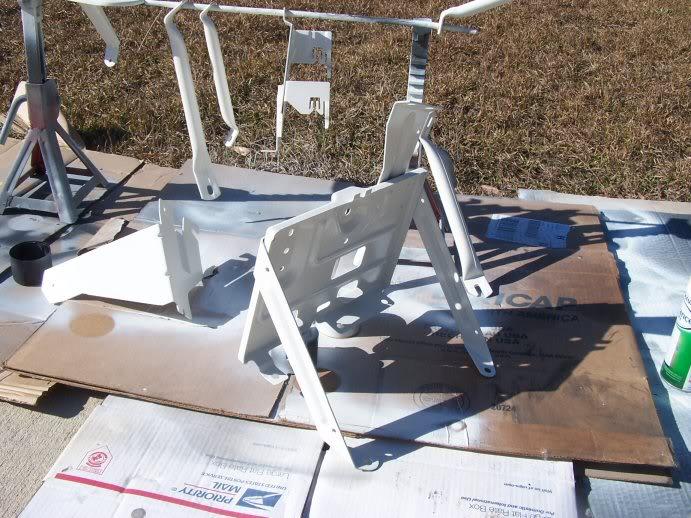
I continued to apply Rustoleum's kitchen appliance paint to a bunch of trim pieces in the engine bay.. they make a color called "Biscuit" which (very) closely matches the CJ factory white (at least as my body shop mixed it).. my CJ tray disintegrated as I took it off the firewall, so my goal is to used the YJ battery tray (requires new firewall holes) and it's associated bracket for the PDC/PDU (the box full of relays).. in the hopes that it will look clean:

100_3064-1.jpg
 
Great work. Am enjoying the pics. Hope the liner problems works out. Looks clearly like metal shavings were in the liner when it was sprayed(??), or they ground something next to it after they sprayed it, but it looks like it was 'flowing' from the support into the floorpan. [I wonder if they did grind after they sprayed, realized it, and tried to wash it out, but it rusted too fast]. Odd they wouldn't remove the molding on the drivers support too, before the sprayed it. Oh well, keep at it; don't despair. :thumbsup:
 
my goal is to used the YJ battery tray (requires new firewall holes) and it's associated bracket for the PDC/PDU (the box full of relays).. in the hopes that it will look clean:

LOVE this idea... :thumbsup:

Did you stick it into the engine bay to see that everything lines up to bolt it in?
 
experiments in frugality

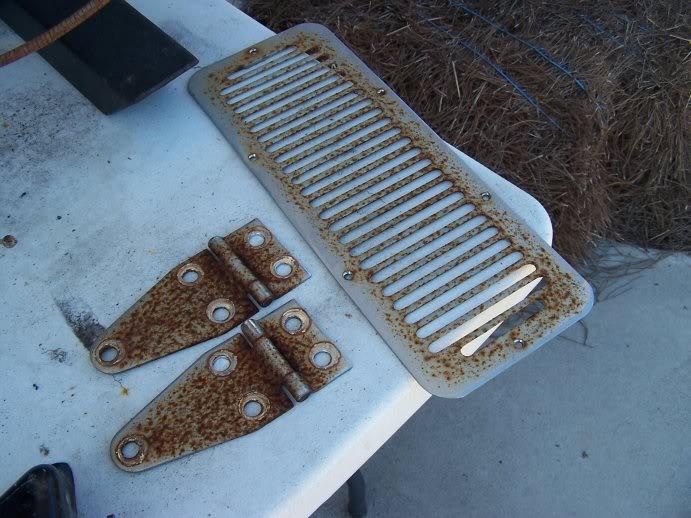
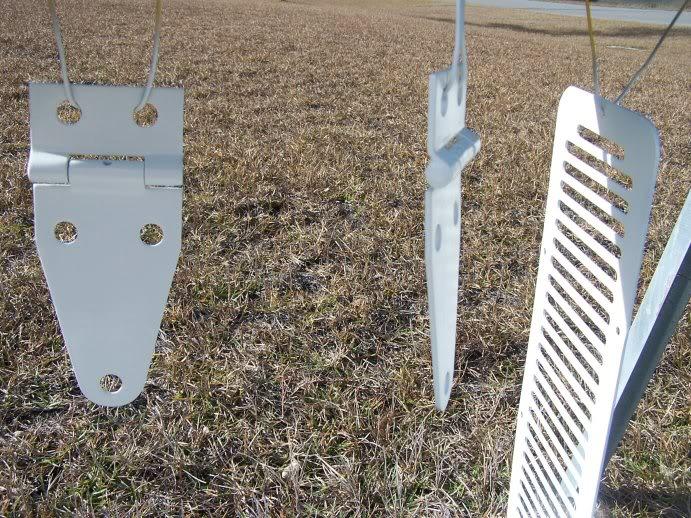
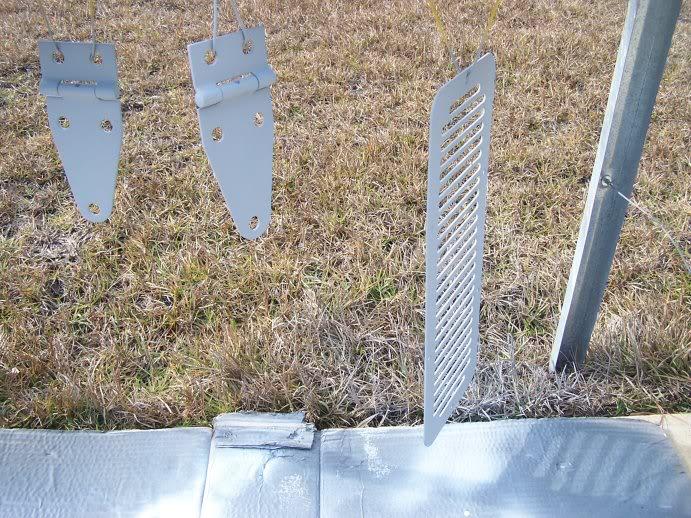
My hood hinge set and the cowl vent cover were pretty rough when I removed them before the tub was painted:
100_3048-1.jpg


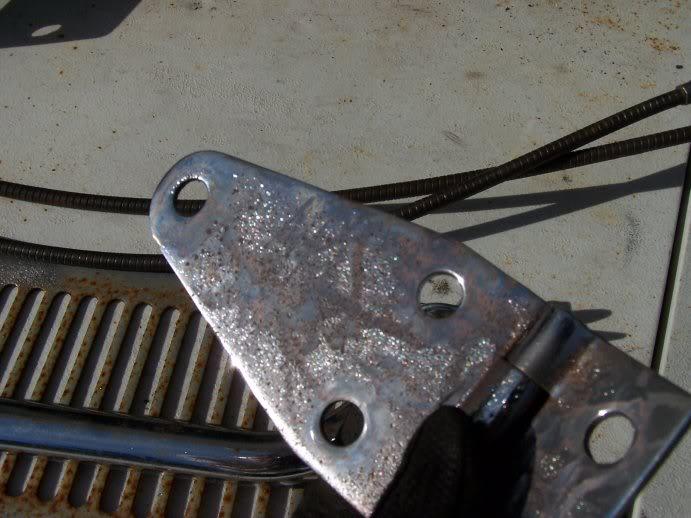
so, in an attempt to save myself a few bucks, AND to "see if this works", I tried restoring them..
about an hour of bench grinding, wire wheeling, and dremel tooling removed most of the caked-on rust
100_3061-1.jpg


and then I primed and painted them (going chrome-free, or at least low-chrome on this project):
100_3071-1.jpg

100_3066-1.jpg


we'll see if it works :fingerscrossed:
 
LOVE this idea... :thumbsup:

Did you stick it into the engine bay to see that everything lines up to bolt it in?

Eric, I did mock it against the firewall (although it was a completely bare firewall) and no, it does not line up... I'll have to drill at least two, possibly more holes in the firewall to place it again.. while that will probably feel painful on a freshly painted tub, I think the end result will be fine, and as long as it doesn't interfere with the HVAC, I'll be happy. I'll have to figure out a way to back fill the existing holes (caps, short bolts, something...).

I'm also going to try and use the YJ air cleaner assembly as a factory unit, which is an air box style filter that rests on this bracket, which is bolted to the DS fender well. I hope the distances are close enough to let me use it:
100_3049-1.jpg
 
Right, I didn't mean the holes would line up, I was curious about it working with the other stuff on the firewall. I'll be :popcorn:

:)
 
other stuff

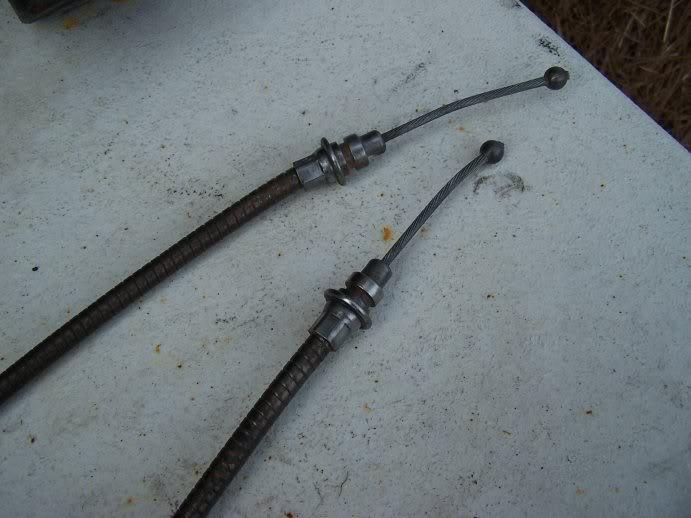
ran my e-brake cable assemblies (surface rusted) through my bench grinde and cleaned them up, may paint or put undercoating on the housings (they're flexible so painting is a dicey option) before I reinstall... they did work before I pulled them, and still look serviceable, but it if doesn't work out, I'll have to buy replacements:
100_3070-1.jpg


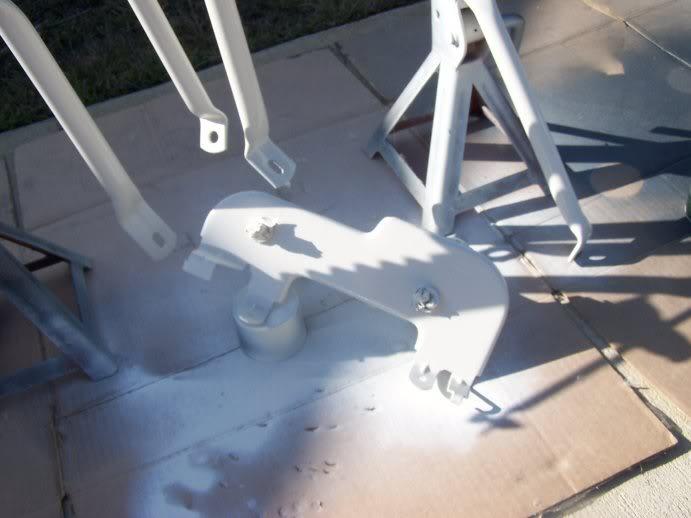
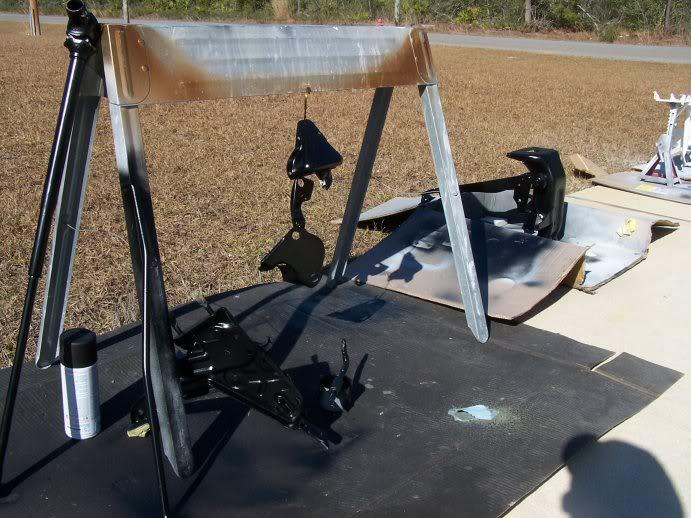
also painted my e-brake assy, the clutch/brake pedal assembly, and the mounting brackets for the steering column to firewall:
100_3063-1.jpg


Mine Jeep had no bracket to firewall gasket/pad on it when I removed it.. if I hadn't seen Raymond's thread, I'd never have thought that one was ever available: :thumbsup:
 
the downside of mail order parts

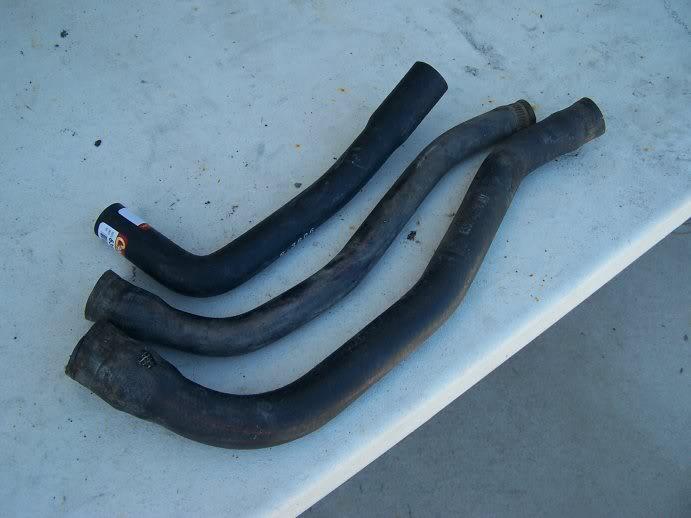
if you're looking for replacement fuel hoses.. I bought one from Qtec that was purportedly for the CJ8 with 20 gallon tank.. it's the upper of these three.. the bottom two being those I pulled off the truck.. obviously not a match
100_3080-1.jpg

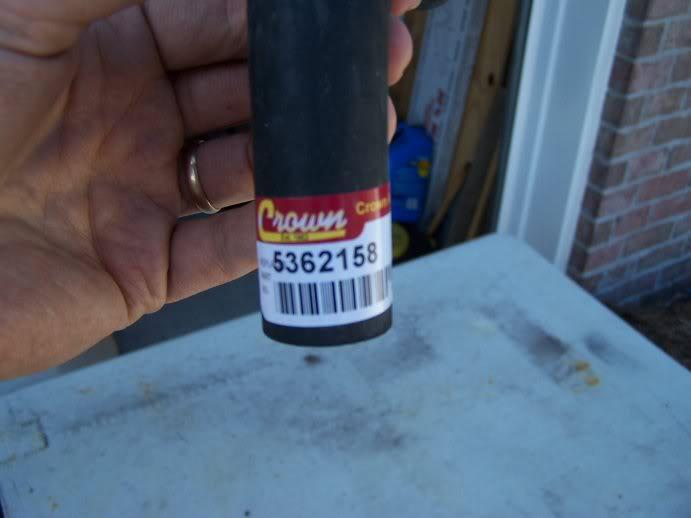
Here's the part number
100_3081-1.jpg
 
Right, I didn't mean the holes would line up, I was curious about it working with the other stuff on the firewall. I'll be :popcorn:

:)

among items that might be affected, one of my next "big" projects is restoring my heater assembly.. I've got both the CJ and the YJ boxes, which are very similar, yet different.. the YJ uses vacuum advance to open/close flaps, while the CJ obviously uses cable pulls.. I'm going to try and merge the two to make one useable system..

considering doing the blazer heater motor upgrade, but not really sure I want to go that route
 
yes yes yes yes yes yes yes yes....

probably the single most gratifying moment in this entire process occurred today...

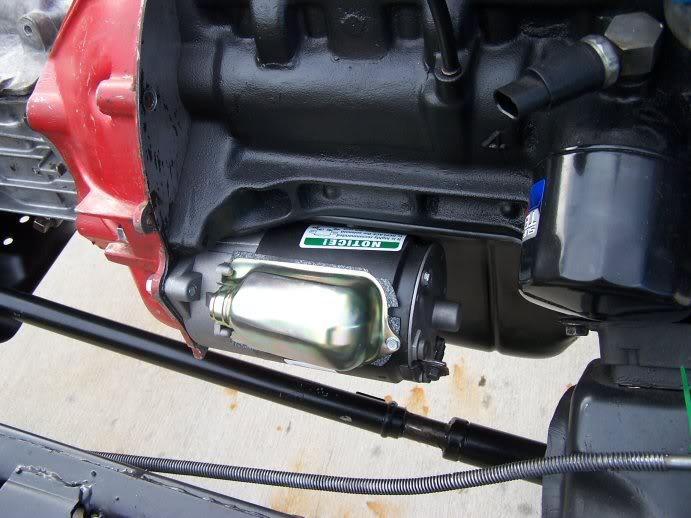
I've reinstalled the (new) starter:
100_3083-1.jpg


did some minor touch up work on some places where the original seam sealer had cracked/flaked out and left some surface rust growing, all of which would be under the hood but I wanted to attack it while it was easier:
100_3085-1.jpg


I rolled my chassis out of the garage and installed the body (lift) mounts (note that I hacked off the outer portions of the damaged rear x-member, which had the holes for the rearmost body mounts.. I have to measure for new holes in the Runck bumper, remove it, cut the holes and then reinstall it so I can put the rearmost body mounts on
100_3084-1.jpg

100_3082-1.jpg


and had a few friends/neighbors come over to help me lift the tub off the sawhorses and onto the frame.. because of the undercoating/bedliner I had the body shop installed had gummed up some of the threads, I'd already chased each body captured nut with a tap set, and even tested each with a bolt before installation.. with a little maneuvering around all the body mounts from the wheel well forward went on like butter
100_3086-1.jpg
 
Last edited:
rolled her back into the garage:

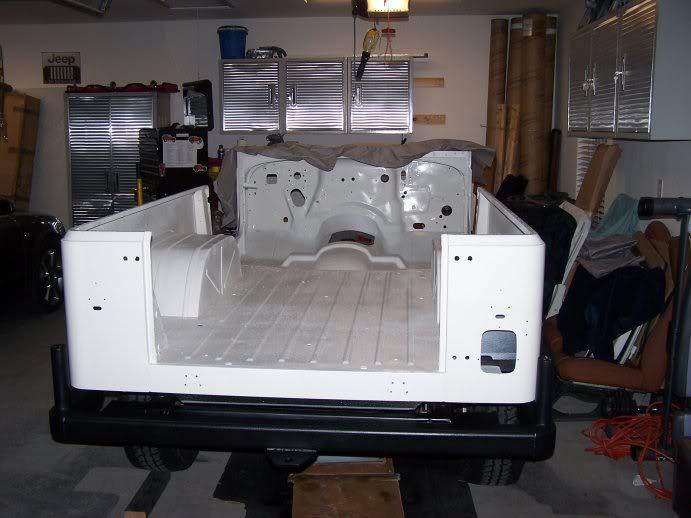
here you can see the two "boxes" on the Runck bumper that are below where the rear most body mounts should be (and will be once I template and cut them)
100_3089-1.jpg


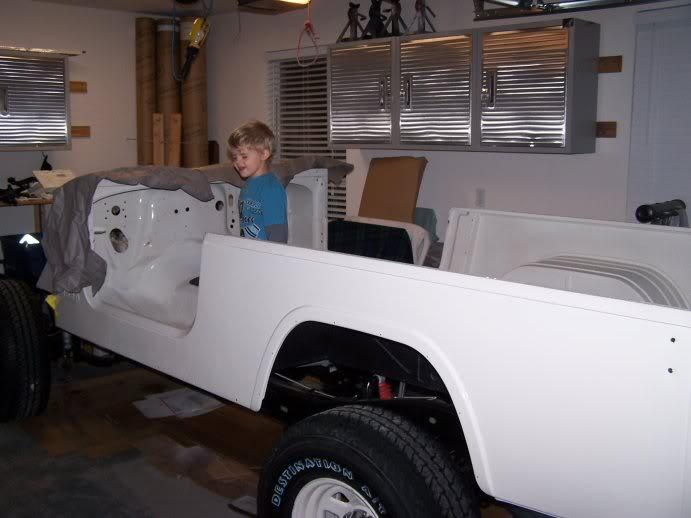
My little man came out and and announced excitedly, "it's FIXED daddy!" "Aaaaaalllllll done!" Not quite buddy.. but makes it feel alot closer!
100_3091-1.jpg


I can not tell you how much of a motivator it is for me to see the tub back on the chassis again.. I know I have a ton of work ahead of me, including some challenging and no doubt frustrating steps (chief among them: CJ to YJ harness merge, and A/C unit retrofit), but I'm VERY excited about getting to start real tangible assembly for a change
 
Last edited:
Back
Top