• Notice for iPhone users: DO NOT use the image size reduction option when uploading photos to the forum. This causes portrait images to post as landscape. We have added a warning to the image insert pop-up as well.

Speedhut gauge install, wiring update/fix, switchplate

That GPS looks just like my XM antenna. It is still going strong and is on the top of the car!
 
I have the same thing on my CJ the sirius one, for 9 years. And I even painted over it and it still works.
 
yes the antenna is water proof. It has a magnetic base to put on the body. It has to be mounted where it can "see" the satellites for best signal (no metal above it)
 
For reference, fiberglass is invisible to these signals. I have my Sirius antenna in my LJ on the rollbar under the roof (and the padding) and it works great. Metal, like Mike mentioned, is the issue.
 
Try it. Maybe it will get signal between the slots .
 
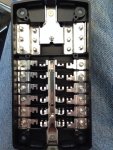
Lots of great progress today. I moved everything that is getting moved to the distribution block and in doing so I decided I HAD to modify the block to have two power sources and the ground bus.

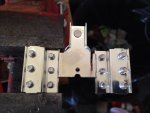
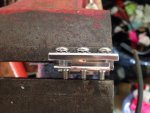
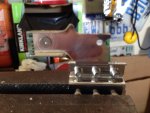
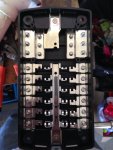
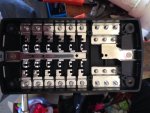
So I opened up the back of the block and schemed on the best way to do the mod. Settled on chopping half of the ground bus loose to create a second 12v input lug from the battery with 6 connections and still have 6 grounding locations. I just ran the ground wire from the battery to one of the ground lugs.

Unmodified block:
ImageUploadedByTapatalk1394951584.946321.jpg

In process:
ImageUploadedByTapatalk1394951603.012542.jpg

ImageUploadedByTapatalk1394951620.046119.jpg

ImageUploadedByTapatalk1394951634.596920.jpg

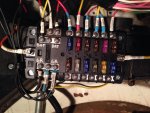
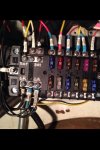
Completed mod. Ground bus by itself and I'm using the lug for a battery feed.

ImageUploadedByTapatalk1394951675.650615.jpg

End of the night setup. Lots and lots of soldering, heat shrinking and organizing.

ImageUploadedByTapatalk1394951781.646705.jpg

I tested the OBA and KC light wiring by throwing one of my nice switches into each circuit and I'm happy to report that they're good to go. :D I started thinking about how best to wire in the throttle controller I got from BadKarma to use with the OBA. Put it down to sleep on it after disassembling the circuit box to remove the on/off switch. Looks like a relay triggered off the OBA circuit could be the way to go. I see more weather pack connectors in my near future.

I also soldered a few things that had splice taps, cleaned up more stock wiring, got some things out of the way and rerouted some wiring. I get into a groove with electrical and just love it. Nice to feel like I'm doing things right/properly for once.

Good day!!
 

Attachments

  • ImageUploadedByTapatalk1394951647.962460.jpg
    ImageUploadedByTapatalk1394951647.962460.jpg
    273.4 KB · Views: 213
:woot:

ImageUploadedByTapatalk1395004559.242617.jpg

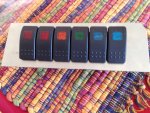
I was an idiot on the colors I bought but not bad for only having hand tools to work with. Now for mounting holes.
 
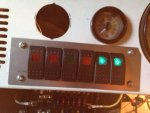
Thanks. Got the switchplate construction finished, mounted and tested. Good weekend!

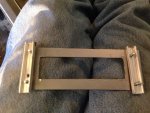
If you're wondering why I put the switches side by side, it's because I realized that the mounting was going to be interesting with the limited amount of room between the DIN radio opening and the speedo with the speedo stud. With them side by side, there was enough space to use this setup to clamp the plate in the opening without any additional holes.

The channel has threaded holes and it clamps the plate in place nicely. I can loosen one side and remove the other and rotate the plate to take it out.

ImageUploadedByTapatalk1395022541.514903.jpg

In with switches installed and working. Currently only have the OBA and KC lights connected. Will work through adding uses for the other four.
ImageUploadedByTapatalk1395022553.997482.jpg

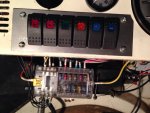
Cover on the distribution block and switches in. Me happy.
ImageUploadedByTapatalk1395022578.280519.jpg

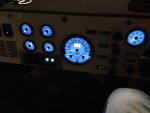
I ended up needing to send back three of my gauges, hence the empty holes and the lack of an overall shot. There was a mix up on the two I ordered last (tranny temp and air pressure) and the artwork for my voltmeter wasn't aligned right. Speedhut was more than happy to make everything right for me though and are even accommodating a change by going from "PRESS" to "AIR" on the face of the pressure gauge. Very appreciative for their willingness to work with me. :thumbsup:
 
Nice work my friend. Now that your all experienced and all.... :wave:
 
My phone kept shutting off due to the cold but I finally got the hand throttle I got off of BadKarma modified the way I wanted it and installed.

Started by cracking the control box open.
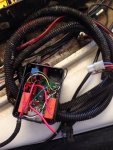
ImageUploadedByTapatalk1395718771.666949.jpg

Thought I had pics of other parts of this, but the cold didn't play nice.

The way it's made to work is that the power switch and indicator light are on the box with one switch to rev up/down and there's a second remote switch for rev up/down. I wanted the box out of sight under the good, so I pulled out the indicator light and power switch and desoldered them.

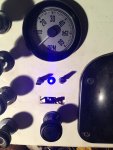
Drilled an access hole and ran new wires for the light and switch and ran them into the cab. Going to mount the two switches under the tach with an LED indicator lamp to hopefully match the gauges and rocker switches (I have my switch panel switches planned already and needed the second momentary up/down rev switch anyway). They're small and unobtrusive and they make sense to be right near the tach.

I had to order the LED lamp, so I didn't drill the holes yet.

I also decided to just go ahead and mount the Speedhut dimmer knob and the clock adjustment button under the clock.

I soldered the control wires to the respective IAC wires near the firewall inside the loom so there's no nasty tap connectors. Ran switched power from the distribution center to the control box and got the ground lug soldered on and hooked up. Tested it to the point that I could without firing the engine. Looks promising.

Got a new spot figured out for the Cobra CB and mounted it.

Cleaned up the wiring under the hood, still some wire shortening to do when I get my gauges back and installed.

Getting very very close.
 
Great! I will referencing this thread when I do my install.

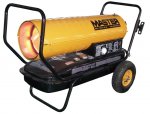
I quickly mentioned this once before in another thread, but after this winter (it's not over yet) this became my new best friend. I would not have fitted the hard doors and top, installed the new seats, rehabbed the heater box, blasted and painted the seat brackets, POR-15 the bumper, etc without it. Plus, you can justify it to the wife as (with adequate venting) you can use it as a emergency heater for your house. I would run it for 20 minutes to an hour and then most of the time just leave it off while I worked. If it was really cold I would leave it on. I would leave both doors open about 18 inches, but the manual says you don't need to do that much. It probably runs cleaner on K1, but it was convenient for me to use diesel as I have that for my tractor that I use to plow snow.

12345_large.jpg
 
Got the hand throttle switches (power on the right and RPM control on the left) and cool black aluminum housing/blue LED indicator light installed.

I think the only thing left is to put a connector in the tranny temp gauge wire and install the gauges when they get back from Speedhut. :headbang:
 
Back
Top