

You are using an out of date browser. It may not display this or other websites correctly.
You should upgrade or use an alternative browser.
You should upgrade or use an alternative browser.
My De-Rustification Project
- Thread starter gr8dain
- Start date
Dain, the vacuum kit will not work unless you get some brake fluid flowing. Is it one side or both sides. I've heard of another guy not being able to get one of the rear to bleed. He ended up disconnecting the line at the rear of the proportionate valve and at the backing plate. He shot some air through the line (at the line where it connected to the valve) and got some garbage out that was blocking the line. He did new lines but reused the valve and believed crap flushed out of the valve and plugged the line. Another member mentioned that if the wheel cylinders rubber caps can sometimes block the fluid flowing out. If you have air (or a portable air tank) disconnect the line at rear of valve and at backing plates (I don't know if air going through wheel cylinders would hurt them, with bleed screw open). I would give it a try. If you want before that try loosening a front bleed screw, have someone sharply push down the brake pedal and hold at floor, then you close the bleed screw. Open the rear line at valve and see if gravity will get the fluid through the valve. If you have fluid leaking there, connect line to valve and go to drivers rear and loosen bleeder and see if you get fluid (gravity ). By loosening the bleed screw (front) and sharply pushing the brake pedal down you can fool the valve into thinking the front is leaking and the valves piston will slide to the front to block the leak. You may now have the piston blocking the rear and you need to fool it into thinking the leak is in the front. If that doesn't work I would check with air (just for peace of mind). I've taken a car to a mechanic for just this problem. They power bleed the system and swore it was good buy it wasn't. Talked to another guy who told me about fooling the valve and he was right.

- City
- Ashburn
- State
- VA
Dain, the vacuum kit will not work unless you get some brake fluid flowing. Is it one side or both sides. I've heard of another guy not being able to get one of the rear to bleed. He ended up disconnecting the line at the rear of the proportionate valve and at the backing plate. He shot some air through the line (at the line where it connected to the valve) and got some garbage out that was blocking the line. He did new lines but reused the valve and believed crap flushed out of the valve and plugged the line. Another member mentioned that if the wheel cylinders rubber caps can sometimes block the fluid flowing out. If you have air (or a portable air tank) disconnect the line at rear of valve and at backing plates (I don't know if air going through wheel cylinders would hurt them, with bleed screw open). I would give it a try. If you want before that try loosening a front bleed screw, have someone sharply push down the brake pedal and hold at floor, then you close the bleed screw. Open the rear line at valve and see if gravity will get the fluid through the valve. If you have fluid leaking there, connect line to valve and go to drivers rear and loosen bleeder and see if you get fluid (gravity ). By loosening the bleed screw (front) and sharply pushing the brake pedal down you can fool the valve into thinking the front is leaking and the valves piston will slide to the front to block the leak. You may now have the piston blocking the rear and you need to fool it into thinking the leak is in the front. If that doesn't work I would check with air (just for peace of mind). I've taken a car to a mechanic for just this problem. They power bleed the system and swore it was good buy it wasn't. Talked to another guy who told me about fooling the valve and he was right.
Thanks. A lot of great info. I appreciate it. I will try these things next. I am not getting fluid to either side of the rear. When I loosened the rear line at the combination valve a few weeks ago, fluid leaked out there when I pressed the pedal. I will loosen it back up and see if I can blow air through it. I may try the trick thing though if I can't get fluid to go when I remove that rear line again.
This is very helpful. I appreciate it.
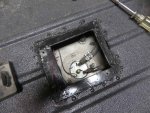
Here's pics of the cj7 (fiberglass body) and the cj8 with the access holes cut. The cj7 I have a wood storage box bolted in so I used the floor of the box as a lid. On the cj8 I cut some 1 1/2" x 1/8"thick flat stock. spot welded as a box with approx 3/4" inside the hole I cut. Drilled holes around the cutout and used rivets to hold. Drilled holes in 3/4" section so I can screw the cut out piece into place. Actual hole (in center of box,lip I made) is probably 4 1/2" x4 1/2". I have something like a 2 or 3 inch body lift so I have extra room to reach under the tub.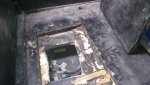
Only other thing that came to mind is make sure the front of jeep is higher than rear (if gravity bleeding). Higher up would help put more pressure on brake fluid to flow down. Just a thought, I feel for you, I've had problems but can usually work out with time, think you just have one that wants to test you.
- City
- Ashburn
- State
- VA
Only other thing that came to mind is make sure the front of jeep is higher than rear (if gravity bleeding). Higher up would help put more pressure on brake fluid to flow down. Just a thought, I feel for you, I've had problems but can usually work out with time, think you just have one that wants to test you.
Probably not. It is backed into my garage. Pretty flat but slightly angled toward the front. Maybe I will jack up the front or pull it out and put it back in front first.
One other thing I was going to write and forgot. Make sure all joint (connections) are air tight, Loosen and tighten to try to get a better seal. On both gravity bleeding and vacuum bleeding they require no places where air can get it. Say the rear of valve where the rear line connects isn't 100% sealed (seated). When you use the vacuum pump it will try to pull the air and any brake fluid to the pump. What it will do is pull air into the system at this point (easier to pull air through the joint than brake fluid from the valve). Same goes with gravity bleeding, pulls air through the leak, weakens the flow. If it weakens it enough nothing flows.

4miles
CJ-8 Member
- City
- Virginia Beach
- State
- VA
It took 10 - 15 pumps with the rear brake line almost removed at the master cylinder before I had good flow of brake fluid through master cylinder. While someone was inside pumping I let it flow into a rag. You will get a little at first, but you will know when you get it. Once I did this I able to bleed the rears. I also had tried the vacuum first with no luck. The fronts bleed fine like yours. Here are a couple more links on the Combination valve.
https://www.cj-8.com/forum/showthread.php?14353-Proportioning-Valve&highlight=metering tool
https://www.cj-8.com/forum/showthread.php?28131-Cluster-Brake-Light&p=203290#post203290
https://www.cj-8.com/forum/showthread.php?14353-Proportioning-Valve&highlight=metering tool
https://www.cj-8.com/forum/showthread.php?28131-Cluster-Brake-Light&p=203290#post203290

- City
- Redmond
- State
- OR
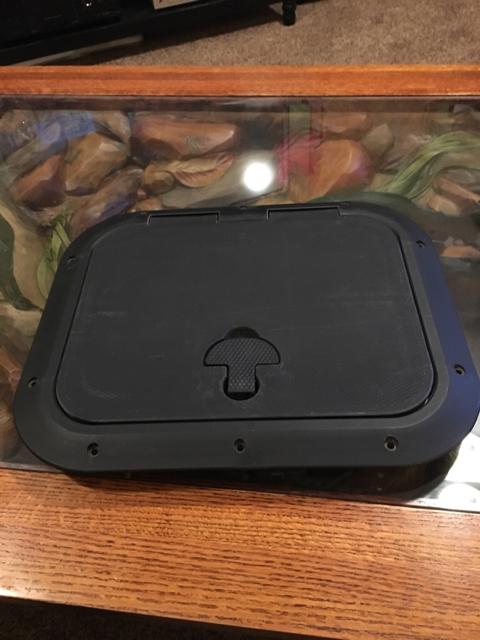
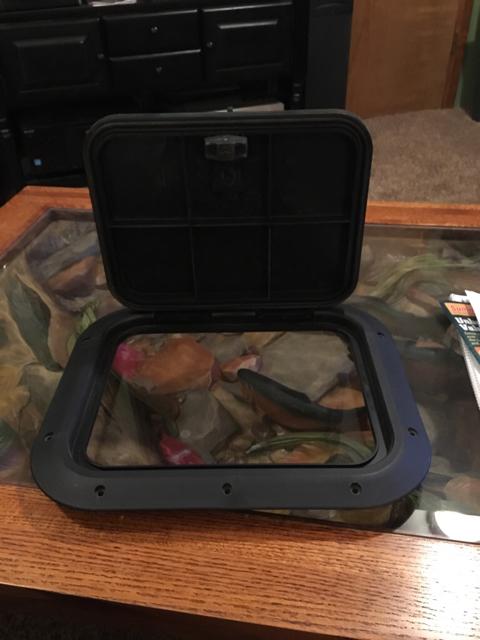
I have a couple of those access hatches that I'm not using- bought them for my build but didn't use them. Here's a pic-
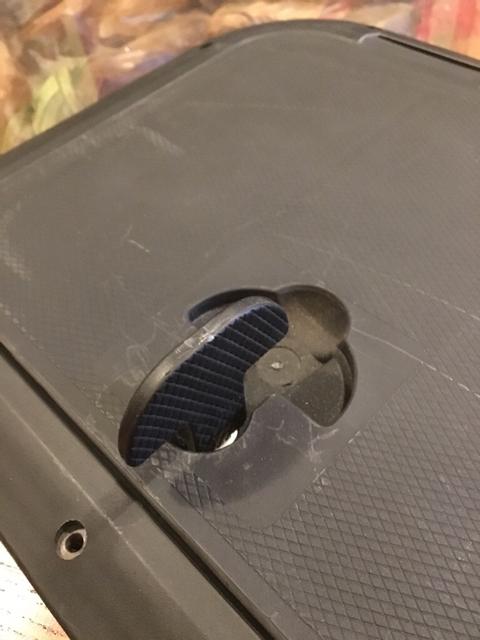
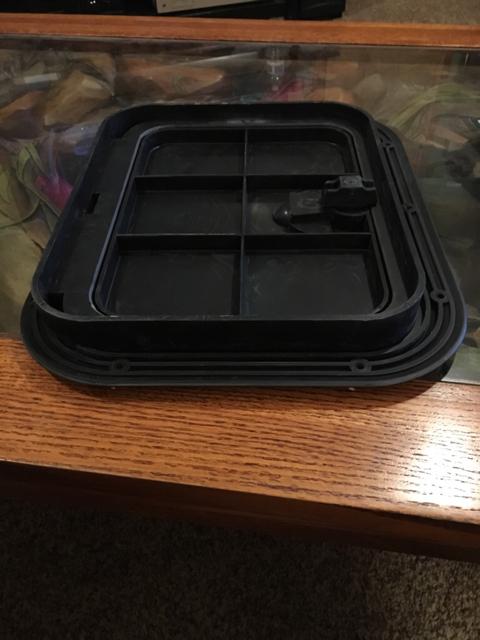 .
Cut out is appx. 13x11 and outer dimensions are 16x13. They are black polymer and sturdy enough to stand on. The lid is gasketed. I was going to use one for fuel pump access, but chickened out. I paid about $50 each, I'd let them go for $25 each plus shipping. Let me know if you're interested.
Cut out is appx. 13x11 and outer dimensions are 16x13. They are black polymer and sturdy enough to stand on. The lid is gasketed. I was going to use one for fuel pump access, but chickened out. I paid about $50 each, I'd let them go for $25 each plus shipping. Let me know if you're interested.
- City
- Ashburn
- State
- VA
I have a couple of those access hatches that I'm not using- bought them for my build but didn't use them. Here's a pic-
.
Cut out is appx. 13x11 and outer dimensions are 16x13. They are black polymer and sturdy enough to stand on. The lid is gasketed. I was going to use one for fuel pump access, but chickened out. I paid about $50 each, I'd let them go for $25 each plus shipping. Let me know if you're interested.
Yes sir. I will send a PM to get one. Thanks.
- City
- Ashburn
- State
- VA
It took 10 - 15 pumps with the rear brake line almost removed at the master cylinder before I had good flow of brake fluid through master cylinder. While someone was inside pumping I let it flow into a rag. You will get a little at first, but you will know when you get it. Once I did this I able to bleed the rears. I also had tried the vacuum first with no luck. The fronts bleed fine like yours. Here are a couple more links on the Combination valve.
https://www.cj-8.com/forum/showthread.php?14353-Proportioning-Valve&highlight=metering tool
https://www.cj-8.com/forum/showthread.php?28131-Cluster-Brake-Light&p=203290#post203290
Thanks! More info for me.
- City
- Redmond
- State
- OR
Those covers will work good with the fiberglass body. My cj8 has the rib metal floor so they wouldn't work well. The other ones (round ones) I also looked at but we're too small.
I've got one more like the one in the pic. $45.00 shipped, if anyone's interested. I paid $50 each when I bought them, but I'm not using them...
End Hijack...
- City
- Ashburn
- State
- VA
I've got one more like the one in the pic. $45.00 shipped, if anyone's interested. I paid $50 each when I bought them, but I'm not using them...
End Hijack...
No worries on the hijack. I appreciate all the help you have provided.
Now, onto other matters. Before I get into things on the list for this weekend, I have a few questions.
How do I test that my alternator is charging my battery fully? The voltmeter on the dash reads just under 12 volts while it is running right now. How do I use my multimeter to check it at the alternator?
I want to test the reverse light switch on the t-176. The reverse lights are not coming on and I want to see if the issue is there.
The next issue is the carb. I think I hooked something up wrong when I reattached the throttle cable to the carb. I am idling high. And the idle screw is not touching anything so it does nothing when I loosen or tighten it. I thinkI have too much tension and the throttle cable is not letting the arm (for a lack of the right term) go back as far as it needs to and rest against the idle screw. Hard to understand without seeing it. But I will be working on that as well. FYI. It is a holley 4 bbl.
Yeah, the brake bleeding too.
And with the weather nice this weekend, hopefully I can get to swapping out the springs for the 2.5 inch lift ones I took off the old frame. We will see.

FLCJ8
Legacy Registered User
- City
- Palm Bay
- State
- FL
Are you having issues, or is the reading at the gauge just low?How do I test that my alternator is charging my battery fully? The voltmeter on the dash reads just under 12 volts while it is running right now. How do I use my multimeter to check it at the alternator?
First thing (as always) is grounds. The voltmeter ground is just the mounting strap to the dash panel. It may not have a low enough resistance and is giving a low reading.
Also, if this is not a new problem it could be within calibration specs of the gauge:
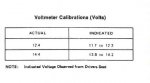
You can test the accuracy easily by following these steps:
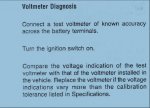
You can do a preliminary basic test of the alternator output by connecting the positive lead of the meter to the stud on the alternator and the negative lead to ground.
I want to test the reverse light switch on the t-176. The reverse lights are not coming on and I want to see if the issue is there.
First check to see if the fuse is good.
With the ignition switch "ON" check the fuse marked B/U Seat Belt (or something similar) I believe it is a 25 amp fuse.
If you have 12 volts there check the wire at the B/U lamp switch connector at the transmission. The one coming from the fuse should be hot, the other goes to the B/U lamps.
While you're down there, with the transmission in reverse, check the terminals on the switch (with the plug disconnected) with your tester set to Ohms or continuity.
You should get a very low resistance or signal, depending on what you set your meter to. This indicates the switch is good.
If you have power at the switch and the switch doesn't seem to test good you can simply jump the two leads from the connector together to simulate a good switch. The backup lights should come on.
I could get into more tests but I may have already gone further than you will need to.
- City
- Ashburn
- State
- VA
Are you having issues, or is the reading at the gauge just low?
First thing (as always) is grounds. The voltmeter ground is just the mounting strap to the dash panel. It may not have a low enough resistance and is giving a low reading.
Also, if this is not a new problem it could be within calibration specs of the gauge:
View attachment 53623
You can test the accuracy easily by following these steps:
View attachment 53624
You can do a preliminary basic test of the alternator output by connecting the positive lead of the meter to the stud on the alternator and the negative lead to ground.
First check to see if the fuse is good.
With the ignition switch "ON" check the fuse marked B/U Seat Belt (or something similar) I believe it is a 25 amp fuse.
If you have 12 volts there check the wire at the B/U lamp switch connector at the transmission. The one coming from the fuse should be hot, the other goes to the B/U lamps.
While you're down there, with the transmission in reverse, check the terminals on the switch (with the plug disconnected) with your tester set to Ohms or continuity.
You should get a very low resistance or signal, depending on what you set your meter to. This indicates the switch is good.
If you have power at the switch and the switch doesn't seem to test good you can simply jump the two leads from the connector together to simulate a good switch. The backup lights should come on.
I could get into more tests but I may have already gone further than you will need to.
Thanks a lot. That should cover it. I will update later when I get a chance to work on it. As for the voltage of the alternator, it is just that my gauge seems to be reading lower than it should.
- City
- Ashburn
- State
- VA
I've got one more like the one in the pic. $45.00 shipped, if anyone's interested. I paid $50 each when I bought them, but I'm not using them...
End Hijack...
Got home from my son's baseball and it was waiting for me. Thanks a lot Randy. Now to make time to install it. It will probably get prioritized above the brakes.
