• Notice for iPhone users: DO NOT use the image size reduction option when uploading photos to the forum. This causes portrait images to post as landscape. We have added a warning to the image insert pop-up as well.

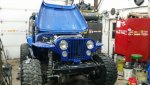
My old 1981 SCRAMBLER returns 25 years later

Made a little more progress........

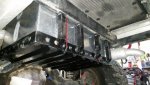
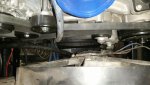
The bottom side is pretty much complete except the fuel tank and line.

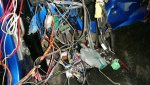
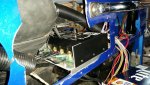
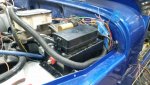
The relay center and harness are in and routed to general areas.

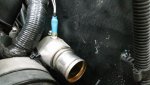
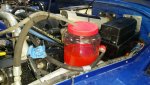
The water pump is drilled and tapped for the sender that feeds the AutoCoolGuy fan controller.

It would run right now if I plugged the fuel cell line and wires in..............
 

Attachments

  • 20171111_135042.jpg
    20171111_135042.jpg
    65.3 KB · Views: 105
  • 20171111_135116.jpg
    20171111_135116.jpg
    90.2 KB · Views: 106
  • 20171111_130225.jpg
    20171111_130225.jpg
    52.1 KB · Views: 103
Awesome. And I’m scratching my head on an LS1 wireing. Your at a whole nother level.
 
I'll agree. Your at a whole other level of technology than most of us "Old Time Jeepers" :thumbsup:
 
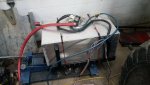
Fuel tank and skid were already built . I finished the mounts for the skid plate. It's painted, tank is strapped in and ready to install.
 

Attachments

  • 20171116_194158.jpg
    20171116_194158.jpg
    51 KB · Views: 70
Wandered down to the shop before work this morning and bolted the fuel tank in. Just need to hook up the lines.
 

Attachments

  • 20171117_050344.jpg
    20171117_050344.jpg
    62 KB · Views: 67
This is a real nice build. I like following any LS build. Most people think the LS engine is ugly but I beg to differ.
 

Attachments

  • IMG_1306.jpg
    IMG_1306.jpg
    76.7 KB · Views: 155
  • 121212.jpg
    121212.jpg
    83.7 KB · Views: 157
  • IMG_1307.jpg
    IMG_1307.jpg
    76.7 KB · Views: 151
This is a real nice build. I like following any LS build. Most people think the LS engine is ugly but I beg to differ.

I am thinking of doing something with the cover on mine, maybe just paint,.............maybe custom......

Your engine cover looks good, but I may run into intake clearance on the top of the motor. My plan is to suck cold air from the cowl vent.
 
Had a good day in the shop :woohoo:

Fuel lines are done.
fuel vents are done.
fuel fill is done.
Fuel tanks wiring is routed and done (other than the fuel pump module is mounted with ZIP ties)
shifter cable is done.
Rear harness grounds are done.
cab and relay center grounds are done.
block grounds are done
tail light wiring is done.
Fitting welded on the radiator for the steam vent.
grill is in place with 2 bolts.
Fan has lots of room and the accessories on the front of the engine are accessable.

getting VERY close to first startup in the Jeep. :bacon: :bacon::bacon:
 

Attachments

  • 20171118_172509_1511044555284.jpg
    20171118_172509_1511044555284.jpg
    50.5 KB · Views: 146
  • 20171118_172451_1511044555926.jpg
    20171118_172451_1511044555926.jpg
    60.8 KB · Views: 140
Last edited:
Sorry, no cool pics today

But IT RUNS:bacon::bacon::bacon::bacon::bacon:


Now I have to get The coilovers, fans, some switchs, the gauges, and loose wires, so I can drive it. :smokin:
 
A little bit of a update. After the excitement of first start :bacon: I ate some lunch and went back out to the shop. warmed it up, circulated the antifreeze, and topped of the power steering. Which puked out the vent when I shut it off because of all the air still in the system.

I did get the front coilovers mounted back up. Looks like I gained about a inch of ride height, that equals about 120 lbs lost. :D

The Autocoolguy fan control is mounted and wired inside, just needs to be hooked to the fan.

The switch panel is mounted and wired.

In the pic you can see some black plastic conduit. I ran those from the left side of the steering column to the center by the gauge panel and behind the glove box. That way I have a place to run future wiring once the AC is back in and blocking under the dash. The relay panel for my lighting and transmission fans will be in the old glove box hole.
 

Attachments

  • 20171120_183230.jpg
    20171120_183230.jpg
    76.3 KB · Views: 112
I'm excited! Get'er done, snows a come'n. :bacon::bacon::bacon:
 
Soooo I had a little time today......

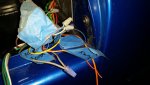
finished up some "test drive wiring" (wire nuts are ok for test drive........right??????????)


did a trip down the driveway and back.

Then I battled limp mode, after limp mode, reduced power, limp mode,

There was everything from module eprom failure to trasfercase high range incorrect codes.

after several reflashes I had it drivable, but not right. then I turned off "brake torque management" That made it come to life. I have a brake pedal position low code that has been coming up. Not sure if it's adjustment, learning, or wiring. But that is most likely some of my "limp Mode" trouble I was having.

Hoping to do a drive on the road tomorrow.


Here's a couple pics of the quality test drive wiring and a short crappy video of the very first trip with the new motor.

https://www.youtube.com/watch?v=nHd2m1lMZPE
 

Attachments

  • wirenut.jpg
    wirenut.jpg
    48.4 KB · Views: 95
  • wirenut2.jpg
    wirenut2.jpg
    58 KB · Views: 96
Awesome! 102 degrees in December aint bad either.lol :wave:
 
Awesome! 102 degrees in December aint bad either.lol :wave:

That was the trans temp. needed to keep an eye on it. The huge cooler I have in the back is all plumbed in, but no fan relays yet, and not much airflow. must be good, it never went over 165*
 
quick top. Nice thing is 2 bolts and some screws its off. Super light, no seat belts to reroute

Sent from my SM-G900V

That's actually pretty dang sweet.. I may have to pick up a CJ7 top...
 
Had a GREAT day cruising the Scrambler with the new motor.

The drivability is just awesome, And I had no complaint's with the old motor. But the shifting of the 6l80 the flat torque curve of the L83 are just cool.

I put about 150 miles on it today, and no big surprises. I have a leak in my steering box that showed up Tuesday when we were acting like two 8 year olds that just got a go cart, doing 65 MPH passes in the rutted corn field. The top cover were the adjustment stud is located is leaking out of the cover. I'm not sure if it was just old, to much pressure, or my hydraulic ram over traveled the steering box. Next step is to check pressure of the pump. It is supposed to be 1600 PSI. The old stock pump was 900 too 1100 psi.

Now it's back in "storage" so I can get some of the "honey do" list done. Then it's just a matter of finishing wiring, cleaning up, and finishing loose ends.

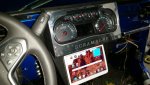
The 10" Samsung tablet in the center under the gauges is working out great. I was worried about the GPS picking up satellites with the aluminum above it, but it works great. The Torque app has any extra gauges I need, and some fun stuff too.
 

Attachments

  • 20171122_152418_1511559062235.jpg
    20171122_152418_1511559062235.jpg
    71.7 KB · Views: 63
  • 20171123_183926_1511559011709.jpg
    20171123_183926_1511559011709.jpg
    60.9 KB · Views: 63
  • 20171123_183255_1511559061917.jpg
    20171123_183255_1511559061917.jpg
    33.5 KB · Views: 61
Back
Top