• Notice for iPhone users: DO NOT use the image size reduction option when uploading photos to the forum. This causes portrait images to post as landscape. We have added a warning to the image insert pop-up as well.

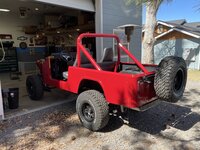
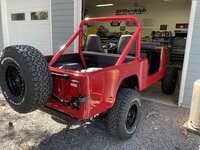
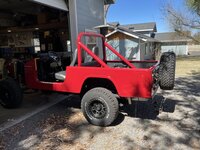
Meet Red, my 81 Restomod Build

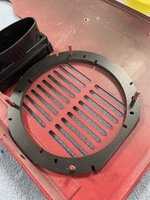
I used the block-off plate from Motobilt.
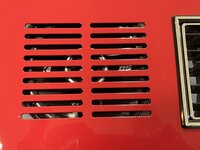
I saw that. It’s not out of the running yet. I like the looks of the stock vent- If I had been thinking ahead I would have epoxied a plate across the back before it was painted. I may try that on a sacrificial one to see if it works. I’m also going to check with a couple of the local CNC guys and see how much they would charge to make one out of a chunk of aluminum- if it’s not horrendous I might go that way. The other option was a black stainless grille with a plate behind it.
 
If you were to have one machined, maybe have raised ribs where the slots would have been. No recessed areas for water to sit in and it would look cool. Ribs look good on valve covers, why not on your vent block off plate.
 
If you were to have one machined, maybe have raised ribs where the slots would have been. No recessed areas for water to sit in and it would look cool. Ribs look good on valve covers, why not on your vent block off plate.
That’s my biggest concern- water collecting in the slots.
 
I tried the epoxy a metal plate on the inside. Didn't like the look, didn't lay flat enough for my liking on the plastic rib (slots). Also worried about the water sitting on the plate (possible leaks). Ended up making a metal plate to cover it.
 
I tried the epoxy a metal plate on the inside. Didn't like the look, didn't lay flat enough for my liking on the plastic rib (slots). Also worried about the water sitting on the plate (possible leaks). Ended up making a metal plate to cover it.
Hmmm. So that idea might be a no starter right off.
Maybe the best idea is have one of those stainless ones painted to match and run a black plate underneath. I know that works, I did it on Copper.
 
Last edited:
I cut one out of a sheet of metal (from a auto body jobber, patch repair) If I remember right used a sheet of carb gasket material to make a gasket for stock vent. Used that to trace out a vent cover in the metal, cut and used the dock protector poles (filled with concrete) to make the gentle curve in the cover. If I don't say it worked out pretty well.
 
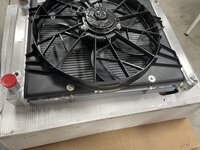
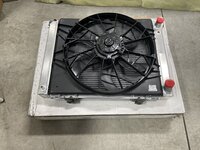
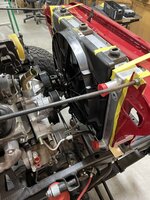
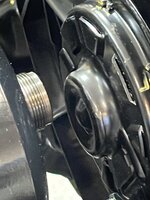
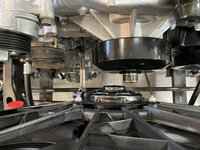
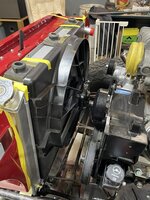
Back to the Radiator fan. Trimmed about 5/8” off the shroud. That gives me 3/8” fan hub to radiator core, and 3/8” water pump hub to fan motor. Close, but works.
37A74C2E-8E0B-4BC5-B029-3F8B681D1EA0.jpeg1163C6CE-9C30-45C4-A9EE-C9EFCE307A06.jpegB15F51F3-EDBA-441A-919E-96770024B1DA.jpegE8C88779-4580-44F5-93EB-3141F6EEB92B.jpeg
 
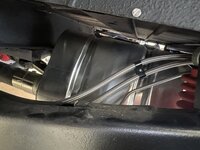
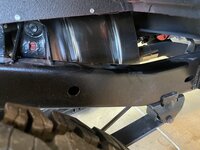
Took the opportunity to sweep the floor. No better time to lie on your back and install the muffler heat shields!
DA8CD793-720A-4A6E-AC31-425F304CBE6E.jpeg70BA74F4-7176-4658-AFE4-6E9A0912E6AC.jpeg
 
I’ll title this post “progress and frustration”.

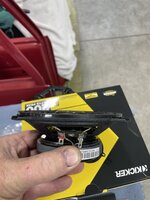
I can’t begin to count the days I have spent waiting for parts, only to find out they won’t work like I had intended. But there have been minor victories too. Taking a break from plumbing and cooling, I got the dash down off the wall and got thinking about speakers. I got some Kickers that were flat across the front. The majority of modern speakers have protruding tweeters. I also ordered a pair of 1/4” spacers off Amazon just to be safe. The combo of the spacers and flat speakers worked perfectly. 08DD5A39-2702-4586-BCE5-F426FFFAFDA7.jpegSpeakers18A3C0FA-44AE-4C47-86A3-87E356933AD4.jpegNo protruding tweeter!
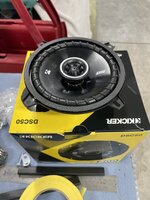
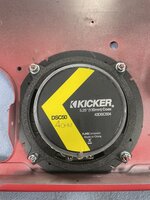
596DDF05-5263-462A-AC5F-9AC7EE867322.jpegSpacers trimmed to clear surrounding components. I also filed a step in the bottom edge to clear the sheet metal stiffener. 474A49F6-B9E3-4CA1-AF41-A7B6A74DC3E4.jpegSpeakers bolted up. I put a washer and a nut on the studs first, tightened the spacer down, then another washer, the speaker, washer, and locknut. This keeps everything tight so no buzzing, and at the same time supports the ears on the speaker frame.21050A06-0E6F-4EB3-9A2A-DDA71A38B35F.jpegPerfect!
I also had the common problem of the aftermarket dash appliqué sticking to the dash but not to itself. The thin plastic outed cover would not stay stuck to the double sided adhesive foam. Some Gorilla Super Glue solved that problem.

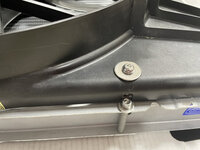
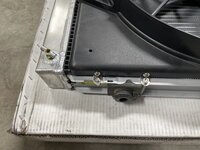
Next I got back on mounting that monster fan. After some OCD induced mental gymnastics, I settled on simple. Some stainless angle brackets, bolts, and nuts should work. A bit of measuring, drilling, and there you go!CD5DFC6B-67B0-4D97-BFC0-F6AFF0B2F6FA.jpeg7078C9D6-64E5-4C9C-B5C3-DA0C54B14FBD.jpegTop mounts. Ran these through the face, as they primarily hold the fan to the radiator. The long bolt and tube are there for a reason. See the next pics.E6DC7CF3-13D1-4289-AA56-38E18B29D26C.jpeg708BE187-692A-4EBD-BAD1-C59C7FC7731D.jpegThese are the bottom mounts. Since they support the weight of the fan, I went with 2 per side. These went through the flange. Now you can see the purpose of the long bolt and tube- it serves as a locator for the rubber radiator mounting biscuits I’m using. That will be in a couple of days.

So now for the frustrating part. I purchased that Wilwood proportioning valve that mounts up by the master cylinder. This has caused me more headache than it might be worth. First the short tubes really don’t fit the ‘Vette master properly- I’ve got them bent to be close but I’m worried about leaks if they’re not perfectly aligned. So, probably need a Wilwood master too. Secondly, the nice stainless brake lines I purchased early on are for the stock prop valve mounted to the frame. Can’t put the Wilwood valve there? No, the exhaust is too close. So, I tried to rebend the lines upward. I had to straighten bends and then re-bend again, and in the process, probably just screwed up the front lines. And- added bonus- the rear line is now 24” too short. Aargh! I’m about ready to give up altogether on the stainless lines and make a complete replacement set out of some of that PVF coated or maybe even the nickel/copper line. I think in the long run that might be the best idea.

I forgot to add that while I’ve been getting frustrated with my Scrambler progress, I’ve been cheating on her with my Cherokee. I’ll post pics tomorrow or so...

 
Last edited:
I just replaced my speakers and dash overlay as well. I went with some kickers and used the same spacer. I'm glad to know it's not just me that had the overlay coming apart and having a hard time sticking.
 
I just replaced my speakers and dash overlay as well. I went with some kickers and used the same spacer. I'm glad to know it's not just me that had the overlay coming apart and having a hard time sticking.
Great minds think alike!
 
I know the frustration of brake line plumbing. I worried about it for far too long. I used the vette master as well. The plan was to use an adjustable prop valve but in the end I used a regular disc/disc that bolted in the stock location. That’s an option for you as well but it’s more changes to what you have already been working on.
 
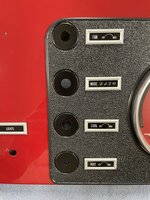
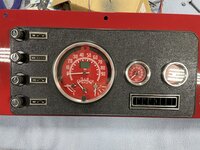
Got the Vintage Air HVAC controls installed today. I had to turn down some washers to fit the overlay, then open them to fit the switches. A little matte epoxy, and then epoxy the washers to the dash. Install the switches- looks sorta stock! Thanks again, Walkerhoundvm for the custom dash lights!

502123A1-101C-4C52-848D-7E233A971283.jpegC34F6DF6-636A-4526-ACDE-AE58378BAD89.jpeg
 
Got the Vintage Air HVAC controls installed today. I had to turn down some washers to fit the overlay, then open them to fit the switches. A little matte epoxy, and then epoxy the washers to the dash. Install the switches- looks sorta stock! Thanks again, Walkerhoundvm for the custom dash lights!

View attachment 93304View attachment 93305
That looks sweet!!! You might consider putting some baffles behind the dash speakers, they'll help prevent the back wave from cancelling out some of the sound.
 
Back
Top