• Notice for iPhone users: DO NOT use the image size reduction option when uploading photos to the forum. This causes portrait images to post as landscape. We have added a warning to the image insert pop-up as well.

1984 SL Restoration

Still no luck finding that receipt for the cable. Let me know how it goes. You could always contact Inline and tell them that you’re building the keep for me and I supplied the cable and see what they do-
I should be able to repair the cable :thumbsup:
 
Knocking out some easy stuff.

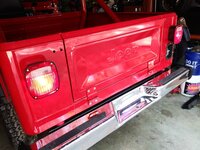
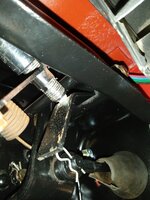
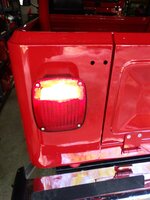
Fixed the brake lights:

20210507_163529.jpg

The connector on the brake light switch was not plugged in LOL. Easy fix. As much as a PIA these are to get to, this one was sort of not too terrible to mess with.

20210507_164722.jpg

Fixed the reverse lights:

20210507_170951.jpg

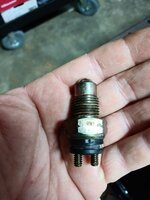
Good thing I have a bunch of blown up T5's, lots of spare reverse light switches/contactor things:

20210507_171956.jpg

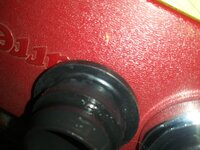
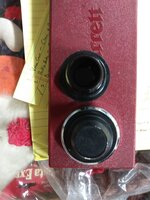
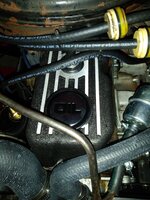
The oil fill caps that come with these aftermarket aluminum valve covers are loose fitting and leak.

20210507_175557.jpg

Part of the problem is that the included oil fill caps are hollow, so they don't really stay tight fitting where they pass through the hole in the valve cover.

20210507_175548.jpg

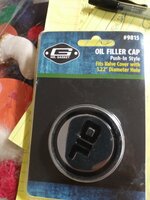
I have been using these oil fill caps, they are usually in stock at almost any chain parts store, about $10.

20210507_175436.jpg

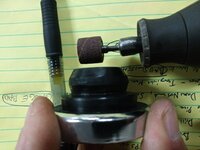
They actually fit a little too tight. I usually make a quick, single pass around the "bulge" of rubber with a Dremel sanding wheel to reduce the OD a hair. In this way the cap still fits tight, but you don't have to pry the cap off the valve cover with a screw driver.

20210507_180737.jpg

Doesn't look too bad installed, matches the black and raw aluminum of the valve cover.

20210507_180817.jpg
 
Rocker trim time.

I installed the OEM rocker trim pieces on my red Scrambler a long time ago. That Scrambler was a base model, so it never had any of the holes in the body or front fenders. I drilled the body, but never did drill the front fenders, and they still fit well.

I checked my green Scrambler, which is a "SR" model, so it came with the rocker trim pieces. Both front fenders have a single hole to secure the rocker trim.

20210507_184504.jpg

I will drill the holes in Tommy's red Scramblers aftermarket front fenders tomorrow, not too terrible.

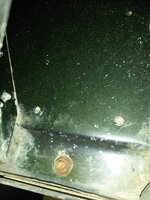
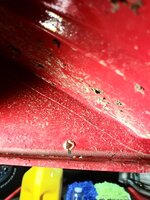
This red Scrambler has the body tub from a 1981 model installed. This tub had all 10 holes, 5 on each side, to secure the trim. One of the holes got filled in on the passenger side, the very front one.

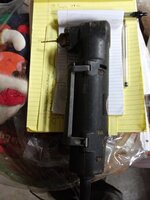
Easy to see the plug from the back side, hard to get a regular drill back there to drill back out the hole. Thank God for the angle drill, very easy to drill this hole from the back side with the right tool.

20210507_190011.jpg

And a small center hole drilled through the plug. Don't mind the mud!!!

20210507_190045.jpg

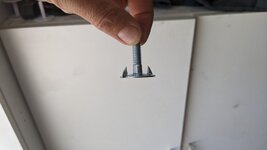
The rocker trim "T" bolts have a 1/4" stud. I ran a 23/64" bit through the OEM holes to clean out excess paint/primer. A 3/8" bit would have taken out metal, a 5/16" bit would not hit the sides of the holes.

Not the best picture, but the location of the 5 holes on the passenger side of the body tub.

20210507_190601.jpg

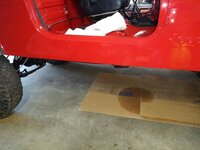
I had to put some "new" used cardboard under the Scrambler due to the water heater rusting out and leaking all over the floor the other night. No new leaks on this one!!!

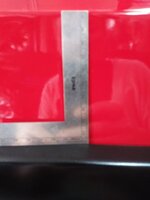
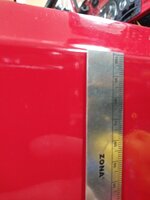
In the picture above, from right to left, the very first hole in the body tub is roughly centered between the two "e" 's of the Jeep stamp. Then, there is a long space with no holes. I am pretty sure it is like this due to how the floor boards meet the rocker panels here, and if the Jeep has the OEM side steps, it would be very difficult to reach any "T" bolts located here.

I can pull some measurements of the location of these holes if anyone wants them. But, knowing AMC, the hole location is probably all over the place.

That's it for now :wave:
 
I can pull some measurements of the location of these holes if anyone wants them. But, knowing AMC, the hole location is probably all over the place.
I measured my original before the tub swap - if I can find them I'll post up to compare 👍🏻
 
Eventually...the trim bolt location will be very helpful. Also the location of bolt holes for the side steps. My floor was to rotten to get a definite pattern.
 
Eventually...the trim bolt location will be very helpful. Also the location of bolt holes for the side steps. My floor was to rotten to get a definite pattern.
I will pull the rocker trim bolt hole measurements and post them up here.

This tub does not have the holes for the side steps in the floor boards. My green Scrambler does. When I install the carpet in my green Scrambler I will take some pictures and measurements of the side step floor board bolt locations.
 
I would like to know the location of the hole in the front fender, if you don’t mind. No holes in my replacement fenders.
 
These are the measurements for the holes, front edge of body tub to the rear. Both sides were within an 1/8".
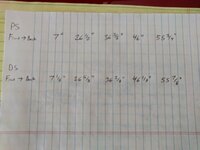
20210508_092323.jpg

I should have pulled measurements from the bottom lip of the tub to the center of the holes. Someone else will have to pick up my slack.

On the front fender holes, this is what I did:
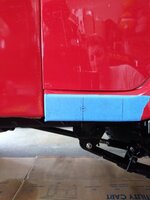
20210508_093515.jpg

The pen line on the right marks an obstruction/piece of metal on the back side of the fender. I centered the hole between this obstruction and the end of the fender on the left side. I used a piece of steel as a straight edge, off the existing body holes, to mark the vertical center line of the hole. More on this in a bit.

I drilled the fender holes to the same size as the body holes, I think 23/64". That is pretty good "slack" for a 1/4" stud to pass through.
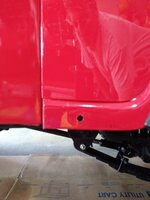
20210508_095741.jpg

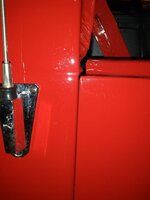
But, my fender holes are a bit too high. I could not get the fender T bolts to pass through. The holes were a bit high.

So, I opened the fender holes up to 1/2".
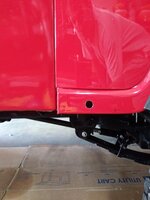
20210508_104906.jpg

With 1/2" holes in the fenders, the rockers slid right in. Still not sure why these holes would not work out when they were the same size and centered off the body holes. I did not want to lower the fenders since they line up with the body tub/grill pretty well. The fenders are actually a hair low, but when lining all this stuff up, it is hard to get every thing 100% perfect everywhere, so you do the best you can. I am happy with how the replacement fenders line up, overall.
20210508_104912.jpg

Just something to watch out for. Would be interesting to see how the OEM fender holes line up with body tub holes? I plan on eventually pulling the rockers off my green Scrambler so I can paint them black, I guess I will find out then!!

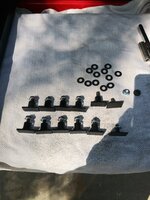
Replacement T bolts. I ended up using stainless washers to prevent the flange nuts from digging into the paint.
20210508_095756.jpg

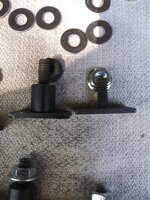
The T bolt on the right is for the fender hole. The one on the left is for the body tub. The fender lower protrusion sticks out past the body tub side, hence the shorter T bolts at the fenders.
20210508_095816.jpg

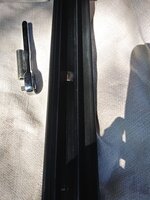
Before I painted the rocker trim, I cleaned these back side channels thoroughly, and masked them off to prevent gumming them up with paint. You want to be able to slide the T bolts back and forth fairly easily when you go to bolt on the rocker trim.
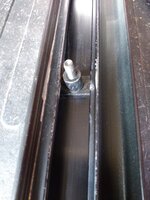
20210508_095824_HDR.jpg

20210508_100015.jpg


The T bolt locations on these rocker pieces did not align with the body holes on this tub. IIRC, these rockers came off the original '84 tub. So, I assume these body tub hole locations vary year to year. Who knows? No big deal, with the back channels cleaned and free, it is easy to slide the T bolts into the correct positions.

 
This might be a stupid question- but I’ve never been lucky enough to install rocker trim before. So here goes.
Does the rocker trim “self locate” on the holes and the lower flange of the tub? What keeps the molding from moving since the holes are oversized? Or does the molding actually locate/stabilize between the shoulders of the studs and the backside nuts “capturing” the sheet metal?
The reason I’m asking is because I am concerned about the mounding rubbing against the paint, and also the shoulder bolts rubbing at the holes. And if the mounding is indeed only stabilized between the shoulders of the studs and the backside nuts- maybe the serrated flange nuts are necessary to keep it in position.
 
This might be a stupid question- but I’ve never been lucky enough to install rocker trim before. So here goes.
Does the rocker trim “self locate” on the holes and the lower flange of the tub? What keeps the molding from moving since the holes are oversized? Or does the molding actually locate/stabilize between the shoulders of the studs and the backside nuts “capturing” the sheet metal?
The reason I’m asking is because I am concerned about the mounding rubbing against the paint, and also the shoulder bolts rubbing at the holes. And if the mounding is indeed only stabilized between the shoulders of the studs and the backside nuts- maybe the serrated flange nuts are necessary to keep it in position.
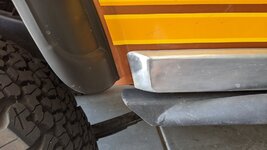
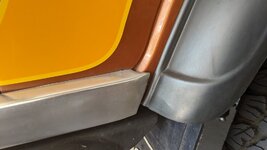
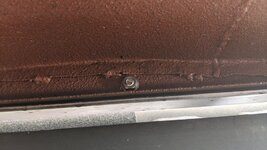
You used a lot of big words there, but I'll try to answer - yes, the rockers can rub against the paint, and the nuts can rub against the back side of the tub. The elevator bolt is in a slider track on the back side of the rocker.

You're trying to get it between the lip of the rear well and the tail of the lip for the front well.

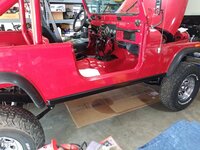
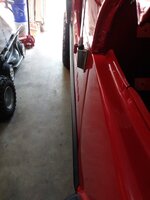
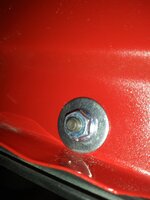
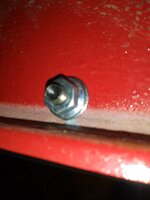
PXL_20210509_200124972.MP.jpgPXL_20210509_200133164.jpgPXL_20210509_200147376.jpgPXL_20210509_200601676.jpg
 
Your t nuts...oem? Or aftermarket if so where and who? Real long time before it happens for me but it will be stock piled as things get used.
 
You used a lot of big words there, but I'll try to answer - yes, the rockers can rub against the paint, and the nuts can rub against the back side of the tub. The elevator bolt is in a slider track on the back side of the rocker.

You're trying to get it between the lip of the rear well and the tail of the lip for the front well.

View attachment 93750View attachment 93751View attachment 93752View attachment 93753
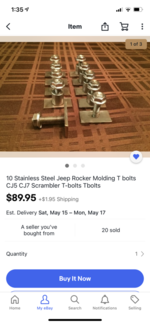
I ended up buying new stainless T-nuts and the had the rocker trim powder coated wrinkle black. I am concerned that the shoulder of the t-nut will dig into the new paint (rust point) or that the rocker trim will abrade the paint.I can insulate against both issues unless the friction at these points is necessary to keep the trim in position.

I found the Stainless t-nut kit on eBay. I do still have about 8 OEM ones left over.

When I bought these I told him it was for a Scrambler so he got me 2 extras. C473301C-FF4B-41B2-BEF6-3A9F6629FD47.png
 
I ended up buying new stainless T-nuts and the had the rocker trim powder coated wrinkle black. I am concerned that the shoulder of the t-nut will dig into the new paint (rust point) or that the rocker trim will abrade the paint.I can insulate against both issues unless the friction at these points is necessary to keep the trim in position.

I found the Stainless t-nut kit on eBay. I do still have about 8 OEM ones left over.

When I bought these I told him it was for a Scrambler so he got me 2 extras. View attachment 93757
Ah, I see. The shoulder should lock it into the hole, but may still contact enough around the rim to rub paint. Meanwhile, the rocker trim is compressed against the body so if you tighten too much, it'll imprint the paint. Obviously, it doesn't take too much pressure to imprint the paint, so it's hard to balance "enough to keep it from moving, but not so much you press into the paint." Best to try to align it perfectly then tighten the whole thing once.
 
This might be a stupid question- but I’ve never been lucky enough to install rocker trim before. So here goes.
Does the rocker trim “self locate” on the holes and the lower flange of the tub? What keeps the molding from moving since the holes are oversized? Or does the molding actually locate/stabilize between the shoulders of the studs and the backside nuts “capturing” the sheet metal?
The reason I’m asking is because I am concerned about the mounding rubbing against the paint, and also the shoulder bolts rubbing at the holes. And if the mounding is indeed only stabilized between the shoulders of the studs and the backside nuts- maybe the serrated flange nuts are necessary to keep it in position.
The extrusion on the back of the rocker kind of self locates on the body tub. The T bolts compress the trim piece onto the rocker. It all fits via friction fit. Not really any movement once the nuts on the T bolts are tightened down.

I wouldn't worry too much about rust/corrosion. I always bolt painted fenders direct to painted body tub with no issues. Or, painted hinges direct to painted metal with no issues. If you paint job and prep was good, no worries.

I like the top edge of the aluminum rocker trim tight against the body to keep mud/sand/little gravel out. Water will run through.
 
Your t nuts...oem? Or aftermarket if so where and who? Real long time before it happens for me but it will be stock piled as things get used.
JeepAddict gave them to me. I have bought new sets off eBay/Collins Brothers in the past.
 
I ended up buying new stainless T-nuts and the had the rocker trim powder coated wrinkle black. I am concerned that the shoulder of the t-nut will dig into the new paint (rust point) or that the rocker trim will abrade the paint.I can insulate against both issues unless the friction at these points is necessary to keep the trim in position.

I found the Stainless t-nut kit on eBay. I do still have about 8 OEM ones left over.

When I bought these I told him it was for a Scrambler so he got me 2 extras. View attachment 93757
I would use the T bolts you bought, tighten them up good and snug, good to go.
 
Ah, I see. The shoulder should lock it into the hole, but may still contact enough around the rim to rub paint. Meanwhile, the rocker trim is compressed against the body so if you tighten too much, it'll imprint the paint. Obviously, it doesn't take too much pressure to imprint the paint, so it's hard to balance "enough to keep it from moving, but not so much you press into the paint." Best to try to align it perfectly then tighten the whole thing once.
I tightened the $hit out of the ones on my red Scrambler with no damage to the paint. I snugged the ones up on this Scrambler pretty tight, no problems.

Funny enough, one side of this tub had a line where the original rocker trim had imprinted.
 
Using a little ruler, keeping the rocker trim level to the molded edge of the door opening on the body tub. Both sides lined up right around 100mm/10cm.

20210508_105519.jpg

20210508_105634.jpg

And finished.

20210508_111047.jpg

20210508_111058.jpg

Larger fender washer under the fender nut 1/2" holes.

20210508_111113.jpg

Regular washers under the other nuts.

20210508_111120.jpg


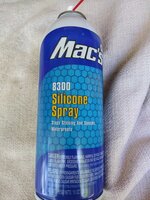
Jumping around a bit. I changed out one piece of damaged side window weather stripping. I suggest spraying something like this on new weather strip, or old. It lubes it up really well, makes rolling windows up and down much easier, especially with new weather strip.

20210508_132709.jpg

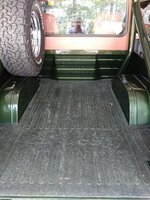
I temporarily pulled the OEM bed mat out of the back of this red Scrambler and put it in the back of my green Scrambler for safe keeping. I wish these things were easier to find/affordable, I really do like them!!

20210508_135000.jpg
 
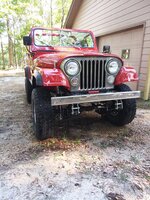
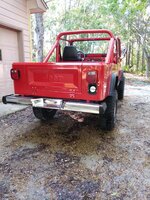
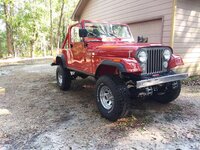
10 years of JeepAddict warehouse dust, one year of dust/debris/mud from me working on it and driving it around the yard, figured the least I could do was wash it. It cleaned up really well, will look even better once someone else installs the decals/door appliques/other missing bits and pieces.

20210508_165403.jpg

20210508_165447.jpg

20210508_165414.jpg

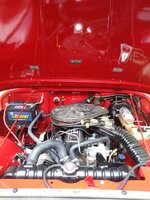
Cleaned under the hood and engine so I can check for new leaks, too.

20210509_163334.jpg

PartMonkey was whooped after the wash job!!!

20210508_165610.jpg
 
Besides the parking brake cable, I am finished with this one. I have taken it as far as I can go, time for JeepAddict to finish it!!!!


20210509_170613.jpg

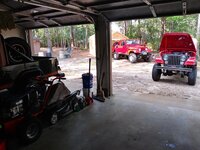
Not the best picture, but three running/drivable Scramblers in my yard again!!!!!

20210509_163906_HDR.jpg

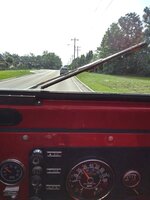
And a picture to prove that this thing does drive and can leave my yard!!!

20210509_165356_HDR.jpg

I drove it around today for about 2 hours. All in all, I am pretty happy with it.

Brakes are good
Suspension is smooth and getting smoother
Steering is good, would be better with stock Pittman arm
Engine starts up fine, runs and accelerates fine
Is actually quite peppy, even with 3.31 and 33's
Clutch works fine with no noises
T5 shifts up and down fine, no noises
This Dana 300 shifts like a dream
All lights and signals work

Once JeepAddict installs a new fuel gauge, all the gauges will work.

I am calling this one done. I am sure I will have to help JeepAddict with a few more things in the future, but for now, I'm done.

From boxes of parts and a Scrambler that was disassembled 10 years ago, with lots of stuff that went missing, to a running and driving mostly completed Scrambler in about a year of weekends and nights, not the easiest thing I have ever done. Glad it is finished for now.

Time for me to start working on my junk again, the National trip and SandBlast will be here sooner rather than later!!!!!!

That's it for now:wave:
 
Back
Top