The set I bought/installed on my green Scrambler fit "good", but not "perfect". Definitely not 100% OEM quality.
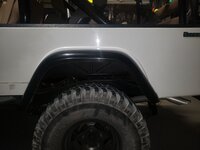
All the holes lined up, but IIRC, there is a slight dip/bow in the middle like you have pictured, and it seems like maybe the whole flair sits about an 1/8" lower then the OEM flair.
My OEM flairs were cracking apart, so I had no choice. NOS would be preferred, but I am not willing to spend that kind of coin on a driver. The other problem with NOS/used, they are sill 30-40 year old plastic/rubber, will be kind of "dried out".
Every time I washed my Jeep or leaned against flares, they would crack/fall apart some more. I also live on a gravel driveway, so gravel thrown up/ejected from the BFG All Terrains lugs would punch through the flares