• Notice for iPhone users: DO NOT use the image size reduction option when uploading photos to the forum. This causes portrait images to post as landscape. We have added a warning to the image insert pop-up as well.

spankrjs's Biloxi, MS '83 Scrambler

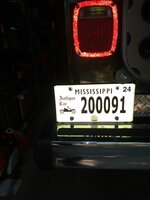
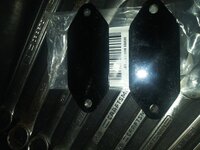
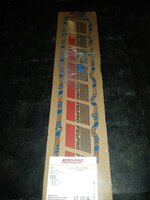
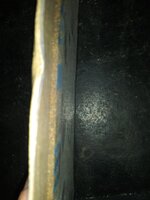
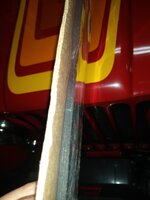
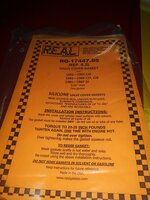
TNT includes this piece to install a license plate, I guess:

20210918_131324.jpg

You can slide this tube into the tire mounting tube. I am not doing this, it would look like crap, and I would not have a tag light.

So, the easiest solution to this problem, for me anyway.

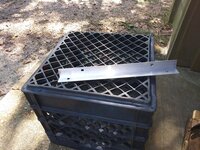
Made a simple aluminum angle with four holes:
20210926_104026.jpg

Drilled two holes in the OEM chrome bumper (chrome drilled easy enough at low speed/medium pressure, no problems):
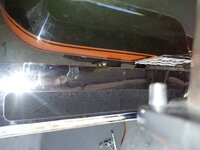
20210926_110031.jpg

Just barely clears the rubber snubber, but it clears:
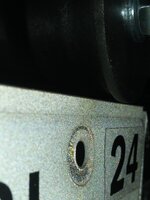
20210926_111212.jpg

20210926_111221.jpg

And the finished product (need to put a plug in the hole at the end of the tube, center of the wheel):
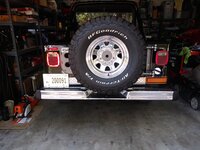
20210926_111228.jpg

All in all, I am happy with this carrier. I would have preferred an OEM carrier, but to find one that is:

1) complete
2) rust free
3) no damage

That's hard. This carrier was expensive, but it is super heavy duty. I do not have to worry about it failing in use. My 31" tire will not tax it at all.

This Scrambler has enough other "tasteful mods" (AC, Mopar MPI, 2" BDS YJ lift springs, Moser rear axle shafts, 31" tires, repainted the original color, reupholstered interior, Alpine knobby radio, aluminum bumper end caps..............................) I do not think this aftermarket tire carrier detracts from it. This Jeep is a driver, and I do wheel it from time to time, so I do not for one second mind adding some "beef" where needed.

Besides, I have my 1985 Spring Special CJ-7 to keep 100% original (mostly).

Anyway, happy with the tire carrier, PIA to install, but worth it in the end (get it, hahahahahaha).

That's it for now :wave:
 
Took this one on a "short" road trip yesterday. Drove it two hours/125 miles to McComb to purchase a trailer brake controller for my Gladiator, and back. Scrambler ran perfect, no problems at all :woot:

250 miles/4 hours is not terribly long for me, but I need to complete some trips like this to gain confidence/work out any bugs with this Scrambler. So far so good. Drove up there on back roads/highways, drove home on the interstate. Speed ranged from 55 to 80, averaged 17mpg.

That's it for now :wave:
 
I took this one for another "long" drive, around 300 miles, this past Friday. Took Highway 90 to New Orleans, drove around south Louisiana some, and back home.

A few pictures:


20211126_105042.jpg


20211126_110221.jpg


20211126_110229.jpg


20211126_110234.jpg


The Scrambler drove and operated fine, no problems or break downs. That is always great.

BUT, I still have two nagging issues that I need to address.

1) I still have a slight vibration. I had all four tire/wheels "Road-Force Balanced" (again), still have a slight vibration that starts around 60mph. Vibration is present load/no load, accelerate/coast/decelerate. Not terrible, but it is there and it bugs me. I am going to recheck all the powertrain bolts/mounts, and revisit my rear pinion to CV driveshaft angle. If no bolts are loose, I will probably turn the pinion "down" around 2 degrees from where it is at now, and retry. I will also check the rear pinion/differential carrier bearings for excessive wear, if I can't find the vibration. I removed the carrier a few years ago to remove the "center block", the bearings all seemed fine back then. Who knows?

2) I am getting some strange pilot bushing noises. I have had these since the engine/transmission were reinstalled a few years ago. The noise does not occur all the time, very random. It seems to be happening more often now, AND it is starting to mess with the synchronizers. For some reason, sometimes, the pilot bushing is "grabbing" onto the transmission input shaft, not allowing it to spin independent from the crankshaft. I am not grinding gears, but I have to "slow shift" to allow for the input shaft to stop turning with the crank. Very random, does not happen all the time, no rhyme or reason. I installed an "oilite" pilot bushing when I installed a new clutch, so very odd for this to be occuring? Maybe the bushing "shrunk" some when it was installed in the crank, too tight of a fit around the input shaft? I was hoping it would "wear in" with time, but that does not seem to be the case. I had this issue with my red Scrambler awhile back. But, it only happened a few times in the red Scrambler, and has not happened again. So, red Scrambler is good to go, green one is probably going to have the transmission pulled to investigate :angry:

Since #1 is easier than #2, I will start with #1 :thumbsup:
 
Working on the vibration issue, did some angle checking.

My red Scrambler has no vibrations at all. It has 4.5" lift, AX15 (longer than T5 so shorter driveshaft that is at a steeper angle), 33" tires, 4.10 gears (deeper gear ratio means driveshaft/u-joints spin faster than green Scrambler), CV driveshaft:

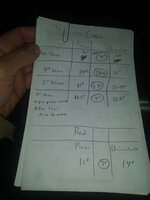
Driveshaft Angle = 14 degrees
Pinion Angle = 11 degrees

So, the pinion being "down" 3 degrees from the drive shaft works perfect on this Scrambler. I assume, once up to higher speeds, the pinion rotates upward some lessening this 3 degree difference resulting in no vibrations. At lower speeds, driveshaft spinning less RPM's, so the misalignment does not come into play. Whatever, I know this one is super smooth, no vibrations at all (even with bent wheels and the tires not being rebalanced since they were installed several years ago!!!!!)

On this Green Scrambler: 2.5" lift, T5 (shorter than AX15 so longer driveshaft), 3.31 axle gears and 31" tires (higher gears mean less driveshaft RPM then Red at same road speed), and a CV rear driveshaft:

Driveshaft Angle = 11 degrees
Pinion. Angle = 14 degrees ( BAD!!!)

So, right now at rest, my pinion angle is 3 degrees above driveshaft angle. So, at speed, it is climbing higher (I assume) causing the vibration. I currently have 4 degree shims angling pinion "up". I will remove the shims, check the angles, and test drive. I assume that when I remove the shims, it should drop the pinion to around 9-10 degrees, slightly increase the driveshaft angle to around 12, hopefully giving me 2-3 degree pinion down angle at rest. Should. IF this gets rid of the vibration, great. If it lessons the vibration, at least I know I am on the right path. If needed, I can always add a 1-2 degree wedge (fat end toward rear) to increase the pinion angle some more, if needed.

Last time I checked this was back in December of 2018. Back then, vibration was not as bad. Also, the pinion angle matched the driveshaft angle exactly. So, pinion climb from matched angle at speed was not as bad. Now, with pinion up, add more pinion up at speed, more vibration.

I am assuming the pinion angle has slightly increased for three reasons:

1) With time and miles, the springs have settled
2) I added a tire rack/tire to very rear, slightly lowering the rear from the weight aggravating an already not optimal situation
3) On my recent road trips I put tools/parts in the very back, pushing the rear end down a little bit more, aggravating the issue.

Lots of words, all theory, need to remove the shims and report back.
 
Worked on my vibration issue this weekend.

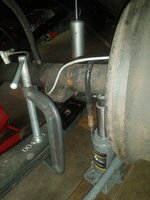
Step one, pulled out the 4 degree shims:

5.jpg

6.jpg

I reassembled and drove the Scrambler with no shims. Vibration was still present, but "felt" different". So, on a hunch, took it apart again:

7.jpg

I installed some 2 degree shims, much better. No more vibration in my "butt", but still have a whole vehicle vibration that starts at around 60-65 mph. Not terrible, but it is there.

Some angle notes:

8.jpg

According to the handy-dandy Tom Wood's calculator, should be right:


14 degree driveshaft angle, 11 degree pinion angle, 33" long drive shaft with CV, NO shims required. My butt confirms this, BUT every vehicle is different. I would say I am pretty close. I could further fine tune this later, if necessary:

I can slightly lessen the angle by adding some 2.5 degree shims, which I have.
I can slightly increase the angle by raising the transmission a little bit (I can not find 1.5 degree steel shims, this small of adjustment, easier to shim the transmission mount up 1/4", plenty of clearance)

For now, I am going to call this good.

Checked all the bolts, everything tight, Now, one thing that I did not install when I reinstalled the engine a few years ago:

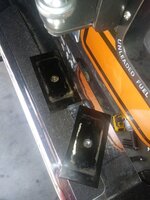
9.jpg

These go between the engine mounts and the steel brackets that bolt to the engine. I forgot to install these on my red Scrambler, went back and installed them right after installing the engine. On this one, I forgot.

Missing:

10.jpg

After about an hour, both sides installed:

11.jpg

This does raise the engine slightly, and decreases the driveshaft angle ever so slightly. So, after installing them, rechecked the angles:

12.jpg

We are talking about very slight changes, like 1/2 a degree. This small of a change could be the result of my eyes or not having the angle finder perfectly plumb etc.

I am going to leave the driveshaft angles where they are at for now, and assume they are close to optimal.


But, I still have my vibration, mainly felt from the front of the vehicle. My "butt"/rear vibration is almost 100% gone.

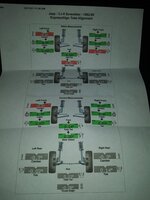
Checking the old FSM, my vibration starts around 60-65mph:

13.jpg

It is a "vehicle speed sensitive" vibration, not audible/torque/RPM sensitive. The FSM indicates a "TLR", which is a wheel run out issue. Unfortunately, this confirms what the tire balance guy told me/showed me. When we "road force balanced" all four tires/wheels, the two wheels on the driver side had some run out. The one on the front was "more then a little", the one on the driver side rear is probably OK.

So, I rotated the tires, put the "worst" on the passenger rear. Did a road test, and probably confirmed my issue:

Placed the "bad" wheel on the rear, the front end shimmy was gone, and I picked up a slight vibration in my "butt" rear end.

I am going to re-balance the spare, confirm it's wheel is "OK", and install it. If this gets rid of my slight vibration, I will either have to repair/replace the "bad" wheel, if possible.

I am still not 100% on this, though. I could see the slight "wobble" on the balance machine, and this one wheel did wobble more than the other three. The other wheel with the "slight issue" had very little wobble.

I doubt this for one big reason:

On my red Scrambler, all four of the wheels that have been on the ground for 50+ thousand miles are beat to $hit. You can walk by, look at the wheels, and see that all four are bent. They are bent from low pressure driving over rocks and logs. BUT, I do not think I have bent the center hub to flange juncture, just the lips that the tire bead seals to. Even with all the bends, all four tires never leak air. I have not rebalanced these wheels since the tires were installed, and they still ride good. On the red Scrambler, no vibrations, only slight shimmy at certain speeds. The slight shimmy is from the tire/wheel balance/bent issues. Right now, IIRC, the two "worse" wheels are on the front, so I get some slight shimmy. Next time I rotate the tires, I can feel the difference. Regardless, I am getting more shimmy/vibration from one bad wheel on the green Scrambler, vs four bad wheels on the red Scrambler??

Maybe the one "bad" wheel on the green Scrambler is really bad?? Easy enough to test, just need to swap on the spare tire/wheel, after I rebalance it.
 
Last edited:
Very thorough and detailed as usual. Your rear driveshaft should be pretty close to optimal at 3 degrees under driveshaft angle. I originally had some speed specific driveshaft vibrations after my engine/trans/Tcase swap. My rear driveshaft was just over 2 ft long and I used 8 degree shims on the original AMC 20. This made the pinion/driveshaft angle nearly 0. From 35-45 I would get a slight vibration. I used weld on perches and set the pinion angle to 2 degrees below with the Dana 60 rear swap. Since then I don't have any vibrations. Hopefully its just a wheel issue and you are able to find a matching replacement.
 
Yep, I am hoping it is a wheel. Will be easy enough to confirm once I get the spare tire/wheel re-balanced.

Will be tough to find a good, used 15x7 OEM chrome wheel, though :(

If the wheel is bad, will have to see/research if a chrome wheel can be repaired without damage :shrug:
 
Also did some work related to "#2", the potential pilot bushing issue.

I know that changing out the transmission fluid would not fix my problem, but decided to swap it out for two reasons:

1) It is a few years old, I have not swapped it out since rebuilding the transmission
2) another post mentioned their preferred fluid, so decided to see what the fuss is about

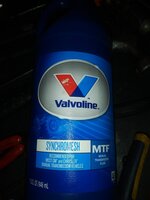
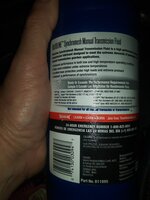
I have been using this stuff, in T5's and my AX15:

14.jpg

15.jpg

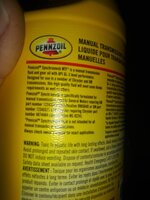
Decided to swap in some Pennzoil Synchromesh:

16.jpg

17.jpg

If you look closely at the two labels, they both meet the same GM/Chrysler specifications. They both also seem to be about the same consistency/texture/feel, according to my own redneck tests. I would go out on a limb and probably say they are probably close to the same thing?

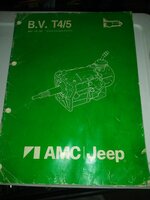
BUT, neither matches the "Bible", which calls out the impossible to find proprietary AMC fluid:

20.jpg

21.jpg

Anyway, was already 99% sure my fluid choice was not causing my issues, but drained/refilled with the Pennzoil stuff just for $hits and giggles.

The old Valvoline stuff still looked/smelled/tasted fine, about the same color as the new in bottle stuff:

18.jpg

And of course, some tiny gold particles in the pan, nothing that would stick to a magnet:

19.jpg

The little metal particles are pieces off the "blocking rings", common to see this in manual transmission fluid. No big chunks of anything, nothing that would stick to a magnet, so great news there.

Did the fluid change fix my shifting issues: YES!!! (temporarily)

I drove the Scrambler for about 45 minutes with the old fluid, some minor notching shifting feel when I got back home. Changed the fluid, did some other stuff, took the Scrambler for another test drive. AMAZINGLY (not really) the transmission shifted perfect. For the first 20-25 minutes. After that, same minor notchy feeling.

So, the fluid change did nothing, which I was pretty sure of, but for $20, worth a shot.

With the Scrambler/engine/transmission cold, works perfect. Once everything warms up I am "ASSUMING" the following is happening:

The fit of the pilot bushing (National part #PB79 IIRC) that is currently installed must be a hair on the "tight" side of the tolerance range. I am ASSUMING, once enough heat transfers to the bushing/input shaft, it must be slightly expanding, causing the input shaft to "drag" slightly inside the bushing. This is causing a slight drag on the input shaft, when it should be free of the crank/engine, resulting in the notchy feel. I do not speed shift, just shift normal. BUT, if I shift deliberately slow, it will shift fine. The slight notchy feel does not bother me. What does bother me is that sometimes/randomly/not that often at all (maybe 4 out of 100 shifts) the bushing/input shaft temporarily seize, resulting in no shifting possible, for 2-3 seconds. Once the sound stops, shifting is normal.

I was playing around with a new pilot bushing on another input shaft (I have a box full of T5 parts, just found this input shaft, looks brand new!!! I have a case in the same box that might still be good, if so, I only need another counter gear to build a spare T5!!!!!!!!!) and the fit is snug, but the bushing slides over the shaft easy enough, slides back and forth no problem.

The only difference with the currently installed bushing - I "packed" it with 30 weight motor oil before installing it. It is an oilite bushing, so probably not needed. I am ASSUMING/GUESSING that MAYBE this excess oil had picked up some contaminates, sometimes, and causes the drag?

I do know that I am NOT in a big hurry to pull down the transmission for a problem that only occurs maybe 4 out of 100 shifts. I was/am hoping that maybe the fit between the bushing/input shaft would self clearance with time.

What I MIGHT do before pulling the transmission back out to inspect/measure the pilot bushing:

I currently have a B&M short throw shifter installed, which has shorter throws than the stock shifter, hence the name LOL!!! Anyway, I could reinstall the stock shifter, which has a longer throw. The slightly longer throw, slightly more time for the input shaft to quit spinning with the engine, might make the notchiness disappear. However, it will not make the "4 out of 100 times the bushing temporarily seizes on the input shaft" issue go away. Worth a shot, easier than changing the pilot bushing :D

It is a minor issue, but it bugs me, And unfortunately, the only way to cure the problem, pull the transmission.

I do not have "gear clash" or any other scary problems. I can shift from first to reverse, engine running, less than 3 seconds, no grinding. I just get that random "bind" every once in awhile. Maybe some more driving will self clearance the problem, wishful thinking :christmas:
 
Yep, I am hoping it is a wheel. Will be easy enough to confirm once I get the spare tire/wheel re-balanced.

Will be tough to find a good, used 15x7 OEM chrome wheel, though :(
Too bad you don't have access to some wheels to swap for a test. :rolleyes: :thumbsup:
 
Had the spare tire/wheel Road Force Balanced. It is good, no runout. So, a simple single tire/wheel swap out will either confirm or disprove my suspicions, after a road test, once it quits raining :crazy:
 
Swapped out the "bad" tire/wheel for the "good" spare tire/wheel last night, 1 hour road test, HUGE improvement :headbang:

ALMOST smooth as silk now. I still have a very slight/minor/barely noticeable shimmy/wobble/vibration coming from the front, but it is very minor. I can barely feel it through the front floor board, down by the gas pedal. I am ASSUMING this is from this front wheel having a hair too much "run out". This minor vibration/shimmy is only present at speeds over 70mph. It does not get worse as speed increases past this point, it is just "there". I could almost be "lazy" and chock this up to the AT tires, but that would be too easy. I drove the same roads that I have been testing on, plus some different stretches of highway, just to be thorough.

Next steps:

1) Try to get the "bad" wheel repaired, if possible, or replace, if necessary :(
2) Front end alignment
3) IF I can get the spare wheel repaired, swap it in for the slightly "BAD" current passenger front wheel, IF the alignment does not cure the minor shimmy

This is more of a "Raymond OCD" thing. Most people would not notice the minor vibration/shimmy, just chock it up to being a 38 year old Jeep on AT tires. But it bugs me, and I am sure I can eliminate it, or at least greatly minimize it further, through some pretty easy steps. Basically, I am going to beat this dead horse into the ground until it is speaking Chinese!!!!!!!

Just the swap last night made a huge difference. I am trying to get this Scrambler to be as smooth/vibration free as my Gladiator, ALMOST there :fingerscrossed:


During my one hour of driving last night, mainly interstate, but I did do 20 minutes of "city driving" (lots of stops/shifting), the "I presume it is the pilot bushing temporarily seizing on the transmission input shaft issue" only occurred once out of probably 100 shifts, and that was while downshifting to third gear coming off the interstate. I am going to continue to monitor this "issue". I am still "hoping" that the bushing/input shaft will "self clearance".

Sounds crazy, but I had this same issue on my red Scrambler just recently: after installing a new Oilite pilot bushing (replacing the blown up pilot bearing that made similar noises), first long interstate drive of 4 hours, downshifting while getting off the interstate, it made this same sound a few times, only with the clutch pedal depressed all the way to the floor, some minor difficulty shifting. Continued on to Michigan, wheeled it a week in the dunes, drove it home, never has made this noise/shifting issue again, after that first initial interstate exit. So, still :fingerscrossed: on the "self clearancing" cure!!!!

If not, I sure know how to pull a T5 :rotfl::rotfl:
 
I took the Scrambler to have the front end aligned. The toe was a little out on the front passenger side, where the vibration appears to be coming from, so this can only help:

20211211_120126.jpg

Camber is out on driver side, nothing you can really do about that, and believe me, I have seen worse!!! Anyway, the alignment did minimize the vibration, BUT it is still there.

So, I took the spare tire/wheel to a wheel repair place. The guy spun it up, said the wheel was fine. BUT, it was out of balance??? According to him, it had the correct weight, just in the wrong spot. He rebalanced the tire/wheel, said it should be fine.

So, good news there. I will install this newly rebalanced tire/wheel to the passenger front. If this fixes the issue, super. If it does, I will take the other "supposedly" bent wheel to see if is bent, or just needs to be rebalanced. Glad this wheel was not bent/damaged. So, hopefully coming to an end on this journey.
 
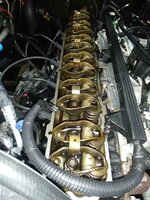
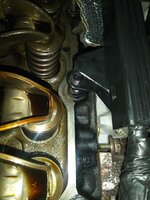
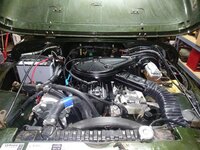
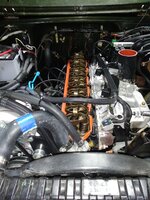
This engine has developed a very minor valve cover leak, so I decided to mess with that this past weekend.

This engine was originally installed in my red Scrambler. I installed one of those aftermarket "4.2" cast aluminum valve covers/included cork gasket on the engine when I "rebuilt" the entire Scrambler. Anyway, never had the valve cover leak with well over 30k miles on that engine. IIRC, when I installed the included cork gasket on the engine, I smeared a thin layer of RTV on both sides of the cork gasket, effectively gluing the whole assembly together. This engine was removed by me, rebuilt by Hesco, then I reinstalled it.

I do not have one of the "special' thick gaskets that come with these valve covers in stock in my garage.

There are other options:

1) Fel-Pro "thin" cork gasket, costs about $12.00:

20211212_120446.jpg

20211212_120455.jpg

20211212_120505.jpg

Pretty thin gasket, compared to what comes with the cast aluminum "4.2" valve covers.

There is this other option from Fel-Pro, BUT it costs around $50.00:

20211212_144450.jpg

20211212_144457.jpg

The above gasket it a "cork/rubber" blend, fairly thick, AND it has a metal piece inserted in the middle. I like the "metal piece", this should prevent the gasket from wanting to smoosh out. The "rubber/cork" mix should "grab" the smooth cylinder head/bottom of valve cover, help prevent the gasket from wanting to "slide" out of position.

I was going to use this gasket, with a little glue to hold it to the valve cover, but decided to try something else first.

20211211_131058.jpg

20211211_131051.jpg

Since @Jeeperdd recommended this, decided to give it a try. IIRC, cost around $45, NO sealant necessary, so figured it was worth a shot!!
 
Since this Scrambler has a 4.0/MPI, MUCH easier to remove/reinstall the valve cover compared to an OEM carb equipped 4.2.

20211211_131237.jpg

Slight leak from the front (more on this later), running down the side a bit.

20211211_131244.jpg

20211211_131257.jpg

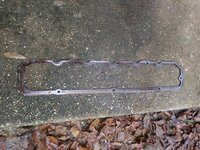
Hesco installed this gasket "dry", which is how a lot of people install cork gaskets. I do not believe this "dry" installation caused the leaking, per say, BUT I prefer to "stick" a cork gasket to at least one surface to help hold it in place. One great thing about a "dry" installation, no mess to clean/scrape off!!!!

20211211_133623.jpg

20211211_134243.jpg

20211211_134307.jpg

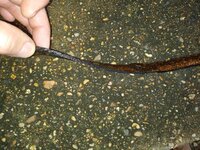
The gasket came off in one piece. I believe it is one of those "thin" Fel-Pro gaskets that I pictured above.

20211211_134320.jpg

20211211_134328.jpg

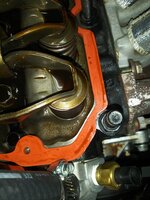
I quickly wiped down the head, and the valve cover, installed the new orange gasket, and torqued the bolts to 25 INCH pounds.

20211211_151232.jpg

You can see the orange gasket, might bother some, does not bug me, ESPECIALLY if it works!!!

20211211_151243.jpg
 
I let the engine warm up, re-snugged the bolts while it was still hot, called it good to go. Went for a 30 minute drive, it was leaking slightly from the front corner :(

20211211_212042.jpg

In the above picture, the gasket looks a bit "smooshed out", too. I could actually push the gasket in and out here, could not do this before??

In the picture below, you will see oil all across the entire top of the gasket in this front corner, where it was leaking.

20211212_093544.jpg


The rest of the gasket is "dry", at least where the cover smooshes down on it AND the little bit that sticks out past the cover. The inner "ledge" of the gasket that sits inboard of the cover is wet, as you would expect.

20211212_093555.jpg

After cursing @Jeeperdd, decided to do some critical thinking. Two things popped out.

1) Remember this:

20211211_131244.jpg

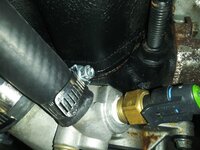
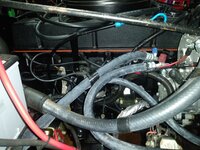
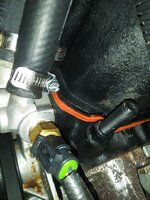
This heater hose clamp contacts the valve cover. This does cause the cover to push back some. I usually pull this hose, and the larger upper radiator hose off the engine when I mess with valve covers, just to get them out of the way. This time, I was in a "hurry" and did not.

2) I believe 20 INCH pounds of torque is too LOW. Just my opinion.

Second try, this is what I did.

I went ahead and cleaned the gasket thoroughly, and then dried it. IF this gasket is wet, either oil or water, it will slip slide around like nobody's business. The gasket, head, and valve cover must be 100% clean/oil free/dry. No short cuts here.

I installed the cover back on the head, no gasket. The cover/and head checked out flat separately, BUT when I put them together, I had a slight rock/gap from the middle of the head to the front. Not bad, and I did not check with feeler gauges, but the "rock/gap" was present.

I reinstalled the gasket, then put the cover on, then gently snugged up the bolts. I kept checking to make sure the gasket stayed in place while tightening. At 20 INCH pounds, I could slightly move the gasket in/out at the front corner. So, I kept snugging all the bolts down until the gasket was thoroughly clamped in place. I can not tell you how much I tightened it down, but not super tight. I was using Allen wrenches, turning the "short" end of the wrench. I kept tightening down until I could not turn the wrenches any longer. The gasket did not "blow out" anywhere, and you can not move it independently any longer.

I also reinstalled the hose clamp, moved the screw portion out away from the cover. No contact now, and the cover dropped straight on.

I started it up, let it run for 20 minutes, re-snugged the bolts while it was running, no leaks so far.

More test drives are needed, but hoping this time it works :fingerscrossed:
 
I let the engine warm up, re-snugged the bolts while it was still hot, called it good to go. Went for a 30 minute drive, it was leaking slightly from the front corner :(

View attachment 99063

In the above picture, the gasket looks a bit "smooshed out", too. I could actually push the gasket in and out here, could not do this before??

In the picture below, you will see oil all across the entire top of the gasket in this front corner, where it was leaking.

View attachment 99064


The rest of the gasket is "dry", at least where the cover smooshes down on it AND the little bit that sticks out past the cover. The inner "ledge" of the gasket that sits inboard of the cover is wet, as you would expect.

View attachment 99065

After cursing @Jeeperdd, decided to do some critical thinking. Two things popped out.

1) Remember this:

View attachment 99062

This heater hose clamp contacts the valve cover. This does cause the cover to push back some. I usually pull this hose, and the larger upper radiator hose off the engine when I mess with valve covers, just to get them out of the way. This time, I was in a "hurry" and did not.

2) I believe 20 INCH pounds of torque is too LOW. Just my opinion.

Second try, this is what I did.

I went ahead and cleaned the gasket thoroughly, and then dried it. IF this gasket is wet, either oil or water, it will slip slide around like nobody's business. The gasket, head, and valve cover must be 100% clean/oil free/dry. No short cuts here.

I installed the cover back on the head, no gasket. The cover/and head checked out flat separately, BUT when I put them together, I had a slight rock/gap from the middle of the head to the front. Not bad, and I did not check with feeler gauges, but the "rock/gap" was present.

I reinstalled the gasket, then put the cover on, then gently snugged up the bolts. I kept checking to make sure the gasket stayed in place while tightening. At 20 INCH pounds, I could slightly move the gasket in/out at the front corner. So, I kept snugging all the bolts down until the gasket was thoroughly clamped in place. I can not tell you how much I tightened it down, but not super tight. I was using Allen wrenches, turning the "short" end of the wrench. I kept tightening down until I could not turn the wrenches any longer. The gasket did not "blow out" anywhere, and you can not move it independently any longer.

I also reinstalled the hose clamp, moved the screw portion out away from the cover. No contact now, and the cover dropped straight on.

I started it up, let it run for 20 minutes, re-snugged the bolts while it was running, no leaks so far.

More test drives are needed, but hoping this time it works :fingerscrossed:
Too bad they can’t make those silicone gaskets like they make them for the SBC valve covers and such- with a steel core so they don’t flex in or out. Also, last time I installed one it was not “smooth” but had a series of ribs to aid in sealing.

I’m surprised that someone hasn’t manufactured a replacement valve cover that uses current gasket technology- o-ring style gaskets captured in a groove. Add that to my mental list of potential money making ideas that I’ll never act on. 🙄
 
Good News, Bad News

Good News - 1 hour drive, valve cover is leak free!! Will report back over the next few days, hopefully good to go

Bad News - - swapped back on the "just re-balanced/not bent tire wheel" to the front passenger side, vibrates worse now then before!!! BUT, the vibration has changed, it is only present from roughly 55-65, not present above/below that speed range.


According to the FSM, this could indicate a wheel bearing problem. I just changed all that stuff, maybe I did something wrong.

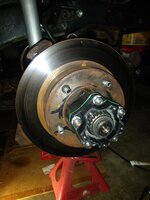
So pulled it back apart for inspection:

20211213_183157.jpg

Before I pulled the tire/wheel off, I rotated the assembly, and I could hear a "rattle"??

Pulled the tire/wheel off, and the pads/caliper, still had a "rattle"?

Hub turns free, no in/out play, no "sticky/rough" spots, what the hell?

Pull the dial assembly off of the hub, noise goes away? Put dial back on, a rattle?

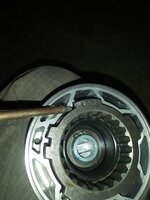
Messing with the dial, this is the cause of the rattle:

20211213_183753.jpg

The fit between the inner grey part stamped "40s" and the outer aluminum housing is very loose. These hubs DO NOT work like the OM/Warn hubs. There is no big spring present. They use a threaded cam type deal to engage. The issue is, when they are unlocked, this inner steel part rattles inside the aluminum hub housing!!!!!!!!!

Now, is that enough to cause my vibration? I would doubt it, since it is in the middle of the entire rotating assembly. However, it rattles even when turning the hub by hand at slow speeds. So, maybe, but still doubtful.

I am going to put the hub dial back on, reinstall the original wheel. If the vibration goes almost away, like it was before I swapped the tire/wheel, I am going to say something is up with that one tire/wheel, maybe a broken belt.

I am also going to remove both hub dials, tape up the opening, and test drive.

I find it hard to believe this could cause my vibration, but easy enough to test/verify/disregard this issue.
 
I would think with as fast as it is spinning,, centrifugal force, it would not cause that. Just a thought. But I sure don't know.
 
Back
Top