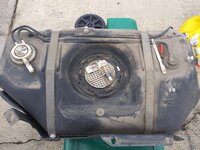
• Notice for iPhone users: DO NOT use the image size reduction option when uploading photos to the forum. This causes portrait images to post as landscape. We have added a warning to the image insert pop-up as well.

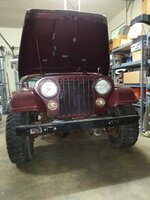
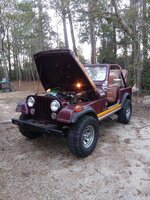
1982 "Vintage Red" CJ-7 Renegade

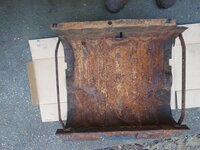
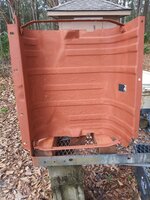
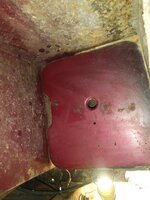
I am not restoring this whole Jeep, but if I come across areas of concern while I am working on it I do what I can to improve the situation. Case in point, the fuel tank skid plate:

20220109_100533.jpg

Lots of surface rust, no holes, still solid. Couldn't leave it alone.

Wire brushes, cleaned with brake parts clean:

20220109_102739.jpg


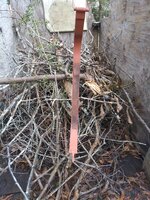
Put what was left of my Evaporust on it next:

20220109_130930.jpg

20220109_130934.jpg

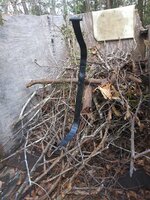
Hit it and the OEM strap with some rusty metal primer. Note the rubber strip on the bottom of the OEM 15 gallon strap to prevent metal to metal contact.

20220109_132124.jpg

20220109_132153.jpg

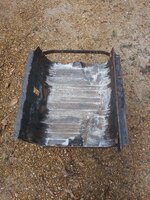
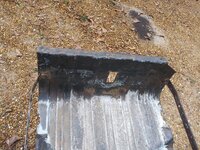
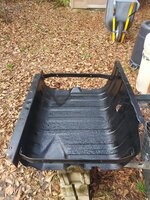
And some black paint.

20220109_143020.jpg

20220109_143033.jpg

I got lucky that I got break in the rain/humidity to paint. I can reinstall this stuff one night this week and will be ready to fire this jewel up!!!

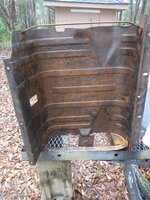
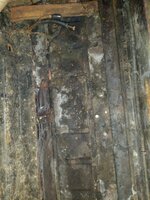
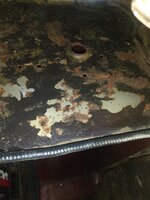
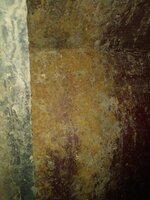
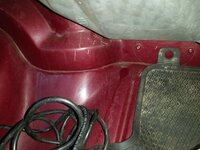
While the tank was down, I decided to clean the bottom of the floor above it. No real reason, it looked like this:

20220109_132444.jpg

No rot or rust, except surface on those little wing thingys. Solid Jeep. If I was looking......
 
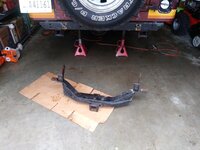
Took off this stupid damn hitch!!!!

20220109_140305.jpg

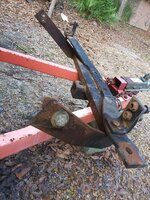
Looks like an original hitch that was field modified by welding in a receiver hitch on the bottom and wings on each side:

20220109_143046.jpg

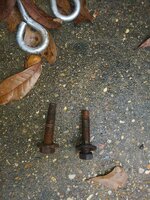
I had to remove the very rear shackle hanger bolt from each frame rail to remove the hitch. They came out no problem. No rust, no spun nuts, nothing. I am strange, but I love pictures like this!!!

20220109_140311.jpg

Again, if I was looking for a nice 7 to keep and drive as is or restore back to super awesome, this Jeep has great bones.
 
Are you planning to drain the gas tank?

With my experience, I now think dumping old gas is prudent.

The ethanol blends sold now just wreck fuel systems that sit dormant.
 
Great progress but a few things to add to lighten the mood after the struggle with the hitch;
- The hitch is way better than the "Epic Fails" thread hitch currently on there (credit SKT)
- I watch a few of the car shows on tv if you want to call them that and I'd rather have you doing your thing on my vehicles - Your level of skills, competency and ability surpass most!
 
The garage was till messy from last night, and it was about to get worse.

Note to self: clean Jeeps BEFORE working on them in the garage.

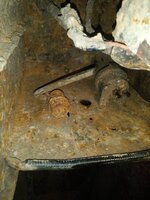
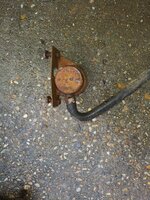
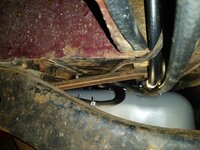
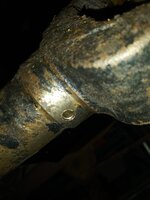
The original 15 gallon tank evap devices each had a broken nipple. Of course, this littly cubby hole full of mud.

20220109_111927.jpg

After a quick hose out:

20220109_120217.jpg

Flakey black spray paint, light surface rust, shiney bare metal.

Some days you have nice clean work days. I knew this would not be one of those days. I hosed out this cubby hole with the garden hose, caught some of the crap in a 5 gallon bucket. The floor caught most of it. So I spent the rest of the day rolling around on wet concrete. Win some, lose some. No way I was going to fight with little fiddly nuts/bolts with crap falling in my face.

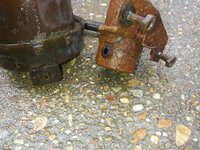
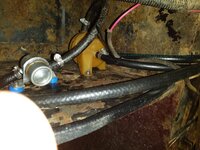
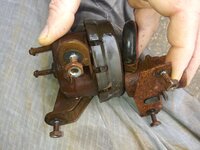
Anyway, the original devices, each has a broken nipple:

20220109_120354.jpg

Whenever I mess with rare/easily broken components like this, I never try to pull the hoses off. I always cut a slit in them. Too easy to break off nipples. Case in point above.

Another lack of rust picture, all 4 of the little push on lock washers are still intact.

20220109_120413.jpg

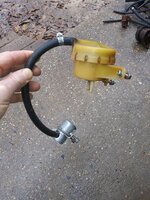
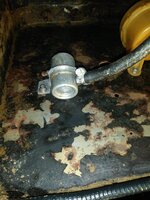
I installed a MTS 15 gallon doo-hickey on my green Scrambler when I thought the OEM components were leaking gas fumes. Turns out they were fine, just had a loose fuel line clamp at the tank. So, they now have a new home on this '82:

20220109_120719.jpg

Interesting note: every '83 and up that I have worked on with an OEM 15 gallon tank, the two doo-hickeys were bolted to a plate that was bolted to the inner fender. This 82 was not like this, no holes for this mounting plate.

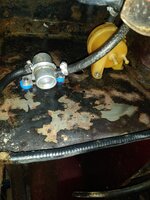
Why does that matter? Well, the roll over check valve on this 1982 has the two nipples oriented parallel to the little mounting bracket, allowing clearance for the rubber hose:

20220109_125124.jpg

On the 1983 roll over check valve, the nipples are oriented at a 45 degree angle, so a hose will not fit if you bolt the valve straight to the inner fender:

20220109_125114.jpg

In true RedneckRay fashion, two new unused plastic valve cover rubber spacers were used, voila, clearance:

20220109_130844.jpg

Only need to reinstall the tank and a few rubber lines and this little side track will be finished!!!

One more under body paint shot. Looks like this now, looks bad:

20220109_111907.jpg

A little water and a rag, looks new!!!

20220109_111916.jpg

Again, if I was a lookin............

While it's on jack stands, I will probably due some greasing, transmission fluid change, and some brake/bearing inspections.

That's it for now!!!
 
Are you planning to drain the gas tank?

With my experience, I now think dumping old gas is prudent.

The ethanol blends sold now just wreck fuel systems that sit dormant.
According to the previous owner, the gas that was in the tank is only 6-8 weeks old non-ethanol 87 octane. I dumped it out of the tank into gas cans, it appears/smells good. If I thought it was old, I would probably burn it in one of my newer vehicles. Haven't decided 100% just yet, but I might put it back into this Jeep. I haven't looked at it since Saturday night, so still on the fence.

But, great point :thumbsup:
 
Great progress but a few things to add to lighten the mood after the struggle with the hitch;
- The hitch is way better than the "Epic Fails" thread hitch currently on there (credit SKT)
- I watch a few of the car shows on tv if you want to call them that and I'd rather have you doing your thing on my vehicles - Your level of skills, competency and ability surpass most!
Thanks man, but I'm just a good ole boy/Redneck with OCD :cheers:

If I could weld, I would be dangerous!!!!!!!!!
 
Looking great Spanky Ray. Turns out Covid didn’t kill me after two steady weeks of trying. I’m at about 50% now so I feel better. I guess I need to come get this one to make room for the next thoroughbred into the stable…


Sold for $24,250 and it isn't as nice as this one.
 
Took a two day break, piddled some tonight.

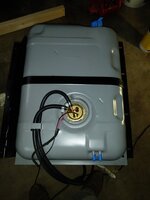
Gas tank reassembled:

20220112_182328.jpg

I removed the sending unit, hooked it up to Jeep, turned the key on, fuel gauge and sender work. Previous owner installed the new sender, but never hooked up the wires??? The sending unit o-ring was tore, had a spare.

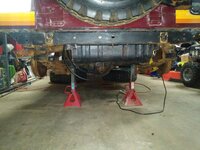
Reinstalled the gas tank. Super quick and easy to drop and install a 15 gallon tank in a '7, especially when a home made hitch is no longer in the way!!

20220112_185645.jpg

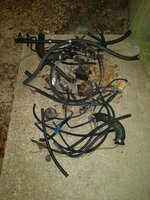
Tomorrow is trash day, so finally got rid of my growing pile of old crap!!!

20220112_185655.jpg

That's it for now.
 
Last edited:
Finished up the gas tank stuff Friday night.

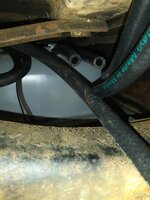
This gas tank has 3/8" vent pipes coming out the side:

20220114_164804.jpg

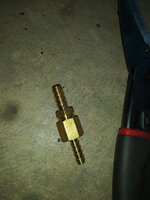
But the OEM liquid check valve has 1/4" nipples, solution:

20220114_164809.jpg

I keep these two vent lines running vertical or uphill. With a full tank, or even less, liquid fuel will freely go into these lines. I imagine side hills do a real number on them!!! I also use fuel line here due to the amount of liquid fuel that frequents these lines.

20220115_094112.jpg

And up to the liquid check valve/roll over check valve. Very busy cubby hole.

20220115_094136.jpg

Refilled the gas tank, no liquid leaks or odors, so good to go.
 
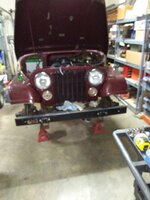
Saturday morning put it up on jack stands and pulled the tires/wheels for some grease work and inspections.

20220115_102433.jpg

Greased up all the u-joints, slip shafts, steering linkage and clutch linkage. No drama, except front driveshaft slip joint zerk looked like this:

20220115_104746.jpg

I figured it was snapped off in there, got out the drill, ez-outs, taps, etc. But, cleaned the hole, zerk was just missing!!! I think this Jeep likes me LOL!!!!

20220115_105143.jpg

Installed a new dimmer switch to fix the non-op headlights, nice rust free floor.

20220115_110648.jpg

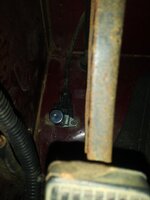
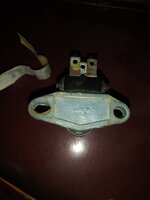
OEM dimmer switch, perhaps??

20220115_110842.jpg

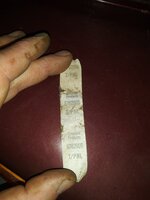
This piece of paper was on the dimmer switch wire harness:

20220115_110912.jpg

Goofed off the rest of the day with my buddy Nathan, who sold his nice '7 on Saturday. He is looking for a Scrambler!!!
 
My nephew called me Saturday afternoon with a broke down LJ. Diagnosed that Saturday evening, no fuel. Dribbled gas down the throttle body to get it out of the street and up the driveway. So, I knew I would be working on a LJ Sunday, so needed to get my jack stands out from under this '82. The LJ is stock, with the OEM HD hitch on the rear. The gas tank won't slide out from under it if it is on its wheels, too low.

Anyway, before I put the tires back on this one I did a half ass inspection of wheel bearings.

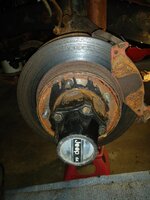
Pulled the calipers off the front end, front wheel bearings/hubs/ball joints/u-joints/lock in hubs seem good to go, pads are thick, rotors have no bad gouges or grooves:

20220116_091130.jpg

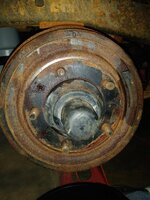
On the rear, I will have to drill out the drum to hub screws to pull the drums off. Previous attempts by others have royally screwed them up:

20220116_093939.jpg

The rear axles turn fine, brakes are not stuck. BUT, it feels like the rear axle bearings have a hair too much play.

For now, OK, so I put it back on all four wheels:

20220116_101207.jpg

I really want to get the engine fired up, running well, before I pull more stuff apart. Because it will just snowball - rear axle bearings and seals, rear brakes, rear rubber brake line. If I do the back, might as well do the front, too!!!!!!

Not sure how deep JeepAddict wants me to keep digging:crazy:

I killed the rest of Sunday with my old LJ Rubicon, and need to get it back running before I mess with this one anymore. Hope to get this one fired up later on this week, right before it might snow on Friday/Saturday!!!!!!
 
Last edited:
Might as well clutter this thread up with some LJ tech!!! Just installed the 15 gallon tank in this CJ-7, how hard can it be to drop the LJ tank???

I watched a YouTube video, piece of cake!!! Well, not technically challenging, it does suck worse then a CJ 20 gallon tank!!!

LJ has full tank of gas. I wanted to siphon it out before lowering tank to make it easier, and not repeat my above described garage incident.

I removed the fuel filler from the surround, pulled surround, could not get siphon hose down fill hose, could not disconnect fill hose from tank with tank installed. I wasted an hour, could not figure it out.

Only 7 bolts hold the tank up, like a CJ: 3 in the front, 4 across the back. This LJ is 100% rust free, so no problem there.

I have never dropped a TJ/LJ tank before, so I took my time. I would lower it a few inches, gain access disconnect one thing, lower it some more, more disconnecting...........

The rear light harness/trailer harness is tied to the fill hose assembly. The rear axle vent and transfer case vent are also tied to this. The driver side cubby on this is jam packed. I recommend pulling the fuel filler cap surround off the body to see what is back there. Two wiring harnesses, two drive line vents, some small gas tank vent lines, and a metal doo-hickey attached to filler hose.

At the front of the tank, fuel supply and vent lines. They have those quick connects. I got them apart, no problem.

On passenger side, some big vent doo-hickey line has to come off, it is also some type of quick connect.

Across the rear of the tank, a hard vent line you need to unclip. It needs to stay with the frame/body.

A bunch of crap, all over the place. I took about 45 minutes to lower the tank, disconnecting things as I found them, and double checking.

With the tank lowered all the way, you can undo the PIA electrical quick connect from the fuel pump module. I also loosened this harness from an underbody clip to give me more slack before lowering the tank to the ground.

Tank down, still on jack:
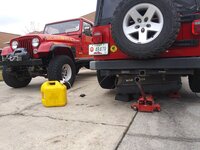
20220116_124603.jpg

After unplugging fuel pump module, I slid tank out from under the LJ. Picked it up, placed it on recycling can to gain elevation and make siphoning the gas easier:
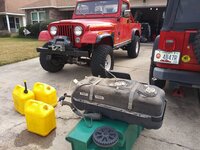
20220116_135149.jpg

Tank had 17-18 gallons in it, so pretty damn heavy!!!!. Even when it is empty, the tank/skid plate is not exactly light.

Picture of the top of tank, module and lock plate still in place:
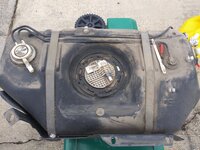
20220116_140652.jpg

The big white circle in the middle is the fuel pump module. I did not take a picture of it, but it is similar to a late model GM module. It is spring loaded, kind of scared me when I removed lock ring LOL. The lock ring is black, metal, easy to remove. There is a big green o-ring under module flange that seals it to the tank. The tank is black plastic, but the inside of tank is silver???

I cleaned all the crud out from around the module before removing it. Silver Lake Sand Dune Michigan sand up there from 2013!!!!! Pulled module, used the huge hole in the tank to remove remaining gas, and crud that fell in when I pulled module.

Tank is clean, old module temporarily cleaned and reinstalled. Once I get a new pump module, reinstallation should only take an hour or two tops.

I was careful with all the wiring/fuel line "quick connects". If you have messed with late model TJ/LJ's you know they suck. Especially the damn little red lock tabs on the electrical connectors!!!! I did not damage any of the connectors, or any of the nylon fuel/vent lines. That is a whole other mess of headaches.

Taking time to carefully take it apart will pay huge dividends upon reinstallation. I don't have to repair/obtain/replace anything, just hook it all back up.

So, interesting to see fuel tank/pump "progress". That mechanical pump on the block is a hell of a lot easier to change!!!!!

This reinforces, to me anyways, the wisdom of the external pump on my 4.0 powered Scrambler. I can crawl under that Jeep and change the pump in 45 minutes, tops. I have 57,000+ miles on the current external pump.

That being said, this is the original internal pump on this 2005 LJ that has 141,000 miles. So, maybe it will outlast my external pump, but changing it out sucks!!!! And if you were on a trail, forget about it. Hell, at stock height, you need jack stands to drop the tank, so not an easy side of road/parts store/hotel parking lot swap, either.

That's why my green Scrambler, which uses a TanksInc internal pump, has a secondary external pump plumbed and wired up. If the internal pump takes a dump, I can switch to the external pump in less then 10 minutes.

I am going to install a Bosch fuel module back into this LJ. Supposedly Bosch was the OEM source of these pumps/modules.

A little off track, but I was on a roll.

That's it for now :wave:
 
Last edited:
I got sidetracked this weekend, but I did leave this one ready for startup.

Got home tonight, cranked starter over for 15 seconds, repeated and it fired up and ran pretty well considering I haven't messed with the carburetor and just "BS'd" the timing!!!

20220117_170051.jpg

See, the belts are spinning LOL!!!


20220117_170102.jpg

But, not everything is unicorn rainbow farts in RedneckRay land.

Minor drip from the heater core box, but this quit after the initial drip. Might have been previous spillage from when I flushed core.

20220117_170851.jpg

Not worried about this one.

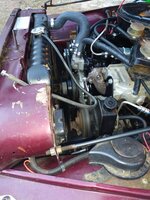
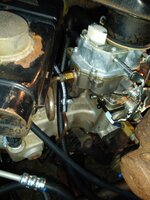
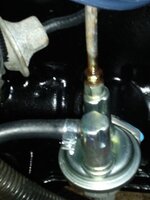
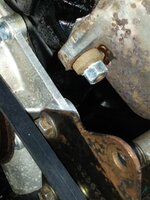
The fuel leaking from the metal under hood lines will have to be addressed, both at the carburetor and the fuel pump. The corrosion I cleaned up must have exposed some pitting/splits.

20220117_170348.jpg

20220117_172035.jpg

Pretty good amount of gas leaking while engine is running!!!!

20220117_173103.jpg

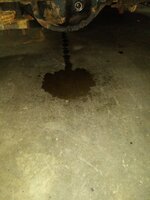
Exhaust manifold is shot. Multiple cracks and leaks, sounds like a pulpwood truck.

20220117_170828.jpg

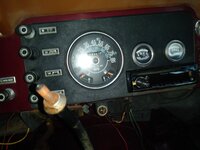
Oil pressure, temperature, volt and gas gauge all work.

20220117_170450.jpg

I ran it for about 10 minutes outside before the fuel started pouring out. Engine seemed to run fine, no strange noises.

Need to swap in a new exhaust manifold and fuel lines, then get this thing dialed in, and then finally take it for a spin!!!

Hope to finish the LJ tomorrow night, take a break for a day or two, then get back on this one this weekend.

That's it for now :wave:
 
I've used Barr's Stop Leak and water pump lube for years and years on all my cars and have had great luck with it.

A friend of mine years ago worked at Tom Lyons Toyota in Boulder and told me Toyota recommended it in all their new cars which had warranty work done on the cooling system. Its great for preventing little leaks like your heater core.
 
I've used Barr's Stop Leak and water pump lube for years and years on all my cars and have had great luck with it.

A friend of mine years ago worked at Tom Lyons Toyota in Boulder and told me Toyota recommended it in all their new cars which had warranty work done on the cooling system. Its great for preventing little leaks like your heater core.
I've used the "liquid" Bar's Leak in the past on a seeping freeze plug, worked perfect, still no leak :thumbsup:

I'm about 99% sure the heater core is not leaking, I believe it is just excess coolant/water that spilled into the heater housing when I was flushing out core with a garden hose. With the engine running/vibrating, it shook it out. No more leaks/drips since the initial few drops :fingerscrossed:
 
  • Like
Reactions: SKT
Since I already interrupted this thread, I'll finish the LJ tech clutter!!!!

A few random pictures, notes, and heartache!!!

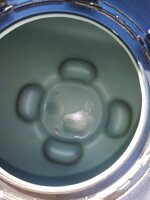
The sump in the middle of the tank that the fuel module sits in, note how the inside of black plastic tanks is silver/grey??
20220118_150832.jpg

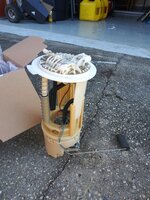
The OEM fuel pump module - "cup/reservoir" at the bottom that holds fuel/pump, sending unit in the bottom, pressure regulator up top, spring loaded legs, I would assume similar to late model GM stuff??

20220118_150850.jpg

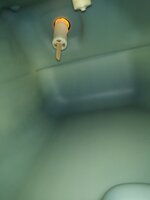
Inside the tank, looking at the filler hole, this little jewel can cause you problems, besides just trying to siphon fuel!!!!

20220118_150841.jpg

That white cylinder can detach from the "welded on" fuel fill neck, from inside the tank. Inside it is a ball, seal, spring. The long stick guides it inside the plastic cylinder, but the inner assembly also slides on three plastic "tracks". In the picture above, it is stuck down, probably from me jamming a siphon tube into it. It popped back up once I filled the tank. Anyway, if your TJ/LJ/JK sprays gas at you when the tank nears full while filling it, this little jewel is the problem. It will stick, causing all kinds of issues. I assume this is an emissions/safety device, keeps gas fumes from migrating up the fill hose, will keep liquid fuel from spilling out of fill hose if you roll the Jeep. On a CJ, there is a BIG fuel fill AND vent hose. On this LJ, only a fill hose. I presume this doo-hickey works with other doo-hickeys on the tank to allow the tank to vent while you are filling up. Anyway, on this LJ, no problems with this doo-hickey. If you have issues, you can remove it, lightly sand down the tracks/ridges" to get the ball assembly sliding smoothly and fix the problems. Some people swapped on a GM filler hose, but that is a band-aid fix. To fix it right, drop the tank. Since I had no issues with the little doo-hickey, I left it alone.
You can see why it is a bitch to siphon fuel out of this thing!!!! Also, not pictured, inside the "welded on" plastic filler neck there are four "L" shaped fingers blocking access. No idea what purpose they serve???

One other note - I am not a TJ/LJ "expert", but I will tell you the 2005-2006 models are nothing like the 2004 and earlier models. The 2005 and 2006 models have an advanced tank evap emissions system, more similar to a JK. There is a "pump" up in the passenger side body (behind tail light" that will pressurize the tank when the PCM commands it to. There is a pressure sensor doo-hickey in the top of the tank, that will check to ensure the tank/system maintains pressure. Basically, if it holds pressure, the PCM knows it is not leaking gas fumes. If it does not hold pressure, you get a CEL. I did not have to mess with any of this crap, BUT I was also super careful with all the associated lines/connectors I had to mess with to drop the tank. It would be a PIA to try to diagnose an evap leak, fix the problem, to clear the "Check Engine Light"!!!!!! I would presume you would have to "smoke" the system to check for leaks, but you would also have to ensure pump/sensor are working properly.

Also, I never saw a "charcoal/fume" canister anywhere, unless it is up in the passenger side cubby hole behind the taillight. A vent line runs from the tank, up under the hood, to a purge solenoid, straight to the intake manifold. MAYBE this system holds the fumes inside the tank until you start up?? Just a word of warning about all this crap, tread lightly!!!!!!!!!!!!!!!!!!!

New pump installed, key "primed" three times, LJ fired right up!!!!!!!!!!

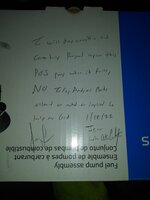
I did NOT receive my Bosch fuel pump module, UPS screwed me, so I installed a Delphi unit from NAPA. This was my 2nd choice. But, I made the NAPA store manager sign the box!!!!!!!!!!!!!!!!

20220118_181140.jpg

"I WILL DROP EVERYTHING AND COME HELP RAYMOND REPLACE THIS POS PUMP WHEN IT FAILS, NO IFS, ANDS OR BUTS ALLOWED OR NOTED OR IMPLIED SO HELP ME GOD.

1/18/22"

Signed by Jeremy

Witnessed by Austin

In all seriousness, the module has a life time warranty, AND after doing it once, I can repeat the entire remove/install in under 2 hours IF the tank is close to empty. Not the best, not the worst, is what it is.

Now the heartache - I get to drop the tank again, next week, once it gets close to empty!!!!!!!

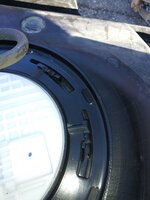
I installed the lock ring like so:

20220118_151907.jpg

This is not "correct", BUT it is locked into place, can not come loose. I installed it and removed it several times, it takes a hammer and punch to break it free. But, it is not "correct" and will drive me crazy!!!!!!!!

On my initial removal picture, you can see how it is supposed to be, basically 180 degrees out:

20220116_140652.jpg

Should have looked at this damn picture yesterday LOL!!

So, I will drop it again next week, install the lock ring "correctly", and sleep better at night.

For now, pump works, fuel gauge is accurate, no liquid or fume leaks, no CEL. Will get it 100% next week :fingerscrossed:

And, this LJ is rust free/unmolested/not damaged or modified, so it a pleasure to work on!!!!!!!!
 
Last edited:
Back
Top