• Notice for iPhone users: DO NOT use the image size reduction option when uploading photos to the forum. This causes portrait images to post as landscape. We have added a warning to the image insert pop-up as well.

1982 "Vintage Red" CJ-7 Renegade

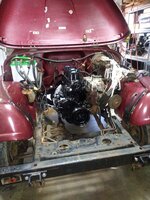
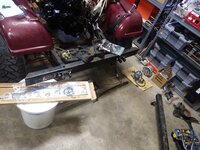
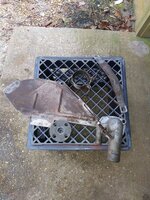
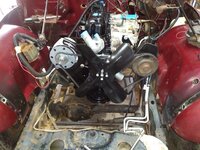
Removed the front grill yesterday, ready for some cleaning before reinstalling the engine.

I preemptively used PB Blaster on all of the grill bolts, they all came out easy, including the bottom body mount bolt.
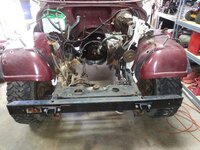
20211225_145503.jpg

So far, this has been an easy/enjoyable project. The lack of rust/corrosion always helps. Most of the "orange staining" present on this Jeep is good old Mississippi red clay dust/residue that cleans off easily. Speaking from experience, frequent long drives on red clay roads also minimizes leaks!!!

That's it for now!!
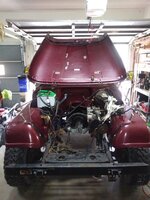
 
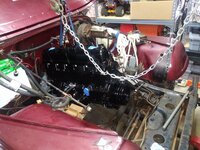
Don’t remember ever seeing an engine pulled with the intake left on the car. Gotta say, that is a very strange look.
 
Don’t remember ever seeing an engine pulled with the intake left on the car. Gotta say, that is a very strange look.
Previous owner LOL. Since they left it like that, I rolled with it. I usually pull both manifolds when I pull an inline 6. Surprisingly, wasn't too big of a PIA during engine reinstallation.
 
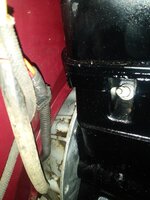
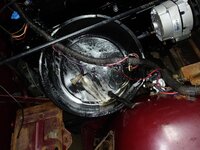
Spent about an hour wiping down all the under hood areas I could reach with some "Tub-O-Towles". Worked out well. Cleaned the bell housing with some of that CRC QC cleaner stuff.

20211226_103655.jpg

Considering all I did was wipe this surface down, someone who knows better than I/more patience can make this paint shine again!!

20211226_103734.jpg

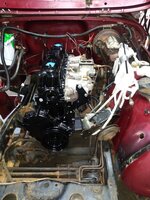
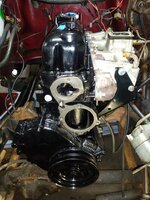
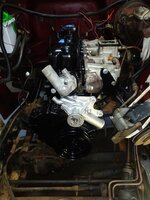
Working by myself, about an hour after beginning to hook the engine up to the hoist to having it mated to the bell housing, not too shabby!!!

What I was looking for!!

20211226_135957.jpg

20211226_140023.jpg

Five of the seven bell housing to block bolts installed (need to install the two "through' bolts still), new motor mounts installed and bolted into place, good progress for just a few hours today.

20211226_153315.jpg

Big task completed, now a million smaller projects that need to be completed to finish the engine reinstallation.

20211226_154402.jpg

Going to Monday Night Football tomorrow night, then will need to spend some time cleaning the next batch of parts/finding hardware, so no updates for a few days.

That's it for now!!!
 
Did a little work tonight.

Cleaned a few parts, might hit a few of the steel parts with a little black paint before installing them:

20211229_184236.jpg

Installed a new one piece transmission mount to replace the old three piece unit!!!! Glad I strapped the transmission/Dana 300 in place tightly before dragging this one home!!! Removed about 5 pounds of crud in the process, 1 pound in my hair!!

20211229_184244.jpg

Will probably work on this one from back to front, bottom to top:

Reinstall rear driveshaft/grease both shafts
Install bell housing inspection cover
Install starter
Reinstall under engine crossbar
Motor mount nuts/ground strap
Reinstall/adjust clutch linkage
Reinstall two motor to bell housing bolts

After that, top side stuff will be fairly easy and quick, from driver to front to passenger side:

Intake/exhaust manifolds and carburetor
Power steering pump/brackets
T-stat housing and water pump
Radiator
Alternator and bracket
Distributor and coil
Dipstick tube
Oil pressure sending unit

And of course all the belts, hoses, wires, etc.

Hope to finish this one up soon, might get close this weekend. That's it for now.
 
Did a little more work yesterday afternoon.

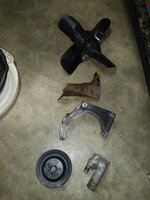
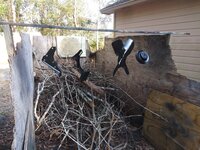
Painted the power steering bracket, alternator bracket, fan, and water pump pulley. I couldn't bolt rusty/crusty stuff back on to a new engine.

20211230_144334.jpg

Cleaned up a few parts, ready for reassembly:

20211230_144351.jpg

And installed the following:

Reinstalled rear driveshaft
Drained and refilled the Dana 300 (had ATF inside)
Installed starter
Installed bell housing inspection plate
Installed/adjusted clutch linkage
Motor mount nuts/ground strap
Under engine frame cross member

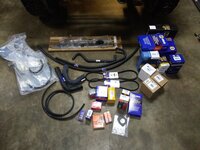
All of the new parts for a new engine (except battery cables):

20211230_171530.jpg

Motor and transmission mounts
Radiator and heater hoses
Fuel line
Fuel and air filters
Belts
Water Pump, T-Stat, gaskets
Plugs, coil, cap, rotor, ICM
Carburetor rebuild kit, just in case
Intake/Exhaust manifold gaskets
Fuel pump
Power steering lines (easy to get to now, original 30 year old hoses look suspect)
Other misc gaskets, clamps, etc.......

I will start on all of the above today, should go fairly quickly/easily.

That's it for now.
 
I love seeing the NAPA parts! I have a buddy that owns 2 stores, I worked at one with him 30 years ago. I think we'd have our own dream team if we'd get you doing the mechanicals and @certifiablejeep doing the panel work (if need be) in following you guys recent threads!
Rock on cowboy!
NAPA seems to have pretty quality parts. My mom's old beer distributing company used NAPA, the construction company I work for have been using them forever, so I have been using them the past 26 years, too!!!!

As you can imagine, I have a pretty good relationship with the owners/employees there, the owner texted me Merry Christmas Christmas morning!!!!!

CertifiableJeep has me beat, no question there!!!
 
Pretty good progress today. It always takes longer putting someone else's already started project back together. Missing parts, bolts, dirty grimy crap, etc.

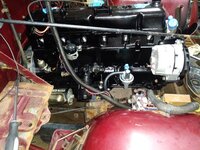
Intake and exhaust manifold back on:

20211231_150833.jpg

And for the record, IMO, it is a huge PIA doing it the way the PO left it. I always remove the exhaust pipe from the manifold, and remove the EGR tube that connects the exhaust and intake manifold. So much easier. Anyway, I got it, but it was a PIA. The PO also had the correct rear PS pump bracket, not sure why they were using their home made rear bracket? Who knows.

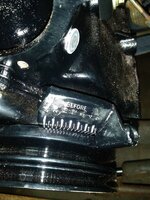
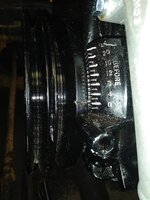
Used a silver paint pen to highlight the numbers/lines on the timing scale since it was easy to get to. The paint pen kind of worked, wiping the paint off with Acetone worked better!!

20211231_150845.jpg

Scraped the paint off the block/head where the T-stat and water pump mount up.

20211231_154158.jpg

Installed the T-stat/housing and water pump:

20211231_160023.jpg

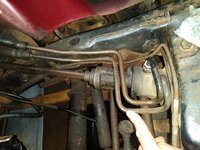
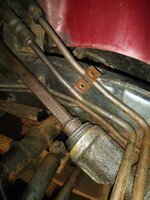
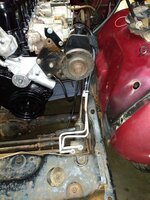
Another reason I removed the grill was to make it easier to change the two PS lines. They are original pieces, and look pretty suspect. Might as well change them out, too.

A few pictures I took of the OEM line routing. My finger is on the pressure line:

20211231_165357.jpg

20211231_165724.jpg

And the new power steering lines and the PS pump/brackets installed correctly:

20211231_174433.jpg

And one last easy part for today, the alternator bracket:

20211231_181118.jpg

A few notes:

I am using new bolts where needed or missing
Reusing some of the OEM hardware if it is OK

Whenever I mess with manifolds on the 258/4.0, I remove the driver side fender. It makes things so much easier. I should have followed my advice on this project. You don't have to pull the fender, but it makes everything easier to reach, especially when using a torque wrench on the manifold bolts.

Anyway, that's it for now.
 
Paint that frame man - It just looks dirty!
It's mostly dirt/red clay, some light surface rust. Really solid CJ.

I'll let JeepAddict detail it :thumbsup:

The black engine kind of bugs me, should be blue in '82, time to pull it again and repaint it :crazy:
 
Knocked out a bunch of work today, getting closer!!!

Working on passenger side, roughly back to front.

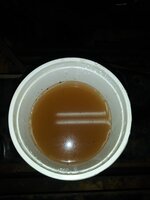
Pulled heater hoses off core, flushed it out with the garden hose, tried to catch most of it with cups before it hit the floor, still made a mess:

20220101_094350.jpg

Battery was showing 12.5, put it on a trickle charge just for the hell of it. Looks like a new Interstate battery.

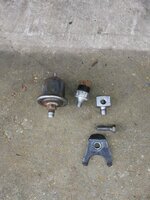
Cleaning and installing more parts. Distributor hold down clamp, oil pressure block, switch, and gauge sending unit:

20220101_100957.jpg

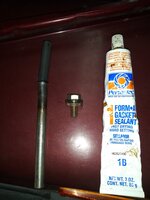
Installing the dipstick tube. I was kind of worried about this, never done this before. Luckily, this engine has the short tube. I used the pictured sealant, the bolt with thick washer dropped down the tube, for an install tool:

20220101_101928.jpg

Note how the paint is grey. It should be black, painting in 100% humidity/fog sucks!!!

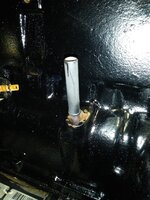
Anyway, tube pushes in this far by hand:

20220101_102156.jpg

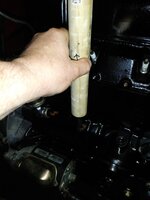
I put sealant on the top 1" of tube, pushed it into the block, placed the bolt/washer on the tube, then a wood dowel on the bolt like so:

20220101_102516.jpg

Two solid hits with a hammer, done deal.

Bolted on the oil pressure stuff, coil and bracket, new fuel pump:

20220101_105724.jpg

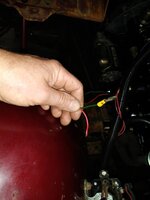
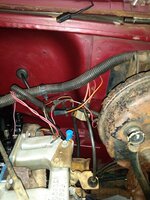
Need to look at two potential wiring issues on this side.

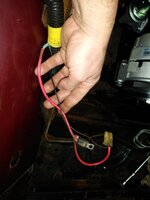
Alternator wiring:

20220101_123125.jpg

And I need to purchase a new ignition coil connector, I presume PO cut it off when swapping in the HEI distributor:

20220101_123140.jpg

With the plugs out, turned the engine over by hand to TDC. NOTE to self: easier to do this with all 6 (not 5) spark plugs out AND the transmission in neutral LOL:

20220101_105737.jpg

And filled the crank case up with oil. Both my '83 258's/4.0 and my '85's 258 hold six quarts. This 1982 258 only holds 5 quarts. Not the best picture, but 5 quarts puts it smack on Full:

20220101_111423.jpg

I can't remember for sure, but I THINK my '78's 258 and my other '78's 304 also only held 5 quarts?? I know there is some controversy about this, I always start with 5 then check the dipstick.
 
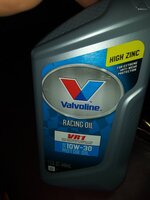
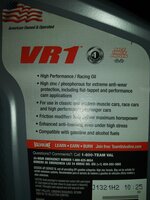
The business that built this engine recommended this oil:

20220101_113307.jpg

20220101_113317.jpg

Hesco built both of my Scrambler engines, they also recommend this type of oil. I run 20-50 VR1 in both of my Scramblers. My '85 Spring Special runs regular NAPA oil.

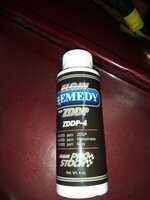
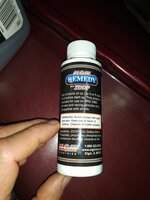
The engine builder also included this stuff, which I dumped into the crank, too:

20220101_113328.jpg

20220101_113337.jpg

Spark plugs, oil filter, fuel line, and alternator installed. Only really missing the distributor:

20220101_123110.jpg

Water pump pulley, fan spacer, fan, and both belts installed:

20220101_123208.jpg

Knowing that I will be looking at the wiring, and the tubing is disgusting, cleaned it in place the best I could:

20220101_123634.jpg

This part of the loom runs behind/over the valve cover and down low on passenger side. Since the floor was already covered in anti freeze from earlier, a bunch of oil and grime won't hurt!!

This is an 82, so no under dash ECM. Wiring is pretty simple. The wiring for the intake manifold stuff, Sol-Vac, choke, etc. on the driver side is pretty intact (read NOT melted):

20220101_123646.jpg

The PO's have not hacked up the wiring under the hood, so it shouldn't take too much time to go though this stuff.

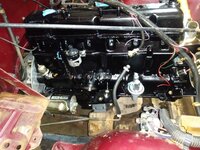
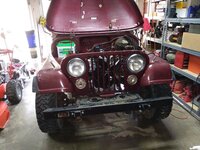
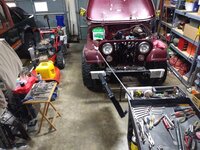
Went ahead and reinstalled the grill, no reason not to at this point:

20220101_145342.jpg
 
Even though I post a bunch of pictures, really just the tip of the iceberg. All kinds of repairs/missing parts/mysteries pop up when taking on something like this.

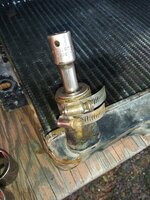
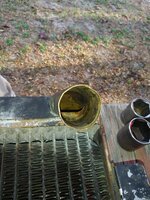
For instance, the lower radiator outlet was smashed. So, roughly bent it into shape with pliers, then kept fitting in slightly larger OD sockets into the tube to make it round again. Once the ID was good, two hose clamps on the outside completed the repair:

20220101_152638.jpg

Not too shabby for old RedneckRay, if I do say so myself LOL!!!

20220101_152751.jpg

After the above repair, repainted the radiator:

20220101_162058.jpg

All in all, considering I only picked this jewel up two weeks ago, and I can only work on it nights/weekends, and two major holidays in between, pretty happy with my progress.

Really only need to install radiator/coolant hoses, distributor, carb and fuel lines, should be ready to try to fire this thing up!!!

But, the PO did install a new gas tank. And, from what I have seen on some other stuff, I am probably going to re-drop the tank, just for "shitsandgiggles".

That's it for now!!
 
One other "Note".

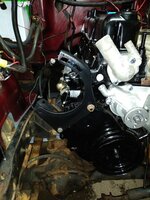
I am more familiar with the 1983 and up feedback carb systems. This 1982 does NOT have the feedback system, but it does have this:

20220101_123154.jpg

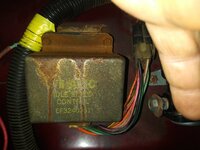
This is the "Idle Speed Controller". It really only controls the Sol-Vac attached to the front of the carburetor. It takes inputs (air cleaner temp, coolant temp, oil pressure, AC on) and will kick the idle speed up if deemed necessary. This unit has the following colored wires going into it:

20220101_203857.jpg

Not all of these colors jive with what I have found in the 1982 FSM. For my own curiosity, I will probably trace these out and record where they go. Might be useful later on.

This Jeep is missing the Sol-Vac, that could easily be added back on if desired. I am NOT going to cut or hack this thing out. I am going to leave it in place, just make sure to secure the Sol-Vac power wire to prevent a short.

This '82 is only missing the Sol-Vac, Cat, and smog pump components to be 100% "correct". I will leave it to JeepAddict or next owner to restore this stuff, if desired.

I have completely restored all the OEM crap on my 1985, works perfect, love it. I did the same on my green Scrambler (except for Pulse Air) and it worked well, too. I then put MPI on that one LOL.

I know simpler carbs/fuel injection are desired, but I find this type of OEM stuff kind of neat, and challenging.

Anyway, that's it for this.
 
And filled the crank case up with oil. Both my '83 258's/4.0 and my '85's 258 hold six quarts. This 1982 258 only holds 5 quarts. Not the best picture, but 5 quarts puts it smack on Full:
I've seen both long and short tubes/sticks on various 258's.
Do you happen to have part numbers that I could compare?
The '82 FSM calls for 5qts +1qt w/filter change for the 258 :confused:
 
I've seen both long and short tubes/sticks on various 258's.
Do you happen to have part numbers that I could compare?
The '82 FSM calls for 5qts +1qt w/filter change for the 258 :confused:
I will look on this '82's dipstick tomorrow. The tube did NOT have a number on it.

My green '83 and my '85 SS both have the long sticks/tubes.

The 4.0 in my red Scrambler has a short tube.
 
The worry would be a long dipstick in a short tube. But then I doubt you'd only be a quart off. I'd check it against your other short sticks though just for piece of mind.

More likely is the oil filter will soak up a quart once you run the engine and you'll wind up with 6 at that point.
 
The worry would be a long dipstick in a short tube. But then I doubt you'd only be a quart off. I'd check it against your other short sticks though just for piece of mind.

More likely is the oil filter will soak up a quart once you run the engine and you'll wind up with 6 at that point.
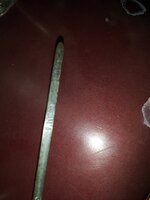
Pretty sure the long dipstick will not work with the short tube. The long one reaches all the way up and almost to the front of the engine. It is curved and has a brace welded to it. I'll take a picture of the long version.

Unless their is a "medium" version I don't know about :eek:
 
Back
Top