

You are using an out of date browser. It may not display this or other websites correctly.
You should upgrade or use an alternative browser.
You should upgrade or use an alternative browser.
1982 "Vintage Red" CJ-7 Renegade
- Thread starter spankrjs
- Start date

Dave The Sparky
Rebuilding my CJ8 very,very slowly...
- City
- Halifax
- State
- UK
My 81 has the short version, would you like some measurements?

FLCJ8
Legacy Registered User
- City
- Palm Bay
- State
- FL
Okay.No part number on the short dipstick.
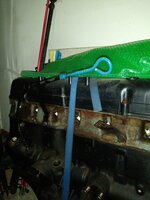
Picture of the "long" dipstick tube, pretty common on '83 and up CJ's:
View attachment 99563
My '83 has the OEM tube and dipstick (Part # on dipstick matches factory parts list)
The tube is ~19-3/4" from block to top end of tube
The dipstick is ~28-5/8" from upper "Full" mark to top end of tube shroud.
Therefore, the full level of the oil should be ~8-7/8" from the top of the oil to the tube opening in the block.


FLCJ8
Legacy Registered User
- City
- Palm Bay
- State
- FL
Measurements would be great.My 81 has the short version, would you like some measurements?
Does your stick have a part number?
How many liters does yours hold when full?
Dave The Sparky
Rebuilding my CJ8 very,very slowly...
- City
- Halifax
- State
- UK
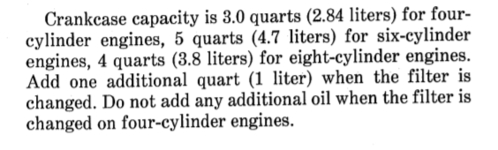
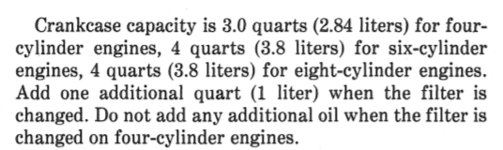
Mine holds a little less than 5 litres with a filter change so 5 quarts (4.7 litres) so thats as the 81 FSM says which makes sense its a 81 engine.
No part number on the dip stick unless its hidden by the paint i stuck on it.
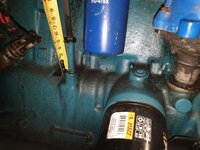
Tube protrudes roughly 2", dip stick is curved to keep it to the side so measurement is as the photo.
Must be miles different to the long dipstick version that is for sure....
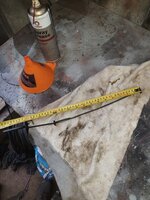
No part number on the dip stick unless its hidden by the paint i stuck on it.
Tube protrudes roughly 2", dip stick is curved to keep it to the side so measurement is as the photo.
Must be miles different to the long dipstick version that is for sure....

- City
- Biloxi
- State
- MS
This Jeep is a 1982, BUT I "think" it was very early '82/late '81 model 
As for the dipstick issue, it would be interesting to see if there is a corresponding change to oil pan part numbers that coincides with the long/short dipstick tube part numbers.
I put 1/3 quart in the "small" oil filter, the remainder of that quart plus 4 full quarts in the pan, reads dead full.
The oil capacity difference would show up in the oil pan, correct? I will measure the sump on this pan and compare it to my '83 engines that hold 6 quarts.
As for the dipstick issue, it would be interesting to see if there is a corresponding change to oil pan part numbers that coincides with the long/short dipstick tube part numbers.
I put 1/3 quart in the "small" oil filter, the remainder of that quart plus 4 full quarts in the pan, reads dead full.
The oil capacity difference would show up in the oil pan, correct? I will measure the sump on this pan and compare it to my '83 engines that hold 6 quarts.
- City
- Biloxi
- State
- MS
I took the day off yesterday, so no work accomplished.
I did notice this, driver side fender behind the horn, the "diagnostic" connector:
Only "3" pins:
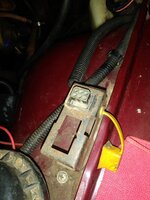
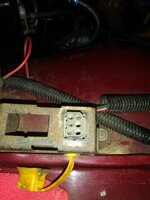
Three wires:
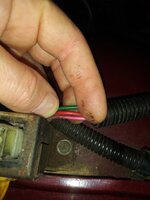
Just assuming at this point, but:
1) Pink - SolVac circuit
2) Red - choke circuit
3) Green - Not sure, this wire also shows up at the 'idle Speed Controller", so maybe just a test port to see if it is getting power?
I did notice this, driver side fender behind the horn, the "diagnostic" connector:
Only "3" pins:
Three wires:
Just assuming at this point, but:
1) Pink - SolVac circuit
2) Red - choke circuit
3) Green - Not sure, this wire also shows up at the 'idle Speed Controller", so maybe just a test port to see if it is getting power?
Dave The Sparky
Rebuilding my CJ8 very,very slowly...
- City
- Halifax
- State
- UK
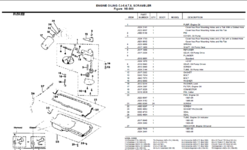
According to the parts manual the oil pan was different 85 onward and the, oil dipstick changed 83 onward 

- City
- Dexter
- State
- MI
Test plug for diagnostics. Wires run to splices in the harness that were all sketchy when I thinned my wiring out with the HEI install IIRC.I took the day off yesterday, so no work accomplished.
I did notice this, driver side fender behind the horn, the "diagnostic" connector:
Only "3" pins:
View attachment 99579
View attachment 99580
Three wires:
View attachment 99581
Just assuming at this point, but:
1) Pink - SolVac circuit
2) Red - choke circuit
3) Green - Not sure, this wire also shows up at the 'idle Speed Controller", so maybe just a test port to see if it is getting power?
- City
- Biloxi
- State
- MS
Test plug for diagnostics. Wires run to splices in the harness that were all sketchy when I thinned my wiring out with the HEI install IIRC.
Yep. I have seen corrosion on these pins before, around Post #238:
Spankrjs 1985 Spring Special CJ-7
Finally have my tapped holes and hardware, time to dry fit the cover to the cylinder head. Installed the rear most bolt: And the front hole will not line up: Passenger side front hole is no bueno: And driver side front hole is off, too, but no picture. In the past, I have had to...
www.cj-8.com
The good thing, this '82 does not have the "full feedback" system, so only three "splice" wires in the harness.
I am going to leave this wiring in place, but it will not be used. A Sol-Vac could be added back on later, if desired.
- City
- Biloxi
- State
- MS
Worked about an hour on this one last night before Monday night football.
Reinstalled the headlight harness into the grill. I noticed this when I took it out, waited until now to fix it:
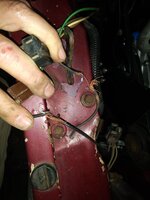
Both headlight plug ground wires had some serious issues to say the least!!!!! The rest of this part of the harness was good, so easy fix here.
The wiring from the Ignition control module into the main harness, and all the way to the distributor was intact/unmolested/undamaged. The only other wiring repair needed:
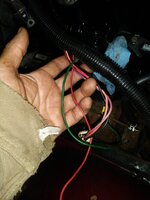
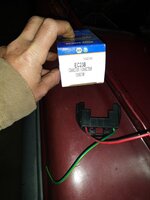
I ordered a new coil connector from NAPA, should be here today. The PO cut the OEM connector off when they installed the HEI distributor. Realistically, you could just splice on two spade terminals, install on coil. I did this for years in my younger days on my '78 CJ-7's with no issue. But, a new connector is less then $10, and looks much better.........
The OEM wiring (choke, Sol-Vac,PCV solenoid Control Vacuum Solenoid) that runs over the intake/exhaust manifolds was OK, the wire tubing was not LOL. This part of the harness was originally suspended from the top of the valve cover by a little metal tab/bracket to keep it off the hot manifolds. Over time, they go missing, or the little plastic wire loom holder falls out of the bracket, and you get melted wires:
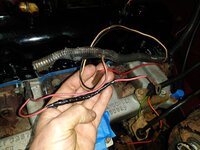
Since I am not using the Sol-Vac orPCV solenoid Control Vacuum Solenoid, I will just loosely wrap those wires up and tie them on to the main harness for future use, if desired. The black tape on the pink Sol-Vac wiring was from me. There is a "diode" on this part of the wire, covered up with the original/deteriorating OEM fabric wire wrap stuff. I covered it all up with black vinyl tape for protection.
The Sol-Vac is useful IF you keep the OEM carburetor and add AC. The Sol-Vac will kick the idle up a hair to compensate for the load brought on by the AC compressor. You could also "hot wire" the Sol-Vac to a toggle switch, use it to manually increase RPM's when winching/jump starting/etc.
Still need to investigate the alternator wiring, but that will be it on the under hood wiring.
I am also going to make myself replace all the under hood vacuum/fuel vapor lines before proceeding with the coolant system/distributor install. I know if I get it running first I will not want to mess with the more fiddly/PIA stuff.
That's it for now!!
Reinstalled the headlight harness into the grill. I noticed this when I took it out, waited until now to fix it:
Both headlight plug ground wires had some serious issues to say the least!!!!! The rest of this part of the harness was good, so easy fix here.
The wiring from the Ignition control module into the main harness, and all the way to the distributor was intact/unmolested/undamaged. The only other wiring repair needed:
I ordered a new coil connector from NAPA, should be here today. The PO cut the OEM connector off when they installed the HEI distributor. Realistically, you could just splice on two spade terminals, install on coil. I did this for years in my younger days on my '78 CJ-7's with no issue. But, a new connector is less then $10, and looks much better.........
The OEM wiring (choke, Sol-Vac,
Since I am not using the Sol-Vac or
The Sol-Vac is useful IF you keep the OEM carburetor and add AC. The Sol-Vac will kick the idle up a hair to compensate for the load brought on by the AC compressor. You could also "hot wire" the Sol-Vac to a toggle switch, use it to manually increase RPM's when winching/jump starting/etc.
Still need to investigate the alternator wiring, but that will be it on the under hood wiring.
I am also going to make myself replace all the under hood vacuum/fuel vapor lines before proceeding with the coolant system/distributor install. I know if I get it running first I will not want to mess with the more fiddly/PIA stuff.
That's it for now!!
Last edited:
- City
- Biloxi
- State
- MS
I had to brush up on my pre-'83 under hood wiring. In the above post I mislabeled the "Thermo Electric Switch" wiring (black and tan two wire connector" as the "PCV Solenoid" which does not exist in this 1982 model.
The little bit of emissions wiring that the pre-'83 non-CA models have runs through the same loom as the regular under hood wiring.
Basically, this vehicle has the following:
1) Idle speed control box (passenger fender)
2) Diagnostic port (driver fender)
3) SolVac unit on the front of the carburetor
4) Thermal Electric switch in air cleaner (different than '83 and up)
5) Single Control Vacuum Switch on the valve cover ('83 and up have three, one for SolVac and two for Pulse Air, pre '83 has smog pump)
I don't consider the manifold heater an emissions component, since it operates independent of any computers (it is in it's own little loop with it's own Relay and Coolant Temperature Switch).
Anyway, for now I bundled the unused emissions wiring to the main loom:
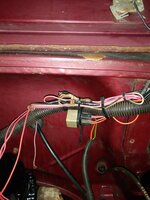
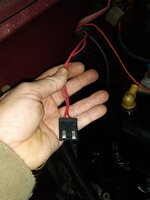
This is the 'Control Vacuum Switch" connector: (I'm not used to pre '83's, the '83's and up use a bigger/different/more wires plug)
The new coil connector:
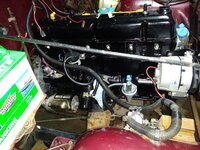
And finished up all the wiring; (except battery cables, plug wires, plugging in the distributor)
Going to knock out the vacuum lines next. Again, I will be "stream lining" here since I am not using any of the OEM emissions controls. Just the basic evaporation canister, vacuum advance, and PCV system.
That's it for now!!
The little bit of emissions wiring that the pre-'83 non-CA models have runs through the same loom as the regular under hood wiring.
Basically, this vehicle has the following:
1) Idle speed control box (passenger fender)
2) Diagnostic port (driver fender)
3) SolVac unit on the front of the carburetor
4) Thermal Electric switch in air cleaner (different than '83 and up)
5) Single Control Vacuum Switch on the valve cover ('83 and up have three, one for SolVac and two for Pulse Air, pre '83 has smog pump)
I don't consider the manifold heater an emissions component, since it operates independent of any computers (it is in it's own little loop with it's own Relay and Coolant Temperature Switch).
Anyway, for now I bundled the unused emissions wiring to the main loom:
This is the 'Control Vacuum Switch" connector: (I'm not used to pre '83's, the '83's and up use a bigger/different/more wires plug)
The new coil connector:
And finished up all the wiring; (except battery cables, plug wires, plugging in the distributor)
Going to knock out the vacuum lines next. Again, I will be "stream lining" here since I am not using any of the OEM emissions controls. Just the basic evaporation canister, vacuum advance, and PCV system.
That's it for now!!
- City
- Biloxi
- State
- MS
Try to "piddle" even just a little every night when i get home from work.
Installed the radiator, mainly to get it out of my way.
Installed the OEM distributor, rotor pointing dead center of #1, matches TDC on crank:
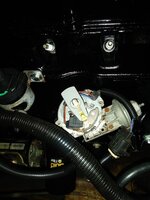
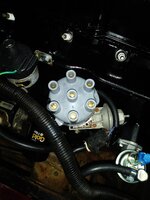
Still need to do the following before start up:
1)Radiator/heater hoses/fill with coolant (check for leaks)
2) PCV hoses and vacuum lines
3)Spark Plug wires
4) Installcarburetor and under hood fuel lines
5) Install new battery/starter cables
6) Drop fuel tank for quick inspection/fuel line swap (PO just dropped/installed new 15 gallon tank, just want to verify a few things)
Depending on how motivated I get this weekend, I should have it running soon

Installed the radiator, mainly to get it out of my way.
Installed the OEM distributor, rotor pointing dead center of #1, matches TDC on crank:
Still need to do the following before start up:
1)
2) PCV hoses and vacuum lines
3)
4) Install
5) Install new battery/starter cables
6) Drop fuel tank for quick inspection/fuel line swap (PO just dropped/installed new 15 gallon tank, just want to verify a few things)
Depending on how motivated I get this weekend, I should have it running soon
Last edited:
- City
- Biloxi
- State
- MS
Chipping away......................
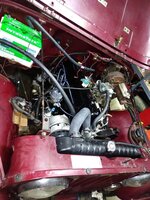
Spark Plug wires installed
Installed radiator hoses
Heater hoses In Progress
Carburetor installed
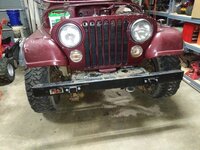
And just for @bigwalton , removed the "hand stickers" from the mirrors/"I'd Rather Be Topless" from the windshield:
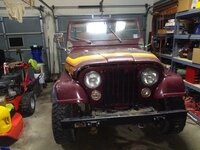
I don't think too many peep's want to see me topless!!!!!!
That's it for now
Spark Plug wires installed
Installed radiator hoses
Heater hoses In Progress
Carburetor installed
And just for @bigwalton , removed the "hand stickers" from the mirrors/"I'd Rather Be Topless" from the windshield:
I don't think too many peep's want to see me topless!!!!!!
That's it for now
- City
- Biloxi
- State
- MS
Plugging away.
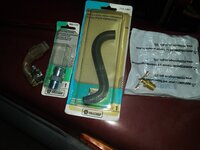
A few needed supplies. Radiator drain cock, intake manifold coolant hose fitting, piece of hose for carb bowl vent fitting.
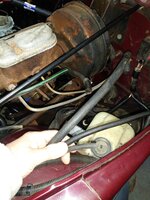
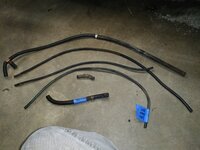
Some hoses that need changing: evap canister, brake booster, distributor vacuum advance.
Cleaned off the original evap canister, going to hook it up and see if it still works.
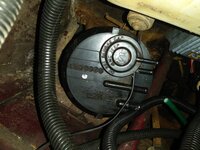
The other benefit of cleaning stuff, you can actually read/see how to put it back together!!
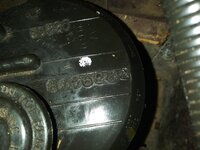
Old hoses on floor:
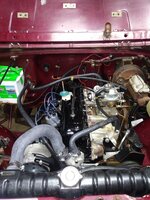
Heater hoses installed, all of the big evap hoses installed, need to make a run to the parts store for the smaller ID vacuum hose:
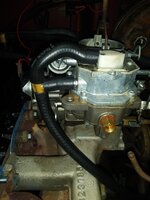
Need to flip the top hose around. The installed made in China carburetor's upper bowl vent fitting is not in the same place as an OEM Carter.
Dumped a gallon of distilled water in the radiator, going to let it sit over night to check for leaks before dumping antifreeze in it:
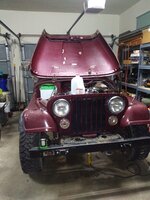
Getting closer!!!!
A few vacuum lines, fuel lines, and battery cables and it will be ready to fire up.
But, I am going to drop gas tank before initial start up. That's it for now.
A few needed supplies. Radiator drain cock, intake manifold coolant hose fitting, piece of hose for carb bowl vent fitting.
Some hoses that need changing: evap canister, brake booster, distributor vacuum advance.
Cleaned off the original evap canister, going to hook it up and see if it still works.
The other benefit of cleaning stuff, you can actually read/see how to put it back together!!
Old hoses on floor:
Heater hoses installed, all of the big evap hoses installed, need to make a run to the parts store for the smaller ID vacuum hose:
Need to flip the top hose around. The installed made in China carburetor's upper bowl vent fitting is not in the same place as an OEM Carter.
Dumped a gallon of distilled water in the radiator, going to let it sit over night to check for leaks before dumping antifreeze in it:
Getting closer!!!!
A few vacuum lines, fuel lines, and battery cables and it will be ready to fire up.
But, I am going to drop gas tank before initial start up. That's it for now.
Last edited:
- City
- Biloxi
- State
- MS
Made some great progress this weekend.
Battery cables installed and routed. Also installed the factory jack and lug wrench. Cleaned up the ground spots and the solenoid threads.
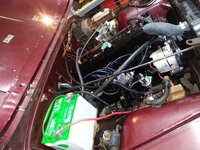
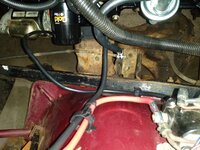
I cleaned up the three under hood metal fuel lines for reuse.
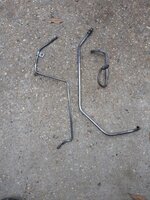
The return line and long supply line were clean on the inside. The line after the fuel filter that goes into the carb was full of crap:
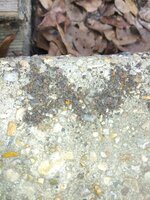
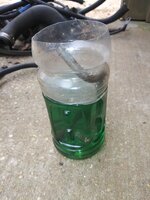
I soaked the line in Evaporust to clean it out. Obviously important that this line is clean because there is no filter between it and the carb.
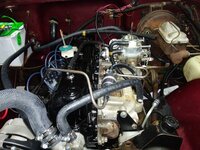
Installed the three metal fuel lines, fuel filter, and all the under hood rubber fuel lines.
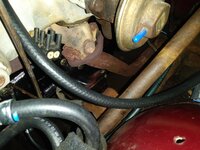
Hard to see, but new rubber return fuel line, too.
The previous owner installed a new fuel tank, more on this later. The original chassis mounted metal fuel supply and return lines look OK from the outside, but no real way to know about the inside. So, I installed this clear plastic filter before the mechanical fuel pump to catch any crap before it gets to the fuel pump.
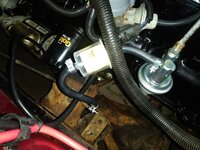
Ran all new evap canister rubber lines, too:
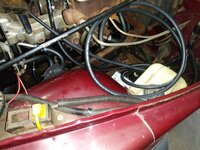
Only lacking the following three items under the hood:
1) coolant recovery tank
2) evap canister purge signal source
3) throttle return spring EGR bracket
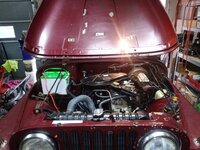
Battery cables installed and routed. Also installed the factory jack and lug wrench. Cleaned up the ground spots and the solenoid threads.
I cleaned up the three under hood metal fuel lines for reuse.
The return line and long supply line were clean on the inside. The line after the fuel filter that goes into the carb was full of crap:
I soaked the line in Evaporust to clean it out. Obviously important that this line is clean because there is no filter between it and the carb.
Installed the three metal fuel lines, fuel filter, and all the under hood rubber fuel lines.
Hard to see, but new rubber return fuel line, too.
The previous owner installed a new fuel tank, more on this later. The original chassis mounted metal fuel supply and return lines look OK from the outside, but no real way to know about the inside. So, I installed this clear plastic filter before the mechanical fuel pump to catch any crap before it gets to the fuel pump.
Ran all new evap canister rubber lines, too:
Only lacking the following three items under the hood:
1) coolant recovery tank
2) evap canister purge signal source
3) throttle return spring EGR bracket
- City
- Biloxi
- State
- MS
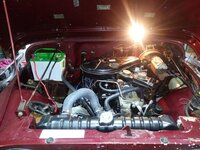
One more under hood shot, finished underneath here for now:
No rest for the weary, decided to drop the gas tank.
This Jeep has no lift and 31" tires, easier access if it is on jack stands.
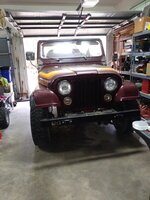
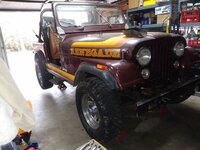
I decided to drop the gas tank out of an abundance of caution. Some other areas of previous work were not up to "RedneckRay" standards, so what the hell.
Glad I did:
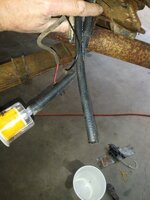
Liquid and rollover check valve not hooked up. Tape over the evap canister line. Fuel filter on the end of one vapor line. Sending unit wires not hooked up. Just a mess.
And of course, I decided to try and drop the tank without removing the fuel first. All 15 gallons. Would have worked, except the hitch would not allow the tank to drop straight down between it and the rear axle. Got the tank down in the end, spilled about a half gallon of gas on the floor. So, hosed the garage floor off, scrubbed it with Simple Green, and let it air out.
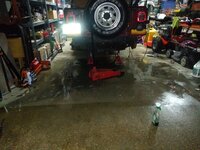
Main reason I prefer to mess with gas stuff OUTSIDE.
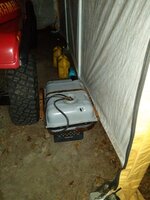
Put the fuel and empty tank in the tent car port, called it a night.
No rest for the weary, decided to drop the gas tank.
This Jeep has no lift and 31" tires, easier access if it is on jack stands.
I decided to drop the gas tank out of an abundance of caution. Some other areas of previous work were not up to "RedneckRay" standards, so what the hell.
Glad I did:
Liquid and rollover check valve not hooked up. Tape over the evap canister line. Fuel filter on the end of one vapor line. Sending unit wires not hooked up. Just a mess.
And of course, I decided to try and drop the tank without removing the fuel first. All 15 gallons. Would have worked, except the hitch would not allow the tank to drop straight down between it and the rear axle. Got the tank down in the end, spilled about a half gallon of gas on the floor. So, hosed the garage floor off, scrubbed it with Simple Green, and let it air out.
Main reason I prefer to mess with gas stuff OUTSIDE.
Put the fuel and empty tank in the tent car port, called it a night.