• Notice for iPhone users: DO NOT use the image size reduction option when uploading photos to the forum. This causes portrait images to post as landscape. We have added a warning to the image insert pop-up as well.

Gazzo's Down-under CJ thread

It's an "eye of the beholder" thing. It is really growing on me. Outside in the sun it's much better (really).
 
Happy J4 you guys.
The cab is complete except for hood lining. Still working on a plan for that. Will involve a "plug" for the roo shooting spotlight hole which will prolly be a centre mount roof antenna. Next up is all the stuff out back, wiring, tail lights and wotnot. Then the bed and canopy. Can't wait. This summer I'll be going bush camping in this beasty with my kid.
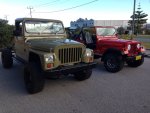
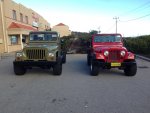
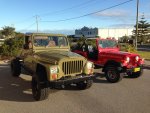
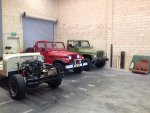
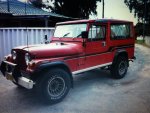
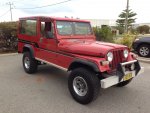
Anyways got him outside next to his "pretty" cousin for a shootImageUploadedByTapatalk1436053221.652864.jpgImageUploadedByTapatalk1436053237.051848.jpgImageUploadedByTapatalk1436053252.785063.jpgImageUploadedByTapatalk1436053270.818890.jpgImageUploadedByTapatalk1436053289.569170.jpg
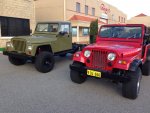
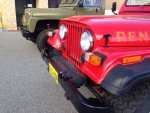
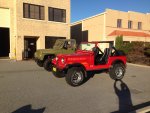
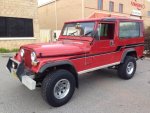
Then the sun popped outImageUploadedByTapatalk1436053319.818423.jpgImageUploadedByTapatalk1436053337.069366.jpg
 
Happy J4 you guys.
The cab is complete except for hood lining. Still working on a plan for that. Will involve a "plug" for the roo shooting spotlight hole which will prolly be a centre mount roof antenna. Next up is all the stuff out back, wiring, tail lights and wotnot. Then the bed and canopy. Can't wait. This summer I'll be going bush camping in this beasty with my kid.
Anyways got him outside next to his "pretty" cousin for a shootView attachment 49192View attachment 49193View attachment 49194View attachment 49195View attachment 49196
Then the sun popped outView attachment 49197View attachment 49198

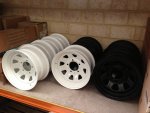
We have to figure out a way to get you as set of the white waggies or that Red 7... I love the Jeep, and it would be so enhanced with some white pinstriped (or chromed)wagon wheels....

Perhaps 4 carry-ons when I come over ;) I am pretty strong and can make do with one out fit and 4 rims/tires!

cb
 
You mean like these cb?ImageUploadedByTapatalk1436090077.177388.jpg
One step ahead of you. Already have the aftermarket flares which look real nice. Have to save up for 32/11.5/15 tyres which will be the hard part. Then just pushing the button.
 
The Overlander is back in town for things I didn't get to last time. There is a spot of rust bubbling through on the left fender which needs URGENT attention and as I've been applying phosphoric in places that all needs tidying up.
The dash need a go through, most lights aren't working and I want to put in the correct oil gauge
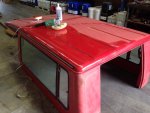
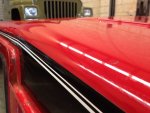
Also got the roof down and I'm cleaning that up to put on for a while. It's in pretty good shape apart from two rust bubbles. ImageUploadedByTapatalk1436572244.398275.jpgImageUploadedByTapatalk1436572293.680761.jpg
The drip rails are in good shape with only flaky paint. I'll give this all a mini resto for now ahead of a full tub off planned for winter after next. It will take me two years to gather my bits given the value of our Aussie dollar at the moment ImageUploadedByTapatalk1436572602.131496.jpg

The other 8 is coming along, should see some good progress once he works out how and where to run the harness and mount boxes of trickery
 
How high are the ceilings in that place ?? :drool:

And do you have to pay to heat/cool it ??? :)
 
How high are the ceilings in that place ?? :drool:

And do you have to pay to heat/cool it ??? :)
I stand 6 metre lengths of pipe against the wall and the don't reach the roof. Our summer highs are 35-45C but we are a few hundred metres from the sea so the daily "Fremantle Docker" blows in every day thru summer so we get cooled off quick. Winter like today ranges between 15-24C during the day and 3-14 at night so heating and cooling is rarely something we think about.

Love that top. Want to sell? j/k :rotfl:
No mate sorry it's a keeper. You know the true rarity of these vehicles in Oz has only come on in the last couple of years. I haven't seen an Overlander complete like mine since I bought it for $7k 3 years ago. Prior to that they popped up for sale maybe once very 6 months or so. The last one was a gold one similar to those discussed on this forum a few months back. My friend who bought my last OL and already had one of his own is building the in my pictures here. He passed up the gold one and it got snapped up by another dude somewhere. They were asking 8.5k. Would have loved seeing it in person.


ImageUploadedByTapatalk1436598656.760950.jpg
 
The long jeep is back in town for some TLC. Full tub off resto is not on the radar at this point so I need to get stuff done to preserve what I have. Last time I brought it down to do this all I did was dd it around town all the time cause it's so sweet to drive. All I did was swap the 4.10 axles out of the renegade into it and all that achieved was stopping me get up sand dunes like I could with the 3:53s that were in it :brickwall:
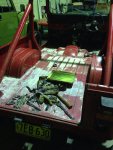
The one hour teardown saw seats out, bases, belts, substitute tailgate and spare carrier along with 11/16 roll bar screws. The remainder are tomorrow's job. ImageUploadedByTapatalk1437145290.833553.jpg
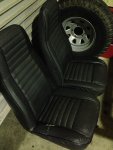
Took the lame covers off the seats, forgot what I had under thereImageUploadedByTapatalk1437145340.366687.jpg drivers seat wear which is a shame. Does anyone know where I can get black denim on a roll?
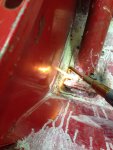
 
Today I got digging into some se sealer in spots and found nothing nasty. That was after I got busy on my way to what might be a world record of 100% roll bar Torx bolts removed legitimately and only one of the bracket mounting screws in the rear sheeted off. That drilled out super easy anyway. Very pleased all in all. I got the blue tongued spanner onto the tight ones and they freed right upImageUploadedByTapatalk1437203820.319105.jpg the heat running down the shaft from the head does the trick nicely. Also worked on all the door and screen frame hinges same way.
Hey a neat little trick I worked out for that one screw behind the front upright where you can't get a tool in if anyone's innerested. Get the type of Torx/socket arrangement where you can take out the bit by loosening the grub screw. Then you can get two little ringies onto the bit opposite one another effectively giving you a tee handle.
https://vimeo.com/133823772
Of course you'll notice I've used soft focus like they do on Sixty Minutes so my hands look nice :tea:
 
Today I got digging into some se sealer in spots and found nothing nasty. That was after I got busy on my way to what might be a world record of 100% roll bar Torx bolts removed legitimately and only one of the bracket mounting screws in the rear sheeted off. That drilled out super easy anyway. Very pleased all in all. I got the blue tongued spanner onto the tight ones and they freed right upView attachment 49388 the heat running down the shaft from the head does the trick nicely. Also worked on all the door and screen frame hinges same way.
Hey a neat little trick I worked out for that one screw behind the front upright where you can't get a tool in if anyone's innerested. Get the type of Torx/socket arrangement where you can take out the bit by loosening the grub screw. Then you can get two little ringies onto the bit opposite one another effectively giving you a tee handle.
https://vimeo.com/133823772
Of course you'll notice I've used soft focus like they do on Sixty Minutes so my hands look nice :tea:

Awesome idea! :thumbsup: :wave:
 
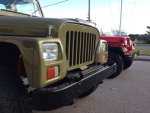
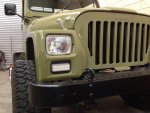
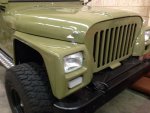
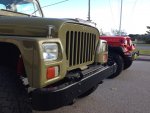
Whilst all you guys are prepping for SB the rest of us are still plugging away in the mouse wheel. Today I may have solved my front indicator problems. Made an escutcheon from 6mm polypropylene to suit these white/orange LEDs from ARB. What do you think? It's one of those "grow on you" things maybe. Like that they are actually not orange to look at. ImageUploadedByTapatalk1437563026.687559.jpgImageUploadedByTapatalk1437563075.413287.jpg versus ImageUploadedByTapatalk1437563100.411702.jpg

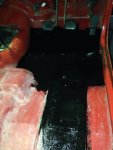
On my beach rig I have wire buff the whole floor, removed old mate's galvo sheet floor patch and stitched in the keyparts one and painted the whole lot with red oxide paint. This is por15 over the pan and the seat support patch plate. The floor was a bit rusted out through there. . ImageUploadedByTapatalk1437563214.394966.jpg
I was tempted to blast the floor and do it 80% right I've decided agin that in favour of preserving it all for another two years and then doing it right.
I'll have a pic of the painted floor tomorrow. Not so bad.
 
Not bad eh.
Today I mucked around with jeeps when I should have been working :rolleyes: couldn't help meself. Just had to reacquaint myself with the tank topImageUploadedByTapatalk1437636722.654128.jpgImageUploadedByTapatalk1437636758.702980.jpg thanks in no small part for the enthusiasm you guys have for the full metal jacket I have a new appreciation of the full metal jacket.
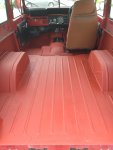
Here's the floor, quite acceptable for a stop-gap measure. ImageUploadedByTapatalk1437636940.318642.jpg
 
Is that floor stock paint or some kind of liner ?

Sent from my SM-N910P
 
Plain old red oxide primer. I didn't want to put anything on there that was going to be difficult to get off in a couple years time. Tempted to spray some Sebring Red over it which is left over from my CJ7. May as well since it's already been in the can for two years and probably won't last much longer.
 
Last edited:
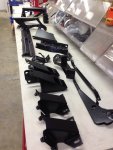
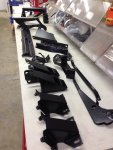
Got a bunch of interior parts back from the powder coasters today. Man my drivers side (right) right bracket was well rotted which I hadn't even noticed. Guess I'll be borrowing one from one of the trucks when I rebuild this Overlander in two seasons time. Also found I have some work to do in the rear of the seats, all the steelwork is rusted out which is a massive disappointment.
ImageUploadedByTapatalk1438175978.566846.jpg
 

Attachments

  • ImageUploadedByTapatalk1438168331.983196.jpg
    ImageUploadedByTapatalk1438168331.983196.jpg
    264.7 KB · Views: 120
Last edited:
Back
Top