• Notice for iPhone users: DO NOT use the image size reduction option when uploading photos to the forum. This causes portrait images to post as landscape. We have added a warning to the image insert pop-up as well.

IAFFCJ 81 Scrambler

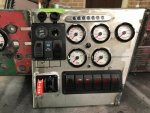
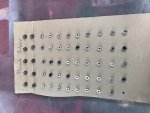
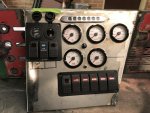
Some more dash work today. Added a switch plate for the ARBs winch also have me two usb chargers and a cigarette lighter plug. Added the dimmer for the speedhut gauges and the button for the fuel guard. I also added a 6 switch panel to use for future upgrades I’ll write the switches to a dummy block so adding things will be supper easy later. I have one more hole to cut for the winch controls which showed up today and I think the dash will be ready to prep for paint.
9C3B894B-41CF-446E-854F-FDBB077425C0.jpg

I am hoping to build the center console soon as well but need the seats first. Well they are coming on Wednesday so things are looking good. If I can get a bunch of parts prepped over the next couple days it looks like the weather might be right to spray some paint on dash parts and armor this weekend. I am trying to get that done so the armor is out of the way for the winter.
 
Nice design Jake. If you need any more console ideas, search for pictures of the one Rubbehook/Kurt had in his Scrambler years ago.
 
I searched that username and didn't get any results John. Anyone able to point me in the direction of some pictures of Kurt's console?
 
I searched that username and didn't get any results John. Anyone able to point me in the direction of some pictures of Kurt's console?

His username is "Rubberhook", he posted pics back in 2002.
I had it bookmarked, unfortunately the pics are no longer there. :(
 
His username is "Rubberhook", he posted pics back in 2002.
I had it bookmarked, unfortunately the pics are no longer there. :(

I think I found where the pictures would have been but as you said they aren't there anymore. Bummer. I think Rubberhook is back maybe he still has some he can share again. Thanks in advance.
 
That is where I got this one from. Guess Ill save that code for the next one oh well thanks. I like it seems like it is going to work well. Not sure about the push buttons rather than a toggle but will give it a shot think i fat fingered my order.

IMG_2212.jpg
 
I searched that username and didn't get any results John. Anyone able to point me in the direction of some pictures of Kurt's console?

Sorry bad typing....dropped the "r", but you figured it out. Too bad the pictures are gone. I know where his Scrambler went, but he took out that console before he sold it.
 
Sorry bad typing....dropped the "r", but you figured it out. Too bad the pictures are gone. I know where his Scrambler went, but he took out that console before he sold it.

NO worries John, hopefully someone has a picture still and can drop it in here. I have a pretty good idea what I want to do and the seats showed up today so once I get them mounted the fabrication can begin. I do need to get my shifter and a cable kit for the atlas, but the basic shape can be started.
 
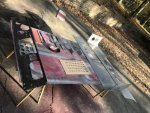
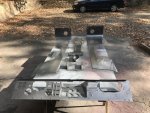
Looking at the weather it looks like it is going to be nice on Friday and warm enough to paint. I spent the day finishing up the body work on the dash and prepping a few other parts so i can get some color on the body armor, the dash, and all the bolts to replace the multi colored ones we used to put the body parts together. Lots of wire wheel time and my hands hurt but should make for easy assembly.
IMG_2213.jpg

UPS also stopped by and dropped off my MasterCraft seats. James is dropping off some parts to try and make the seat mounts like I want them so I am looking to have seats mounted by next week. If I work this right I can probably get the mounts done while waiting for paint to flash on Friday.
IMG_2214.jpg
 
With Mother Nature being her normal fickle self her in Northern Virginia I wanted to take advantage of the 80 degree day sandwiched between the to cold to paint days. I was able to get everything I wanted prepped this week before I when to work on Thursday. Came home this morning and after a cup of coffee talking with the wife the fog had lifted and temps were already in the 70s. So I cleaned a spot in the driveway free of leaves and set everything up for primer.
IMG_2217.jpg
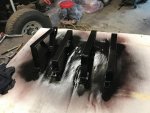
Both sides primed and sanded and the non showing side of everything got color. While it seems like a waste of paint for all these spots you will never see I am trying to keep the rust away as long as possible and keep this as easy as possible to keep cleanish. I also started with the non-visible side as I have been having imperfections show up after I flipped stuff over even after I thought things were dry.
IMG_2218.jpg
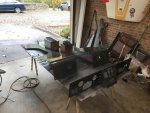
I took a 2 hour brake for lunch and errands while the first coat dried. I was getting ready to flip everything over and an unexpected rain shower showed up so everything was moved into the garage for the visible side paint.
IMG_2221.jpg
This makes everything I think that needs to be gray painted. Ill give everything a day or two to cure and then I can install my armor for good, change out the chrome door hinges and start replacing the crazy colored bolts with actual gray ones. Oh and put the dash together.
 
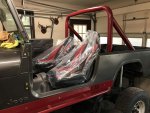
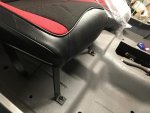
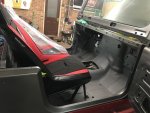
I also had a chance to work with my seats mounts while waiting for paint to flash today. As I have no need for either of my seats to fold forward I wanted to mount the passenger seat with a fixed bracket. So what do you do when your looking for something you call Lupo. This is when he informed me that he didn't think that there was such a thing as a fixed passenger side bracket that they we all flip forward but he had a drivers side one I could try to flip over. I figured with an angle grinder and a welder I could probably make it do what I wanted. Well turns out it is much easier that that, swapping the bracket with each other I bolted them in to the passenger side and everything seems to line up nicely. I bolted my new seat in for a test fit and while i think it needs to be moved forward in the holes it has in the base so it has a little more clearance at the bulkhead it looks like I have a fixed passenger seat now. After sitting in it I think I am most likely going to have to lower both sides the same way that Jbeemer and JeeperDD have but that shouldn't be difficult with both sides being the same. I may try to find another slider and make them both adjustable as well but we will see as I am hoping to mount them directly to a cage eventually.
IMG_2219.jpgIMG_2220.jpg
 
Had a few minutes this morning and took the time to mount up some of the parts I just painted.
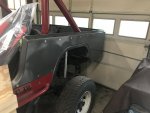
Side armor is on. Have yet to decide if I am going to leave the bolts silver or paint over them when I do a final paint coat in the spring.
9FE3AC27-0B6E-4ED7-9766-CF1ECCF35579.jpg

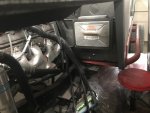
The engine computer is now in its official home for good and I can start running wiring harness.
26B703DF-AC2A-4990-A1EA-FE51D839D42A.jpg

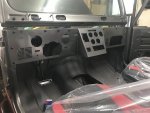
I was going to put the dash together also but saw a couple spots that are thin in paint an being I’ll have to look at it every time I drive it I am going to put another coat of paint on it before it goes together. I am also building a center console so the dash may need adjusting and thus more paint. If everything works out I’ll catch a day that is warm enough to paint next month. Have to wait 60 days per paint if after 48 hours. So that should give me time to build a console and paint it all together. Put it in the jeep anyway to get it off the bench and like how it’s coming out for sure.
4CFBE730-64A4-4FD6-90BD-2627D362F7EF.jpg
 
Had a couple hours that I spent in the garage today. Lots of small things to do and my ADD is making it difficult not to jump around when working on this. Positive note things are getting done.

I had lowered the drivers seat 2ish inches the other day and made the passenger seat match today. I really like where they came out I was going to do sliders on both sides but very possible that I won't need them. Going to keep the option of sliders but solid mount for now.
IMG_2261.jpg

Also took some time to bolt in the hydro boost and see how everything was going to fit. I need to get another nut as I seem to be missing one but other than that it all looks good. Need to finish bolting everything together then fit the hard brake lines.

IMG_2260.jpg
 
Good stuff! I think the slider I put on my driver seat has been used less than a handful of times. :shrug:

Maybe now that Laura is getting excited about driving, that will change though. :smokin:
 
I think the slider I put on my driver seat has been used less than a handful of times.

As I would like to attach them to the cage when it gets built i think I am going to set and forget the seats. Very few folks that would be in the driver seat of this one anyway and pretty sure they will fit if i set the seats for me. :cheers:
 
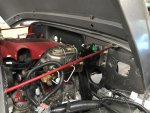
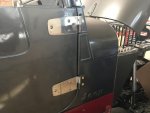
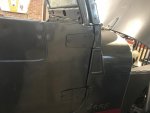
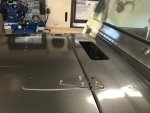
Spent some time taking care of some of the tedious stuff yesterday while waiting for the wife to get home from work. Got the ugly Chrome hinges off and replaced with stock painted ones Also changed out all the bolts of many colors for the ones I had painted body color.
BA67F90A-A3C6-429C-98BA-490F577F606D.jpg7943E1F0-DF14-4D4B-83D8-18B246B9008C.jpgD145ECA0-531D-4DCB-9DD4-F6DF215BFB21.jpgE4813DF6-DAEC-48B1-B25C-E58802DB66D7.jpg
 
Back
Top