
When I got my scrambler it had one flare and I bought three others from another forum member so now they don't match wear wise. If your set are all matching, I Could use them now. Jeepered. I can send you something as consolation? You have sent me some stuff before for the scram that worked out great.

You are using an out of date browser. It may not display this or other websites correctly.
You should upgrade or use an alternative browser.
You should upgrade or use an alternative browser.
It's a wreck
- Thread starter TFDScrambler
- Start date


TFDScrambler
Basic User
- City
- Tulsa
- State
- OK
I forgot that I work today but will post pics of the fender flares tomorrow and if you want them I will get you a shipping quote. I have other parts that I will be getting rid of also. Just stay tuned. I'm not interested in making money on these parts just want to help out other scrambler owners.
Sent from my iPad HD
Sent from my iPad HD
TFDScrambler
Basic User
- City
- Tulsa
- State
- OK
Hit another milestone today. I know have a rolling chassis again.
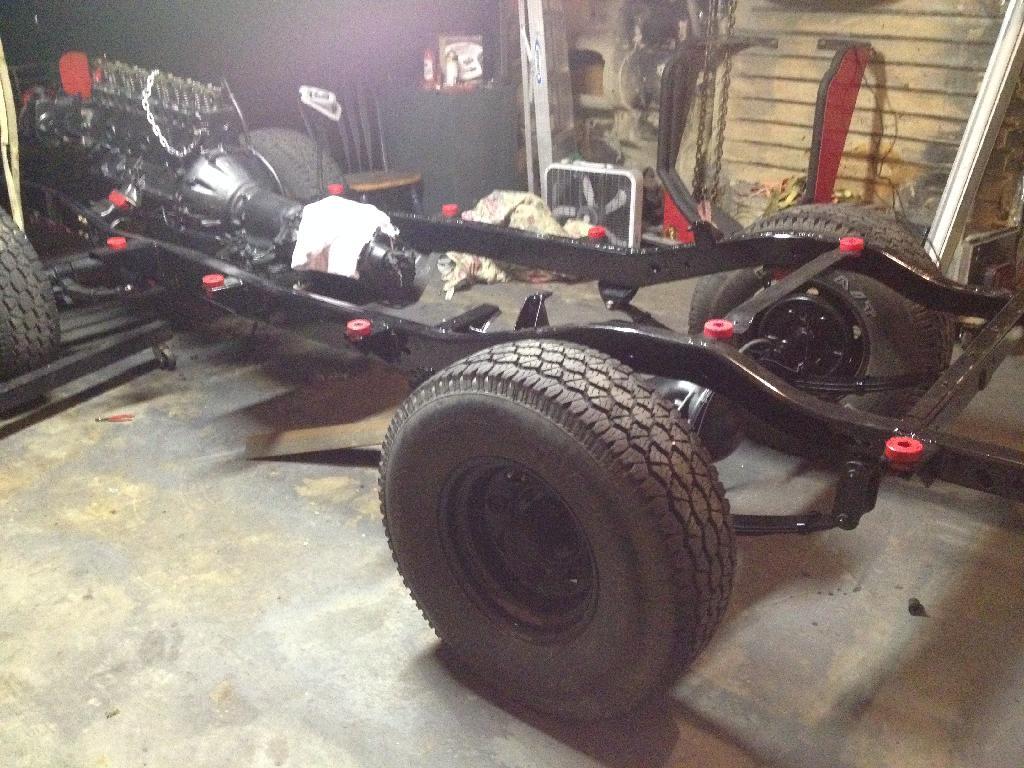
Sent from my iPad HD
Sent from my iPad HD
TFDScrambler
Basic User
- City
- Tulsa
- State
- OK
I picked up the rear axle from the sand blaster and painted it. Will still have to do brakes and drain/clean the rear diff as I am sure there is sand inside but at least it's together again.
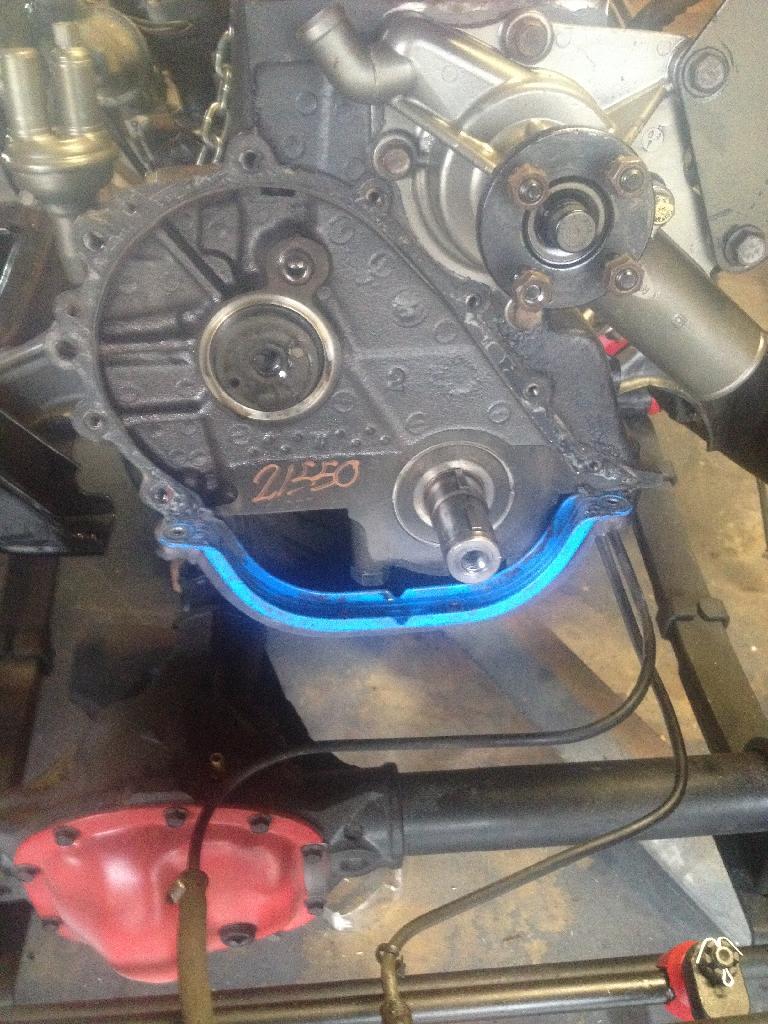
I also tackled the timing chain, and I am glad I did.
Look at this slack
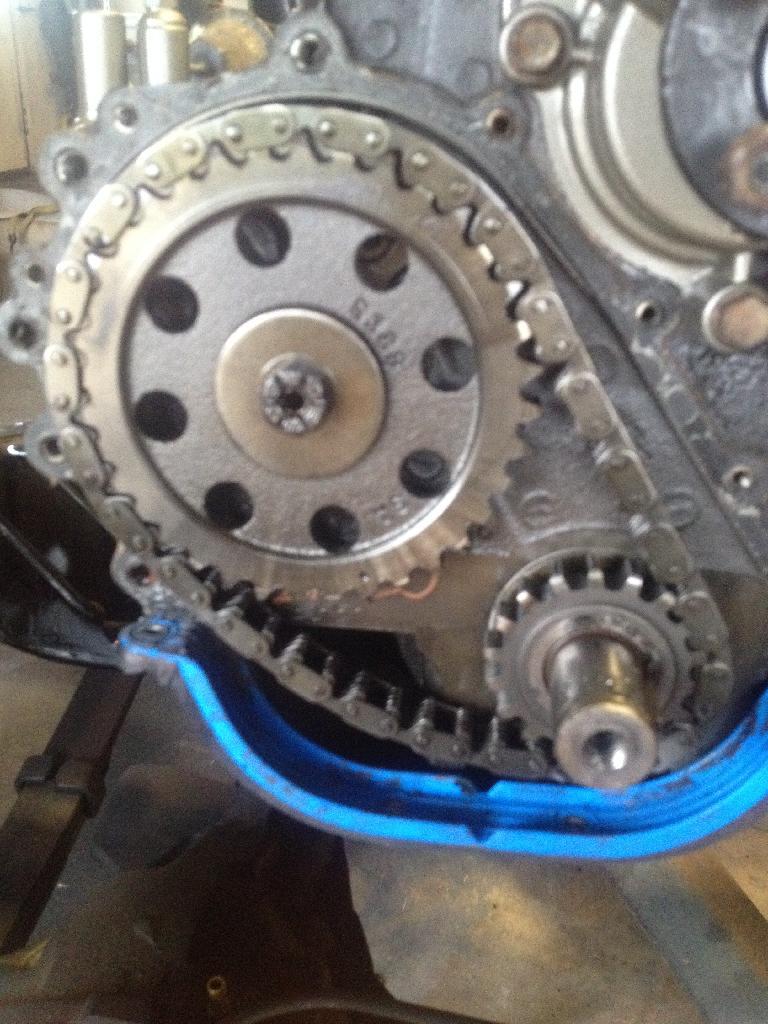
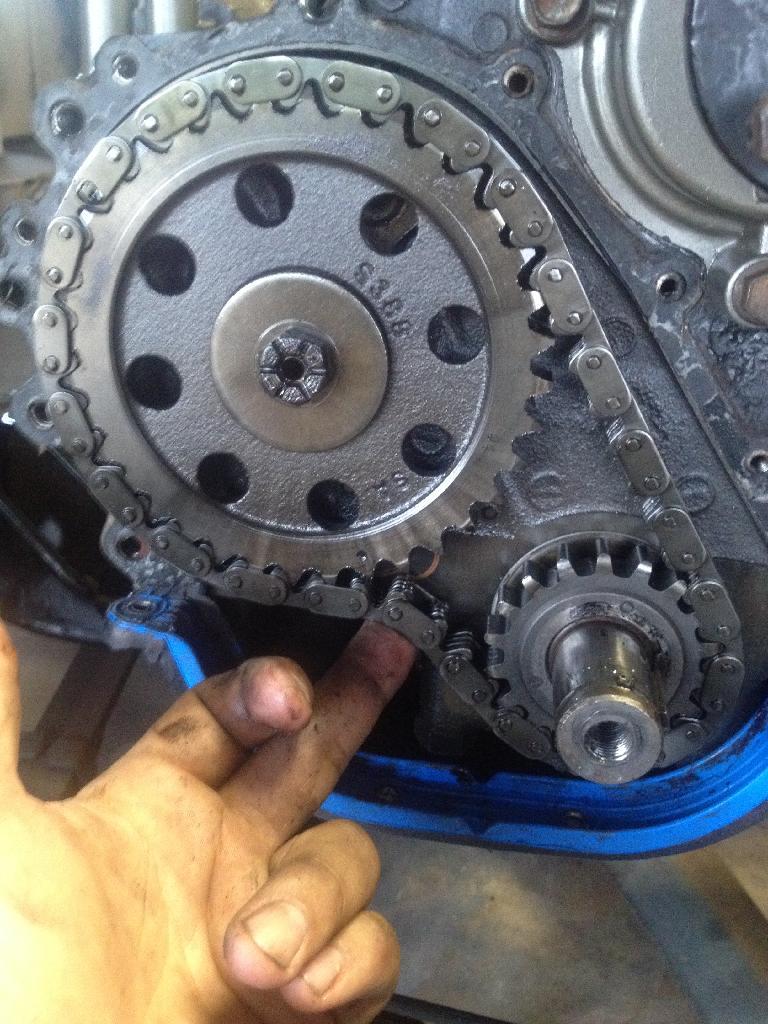
This thing was probably not far from jumping a gear.
So here are some of the highlights of the install after removing fan/clutch, alternator, harmonic balancer, and timing chain cover.
Line up timing dots so that they are in a straight line with bolts or closest point to each other.
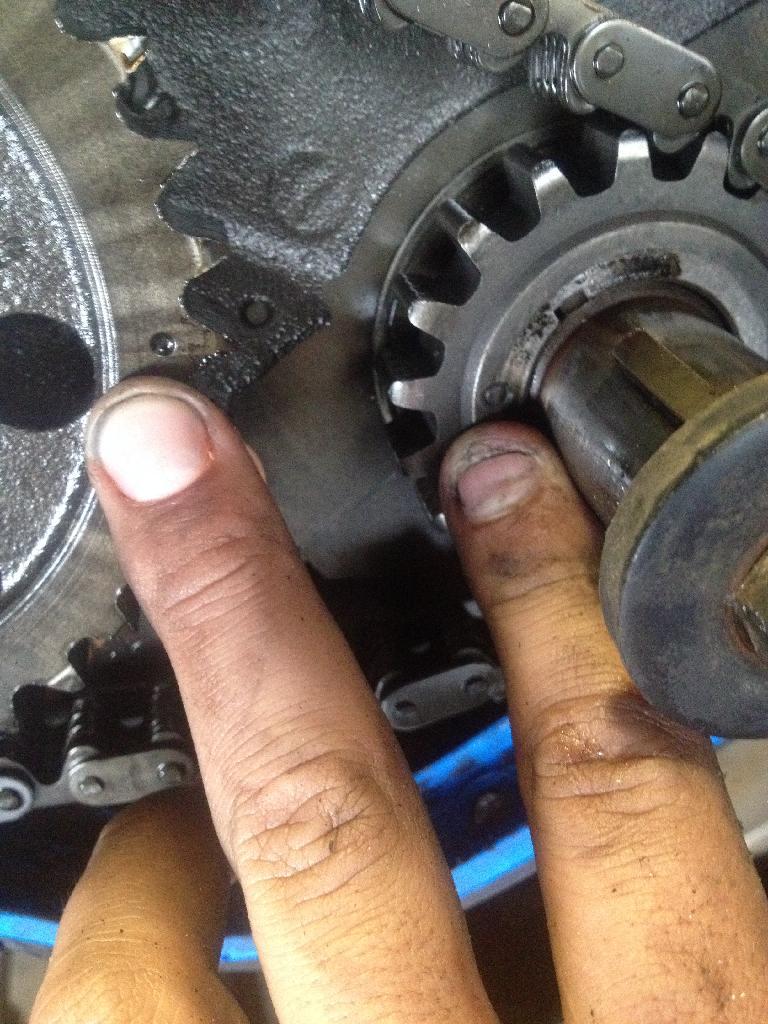
Next pull assembly off.
Sent from my iPad HD
I also tackled the timing chain, and I am glad I did.
Look at this slack
This thing was probably not far from jumping a gear.
So here are some of the highlights of the install after removing fan/clutch, alternator, harmonic balancer, and timing chain cover.
Line up timing dots so that they are in a straight line with bolts or closest point to each other.
Next pull assembly off.
Sent from my iPad HD
TFDScrambler
Basic User
- City
- Tulsa
- State
- OK
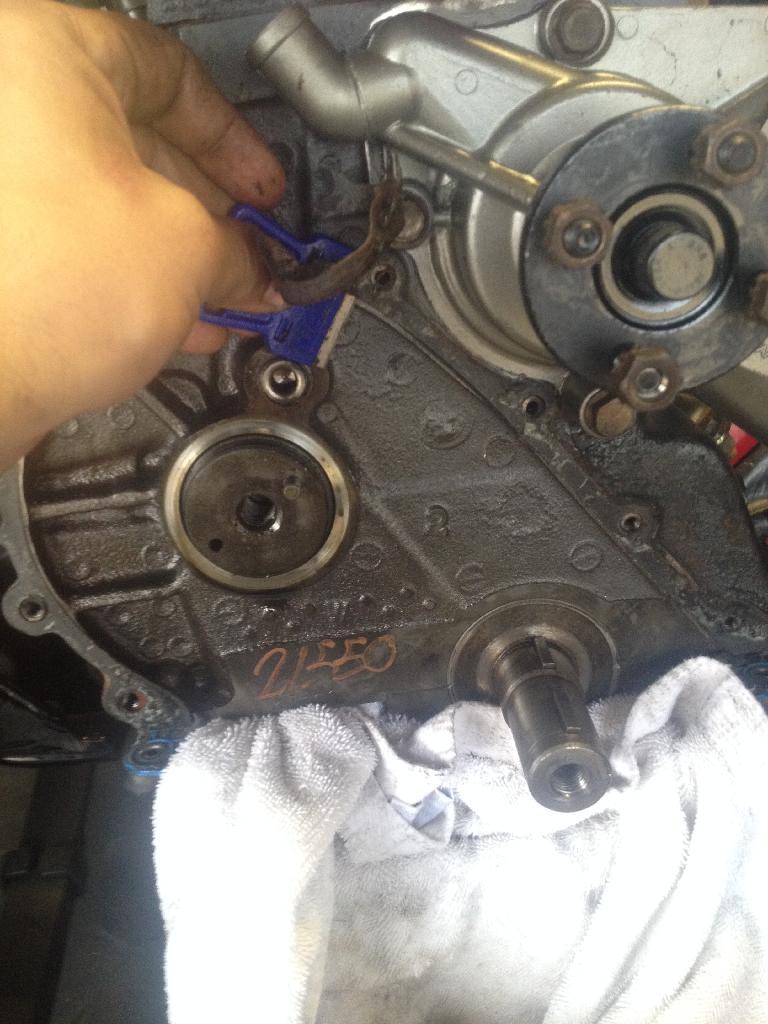
Then clean up gasket sealing surface. I used a razor blade followed by a very ginger cleaning with roloc on pneumatic die grinder with a towel blocking the oil pan.
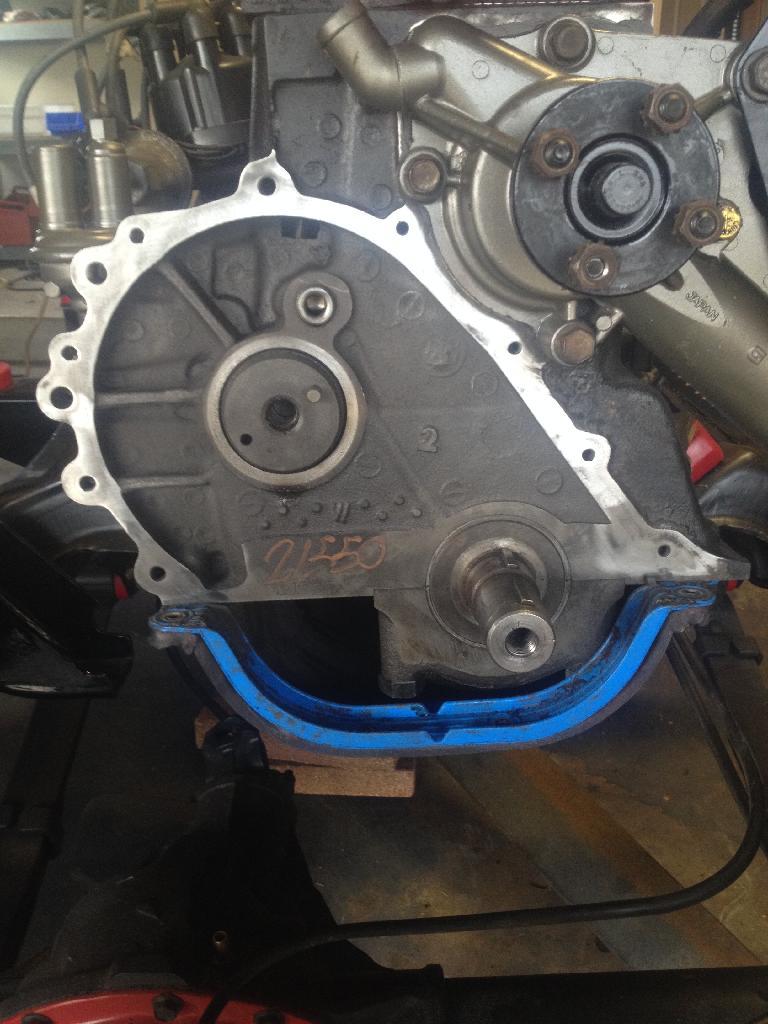
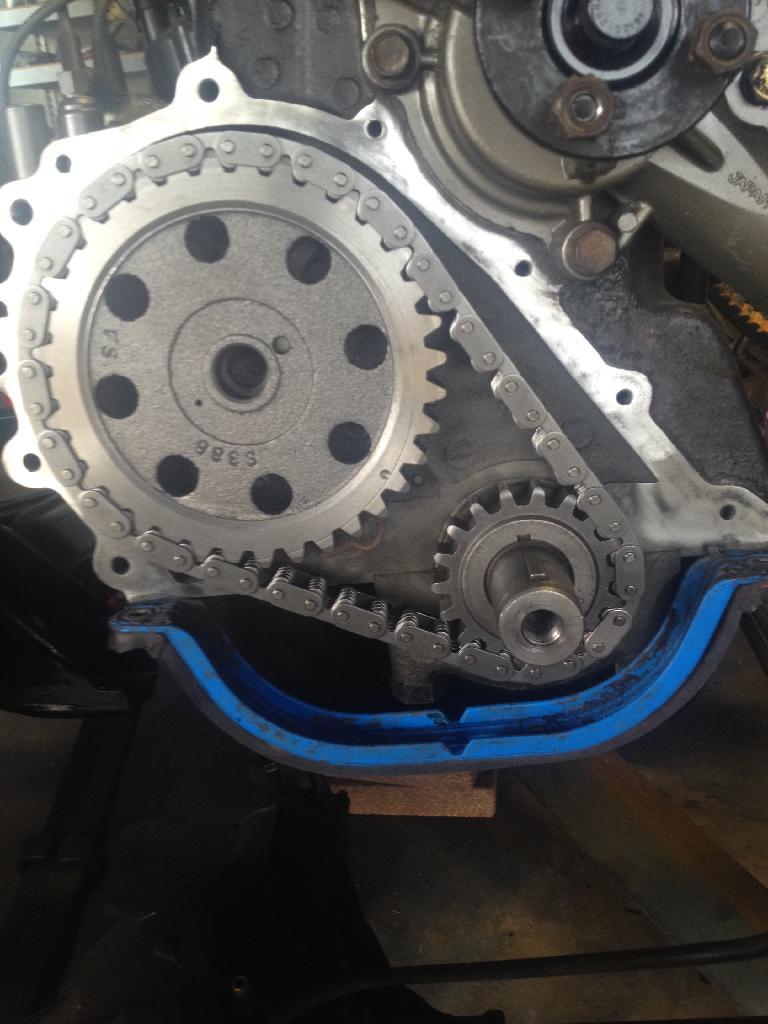
Next I installed assembly( both sprockets and chain) which took a bit of manipulation to get lined up. Both marks should be in the same place they were on old assembly as the crank has a woodruff key and the cam has an alignment pin.
Sent from my iPad HD
Next I installed assembly( both sprockets and chain) which took a bit of manipulation to get lined up. Both marks should be in the same place they were on old assembly as the crank has a woodruff key and the cam has an alignment pin.
Sent from my iPad HD
TFDScrambler
Basic User
- City
- Tulsa
- State
- OK
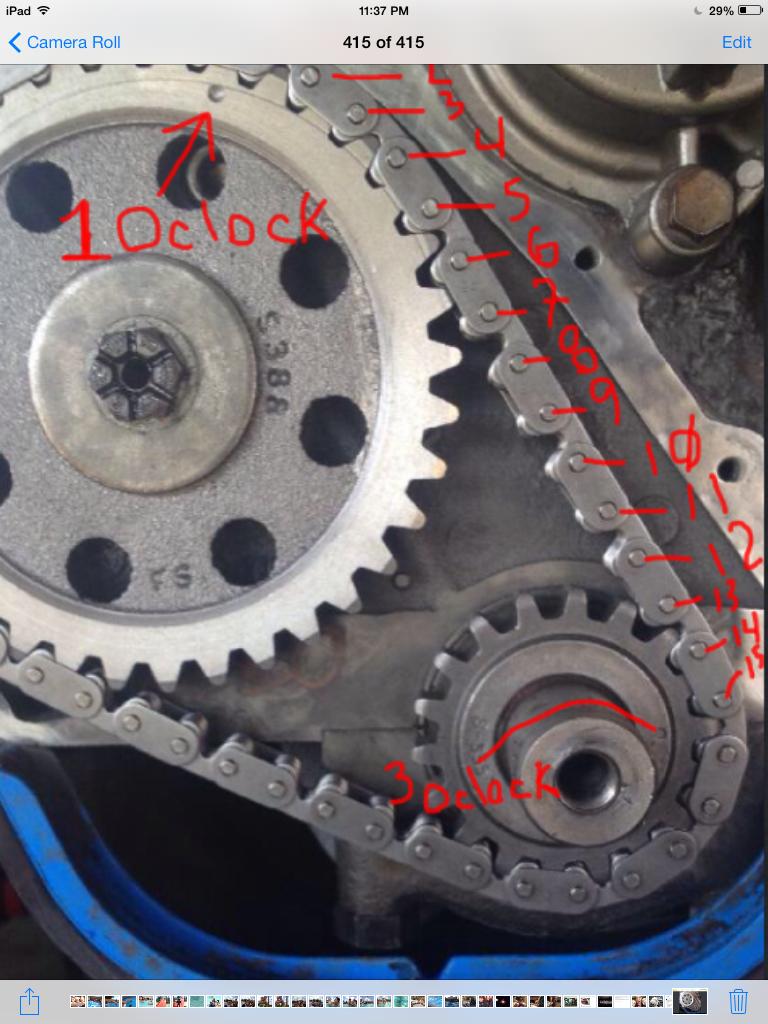
To check that it is set to correct tooth you out the cam sprocket mark at 1 o'clock and the crank should line up around three o'clock and you count the pins between the two and there should be 15. I had 15 pins luckily.
Sent from my iPad HD
Sent from my iPad HD
TFDScrambler
Basic User
- City
- Tulsa
- State
- OK
Next I removed the seal from the timing cover with a screw driver.
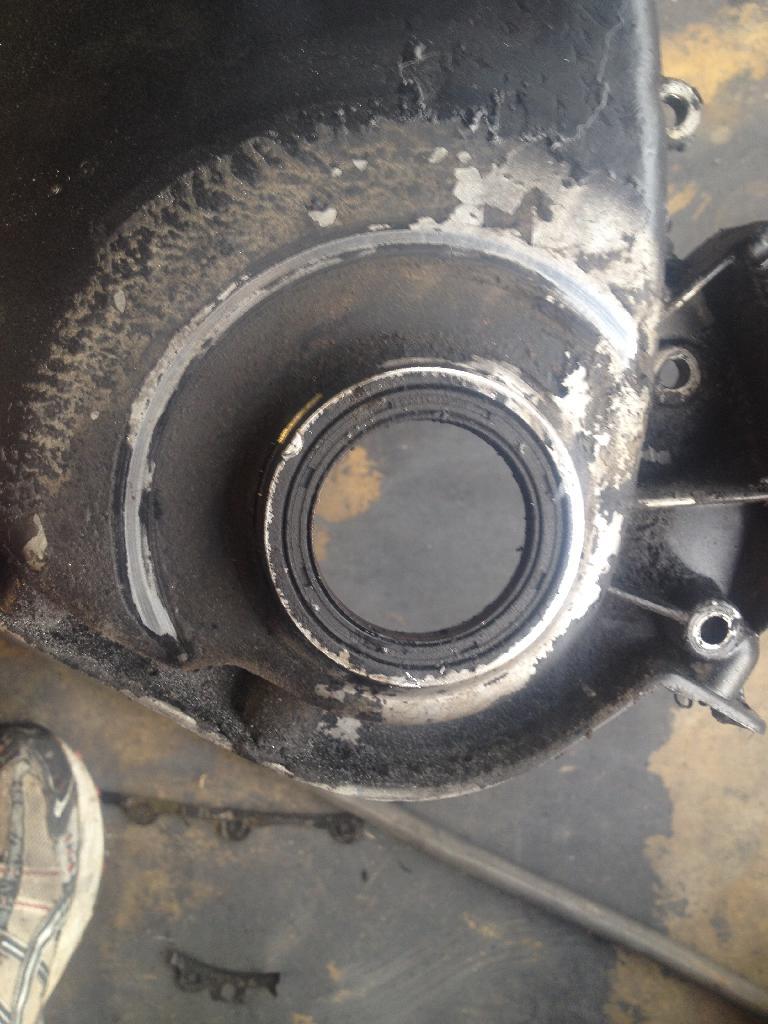
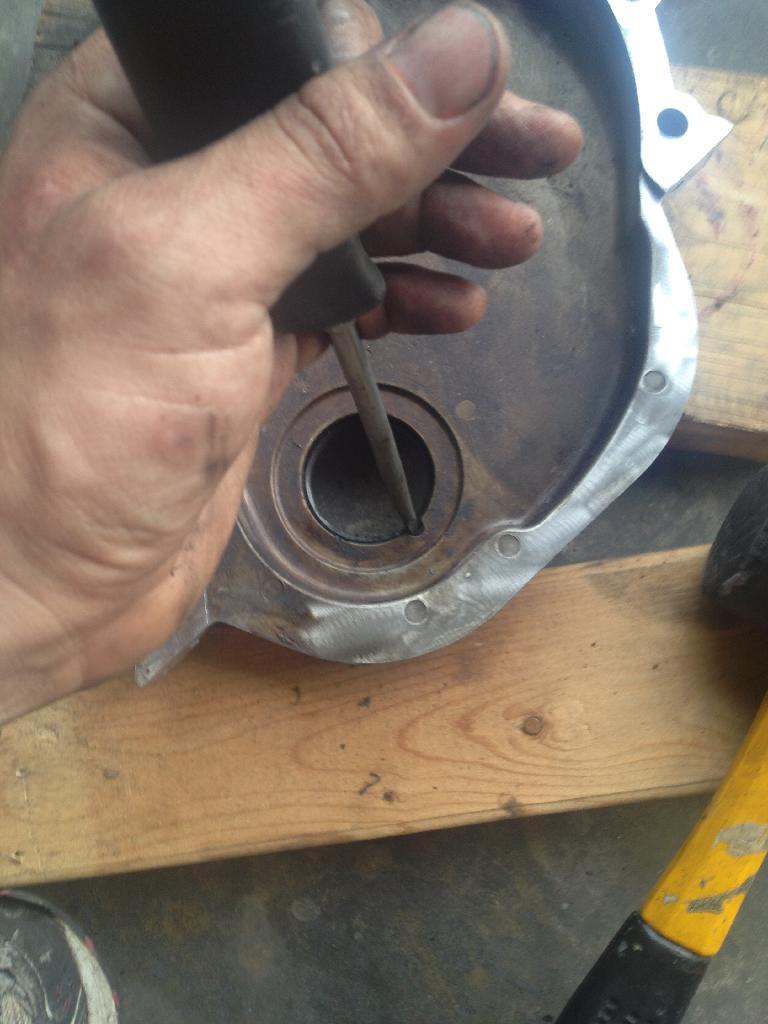
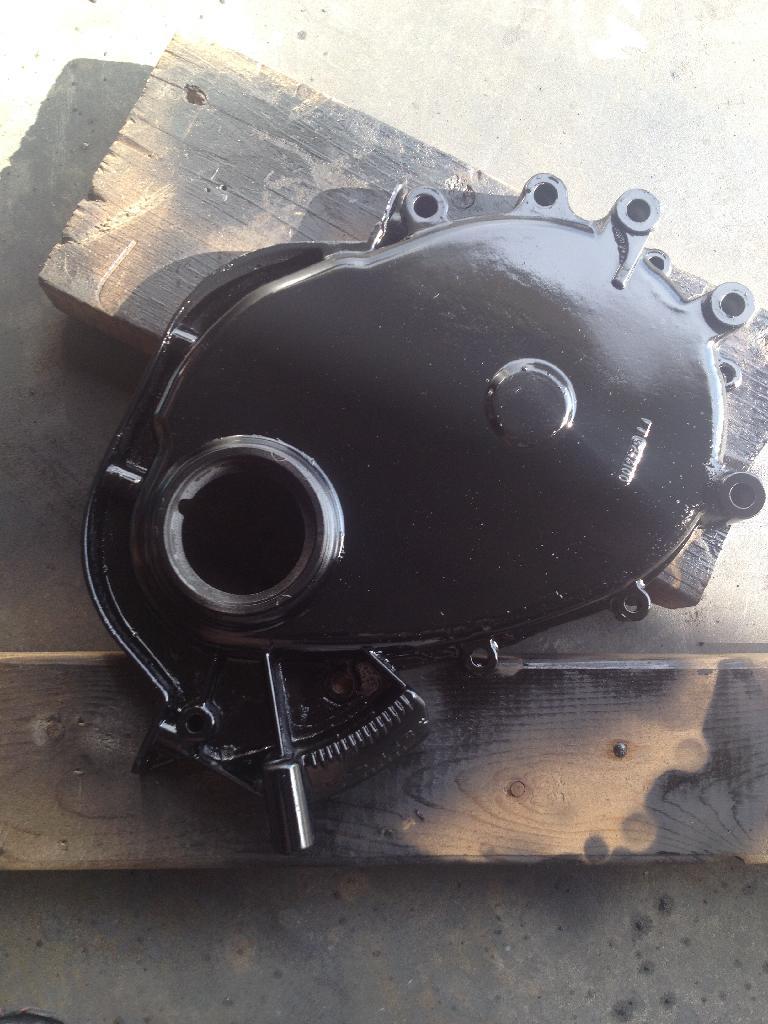
Cleaned and painted cover then installed new seal with large socket and mallet.
Sent from my iPad HD
Cleaned and painted cover then installed new seal with large socket and mallet.
Sent from my iPad HD
TFDScrambler
Basic User
- City
- Tulsa
- State
- OK
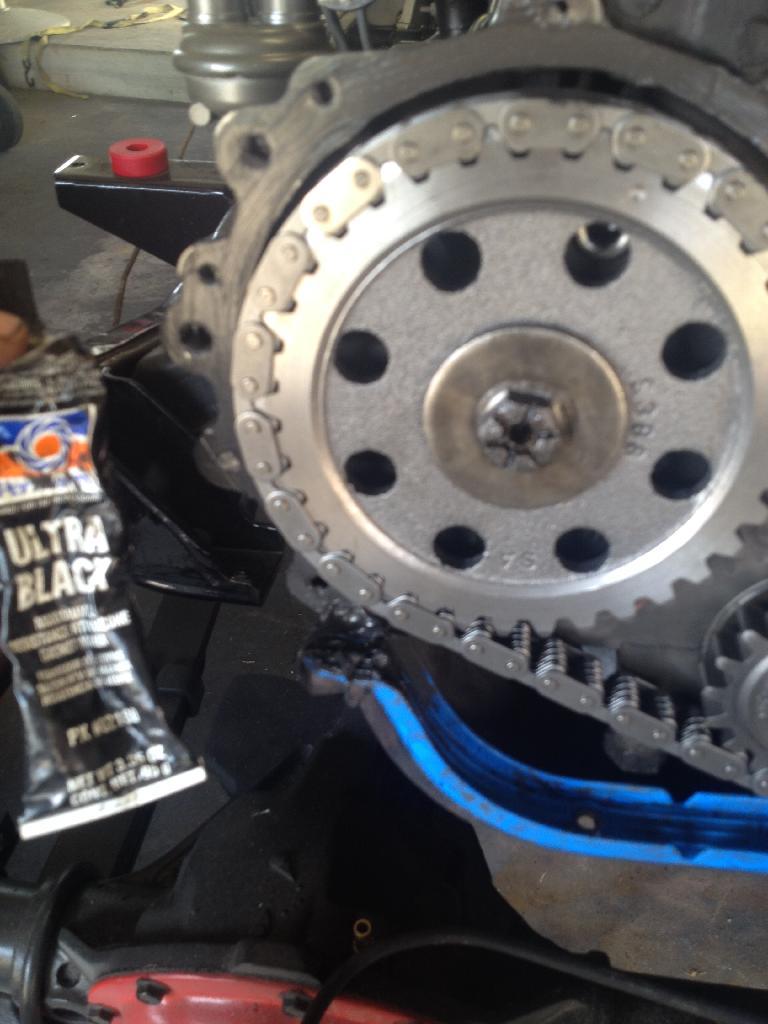
I used some RTV on the gasket sealing surface then placed the gasket and punt a thin layer in the sealing surface of the cover.
Sent from my iPad HD
Sent from my iPad HD
TFDScrambler
Basic User
- City
- Tulsa
- State
- OK
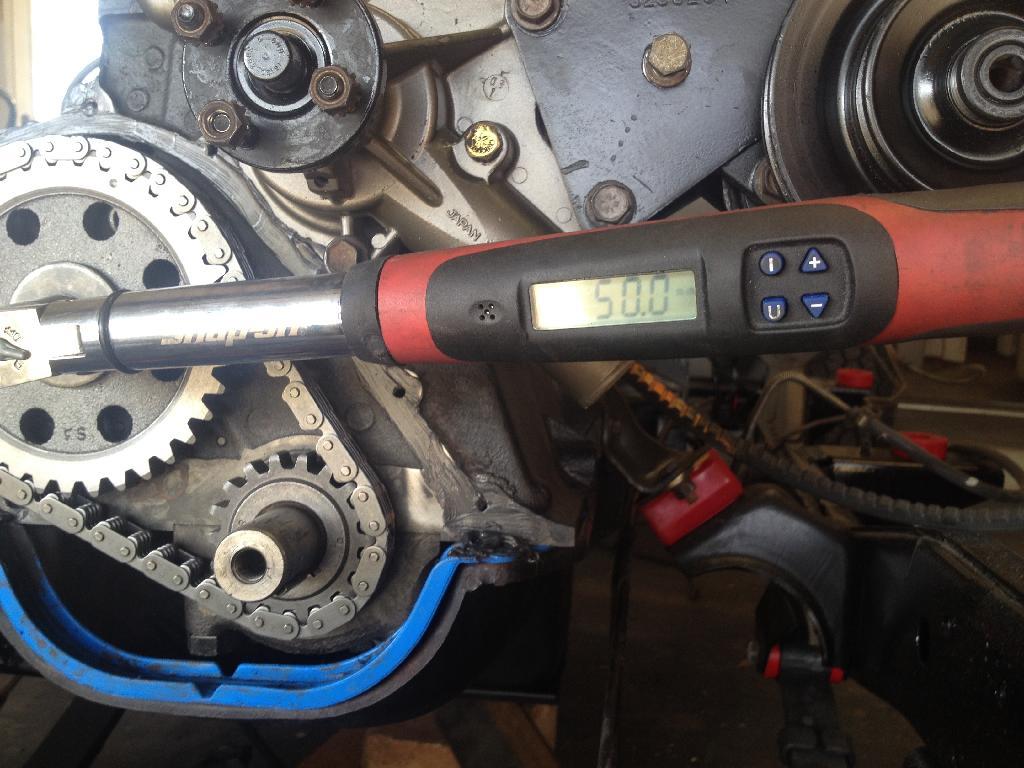
Then I torqued the bolt on the cam to 50 ft lbs
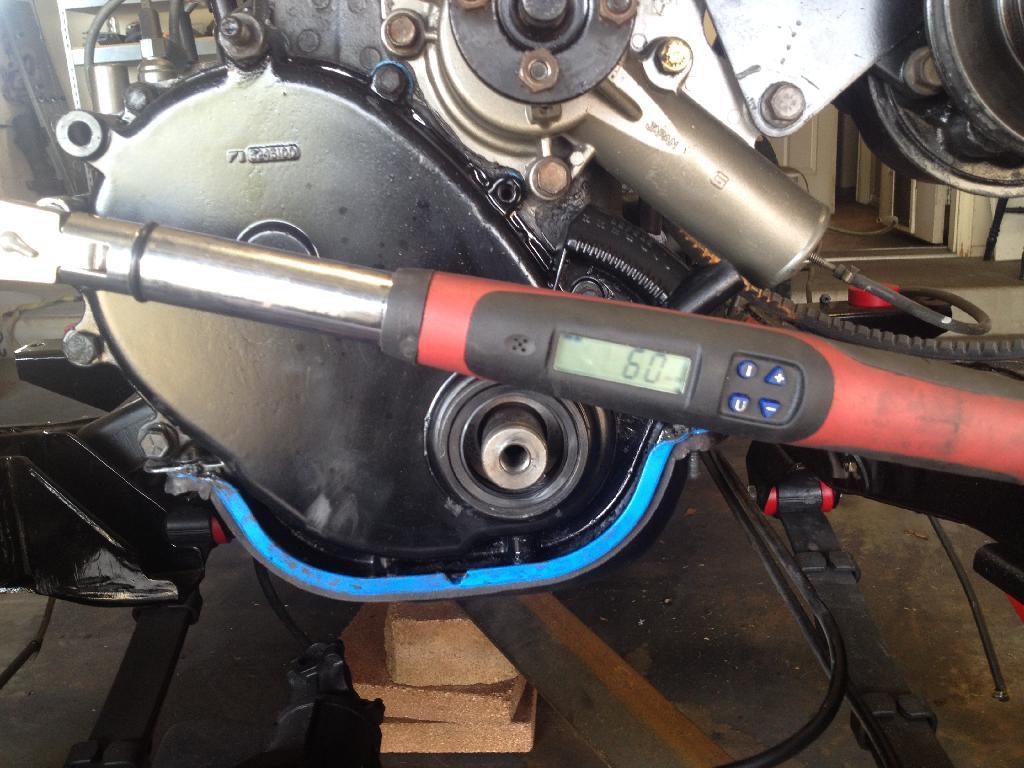
Then the cover small bolts to 60 inch lbs
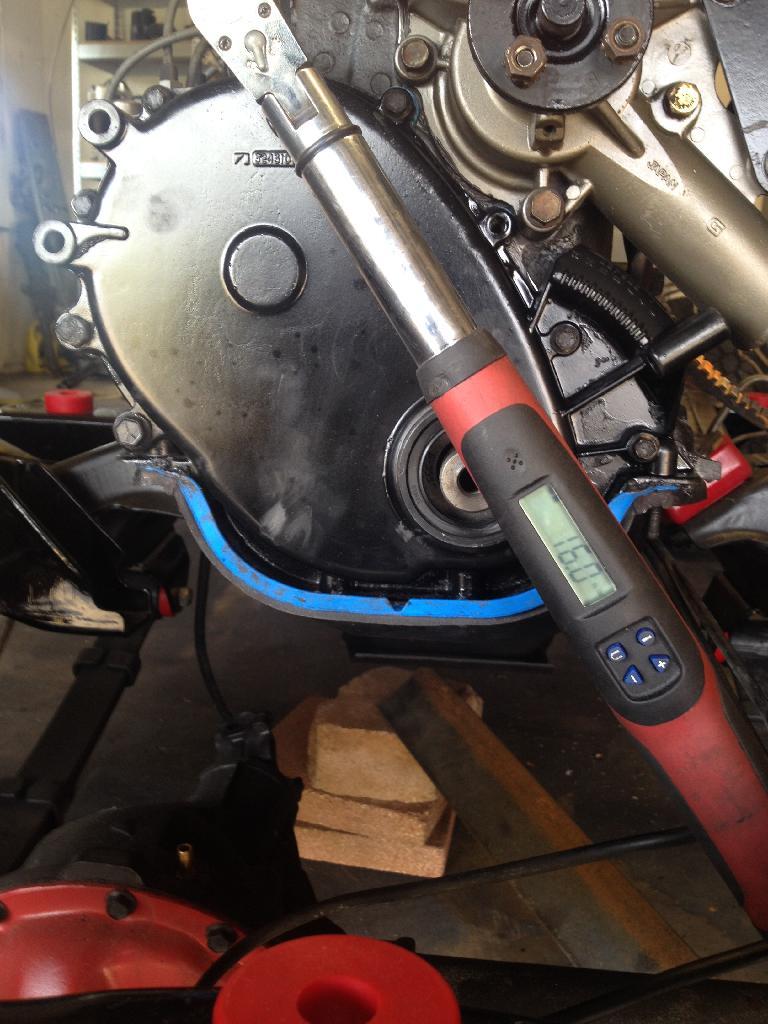
And the studs to 16 ft lbs
Then I torqued the harmonic balancer to 80 ft lbs while holding a screw driver in the fly wheel to keep it from turning over.
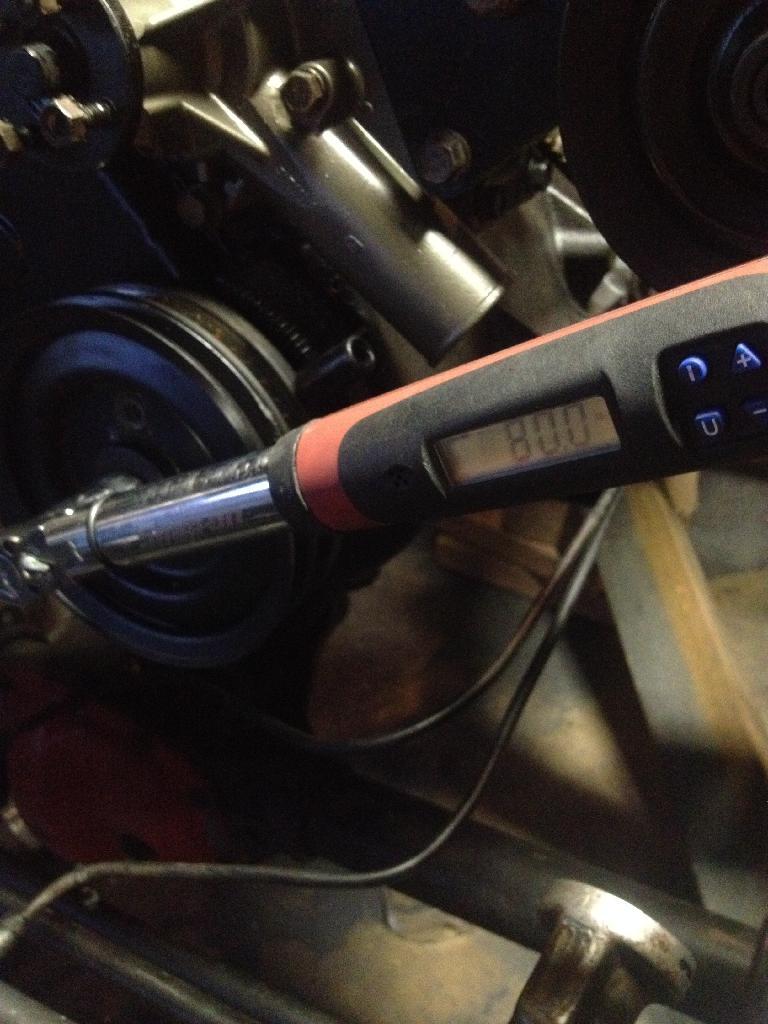
Then installed the belt to power steering pump and alternator back on. I didn't document it but I also put the metal repair sleeve on the shaft of the harmonic balancer as mine had worn a groove and I am trying to invest as little money in this motor as possible because I am hoping to swap in an LS in the fall.
I also had some wear from the timing chain that you can see in the backside pic of the cover
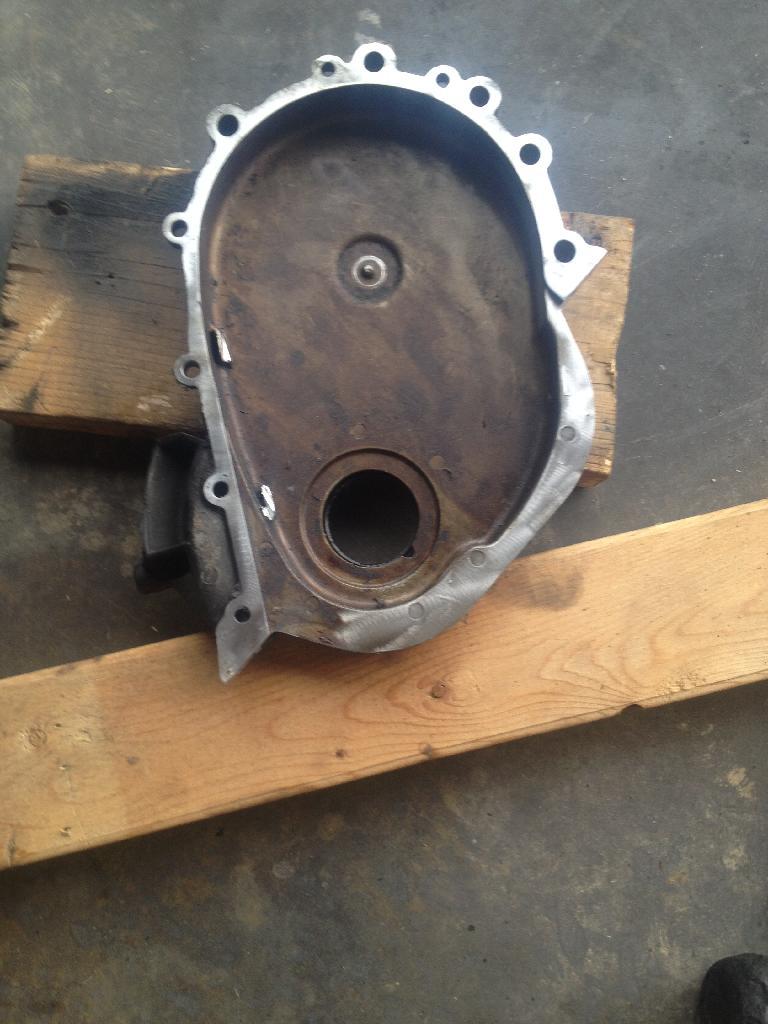
Also the chain snubber that keeps the linkage under control is missing but I'm going to roll with it for now.
I'm by no means a mechanic but want to show if an idiot like me can do these things that anyone can. If any of you smart fellas see something that I have done wrong or if I am steering people in the wrong direction let me know and I will fix the mistakes. That is all for tonight.
Sent from my iPad HD
Then the cover small bolts to 60 inch lbs
And the studs to 16 ft lbs
Then I torqued the harmonic balancer to 80 ft lbs while holding a screw driver in the fly wheel to keep it from turning over.
Then installed the belt to power steering pump and alternator back on. I didn't document it but I also put the metal repair sleeve on the shaft of the harmonic balancer as mine had worn a groove and I am trying to invest as little money in this motor as possible because I am hoping to swap in an LS in the fall.
I also had some wear from the timing chain that you can see in the backside pic of the cover
Also the chain snubber that keeps the linkage under control is missing but I'm going to roll with it for now.
I'm by no means a mechanic but want to show if an idiot like me can do these things that anyone can. If any of you smart fellas see something that I have done wrong or if I am steering people in the wrong direction let me know and I will fix the mistakes. That is all for tonight.
Sent from my iPad HD
TFDScrambler
Basic User
- City
- Tulsa
- State
- OK
Oh yeah, almost forgot. I have a set of used rear mud flaps for anyone who wants them. You pay shipping and they are yours. I'm going to post office tomorrow to get shipping quote on some fender flares I'm sending to one of our members and could get you shipping quote as well. Just let me know. They aren't in new condition and the color is faded off. I can post pics if needed.
Sent from my iPad HD
Sent from my iPad HD
TFDScrambler
Basic User
- City
- Tulsa
- State
- OK
Ok I didn't have much time tonight as I had to spray the nasty spring weeds in the lawn, but I did accomplish a small project today.
I had a trans leak (Torque Flight 999) since I pulled this motor and assumed that it was coming from the pan gasket because that's where it was and I set it down in the floor pretty hard when I pulled it the first time.
I think the TF999 is the same body as TF727 and TF904 so the repair should be the same for all.
Upon further inspection this is the culprit.
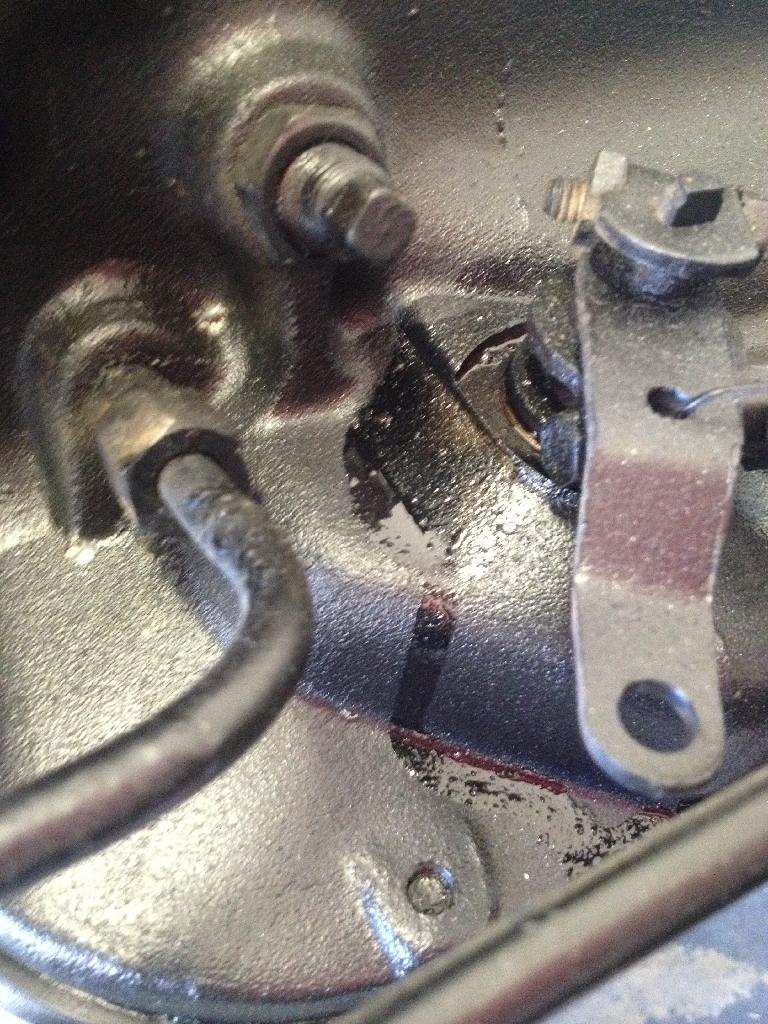
So here we go. Shift selector shaft seal is leaking.
First loosen nut on throttle kick down cable and pull it straight up and off. Repeat for gear selector lever.
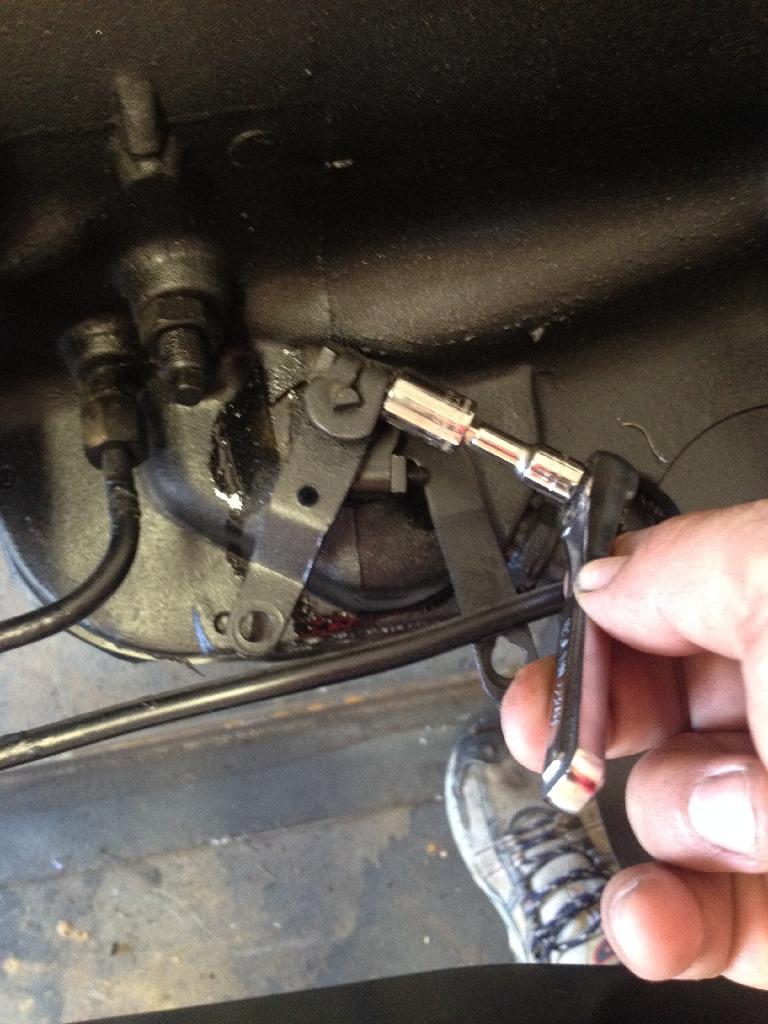
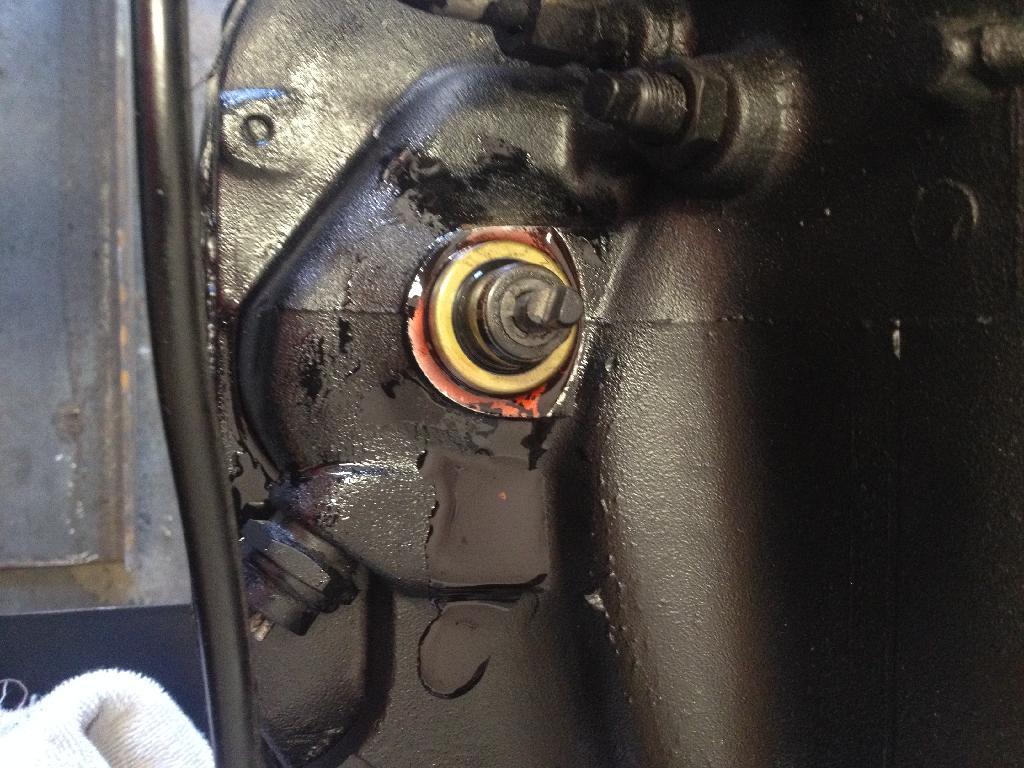
Now you have exposed the seal.
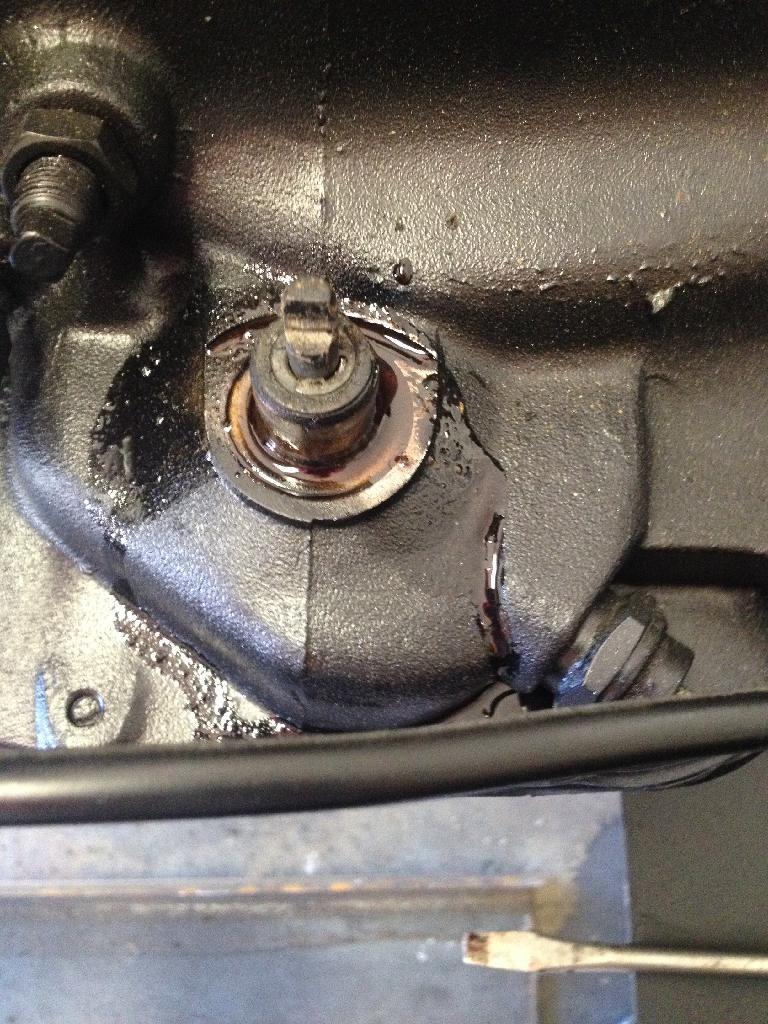
I pried the seal out very carefully with a small ended screw driver. It actually popped right out without much pressure.
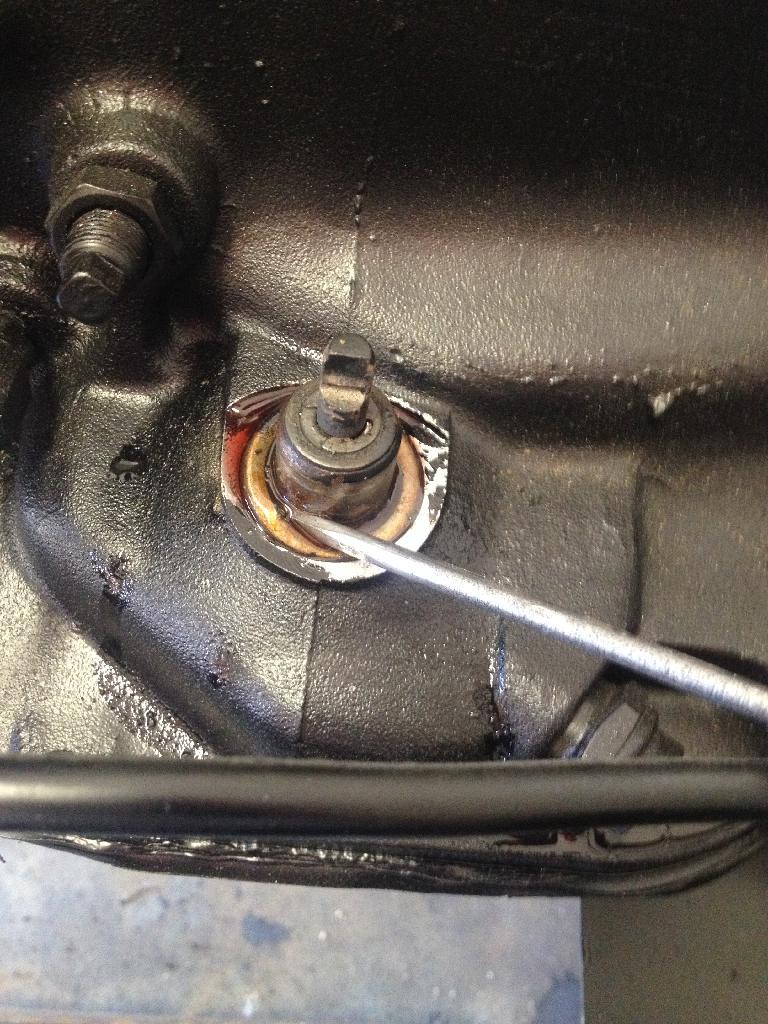
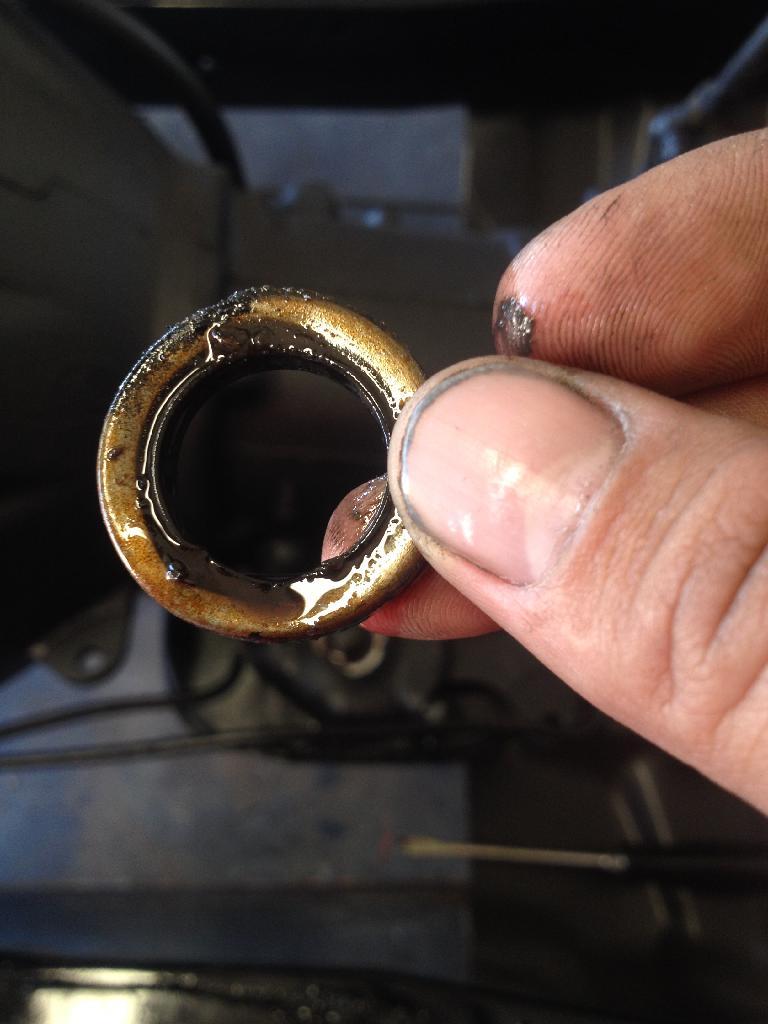
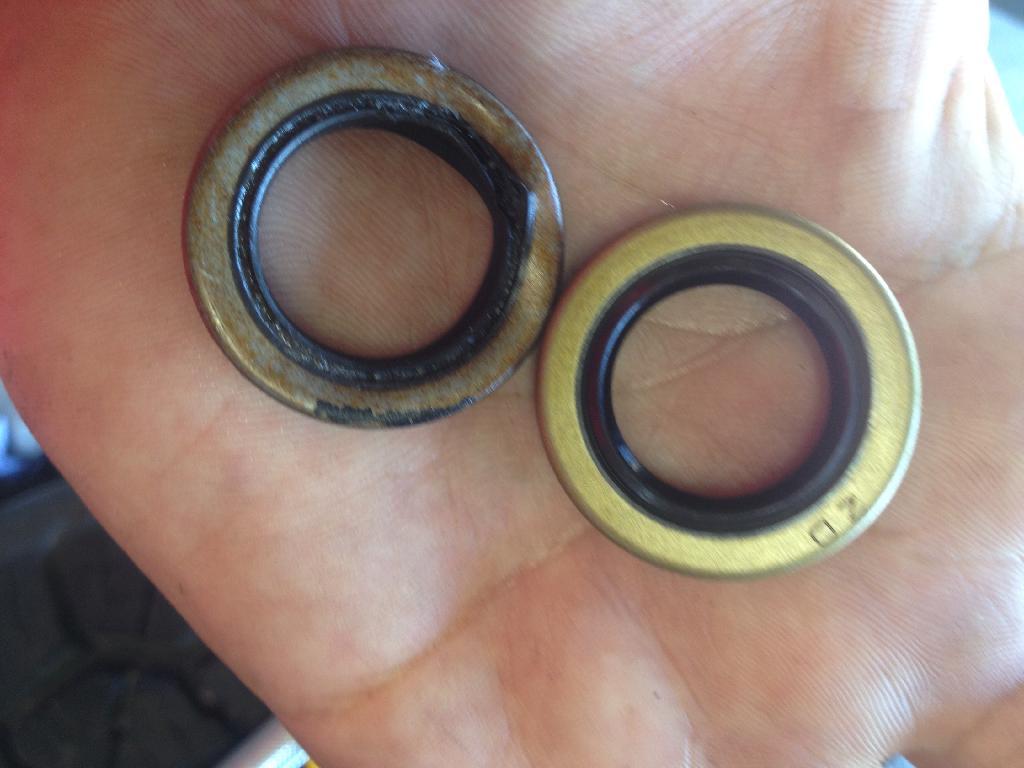
This is what the old seal looks like.
New seal
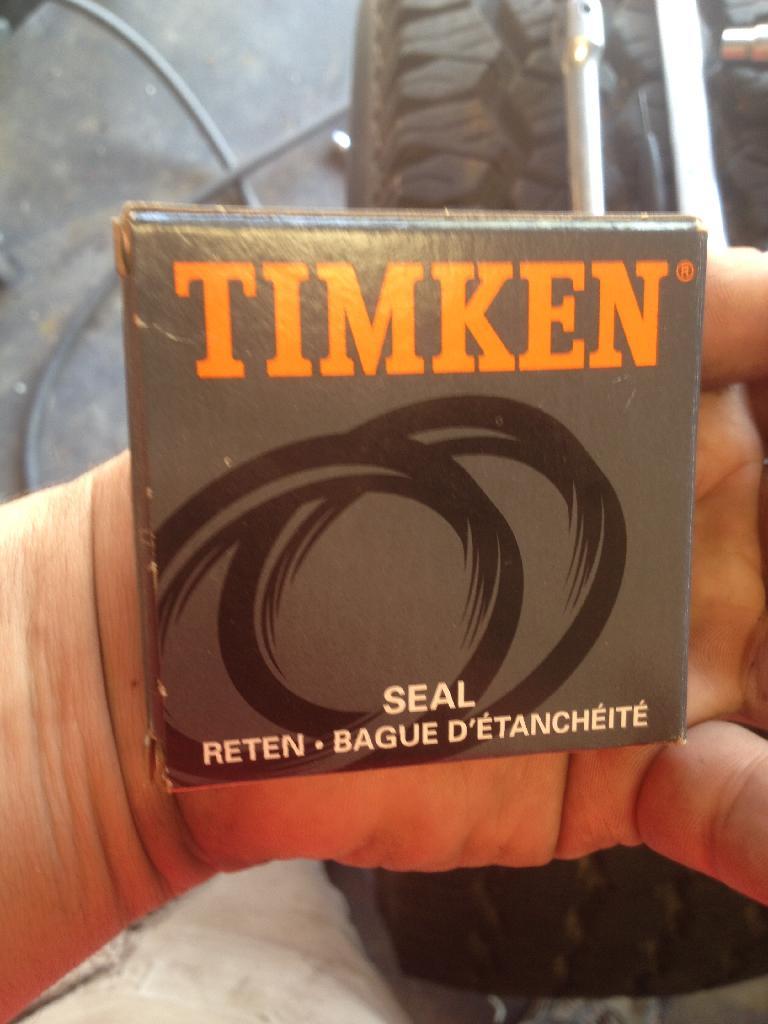
I picked it up at autozone because they had it in stock at the store near me( I usually never go to autozone and prefer napa or advanced auto).
Autozone part number is 8609
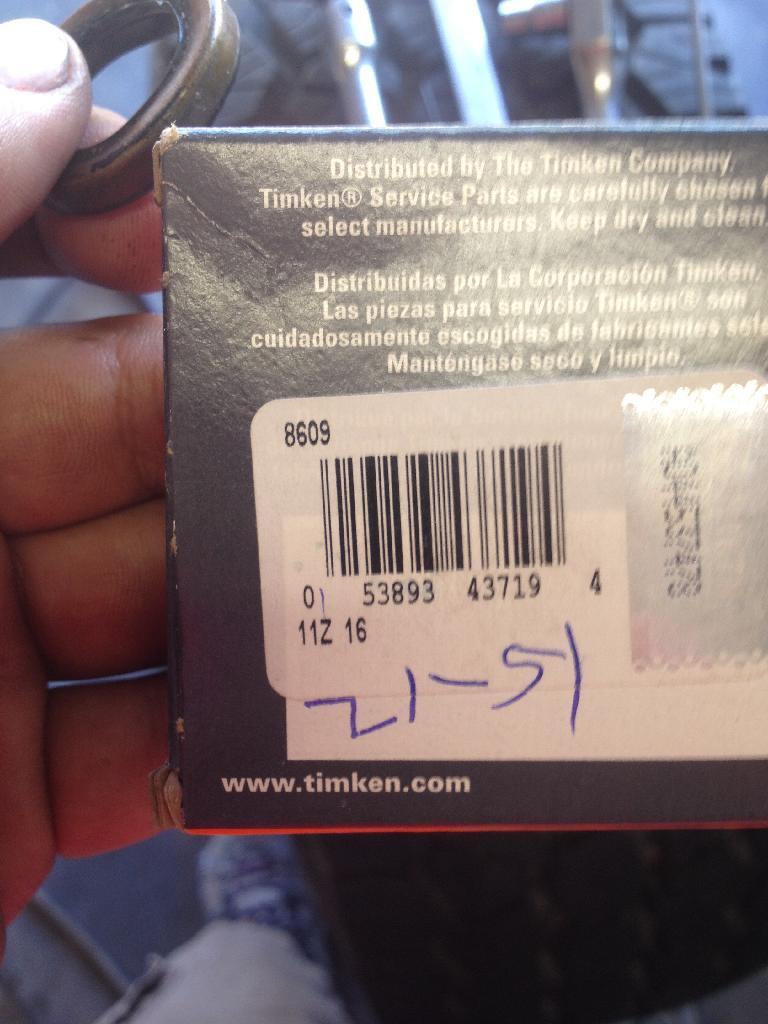
New and old
Placed new on the shaft and slowly and carefully pushed it down.
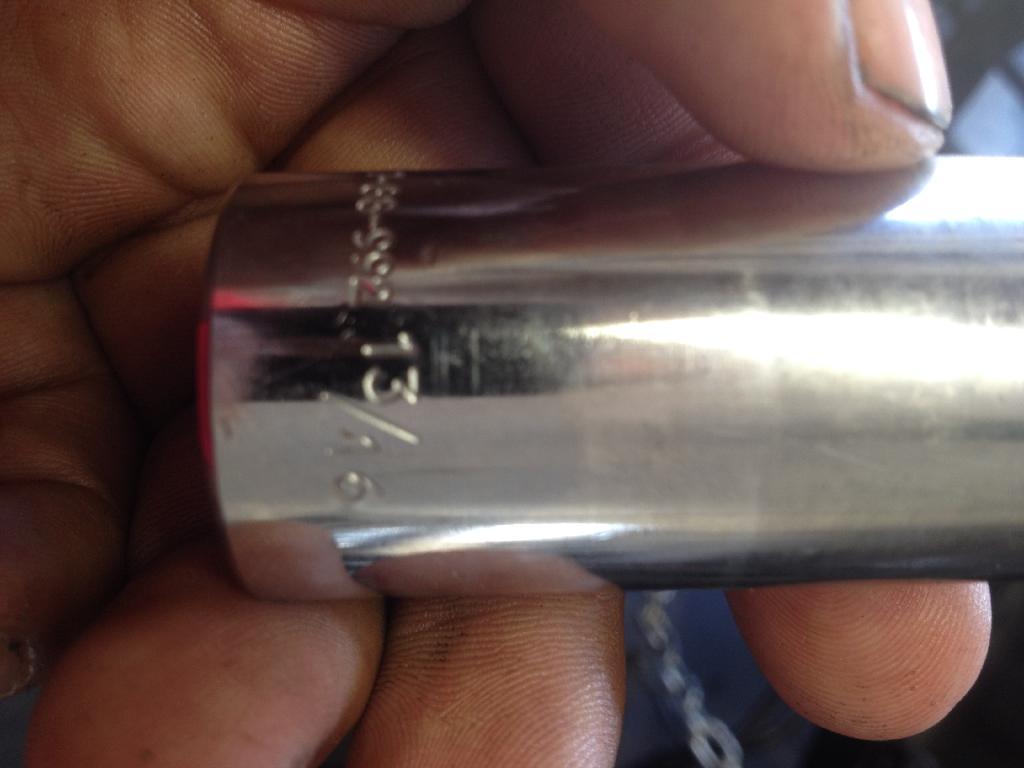
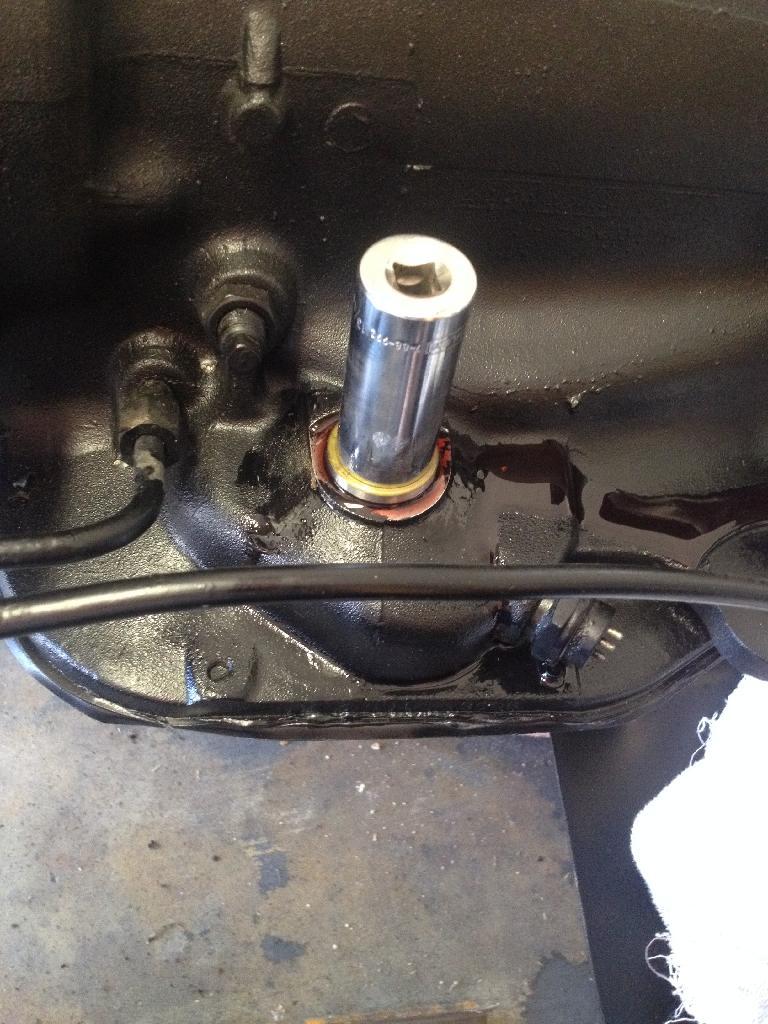
Used a 13/16 deep socket
Continued in a minute....
Sent from my iPad HD
I had a trans leak (Torque Flight 999) since I pulled this motor and assumed that it was coming from the pan gasket because that's where it was and I set it down in the floor pretty hard when I pulled it the first time.
I think the TF999 is the same body as TF727 and TF904 so the repair should be the same for all.
Upon further inspection this is the culprit.
So here we go. Shift selector shaft seal is leaking.
First loosen nut on throttle kick down cable and pull it straight up and off. Repeat for gear selector lever.
Now you have exposed the seal.
I pried the seal out very carefully with a small ended screw driver. It actually popped right out without much pressure.
This is what the old seal looks like.
New seal
I picked it up at autozone because they had it in stock at the store near me( I usually never go to autozone and prefer napa or advanced auto).
Autozone part number is 8609
New and old
Placed new on the shaft and slowly and carefully pushed it down.
Used a 13/16 deep socket
Continued in a minute....
Sent from my iPad HD
TFDScrambler
Basic User
- City
- Tulsa
- State
- OK
Slowly seated the seal with the socket and a hammer.
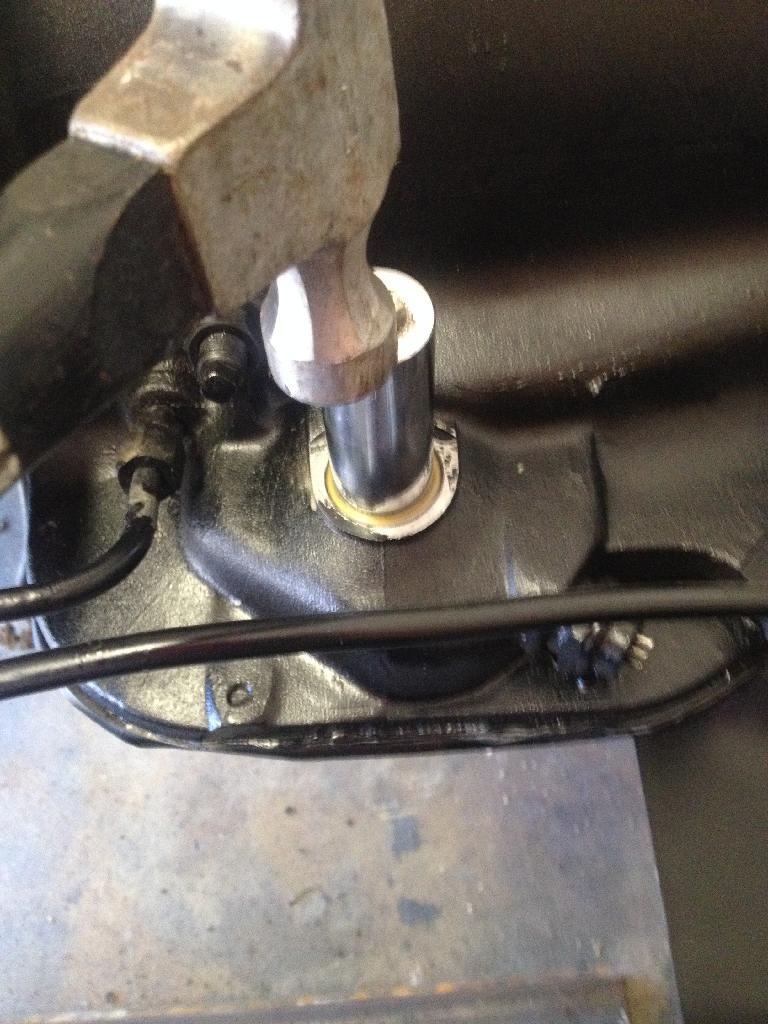
Replace the shift selector lever
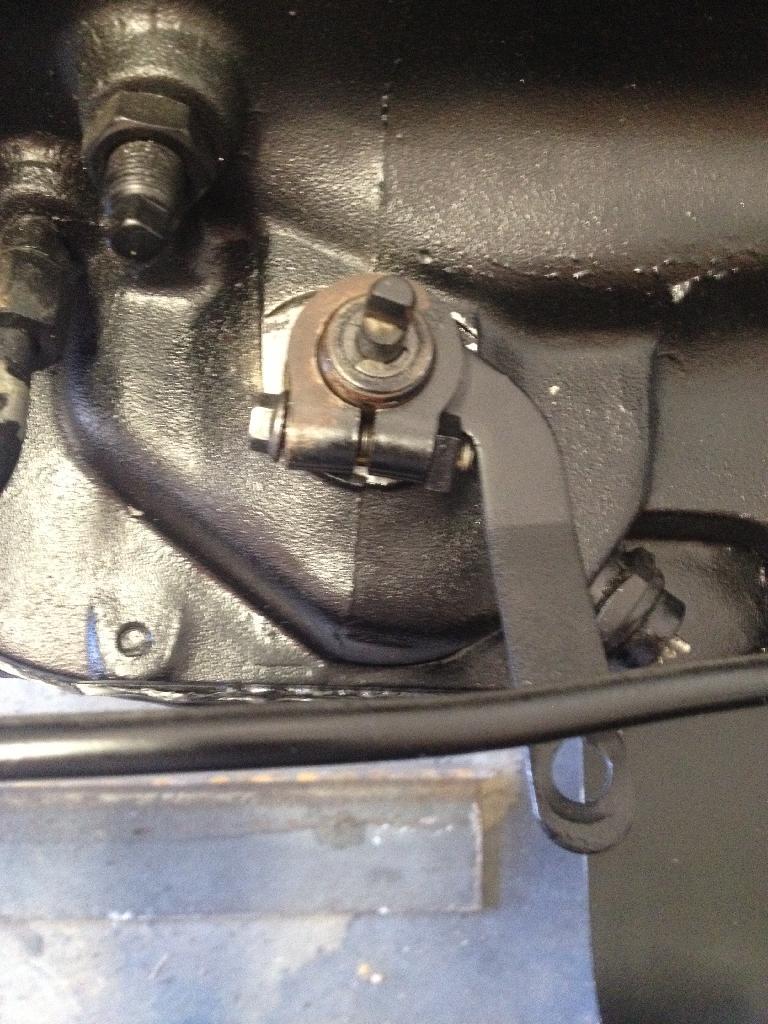
And the throttle kick down lever
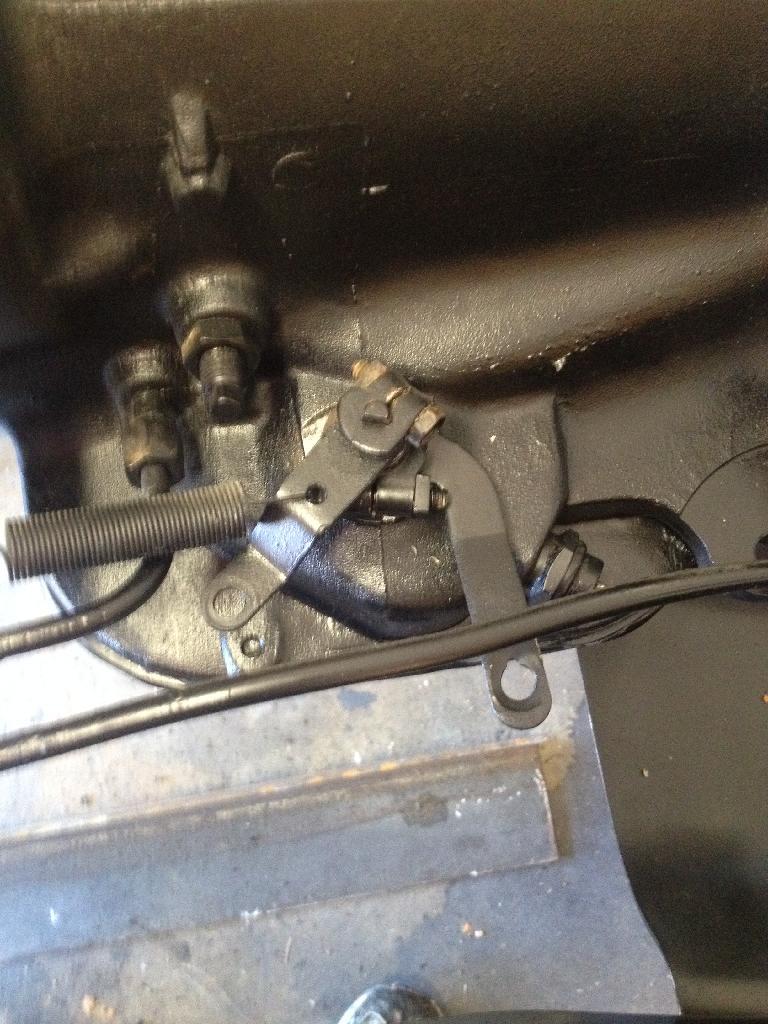
and viola. Done. The whole repair honestly took me 10 minutes. No problem and you should be afraid to tackle this one if you have a leaky TF999.
Sent from my iPad HD
Replace the shift selector lever
And the throttle kick down lever
and viola. Done. The whole repair honestly took me 10 minutes. No problem and you should be afraid to tackle this one if you have a leaky TF999.
Sent from my iPad HD


TFDScrambler
Basic User
- City
- Tulsa
- State
- OK
So quick question for you guys. Me and a buddy were talking about how long this is taking me and I felt that I was moving pretty quickly given I have a couple of real jobs and a family. So what would you say is the average time for an average guy on a frame of from start to finish? I'm at seven months and hope to be driving within the next 5. It will never be completely done but how long would you say is average?


- City
- God's Country
- State
- AR
I bought my first Jeep in 1992 and guys like spankrjs do more in a weekend than I do in a year. All mine needs is tub off, repaint, swap in T176, add new exhaust I bought around 2006, install Powertrax I bought 3-4 years ago, put in new springs I got in 2010. In other words, we all work at our own pace

- City
- Wilbur by the Sea
- State
- FL
Absolutely true! We all work at our own pace given family, job, and other events that come our way. My resto has just past 2 years and 5 months. It doesn't seem that long ago that I first started the resto, but I just keep plugging away and don't lose sight of the goal. I make it a point to go in the garage every day I'm home and fiddle with something if it's for 5 minutes or half a day even if it just involves looking at my progress on a part of the build. It keeps me in touch and keeps the juices flowing. Several times I've had money saved for one thing and something else not related to the Jeep used it up.
Friends can sometimes seem somewhat pessimistic because they lack the desire and passion for the project. If they watch the car shows where restorations are completed inside of one hour on TV they expect yours to be complete within the next few weeks or months. It helps to have an understanding and supportive spouse too. Many just don't understand the dedication to "vehicle". But press on and finish the job. Much of the satisfaction will be yours to share in the final outcome and enjoyment. Be confident in your ability to take the time it takes to see it through because when you're driving it over to your buds house with the family in tow the moment will be all yours to enjoy.
Friends can sometimes seem somewhat pessimistic because they lack the desire and passion for the project. If they watch the car shows where restorations are completed inside of one hour on TV they expect yours to be complete within the next few weeks or months. It helps to have an understanding and supportive spouse too. Many just don't understand the dedication to "vehicle". But press on and finish the job. Much of the satisfaction will be yours to share in the final outcome and enjoyment. Be confident in your ability to take the time it takes to see it through because when you're driving it over to your buds house with the family in tow the moment will be all yours to enjoy.