• Notice for iPhone users: DO NOT use the image size reduction option when uploading photos to the forum. This causes portrait images to post as landscape. We have added a warning to the image insert pop-up as well.

Meet Red, my 81 Restomod Build

Randyzzz

Blown Budget
BENEFACTOR
Gold Member
Lifetime Member
SOA Member
City
Redmond
State
OR
I beg to differ Randy. The way you do things, I find your running wires pretty exciting.
Thank you, but some things are just pretty dry.

If you’re interested- all connections to lights and the like are through Weatherpack connectors. Also the fuel pump and sender have their own Weatherpack. All external wires are run in OEM grade split convolute. It’s much thicker and high heat resistant compared to the stuff you get at the parts house. The tape I use is Polyken 264NFR high temp harness tape, also OEM stuff. The heat shrink is ES-1 4:1 adhesive lined high temp.

Inside the cab I run wire in split braid nylon, and use Coroplast polyester cloth harness tape. I usually put a dab of Gorilla CA Glue on the ends of the tape to ensure permanence. I found out about all these products while working at various dealerships. I figured if the OEM required it for repairs, it was good enough for me

Lastly, if you look closely at the plastic wire run in the fender well, I used a strip of aluminum under the screws to get rid of the occasional warp and give it a finished look.

I guess that explains why this is taking so long too…
 

Randyzzz

Blown Budget
BENEFACTOR
Gold Member
Lifetime Member
SOA Member
City
Redmond
State
OR
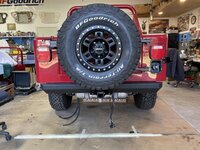
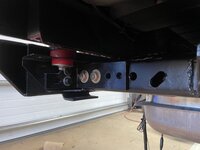
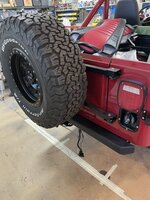
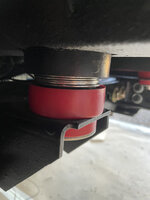
More progress. It’s almost like I’m finally trying to get this going!😉 I was looking for a simple rear bumper with a hitch, specifically in wrinkle finish to match my rocker moulding. Found a Smittybuilt bumper that looked like it fit the bill. And it cost about the same as having my existing bumper with no hitch powder coated. So I ordered it. I couldn’t have been more positively surprised. This thing is beefy- 58 lbs worth. With a Class III hitch even. Welds looked good, and 1/4” steel, solid on the back with just tapped holes for mounting. Everything mounted right up. I wasn’t super impressed with the bolts, but they weren’t bad for overseas. But best part is it is the exact low profile look I was going for. 0F52C47B-2998-4E6F-BE64-B0E1FC38B7E6.jpeg9275D153-D50B-4611-980C-E5DD23BD69E7.jpeg6ABA2E01-627A-4CD5-8C9B-B619BA679252.jpegI braced the backside with 3/8” doubler brackets- inside and outside of the frame. 9/16” bolts through the brackets and frame. This bumper is going nowhere.8122514A-FDF3-4D97-A8DD-36EB46C01D7C.jpegAnd I just finished installing the vapor/rollover valve assembly. The back half is done with the exception of building a shroud for the backup camera.
 

Attachments

  • 1583FA3C-E4E8-490B-AB39-02A3F3850A40.jpeg
    1583FA3C-E4E8-490B-AB39-02A3F3850A40.jpeg
    177.4 KB · Views: 6

Randyzzz

Blown Budget
BENEFACTOR
Gold Member
Lifetime Member
SOA Member
City
Redmond
State
OR
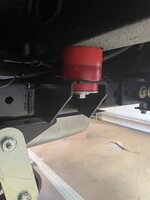
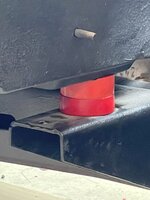
Today was body mount day. The 12” long chunk of 2 1/4” 90d polyurethane arrived yesterday. I opened up the shop doors last night after it cooled, and made a heck of a mess cutting it into precisely sized spacers. I used a chop saw with a carbide blade. I had to spray everything down with WD40 before each cut or it would really gum up. But, it worked. Drilled out center holes and jacked up one side at a time. Here’s why I chose to do it this way-

Before:
2A16C878-29EC-4917-A085-C017807C1768.jpegAnd after with a custom sized spacer:
930DF3B2-9BE2-4A16-B905-BAEE5FF82395.jpeg
the end goal was to get a bit of upward rise towards the cowl. The prior 5/8” spacer is now a .90 spacer. This is at the firewall. It tapers from 5/8” at the rear bumper, to about 1” at the grille
EB8A7D7A-2720-49C6-A48C-0B6F9C34E6C1.jpegHere’s a shot from further back.
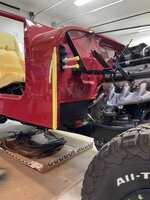
E68582F4-E2A6-4EEB-8F35-028D26B23823.jpegAnd, now there’s plenty of room for the lower radiator mount. Success! Also, the bed rails on the tub are perfectly level front to back.
1EFEBC7A-9848-429A-9779-BADD90E0B699.jpegGuess it’s time to start wiring up the dash! Stay tuned…
 

Randyzzz

Blown Budget
BENEFACTOR
Gold Member
Lifetime Member
SOA Member
City
Redmond
State
OR
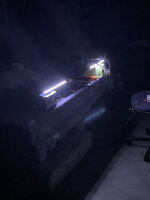
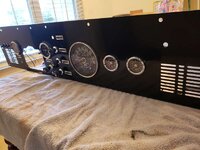
Quick teaser. Had to make sure all the dash lights worked along with the courtesy lights. I’ll post more up once the wiring is all done. Tomorrow, maybe Wednesday. Depends on when my connectors arrive. 4C5C29AC-7C0C-4522-8303-31EB6E6EF9C0.jpegHard to get a nice pic with a phone but they look awesome in person 4FA7BE37-F606-49D7-9DA7-18C5AEF80D5C.jpegCourtesy lights are led strips. They are not as harsh as they look- the illumination is actually perfect.
 

Randyzzz

Blown Budget
BENEFACTOR
Gold Member
Lifetime Member
SOA Member
City
Redmond
State
OR
Dash is 95% wired. I decided to do it a bit differently, especially since it seemed like with the Vintage Air and the Speedhut gauges there were so many wires. I put most all the dash wires in Deutsch connectors- one for the gauges and lighting, one for the A/C feeds. There are still a few individual wires- the mode servo on the A/C and the blower motor feed. Here’s pics. It ended up way more complicated than I had hoped for, but being able to easily install the dash as an assembly is worth it to me. I’ll call it organized complexity. 75A9C9DF-C337-436A-A57F-738C42E7B2B1.jpeg D7BE1599-EADB-490C-A10C-37BF614EB6C2.jpeg
 

Chamba

Not obsessed: focused.
Member
City
Vero Beach
State
FL
I love it. I finally did something just like you Randy!
 

Attachments

  • 20200401_143109.jpg
    20200401_143109.jpg
    52 KB · Views: 17
Last edited:

RockTractor

Basic User
Silver Member
City
Albuquerque
State
NM
Dash is 95% wired. I decided to do it a bit differently, especially since it seemed like with the Vintage Air and the Speedhut gauges there were so many wires. I put most all the dash wires in Deutsch connectors- one for the gauges and lighting, one for the A/C feeds. There are still a few individual wires- the mode servo on the A/C and the blower motor feed. Here’s pics. It ended up way more complicated than I had hoped for, but being able to easily install the dash as an assembly is worth it to me. I’ll call it organized complexity. View attachment 96424 View attachment 96425

Randy,
I did the same thing on my last CJ7 build, except with Weather-Pack connectors. It was definitely worth the extra effort.
Your build is looking great - nice work!
 

Randyzzz

Blown Budget
BENEFACTOR
Gold Member
Lifetime Member
SOA Member
City
Redmond
State
OR
Randy,
I did the same thing on my last CJ7 build, except with Weather-Pack connectors. It was definitely worth the extra effort.
Your build is looking great - nice work!
I was going to use the Weatherpacks, but one of the connectors needed 12 pins. I was having a bit of a hard time finding a suitable connector and ran across the Deutsch. They are a lot more compact and I really like how they assemble. I will stick with Weatherpacks for all the exterior stuff though.
 

Randyzzz

Blown Budget
BENEFACTOR
Gold Member
Lifetime Member
SOA Member
City
Redmond
State
OR
While waiting for parts, I decided to install the windshield hinges and door hinges. Talk about stressful. My plan of scuffing and epoxy painting the zinc plated torx bolts was somewhat a bust. Little tiny blemishes here and there. I guess I could touch them up, but instead I ordered some black zinc plated bolts. They may take some regular maintenance (wax or oil) but they’ve got to be better than black oxide, and much better than chipped epoxy. Crossing my fingers.
 

zr10054

Car and Gun Junkie
Lifetime Member
City
Gonzales
State
La
While waiting for parts, I decided to install the windshield hinges and door hinges. Talk about stressful. My plan of scuffing and epoxy painting the zinc plated torx bolts was somewhat a bust. Little tiny blemishes here and there. I guess I could touch them up, but instead I ordered some black zinc plated bolts. They may take some regular maintenance (wax or oil) but they’ve got to be better than black oxide, and much better than chipped epoxy. Crossing my fingers.
I slipped in here just to see how you are doing. Looks like you are doing fine without me.
 

RockTractor

Basic User
Silver Member
City
Albuquerque
State
NM
I'll have to keep those Deutsch connectors in mind when I wire up my CJ-8 dash.
Did you make those (heat-shrink?) labels yourself?
 

Randyzzz

Blown Budget
BENEFACTOR
Gold Member
Lifetime Member
SOA Member
City
Redmond
State
OR
I'll have to keep those Deutsch connectors in mind when I wire up my CJ-8 dash.
Did you make those (heat-shrink?) labels yourself?
The labels were made using a Dymo Rhino 5200 label maker. You can get cartridges with heat shrink tubing.
FYI, the Dymo cartridges of heat shrink are somewhat pricey. I read through reviews on Amazon and found an overseas manufactured replacement that costs 1/5 of the Dymo, and it works just as well if not better ( print seems clearer).1840B0A1-E280-4EED-87D1-E9AA8A455D56.jpegHeres the type of replacement cartridge I ordered. 5 cartridges for $19.957ACA4F21-1BE2-4FC3-BDBC-AA054F5C978A.png
 

Chamba

Not obsessed: focused.
Member
City
Vero Beach
State
FL
The labels were made using a Dymo Rhino 5200 label maker. You can get cartridges with heat shrink tubing.
FYI, the Dymo cartridges of heat shrink are somewhat pricey. I read through reviews on Amazon and found an overseas manufactured replacement that costs 1/5 of the Dymo, and it works just as well if not better ( print seems clearer).View attachment 96435Heres the type of replacement cartridge I ordered. 5 cartridges for $19.95View attachment 96436
Nope. Missed that. It turns out I didn't do my dash as well as you Randy..... again it turns out I was just me.

I DID wire it separately and I DID use separate connectors for my Speed Huts and attach the wires to the dash tomake it a stand- alone install, but I did NOT use heat shrink labels.....I didn't even know they existed.

So, I am back to dreaming about being the guy that did the perfect Scrambler and watching you actually accomplish it.
 

Randyzzz

Blown Budget
BENEFACTOR
Gold Member
Lifetime Member
SOA Member
City
Redmond
State
OR
Nope. Missed that. It turns out I didn't do my dash as well as you Randy..... again it turns out I was just me.

I DID wire it separately and I DID use separate connectors for my Speed Huts and attach the wires to the dash tomake it a stand- alone install, but I did NOT use heat shrink labels.....I didn't even know they existed.

So, I am back to dreaming about being the guy that did the perfect Scrambler and watching you actually accomplish it.
Thanks for the kind words. It’s not perfect-trust me. But I’m trying.
 

Randyzzz

Blown Budget
BENEFACTOR
Gold Member
Lifetime Member
SOA Member
City
Redmond
State
OR
NEXT time will be perfect, right? ;)
Next time, if there is a next time, will be more focused on enjoyment than perfection. I’ve spent way too much time and money making this “just so” to the point of not being able to enjoy it for what it was intended for. Back to that “marrying a supermodel” thing. Honestly, if I had the funds I would buy the blue 85 that’s up for sale here, just to have a driver.
 
Top