• Notice for iPhone users: DO NOT use the image size reduction option when uploading photos to the forum. This causes portrait images to post as landscape. We have added a warning to the image insert pop-up as well.

Meet Red, my 81 Restomod Build

Randyzzz

Blown Budget
BENEFACTOR
Gold Member
Lifetime Member
SOA Member
City
Redmond
State
OR
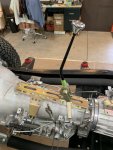
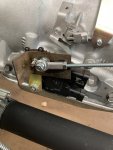
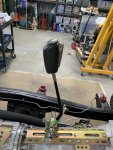
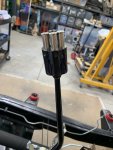
My shifter showed up on Saturday, and I started the install process. The quality looks good. But, just like the Lokar shifters that I have dealt with before, getting everything fine-tuned to work properly is a bear. Easy to adjust for one end of the arc, but the other is off... and I hate, hate, hate the button in the middle of the knob. They even sent the polished aluminum knob/paperweight. So that will be today's project.

Also, MomoJeep is planning to stop by this morning on the way back from an adventure with his Scrambler- (y)
 

Randyzzz

Blown Budget
BENEFACTOR
Gold Member
Lifetime Member
SOA Member
City
Redmond
State
OR
After much trial and error and adjusting, I was finally able to get the shifter to work. I had to try several positions before it all fell in place. And, I will shamefully admit, I found Lokar instructions online and that helped a lot. Will I get a Lokar to replace this one? Definitely, once I’m sure I like this unit. I might put some miles on it first and wait to see how it lasts.

Would I recommend the overseas made “American Shifter”? No, not really. The Allen head bolts are really soft, the instructions online suck, the shift linkage rod is too small, and I’m pretty sure they sent the wrong shift selector lever. Functionally, it feels just like a Lokar once it’s all adjusted.

I ended up having to cobble together a temporary shift lever, as the angle of the supplied lever was all wrong. I have a Lokar adjustable lever on the way. I could have cut and welded the supplied lever, but in case any fine tuning is needed, the Lokar lever will help out. I also ordered some 5/16 rod ends and rod, the 1/4” stuff supplied flexes a lot. 9C2CBAA8-4A60-4C07-9637-7BF311C3B469.jpegB3A60464-CB89-4E79-9450-D09C527B1C87.jpeg
 
Last edited:

Randyzzz

Blown Budget
BENEFACTOR
Gold Member
Lifetime Member
SOA Member
City
Redmond
State
OR
Idle hands.... just playing around with shift knobs.
This one looks too clunky-
1956B001-A463-419A-A4E6-C5B2D5A63EE2.jpeg

This one would be the coolest ever, but probably a bit uncomfortable and still a center button...
BA0C81CB-8C53-4A8B-A804-4F4174BCB5FB.jpeg
It’s the cylinder from a LA County Sheriff .38 S&W revolver that was decommissioned. I have a friend who used to be one of their armorers.
 

Jeepskate

Insane in the Membrane
City
Christiansted
State
VI
Idle hands.... just playing around with shift knobs.
This one looks too clunky-
View attachment 85892

This one would be the coolest ever, but probably a bit uncomfortable and still a center button...
View attachment 85893
It’s the cylinder from a LA County Sheriff .38 S&W revolver that was decommissioned. I have a friend who used to be one of their armorers.

I kinda like that first one. I would wait to decide until you have the Jeep assembled with the interior in place.
 

sdsupilot

CJ-8 Member
Member
City
OKC
State
OK
I agree with Jeepskate. You can get used to the push button like I have. I think the trigger/blade would be pretty slick though.
 

Randyzzz

Blown Budget
BENEFACTOR
Gold Member
Lifetime Member
SOA Member
City
Redmond
State
OR
The first one is my current favorite- I need to figure out how to taper it into the stick, and maybe sleeve the stick to bulk it up a little.

Lokar has an adapter so the whole knob becomes the button, with some bars out the sides to hook your fingers over. If I can’t make the blade to my satisfaction, I’ll give that a shot.
 

Randyzzz

Blown Budget
BENEFACTOR
Gold Member
Lifetime Member
SOA Member
City
Redmond
State
OR
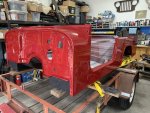
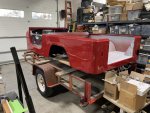
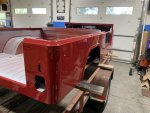
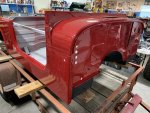
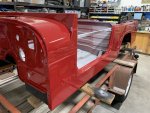
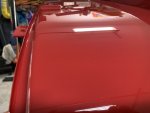
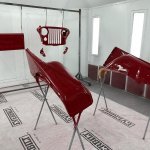
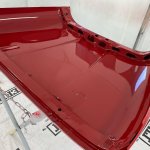
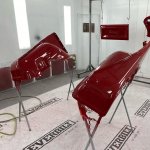
Big day today. Went and picked up the tub from the painter. Wow- it is shiny! The other parts all need to be cut and buffed, but he’s out of town for a couple of weeks, so I’ll be patient. Here’s some pics.

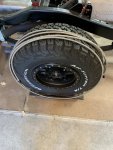
ECFAC348-E681-462D-9356-A7E07C7839FF.jpeg04BFF260-8A25-44E6-A984-8FCF63E27C4B.jpeg501BF85E-78F9-4DCC-B4BD-636E41B75571.jpegBE855B81-A003-46A7-8408-429C491E7107.jpegD3F6C7D8-B1D2-4339-9D53-9F8C262A9C2A.jpegFCDBFA39-5D50-4D60-868A-AF1A71A9BC38.jpeg

Also had some parts show up today. In the process of researching PTFE lines and AN fittings, I found a place that would make up stainless braid PTFE lines for just a little more than doing it myself. Plus they test them to 1500 psi. So instead of hard lines with braided at the ends, I’m going full braided. Will have black billet clamps holding them in position. Not much to look at currently, but here’s a pic anyways.

37FE6148-DE0E-4EA0-8283-26675401FF4A.jpeg
 

Belizeit

CJ-8 Member
Gold Member
City
River Ridge
State
La
Bet you were a little nervous driving that home down the road. Almost makes me want to repaint my nice patina body. Looks magnificent.
 

Randyzzz

Blown Budget
BENEFACTOR
Gold Member
Lifetime Member
SOA Member
City
Redmond
State
OR
Bet you were a little nervous driving that home down the road. Almost makes me want to repaint my nice patina body. Looks magnificent.
Thank you! I was so nervous. A center dump pulled out in front of me on the highway- I pulled over and waited a few minutes before continuing on. Didn’t want a rock chip before even driving! The paint shop is about a 30 minute drive.
 

Belizeit

CJ-8 Member
Gold Member
City
River Ridge
State
La
Forgot to ask where did you get the fuel lines ? And do you have an intank pump ? Where did you get the clamps and what do they look like ? Thanks
 

Randyzzz

Blown Budget
BENEFACTOR
Gold Member
Lifetime Member
SOA Member
City
Redmond
State
OR
Forgot to ask where did you get the fuel lines ? And do you have an intank pump ? Where did you get the clamps and what do they look like ? Thanks
The fuel lines came from ANPlumbing.com. They also have tons of adapter fittings on their website. Ordered Monday, arrived Thursday. I do have an in-tank pump. It’s a 91 K5 Blazer tank. The clamps are from Amazon, black anodized. I have used them before and they work well. I drill out the center threads and use a longer bolt that I tap the frame for. I’ll post pics once I do the install.
 
Last edited:

Randyzzz

Blown Budget
BENEFACTOR
Gold Member
Lifetime Member
SOA Member
City
Redmond
State
OR
Beautiful paint! What did you decide to spray the inside with?
The cab will be coated with the two types of Lizard Skin. Then top coated with the same red. The bed will be black Raptor liner. Although now that the paint is so nice I almost wish I had the bed painted too. But then I would never use it for anything!
 

gpassida

Basic User
Silver Member
City
Redding
State
Ca
Wow! Your tub and other parts look amazing!

I am about 2-3 weeks out from getting my tub and parts from my body/paint guy. (Voodoo Blue Color)

It's a 5 hour drive one way. I have been thinking about the best way to transport it back. I love your idea of securing it on the body mounts like that.

How did that work out? Any tips? Anyone else have tips for transporting a just restored tub?

Thanks!

George
 

Jeepskate

Insane in the Membrane
City
Christiansted
State
VI
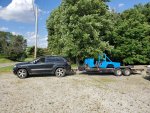
I was only going about 30 minutes on mostly well-paved back county roads, definitely would have done things differently for highway driving.
 

Attachments

  • 65178888_10216968406901066_8028697084989276160_n.jpg
    65178888_10216968406901066_8028697084989276160_n.jpg
    340.3 KB · Views: 15

Randyzzz

Blown Budget
BENEFACTOR
Gold Member
Lifetime Member
SOA Member
City
Redmond
State
OR
Mounting the tub to two 2x6’s worked out well. I ran a 2x4 across the back to make up the height difference. I used some hard rubber spacers that I had laying around, and some longer bolts. The body shop loved it, and it made it easy to load and unload without risking damage.

Hardest part was getting the holes in the wood to line up correctly. I taped a long strip of paper to the tub, front to rear, and used a pencil to poke holes where the body mounts went. Transfer that to a 2x6, drill some holes, and bolt it up!
 

gpassida

Basic User
Silver Member
City
Redding
State
Ca
Mounting the tub to two 2x6’s worked out well. I ran a 2x4 across the back to make up the height difference. I used some hard rubber spacers that I had laying around, and some longer bolts. The body shop loved it, and it made it easy to load and unload without risking damage.

Hardest part was getting the holes in the wood to line up correctly. I taped a long strip of paper to the tub, front to rear, and used a pencil to poke holes where the body mounts went. Transfer that to a 2x6, drill some holes, and bolt it up!
Thanks!
 
Top