• Notice for iPhone users: DO NOT use the image size reduction option when uploading photos to the forum. This causes portrait images to post as landscape. We have added a warning to the image insert pop-up as well.

My Blue Jeep

Then the problems start. On my way home from sandblast I I started hearing naughty sounds under the hood. It started a rod knock! :angry: I get it home, tore it apart and saw this.
View attachment 56183
It's hard to see, but my crank got scored and my cylinder walls were smooth. Not in a good way either, the cylinder walls wore off the cross hatching completely! I've had engines apart with over 400,000 miles on them and didn't look this worn. I took my parts to the machine shop and what they told me completely confuses me. They found a bunch of glass beads from a media blaster. The interesting part is that I didn't media blast anything and I clean Everything very thoroughly before assembly. I also changed the oil 3 times. The first time after the 20 minute break in, then at 200 mile, then right before I left for Michigan. The oil looked great each time. I don't get it. So as of right now this is how my jeep sits.
View attachment 56184

Was this a warrantied engine? That is not the first time I have heard the glass beads sand blasting material BS line from a engine rebuilder company.
 
Was this a warrantied engine? That is not the first time I have heard the glass beads sand blasting material BS line from a engine rebuilder company.

Nope, I built it myself a little over a year ago. It ran great last spring and then I made the switch to efi. I'm fussy as hell with engine building. I measure everything, clean, lube, torque everything to spec. If I missed something, I could accept that. But not completely knowing is so much worse.
 
Judging by the flywheel drilling/reaming process and the care you took, I'm going to say the engine failure was a fluke. Nice going on this.
 
Did anyone have the opportunity to dump anything into your tank. I would check my fuel filter, then tank. Just saying. But then you didn't say the cylinders were scratched up, did you.
 
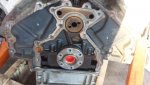
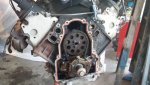
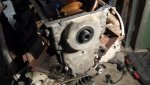
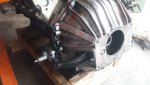
Even though I found no evidence of any oil leaks, I wanted to replace the rear main housing gasket and seal, timing cover gasket and seal, and the oil pan gasket. Unlike the old gen 1 motors, the ls stuff has to be properly aligned to work. I went ahead and pulled everything off and cleaned all the gasket surfaces.
rear main housing.jpgtiming cover.jpg
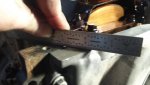
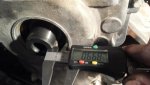
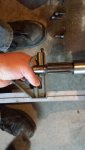
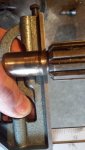
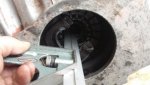
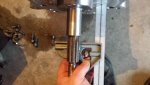
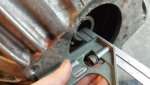
GM tells you that you need special tools to install everything, well that kit is over $1000 so I said forget that. For the timing cover and rear housing use a straight edge to align the cover to the oil pan mounting surface. If you measure between the cover and crank with a caliper, you'll find that centers it up and down really well. Just tap the cover side to side until you have it centered. Just double check everything after you tighten everything down to make sure nothing moved on you. The rear of the oil pan needs to be aligned with the bellhousing for the trans to mount up. None of this is hard, just time consuming. A cheap $20 caliper from Menards does just fine for this. They are surprisingly very accurate. I checked mine on some precision gauge blocks at work and it was spot on.
cover alignment.jpgcrank alignment.jpginstalled cover.jpg
 
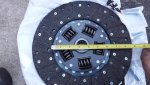
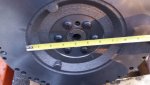
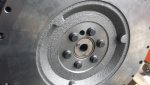
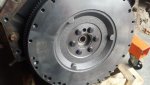
Now that have things back together, I moved on to bolting up the flywheel and clutch and found this...
clutch disc.jpgflywheel.jpg
At first I thought I simply bought the wrong year needed so I tried various different years and had the same results. I read multiple build threads and articles and no one mentions this issue. Maybe it is just fine having a good amount of the friction material hanging off in la la land. But I sure don't trust it. According the www.hotrod.com the gen 3 clutch sits 1 inch taller than a gen 1 clutch. I wanted to compare for myself. So I got one for a 2001 chevy 1500 and it was almost the same height.
 
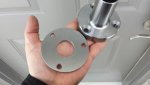
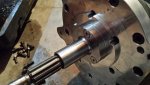
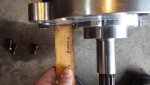
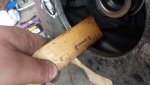
I'm a little irritated right now. There is a lot of bad info out there. Before I get to the clutch, I wanted to make sure the pilot bushing was right. According to Novak and several others you need a special bushing that sits in the outer lip of the crank instead of the traditional spot because of the .400 difference. So that's what I bought. I measured with the bellhousing in place and surprise surprise, it's wrong. It does just barely clear the splines. But because of the taper, almost half of the bushing isn't supporting anything. So I need the other bushing that gets installed on the inner part of the crank.
bushing depth.jpgbushing depth 2.jpgbushing depth 3.jpg
 
Now on to the clutch. I installed the 2001 chevy truck clutch and measured the spline engagement. So again I measured from the bell to beginning of the splines. It has perfect engagement, nothing is hanging off.
splines.jpginput splines.jpg
 
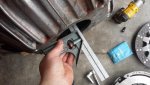
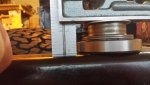
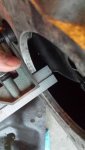
There are two chevy throwout bearings that I'm aware of, long and short. I got the short one for a 1977 chevy 305 truck. It measures about 1.25". I think the tall one is around 1.875", so it's easy to tell them apart. With the bearing in place there is plenty of room behind it. Also plenty of clearance between the fork and pressure plate, at least .75". The only thing I feel I need to address is the snout. The bearing is going to be REALLY close to the end of the snout. So I will either shim it or just make a new snout. Not sure yet. Besides that, once I get the right pilot bushing I should have everything I need. I really don't see why any of this won't work unless I'm not seeing something?
throw out.jpgbearing clear.jpgbearing clear 2.jpgfork clear.jpg
 
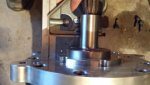
I got in a few hours of work on this thing this week. I was a bit nervous about the amount of travel on the snout, I didn't want the throw out bearing to go right to the edge or over the edge. So I made a 1/4" thick spacer. Maybe this wasn't needed, but it gives me a piece of mind. The snout fits in a 1/8" deep pocket in the adapter plate, but it's not really needed to locate the snout because of the countersunk bolts. They locate it just fine, I simply got longer ones to make up the 1/4" difference. Once installed I double checked the clearance and all is good.
spacer.jpgspacer installed.jpgspacer installed 2.jpgspacer clear.jpg
 
I switched out the pilot bushing on the outer lip for one that mounts in further. I now have full engagement on the input shaft for proper support.
Before
pilot bushing.jpg
After
new bushing.jpg
Now I could finally assemble everything for good. I got thread locker on all the bolts, adjusted the pivot ball, and mounted up the clutch slave. The slave is for an 86-91 Mazda RX7. My buddy swapped in a LT1 with a Pontiac Solstice trans (basically the same as AX15) into his RX7 and bought an entire kit for the swap. He went with an internal slave so he gave me the bracket. Even if he didn't it wouldn't be hard to make one out of some angle iron. The RX7 bore size is 3/4" which is the same as the 75-80 toyota land cruiser slave that advance adapters uses for their swap. So either one should work just fine.
bell assembled.jpg
 
Wow- that's a lot of research just to get a clutch to work.

I fully believe that the longer the internet has been running, the more incorrect info is out there. I remember years back there was minimal info but it was mostly correct. But now...it's a crap shoot. well, except for here.:headbang:
 
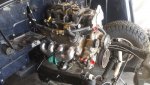
I finally got my motor in! :woohoo: The trans had to be moved forward about 1.5" the the engine wouldn't be against the firewall. Well it looks like I'll have to change the driveshafts...again
engine in.jpg
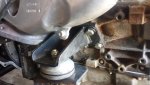
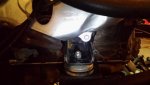
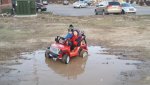
As far as the mounts go, I had some Gen 1 laying around so I used those. All I had to do was make an adapter plate. Sorry I forgot to take pics of the plate, I basically did the same thing as Randy. I could have offset the plates a bit more for clearance for the exhaust manifolds, but it clears fine. Of course my kids were out jeepin while I'm working on this.
motor mounts 1.jpgmotor mounts 2.jpgkids jeepin.jpg
 
20170411_175731.jpg
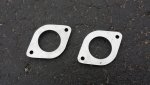
I made my exhaust flanges too. You can buy them online for like $60, but all these little purchases add up quickly. So if it's something I can make, I will.
 
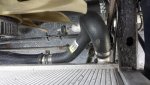
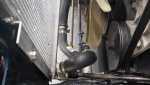
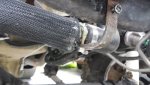
I'm going to try to re-update this. I got the grill back on to figure out what to do for hoses. I'm running an aftermarket aluminum radiator for a 6 cylinder. I called radiatorexpress (where I got it from) and they assured me it would be fine for a Chevy 5.3L. After making a few trips back and forth to auto zone I found some that work. Sorry, I don't remember the part #s anymore. If someone needs them I could probably figure them out. I ran 2 separate hoses for the lower and made a simple bracket in the middle to prevent them from bouncing around.
20170626_154431.jpg20170626_155003.jpg20170626_154527.jpg
 
For my wiring needs I worked on my own harness. I followed the write up on LT1swap.com. Most of the info is on there. I did get the rest on here but honestly I don't remember anymore. I know Randyzzz helped but beyond that :shrug:sorry guys

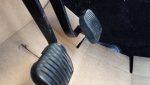
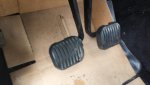
Now that I have it running and driving, I can definitely tell you what works and what doesn't with clutch master and slaves. When the master is bigger than the slave the pedal is stiffer with a short travel distance to disengage. When the master is smaller you have an easier pedal, but the travel distance is longer. First I tried a factory cj clutch master cylinder which is a 13/16 bore. The pedal is way too stiff. This doesn't work at all unless you are Hercules. Then I tried using Novaks recommendation to use a master from an 87-90 yj which is a 11/16 bore. The pedal went to the floor and wouldn't even disengage the clutch. The factory cj clutch pedal is lower than the brake pedal. So I cut and rewelded the pedal so they are both the same height. I did not want it higher than the brake pedal.
Before
20170625_110000.jpg
After
20170625_113712.jpg
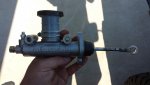
The pedal was much easier to push, but it would disengage the clutch JUST off the floor. I had to take out my floor mat to drive it. I didn't like this at all so I bought a universal Wilwood master that was a 3/4 bore.
20170630_165418.jpg
This worked really well but the pedal got stiffer again. A bit too much for my liking. So the clutch was to blame. This is what Novak and Advance Adapters told me. They told me it wouldn't work and damn near laughed at me for even trying it. So I took the kick in the nuts and bought the $350 custom flywheel they told me I just had to have. Got a Gen 1 11inch clutch again and changed everything over. Only to find out..........it barely made a difference!!!:angry: I was so pissed. If I knew that I would've just left it. I was done dealing with it and decided I just needed to get used to it. Now after driving it all summer, it's really not that bad. I like the travel distance and the stiffer feel doesn't bother me at all anymore.
 
Time to update....The holidays were very expensive for me this year. I had to stick $500 into my suburban and $2000 in my Camry. I really hate sticking money into my daily drivers. But it's still cheaper than a new car and my Camry only has 174,000 miles on it. Hopefully I can get another 300,000 out of it. We'll see. Anyways, back to my Jeep. She was my daily driver for the summer and for the most part she ran great. I did have a few issues though. I discovered that mass air flow sensors definitely don't like k&n style air filters. The oil from the filter throws off the sensor. I had to spray the crap out of the sensor with maf sensor cleaner and install a foam air filter. At sandblast it started running like hell. There I discovered a loose connection at the map sensor. Easy fix. It also started making this wierd rotational noise. Raymond was kind enough to go for a test drive with me and of course I couldn't get it to do it when he was with me. Isn't it amazing how things don't do what you want them to when you're trying to show someone something? Oh well, I am going to re-gear so I will have the thing apart anyways. So the list of things I want to do before spring....

1. Now that I'm recovering my bank account I'm definitely getting my lifetime membership here first.:headbang: This is long overdue.
2. Re-gear my axles. I refuse to drive any longer with the 2.73 gears on 32inch tires. It just sucks. I want to actually use 5th gear on the freeway as well. Also install lockers front and rear and get one piece axles for the AMC 20.
3. Build a rear roll cage for the kids. I'm taking them to sandblast this year for the first time and I want them to be safe. Just cruising around town is one thing but taking them out of state and going off-road with them definitely makes me nervous.
4. Ditch the full hard top and put the full soft top back on! As far as I'm concerned that hard top can go right back in the corner for another 27 years. Even my wife and kids got upset with me for putting it on in the fall and said it's boring and doesn't feel like a Jeep. Honestly, I agree.

As far as the axles go, I've never rebuilt any before. So this will be a learning experience for me. If anyone has any tips along the way it will be very greatly appreciated. Unless someone tells me otherwise, here's what I plan on using...

1. 3.73 G2 gears. I have been told on a number of occasions that these are really easy to set up and are overall just really good quality. The 3.73s will put me at about 2,200 rpm at 70 mph. Right now in 4th gear I'm at about 2,000 rpm at 70 mph and it cruises really nice.
2. Aussie lockers front and rear. Years ago my old CJ7 had an old school auto locker in it when I got it. I was told it was a Detroit but I never confirmed it. All I can say is that it was scary! It would bang and clunk violently and I swore I would never buy an auto locker again after that. Years later my friend bought one for his 4runner. After my horrible experience with one I strongly discouraged him from buying an auto locker but he did anyways. After he installed it he reported back that he hardly noticed it. I didn't believe him until he let me drive it. It wasn't bad at all! You would feel there occasionally but overall it was very tame. As nice as selectable lockers are, I just really don't like the price tags that go with them. I know the AMC 20 is a somewhat decent axle, but I just don't really want to spend that much on the 20 and Dana 30.
3. One piece axles. I looked around on the forums and of course a lot of people usually recommend Moser, but on quadratec these "ten factory" axles caught my eye. They are about $100 cheaper than the mosers and a few others. At first I figured they were junk based on price but after reading about them on different forums people seem to be having really good luck with them. And apparently they are really good with their warranty. Is there any reason I shouldn't go with these? Anyone here have any experience with them?

 
Since it doesn't require a penny. I thought I would take advantage of the nice 50 degree weather this weekend and tear apart my rear axle. At the end of the season right before I parked it for the year I noticed a very small vibration. I didn't really think much of it and figured a wheel weight fell off or something. Well, when I went to remove my drive shaft I found this...
IMG_20180111_183219.jpg
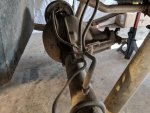
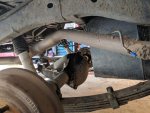
One of my u joints was destroyed! All of the needles were gone in one cap and the other one half we're gone. How the hell did this not vibrate/shake worse than it did? At this point this is the third set of ujoints in the 6,000 miles I put on it in the last year. Every time I check the ujoint bolts they are tight but the cap wiggles in the strap. I replaced the straps every time as well. I'm guessing they stretch and when they do it just murders the ujoints. I'm going to upgrade to u bolts instead and see if it helps. After that I disconnected the brake lines, vent hose, and shocks and hung them up out of the way. My 4 year old was helping me but was being very camera shy.
IMG_20180120_115228.jpgIMG_20180120_120920.jpg
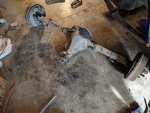
And......... it's out
IMG_20180120_125022.jpg
 
Back
Top