

You are using an out of date browser. It may not display this or other websites correctly.
You should upgrade or use an alternative browser.
You should upgrade or use an alternative browser.
my new scrambler..and first one for me
- Thread starter jeepinjosh
- Start date


- City
- Biloxi
- State
- MS
Looking good. You have some good ideas on working around making parts that aren't easy to get. Merry Christmas and enjoy the holidays.
Keep up the good work. There is a light at the end of the tunnel!
Appreciate it guys
 I couldn't "justify" spending $16.00 for the "correct" glove box door bumpers for this Scrambler

So close to being done, but we have had non-stop rain since December 21st, should end in February


Merry Christmas


- City
- Dallas
- State
- tx
Great work on the doors...wow. What is your hourly rate? Here in Dallas, Tx a shop would bill out the cost of a new JK Unliimited...Happy Christmas
- City
- Biloxi
- State
- MS
Merry Christmas from Gonzales, Louisiana. It's been raining cats and dogs here to for day's and it was 82 degrees today.
I hope Santa has an Air boat or a good Scrambler.
Merry Christmas to you too
I thought the rain was finished, nopeGreat work on the doors...wow. What is your hourly rate? Here in Dallas, Tx a shop would bill out the cost of a new JK Unliimited...Happy Christmas
Appreciate it
 My hourly rate is too cheap to repeat

Due to weather/Christmas stuff, no work on the Scrambler during the last few days

But, should get back to work on it soon


regular guy
Basic User
- City
- Cameron
- State
- NC
Holy Smokes! I just read through this entire thread and you are knocking it out of the park, once again. Seeing as I am going through a similar situation right now, I think body shops are far worse than previous owners in that they think they actually know what they're doing and are far more ready with the sawzall and the hammer.
Don't trust anything the shop MIGHT'VE touched as I am replacing wheel studs right now because they took a wheel off they shouldn't.
Amazing work and I love seeing your work.
Don't trust anything the shop MIGHT'VE touched as I am replacing wheel studs right now because they took a wheel off they shouldn't.
Amazing work and I love seeing your work.
- City
- Biloxi
- State
- MS
Merry Christmas and Happy New year my friend. Give Tiffany a hug for me. 1/3 of the way to "Sand Blast".
Your work is as amazing as always. Enjoy watching.
Will do Toby, you too, and Appreciate it
Need to see if I can get my green Scrambler "Dune Bound" this year

Holy Smokes! I just read through this entire thread and you are knocking it out of the park, once again. Seeing as I am going through a similar situation right now, I think body shops are far worse than previous owners in that they think they actually know what they're doing and are far more ready with the sawzall and the hammer.
Don't trust anything the shop MIGHT'VE touched as I am replacing wheel studs right now because they took a wheel off they shouldn't.
Amazing work and I love seeing your work.
Appreciate it
The "shop" Josh used did a terrible job. The things they "touched" tuned to crap, and they lost a bunch of parts
I have spent 75% of my time repairing their damage, or searching for lost parts. The good thing, I have just about finished working through the "body shops" problems. Another shop put the Motorcraft carb on this Jeep, it seems to run well. But, they disconnected certain things for no reason, plus did some other "head scratchers". It wont take too long to work through that, I hopeBeside "body shop" screw ups, this Jeep mainly just needed basic/preventave maintenance. I am not going any "deeper" mechanically on this one. I just want to get Josh his Jeep back so he can enjoy it. I could probably spend a bunch more time and money on this one, but its not mine, and it should be fairly reliable to Josh for awhile, I hope
- City
- Biloxi
- State
- MS
Holy Smokes! I just read through this entire thread and you are knocking it out of the park, once again. Seeing as I am going through a similar situation right now, I think body shops are far worse than previous owners in that they think they actually know what they're doing and are far more ready with the sawzall and the hammer.
Don't trust anything the shop MIGHT'VE touched as I am replacing wheel studs right now because they took a wheel off they shouldn't.
Amazing work and I love seeing your work.
I read your thread this morning, distressing to say the least
I hope you get it worked out soon
Unfortunately, judging by Josh's body shop, your shop, and Tommy's "shop" in Baton Rouge, this seems to be a common problem
- City
- Biloxi
- State
- MS
I was able to work on Josh's Scrambler a bit more over the New Years holiday.
I received the last two body mounts in the mail. Even though they sell you a CJ-8 kit, they always send a CJ-7 kit, then send the last two mounts in a later shipment!!!!!!!!! I saved the rear cross member mounts for last, no surprises, cross member is still solid.
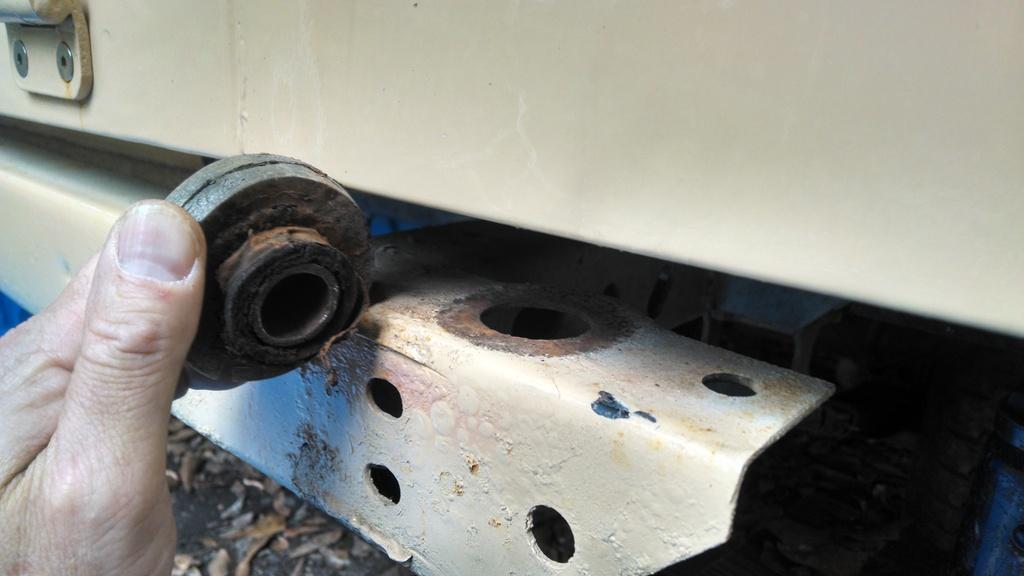
After I installed the last two body mounts, and torqued them all down, the Scrambler disappeared!!!!!!!!!!!!!!!!!!
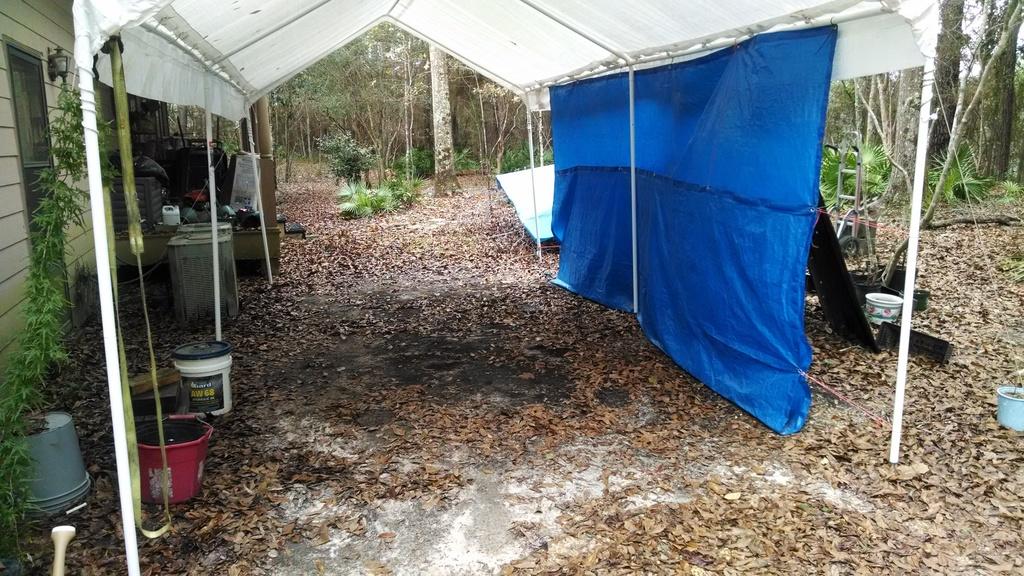
I moved it closer to the garage, less walking to get tools!!!!!!
Besides the body mounts, I spent what little time I had working on the steering column, trying to get the gear indicator worked out.
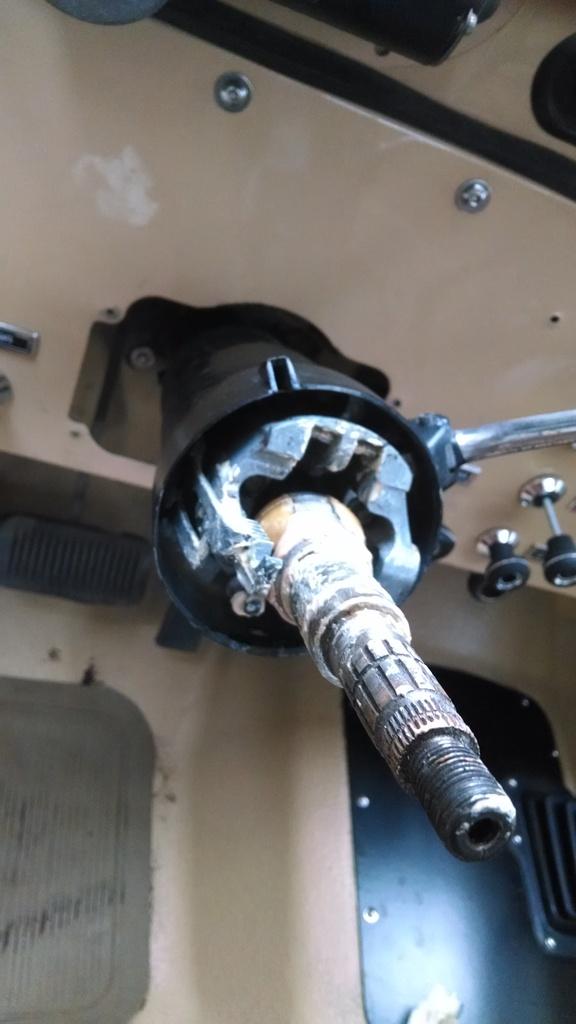
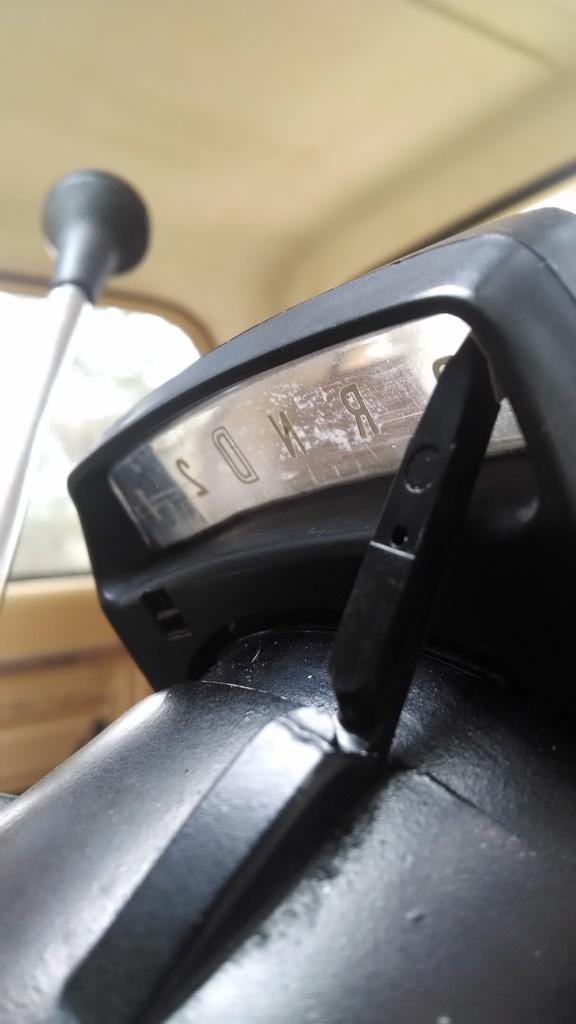
Tore the column down to here, to get to the slot the gear indicator needle slides into.
The body shop broke the original/correct gear indicator needle. I could not find another AMC/Jeep needle, so I am trying to get this other GM needle to work. The white piece is what is left of the "correct" part, the black needle is the replacement I am trying to make work.
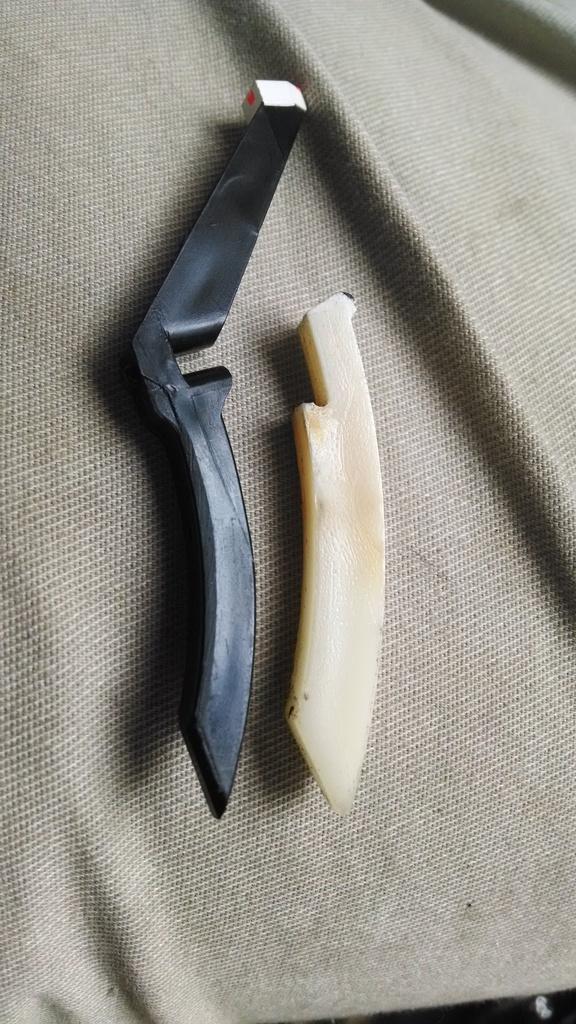
First problem, the black needle is thinner then the stock needle, so it fits really loose. So, a bit of sheet styrene and plastic glue, fixed that issue.
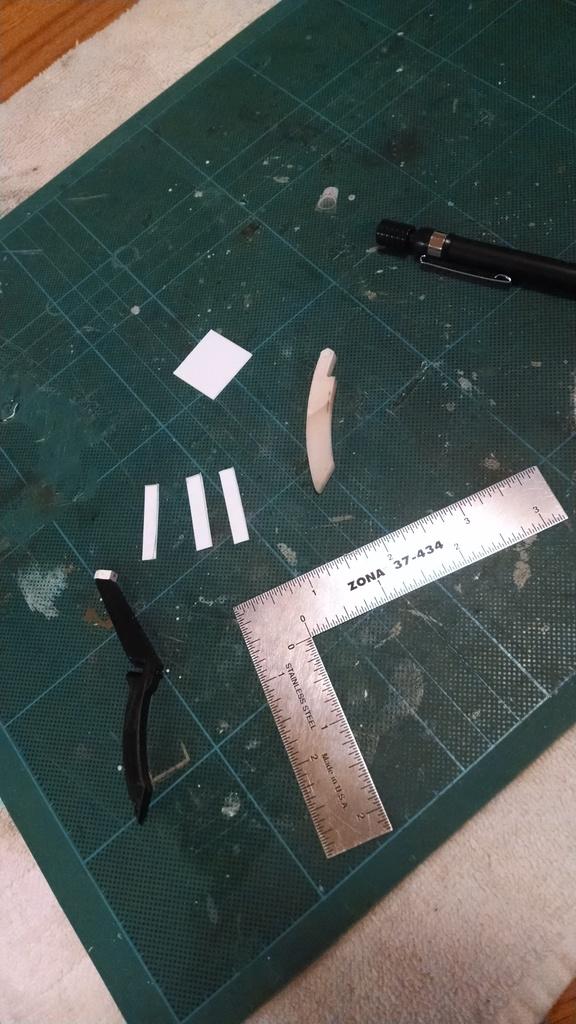
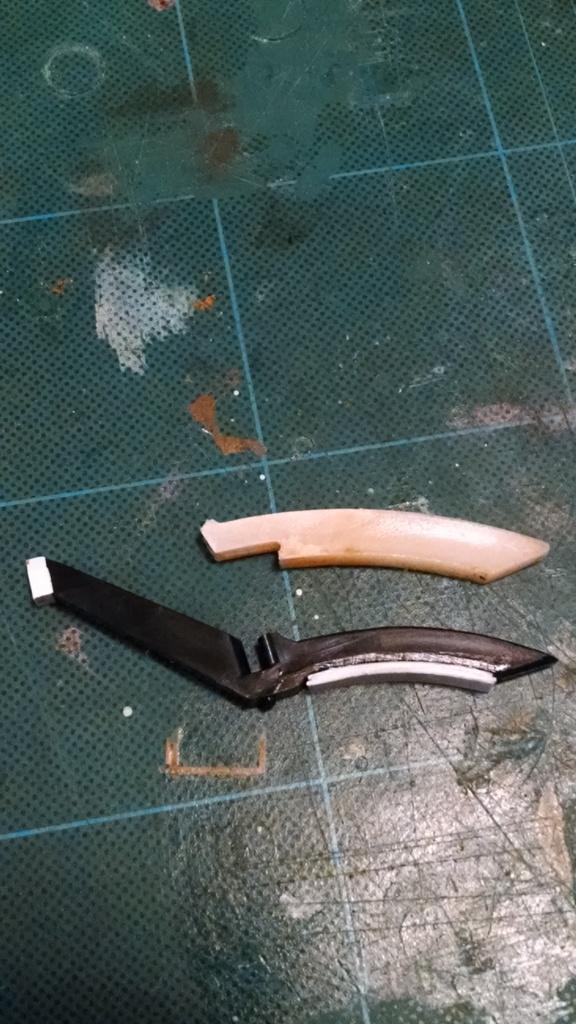
After that mod, the needle fits tight in the column.
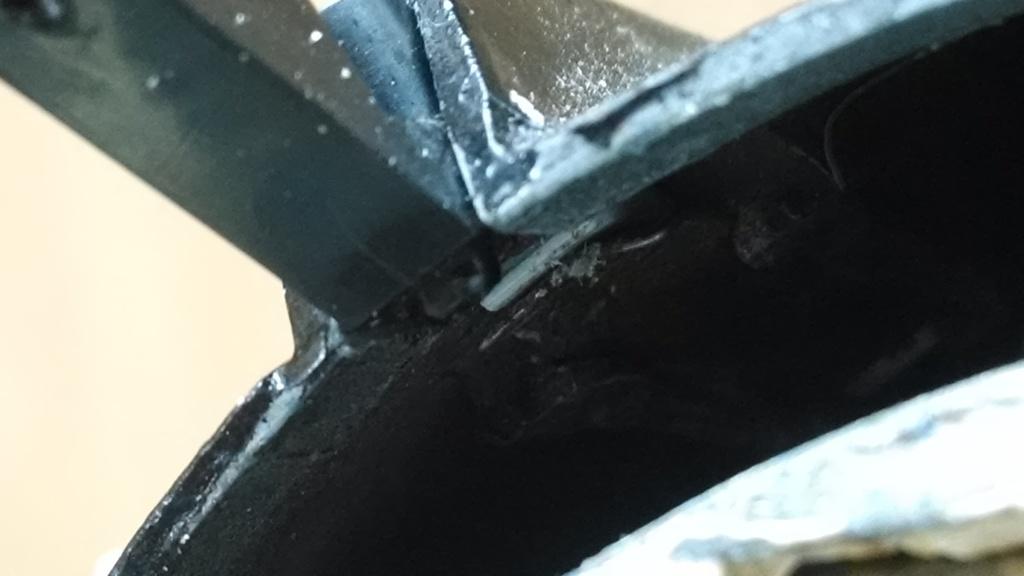
And, it "appears" to work.
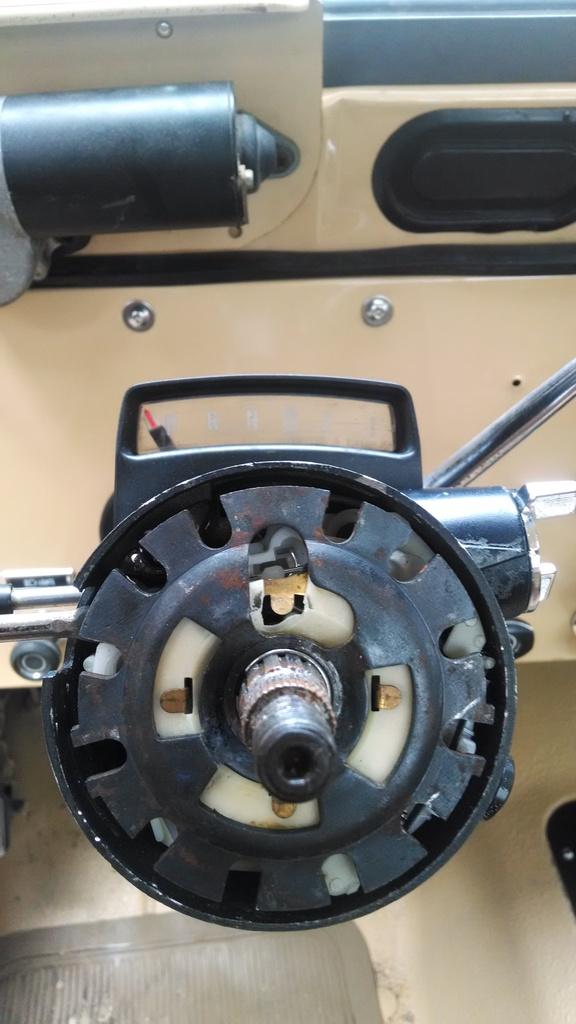
I was so happy, until I tilted the column all the way "up". The indicator will hit the needle.
I received the last two body mounts in the mail. Even though they sell you a CJ-8 kit, they always send a CJ-7 kit, then send the last two mounts in a later shipment!!!!!!!!! I saved the rear cross member mounts for last, no surprises, cross member is still solid.
After I installed the last two body mounts, and torqued them all down, the Scrambler disappeared!!!!!!!!!!!!!!!!!!
I moved it closer to the garage, less walking to get tools!!!!!!
Besides the body mounts, I spent what little time I had working on the steering column, trying to get the gear indicator worked out.
Tore the column down to here, to get to the slot the gear indicator needle slides into.
The body shop broke the original/correct gear indicator needle. I could not find another AMC/Jeep needle, so I am trying to get this other GM needle to work. The white piece is what is left of the "correct" part, the black needle is the replacement I am trying to make work.
First problem, the black needle is thinner then the stock needle, so it fits really loose. So, a bit of sheet styrene and plastic glue, fixed that issue.
After that mod, the needle fits tight in the column.
And, it "appears" to work.
I was so happy, until I tilted the column all the way "up". The indicator will hit the needle.
- City
- Biloxi
- State
- MS
But, I have some room to space the needle back, I hope to "easily" fix this issue without resorting to major needle surgery!!!!
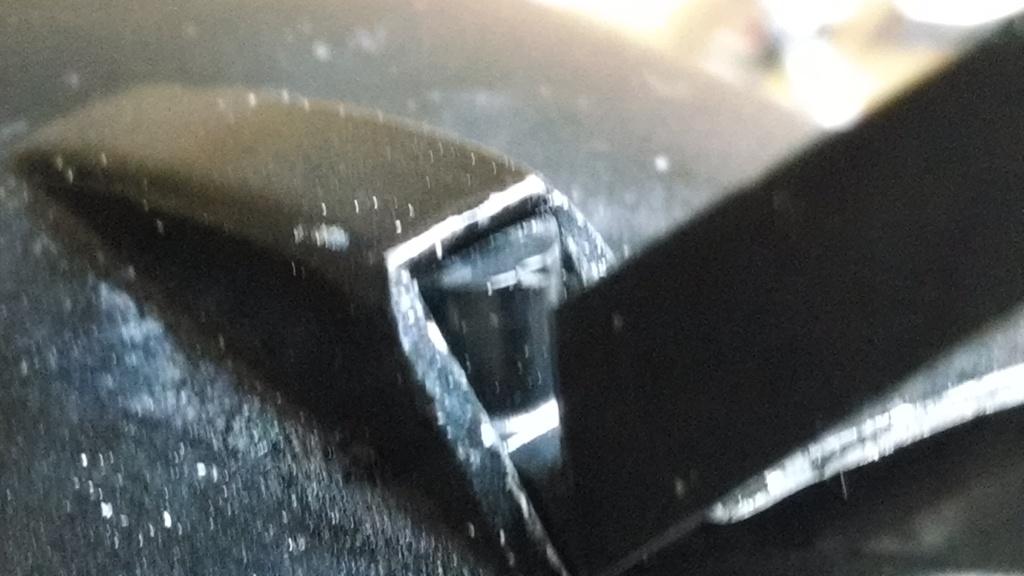
While I had the column apart, I looked into tightening up the lock cylinder that slides in and out about 3/16". But, there is no way to "shim" the cylinder. It appears that the cast housing where the cylinder goes is broken. Picture is a bit crappy:
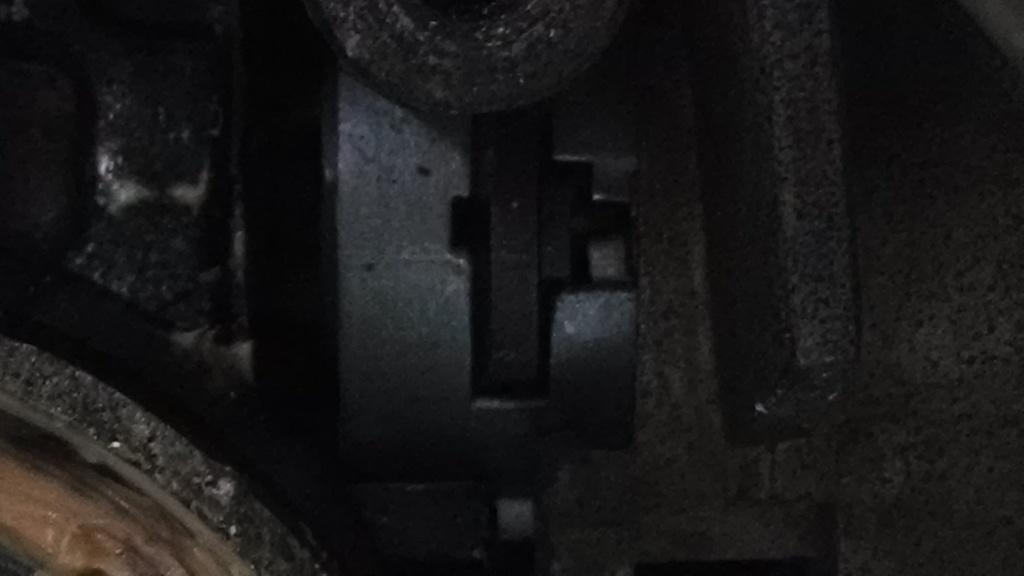
I am going to leave this issue alone. While it is possible to purchase just this part of the column, it will be hard to find this part for a Jeep CJ/auto/tilt column. A regular GM truck column shift column part is easy and inexpensive to buy. BUT, they do not have the notches for column mounted gear indicator parts. In the interest of getting this Scrambler back to Josh, I am not going to worry about this minor issue. The lock cylinder functions 100% correct, it just slides in and out a bit too much for my liking.
All of this column work uncovered another issue: The weather has gotten a bit colder here, and I noticed that the steering wheel lock bolt was not engaging. What I mean, when you lock the key cylinder, the steering wheel should lock in place. It was not. The problem - too much grease on the lock bolt, slight burr at the end of the hole the lock bolt slides into. Picture of the lock bolt:
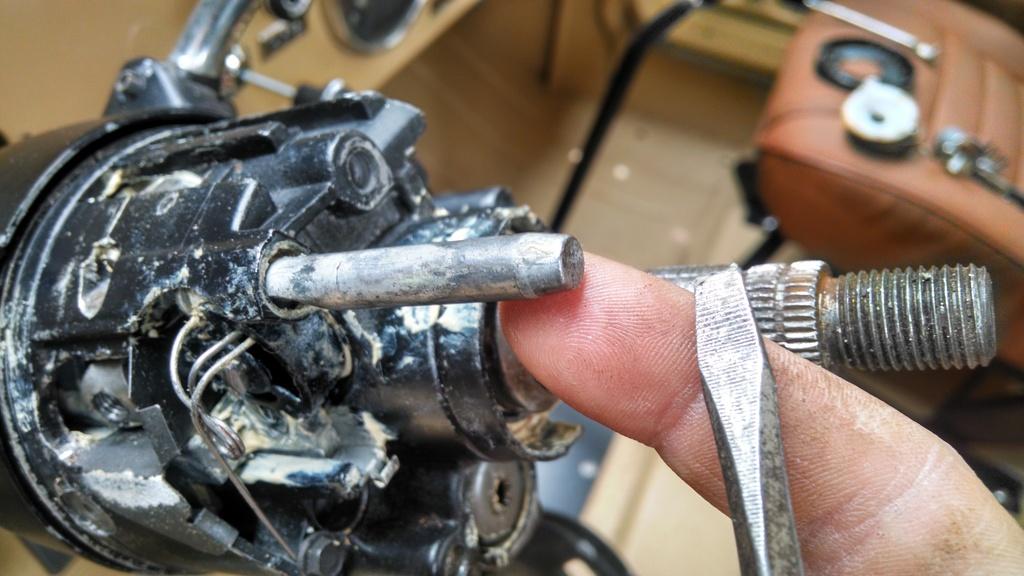
After removing the burr, wiping off some grease, the column is back to being 100% functional. Just some minor gear indicator needle surgery should have it at 100%.
Two quick pictures, showing Josh's Scrambler next to my Tan Scrambler, just to prove it moves under its own power LOL:
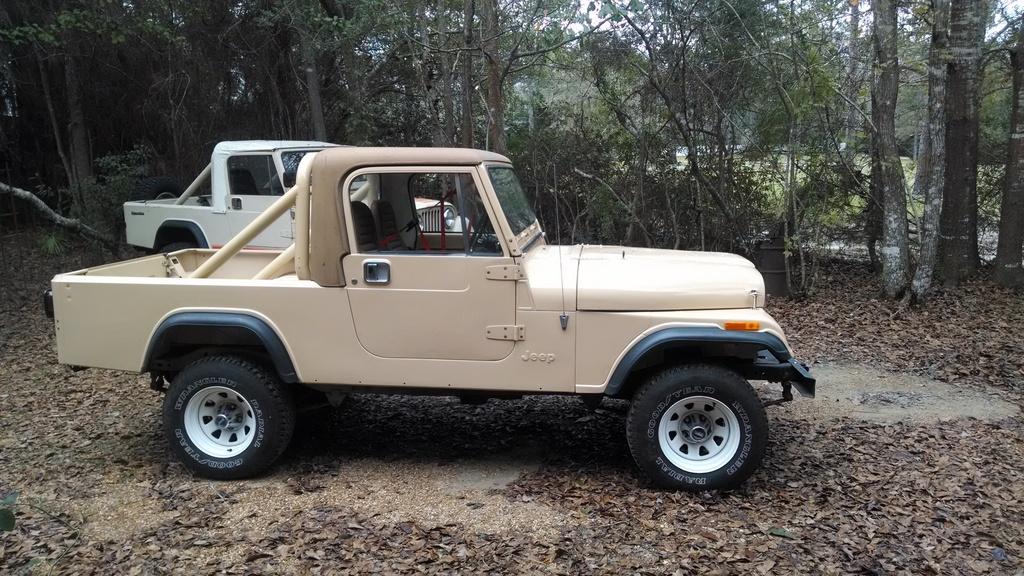
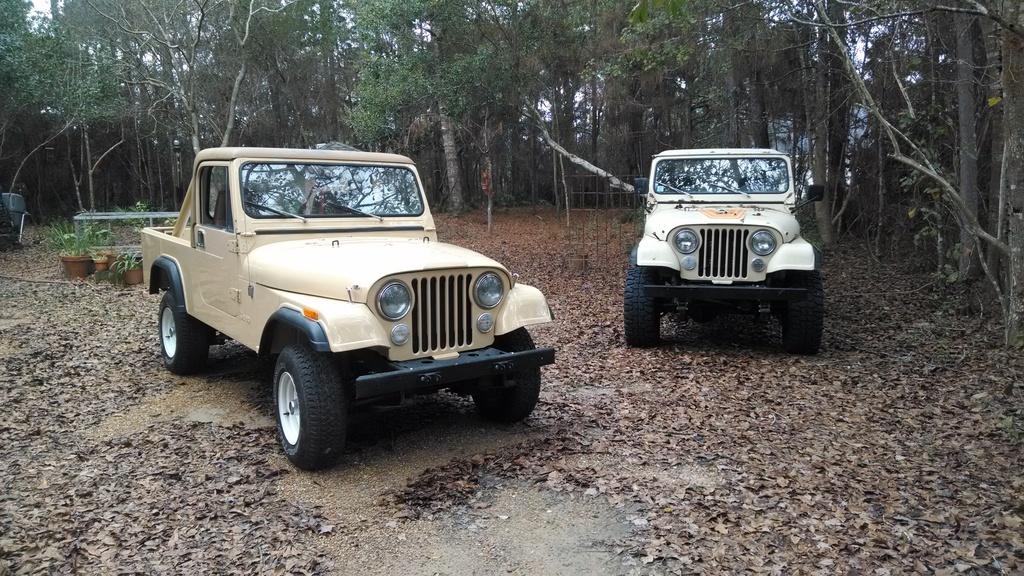
I drove Josh's Scrambler some this weekend on a few short trips. Once it warms up, it runs pretty good. Steering is tight, brakes work well, transmission seems to function fine. All in all, pretty happy with that.
But, the aluminum valve cover leaks bad, and it appears the bottom of the intake manifold is leaking a bit. So, I am going to change the valve cover, intake, and exhaust manifold gaskets, then do some minor tweaking.
One other "issue": the choke plate functions fine on this Motorcraft carb. But, I do not see a "fast idle" adjustment. So, while the choke closes, without the fast idle, the Jeep is not drivable when it is cold. It boggs down bad, and it stinks, due to all the un-burned gas washing through the cat. If you keep it slightly revved up with the gas pedal while cold, it works much better.
Anyway, getting closer, that's it for now
While I had the column apart, I looked into tightening up the lock cylinder that slides in and out about 3/16". But, there is no way to "shim" the cylinder. It appears that the cast housing where the cylinder goes is broken. Picture is a bit crappy:
I am going to leave this issue alone. While it is possible to purchase just this part of the column, it will be hard to find this part for a Jeep CJ/auto/tilt column. A regular GM truck column shift column part is easy and inexpensive to buy. BUT, they do not have the notches for column mounted gear indicator parts. In the interest of getting this Scrambler back to Josh, I am not going to worry about this minor issue. The lock cylinder functions 100% correct, it just slides in and out a bit too much for my liking.
All of this column work uncovered another issue: The weather has gotten a bit colder here, and I noticed that the steering wheel lock bolt was not engaging. What I mean, when you lock the key cylinder, the steering wheel should lock in place. It was not. The problem - too much grease on the lock bolt, slight burr at the end of the hole the lock bolt slides into. Picture of the lock bolt:
After removing the burr, wiping off some grease, the column is back to being 100% functional. Just some minor gear indicator needle surgery should have it at 100%.
Two quick pictures, showing Josh's Scrambler next to my Tan Scrambler, just to prove it moves under its own power LOL:
I drove Josh's Scrambler some this weekend on a few short trips. Once it warms up, it runs pretty good. Steering is tight, brakes work well, transmission seems to function fine. All in all, pretty happy with that.
But, the aluminum valve cover leaks bad, and it appears the bottom of the intake manifold is leaking a bit. So, I am going to change the valve cover, intake, and exhaust manifold gaskets, then do some minor tweaking.
One other "issue": the choke plate functions fine on this Motorcraft carb. But, I do not see a "fast idle" adjustment. So, while the choke closes, without the fast idle, the Jeep is not drivable when it is cold. It boggs down bad, and it stinks, due to all the un-burned gas washing through the cat. If you keep it slightly revved up with the gas pedal while cold, it works much better.
Anyway, getting closer, that's it for now
- City
- Biloxi
- State
- MS
How do you plan to fix the cold idle problem. If it was mine I doubt I would enjoy driving it and I would probably end up buying a new carb if all else fails.
I "think" the fast idle adjustment is on the "passenger" side of the carb, I will have to look and see
It's been awhile since I messed with a Motorcraft carb
I plan on:
checking the timing
reset the base idle
reset the air/fuel mixture
adjusting the choke
adjusting the fast idle
- City
- Biloxi
- State
- MS
Before attempting any engine tuning, decided to tackle a few "basic" engine problems.
#1) The valve cover has been leaking like Wikileaks
#2) Intake/Exhaust manifold gaskets
Josh's Jeep came with an Aluminum valve cover. And, his head has 5 threaded holes, 2 on the driver side, 3 on the passenger. I wish it had the front and back holes, but hopefully the 5 side holes will be enough. Someone used some sort of foam/rubber gasket, and lots of RTV. It leaked really bad. The biggest issue - the bolts were too long, so even fully tightened, they never really "clamped" the valve cover down.
I am replacing the crappy foam/rubber gasket with a cork gasket, glued to the valve cover. I did this with my red Scrambler, and after 28k miles, no leaks, knock on wood I am also going to add a few washers under the cap screw heads, to space them up.
After pulling the intake/exhaust manifolds, both gaskets were found to be blown. All of the intake/exhaust manifold bolts were very loose, which doesn't help.
After pulling the engine apart, spent a couple of hours cleaning the block. Got most of the old grime/oil off. Hopefully it won't stink as bad once I get it running again.
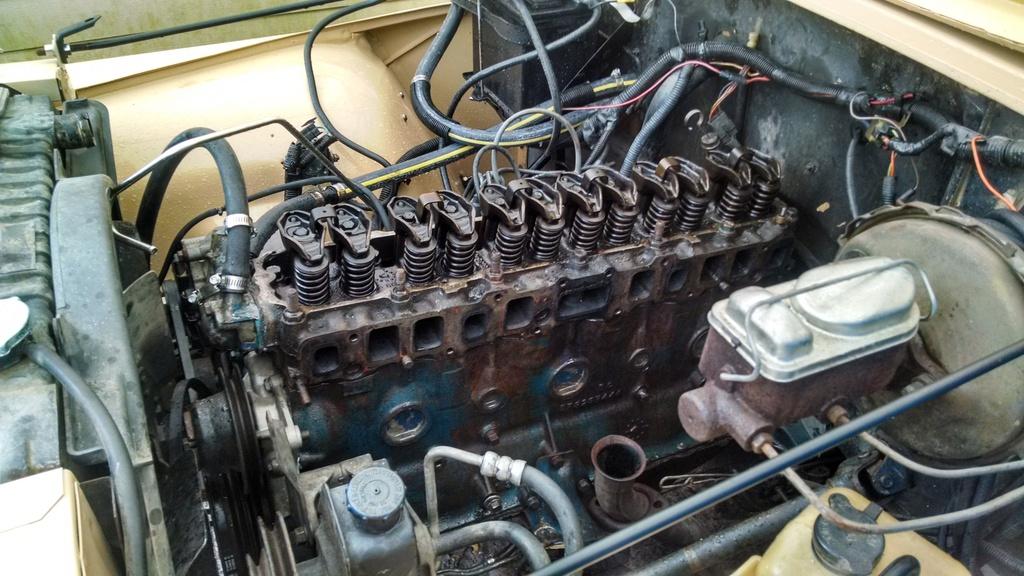
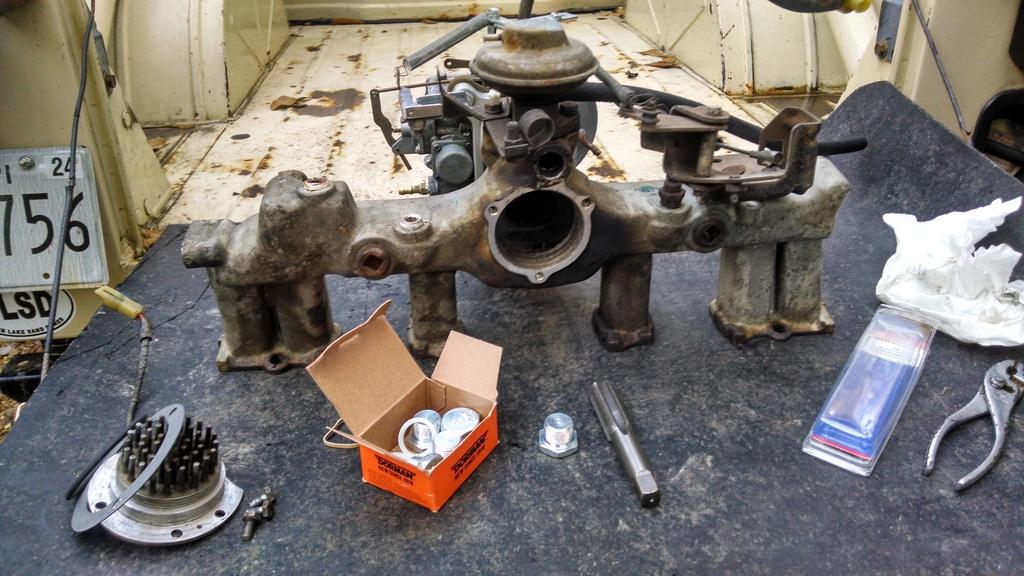
But of course, nothing is easy. Someone cut the original EGR tube and clamped the two ends shut. Not the end of the world, I am not too worried about the EGR functioning. The biggest problem, someone cross threaded the fitting in the bottom of the intake manifold. Also note the oil/grime on the bottom of the not yet cleaned intake heater, this is how the whole engine block looked
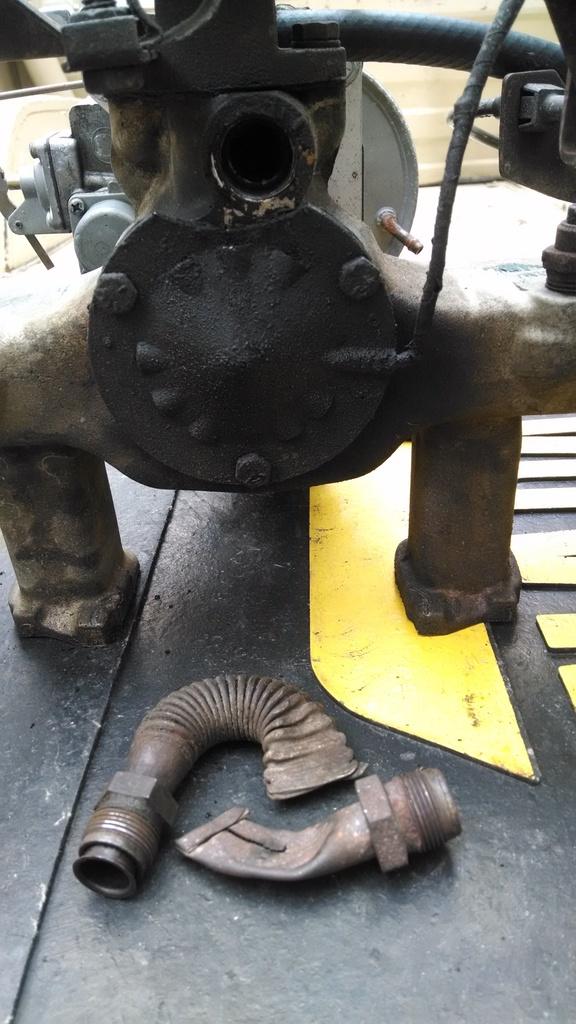
The two cut tube ends were both leaking, intake end sucking air, exhaust end leaking. These fittings are an odd thread, 7/8-18, so I had to order a tap to hopefully repair the threads in the intake manifold. I ordered some Dorman oil pan drain plugs, part # 090-011, to plug the two EGR ports.
I should get my tap/plugs this week, so hopefully this weekend I can reinstall both manifolds, and then do some tune up work.
Quick "time" update:
Thursday, 12/31 - (1.5 hours) body mounts
Friday, 1/1 - (2 hours) steering column
Saturday, 1/2 - (4 hours) steering column
Saturday, 1/9 - (5 hours) intake/exhaust manifolds, valve cover, clean engine
195.5 hours Total, so far
That's it for now.
#1) The valve cover has been leaking like Wikileaks
#2) Intake/Exhaust manifold gaskets
Josh's Jeep came with an Aluminum valve cover. And, his head has 5 threaded holes, 2 on the driver side, 3 on the passenger. I wish it had the front and back holes, but hopefully the 5 side holes will be enough. Someone used some sort of foam/rubber gasket, and lots of RTV. It leaked really bad. The biggest issue - the bolts were too long, so even fully tightened, they never really "clamped" the valve cover down.
I am replacing the crappy foam/rubber gasket with a cork gasket, glued to the valve cover. I did this with my red Scrambler, and after 28k miles, no leaks, knock on wood
I am also going to add a few washers under the cap screw heads, to space them up.After pulling the intake/exhaust manifolds, both gaskets were found to be blown. All of the intake/exhaust manifold bolts were very loose, which doesn't help.
After pulling the engine apart, spent a couple of hours cleaning the block. Got most of the old grime/oil off. Hopefully it won't stink as bad once I get it running again.
But of course, nothing is easy. Someone cut the original EGR tube and clamped the two ends shut. Not the end of the world, I am not too worried about the EGR functioning. The biggest problem, someone cross threaded the fitting in the bottom of the intake manifold. Also note the oil/grime on the bottom of the not yet cleaned intake heater, this is how the whole engine block looked
The two cut tube ends were both leaking, intake end sucking air, exhaust end leaking. These fittings are an odd thread, 7/8-18, so I had to order a tap to hopefully repair the threads in the intake manifold. I ordered some Dorman oil pan drain plugs, part # 090-011, to plug the two EGR ports.
I should get my tap/plugs this week, so hopefully this weekend I can reinstall both manifolds, and then do some tune up work.
Quick "time" update:
Thursday, 12/31 - (1.5 hours) body mounts
Friday, 1/1 - (2 hours) steering column
Saturday, 1/2 - (4 hours) steering column
Saturday, 1/9 - (5 hours) intake/exhaust manifolds, valve cover, clean engine
195.5 hours Total, so far
That's it for now.
jeepinjosh
Basic User
- City
- pell city
- State
- al
So that's what it looks like under all that oil....😬
- City
- Biloxi
- State
- MS
So that's what it looks like under all that oil....😬
Yep
I found one spot on the front I still need to clean, to make sure the new valve cover gasket works.I did a little work this weekend, not too much, valve cover gasket issues

On the intake/exhaust manifolds, the tap worked, I was able to re-thread the intake manifold, big sigh of relief. The oil pan drain plugs work. I will have to see if I need to install washers after I get the engine fired back up, but I believe the end of the plug seated firmly against the interior seats in the manifolds should seal the holes.
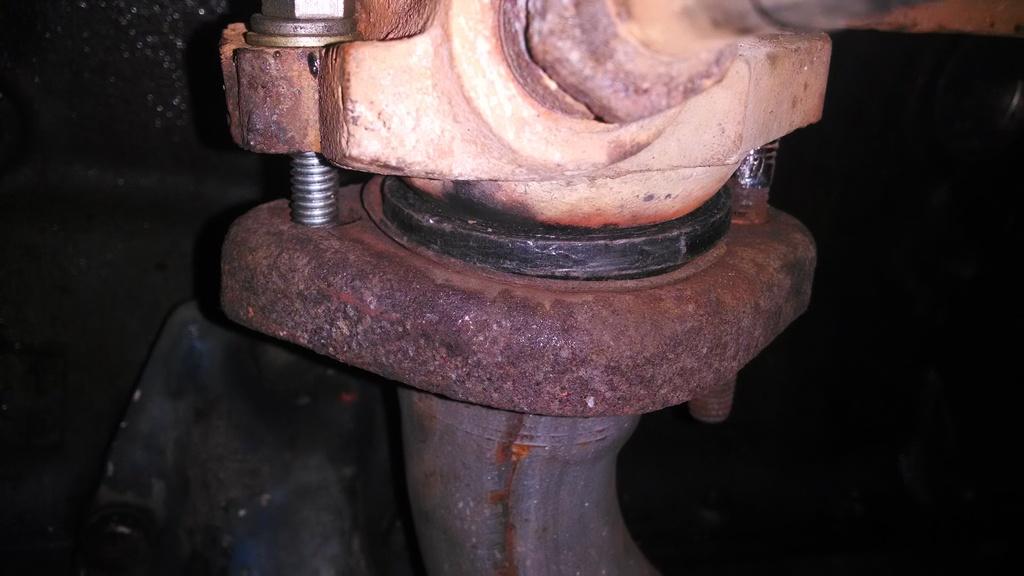
The exhaust manifold on Josh's Scrambler had issues, too. One stud to hold the down pipe to the manifold was missing, the other one has stripped threads at the top. A bolt fixed the missing stud issue, and I used a steel spacer to get below the stripped threads on the other stud. I tried to heat the stud with a torch to remove it, no go. I didn't want to break it, I've done that, it's real fun drilling out busted studs in the exhaust manifold.
The other issue - the down pipe "flare" did not fit tight against the cast "doughnut" on the bottom of the exhaust manifold. On my two 83's, the pipe fits tight to this doughnut and seals. On this '81, it was a loose fit. But, I had a "gasket" thing for this issue that I previously bought and never used. All these repairs should quiet this Scrambler down considerably.
Picture of the "gasket" and studs.
I had previously bought and (attempted to) installed a thin, cork gasket to the aftermarket aluminum valve cover. I used a NAPA/Fel-Pro gasket Part #VS50244C. I really liked this gasket, and it only cost around $10.00. But, I tried to glue it on with aviation sealant, and it never would glue down tight to the valve cover, it wanted to squirm out. I removed the gasket, then attempted to glue it to the valve cover, but the two adhesives did not like each other, and made a big goopy mess.
After about two hours of clean up, I had the valve cover ready for another gasket. But, no stores had the above referenced gasket in stock. The only gasket I could obtain was a Fel-Pro VS50244R, which cost like $45.00!!!!!!!!!!!!!!
I went ahead and bought the expensive gasket to try out, here is what it looks like:
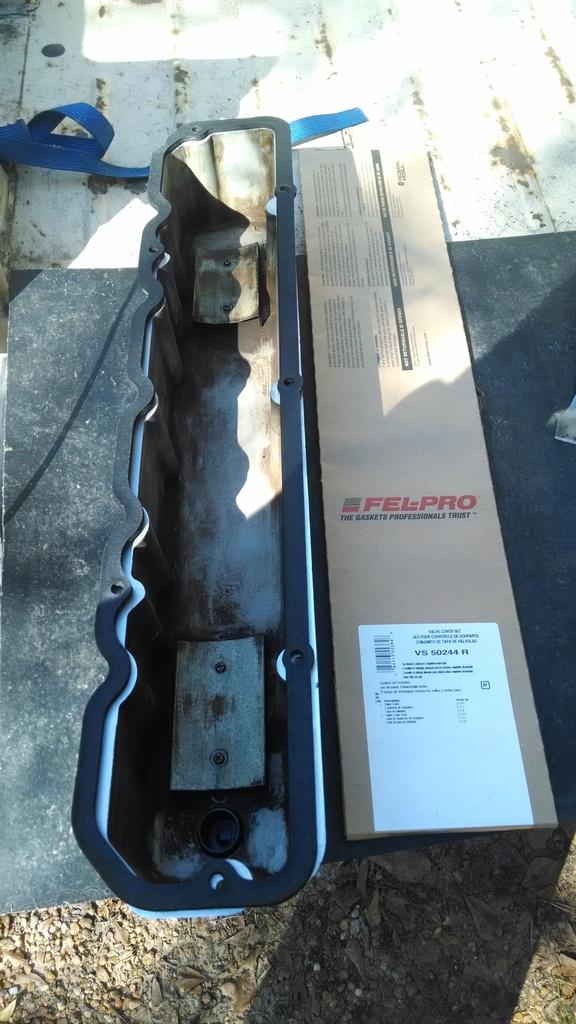
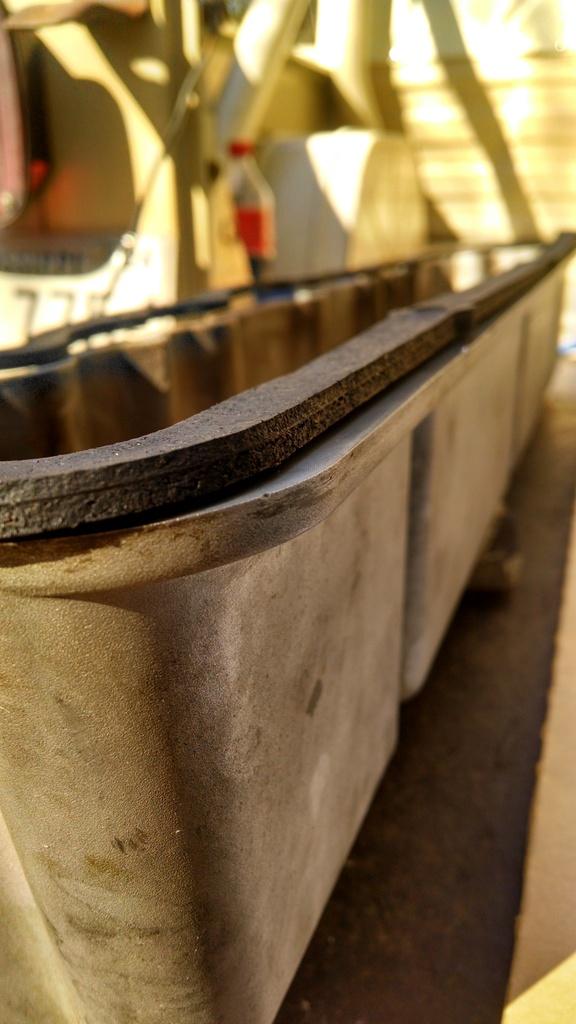
It is some kind of cork/rubber composite, like two seperate gaskets, bonded to an internal steel strip. The instructions say not to glue it to the valve cover, so that is what I am going to attempt. I do like the internal metal strip, once you install the valve cover bolts through the gasket, the steel strip keeps the gasket from squirming out.
Once I get the engine up and running I will report back on this gaskets performance. If it leaks, it will be simple enough to remove it and install a more conventional cork gasket, like I installed on my red Scrambler's 4.2 (with aftermarket aluminum valve cover), 28,000 miles with no leaks, knock on wood
That's it for now
- City
- Biloxi
- State
- MS
We had decent weather this weekend, so I was able to get some more work done on Josh's Scrambler.
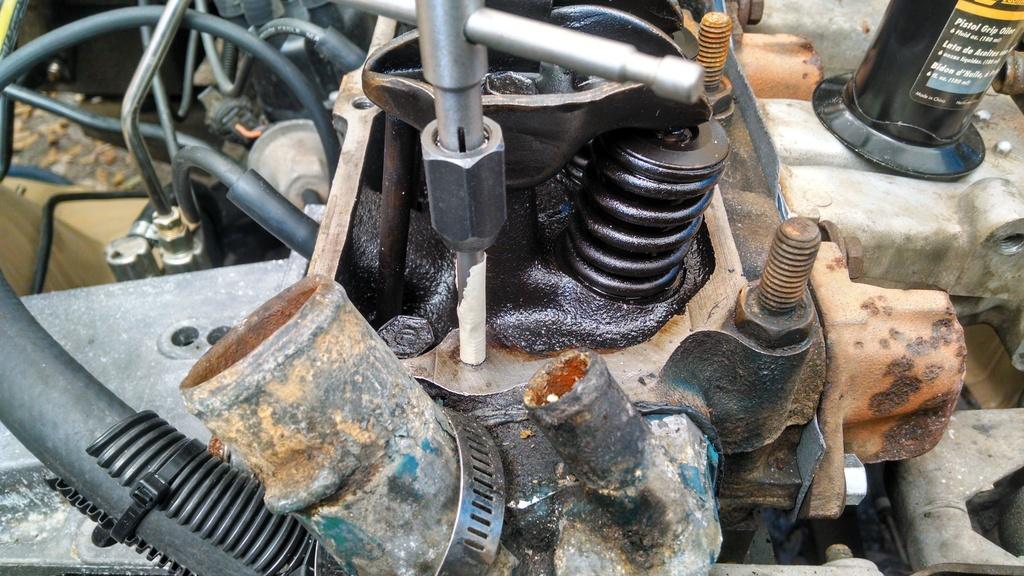
The cylinder head on this '81 Scrambler did not have the front or back valve cover mounting bolt holes present. This bugged me, so I decided to drill and tap these two holes.
I used an old cylinder head to determine how deep I could go: 5/8" deep hole with approximately 3/8" threaded. I used pieces of tape on the drill bit/tap so I wouldn't go too far.
Front hole was easy:
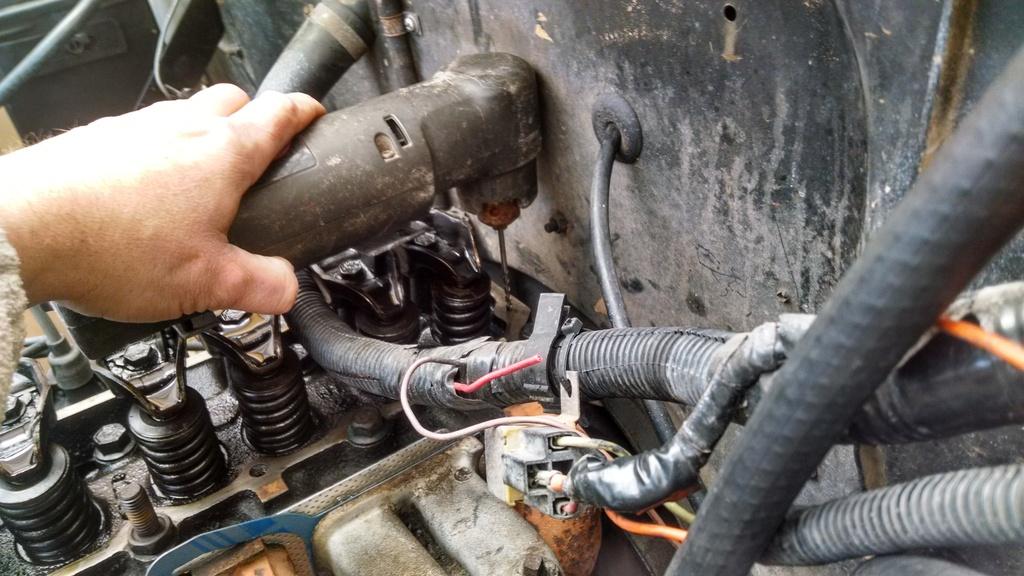
The rear hole is a PIA to create if the head is still attached to an installed engine. But, I was able to borrow an angle drill which allowed me to drill this hole. The angle drill is a bit trickier to use, so practice might be in order if you have never used one before.
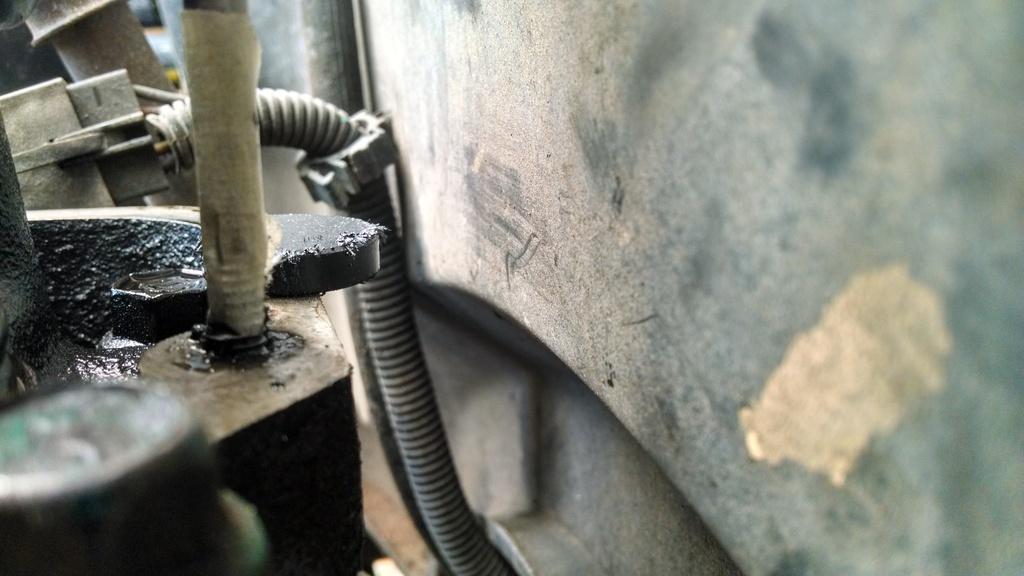
And the tapped rear hole. You can also see the magnet I used to catch all the metal chips. I would drill a little bit, clean up, drill a little bit, clean up..........The cast head is pretty easy to drill and tap, but I also used a new bit and new bottom tap, cheap insurance.
Finally, the installed with 7 bolts valve cover, with "miracle gasket.........
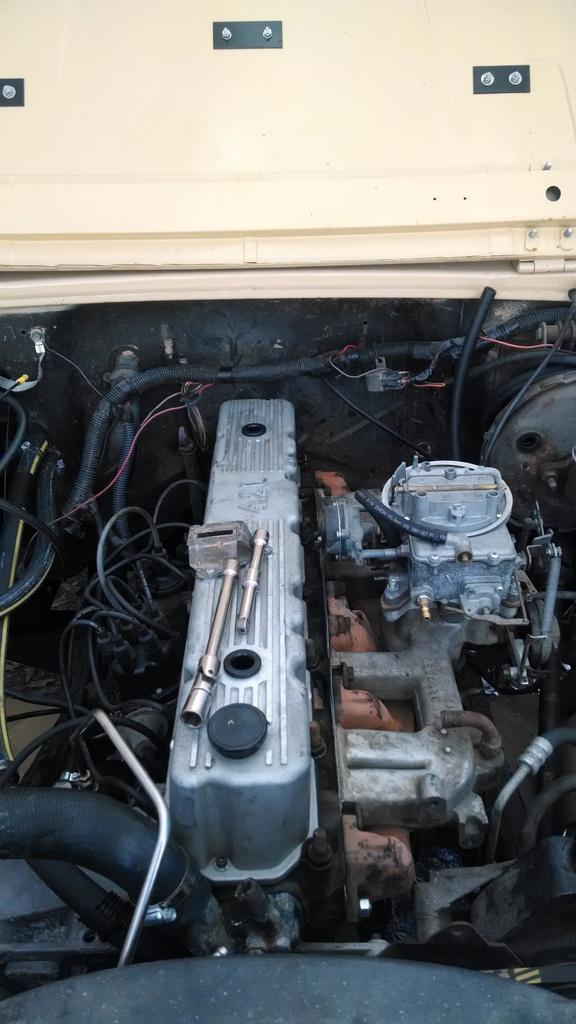
Which promptly leaked like a stuck pig on the intake/exhaust manifold side!!!!!!!!!!!!!!
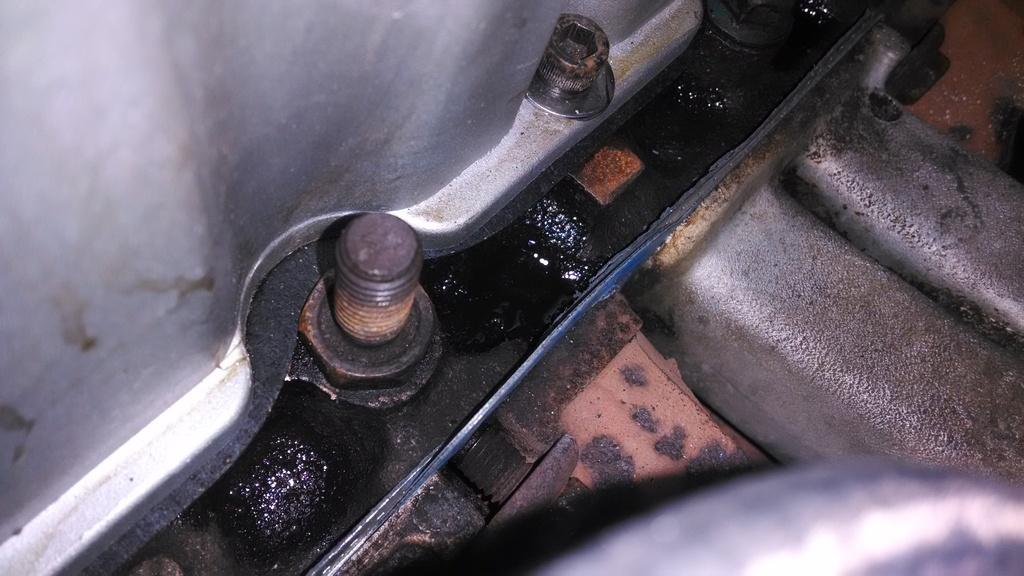
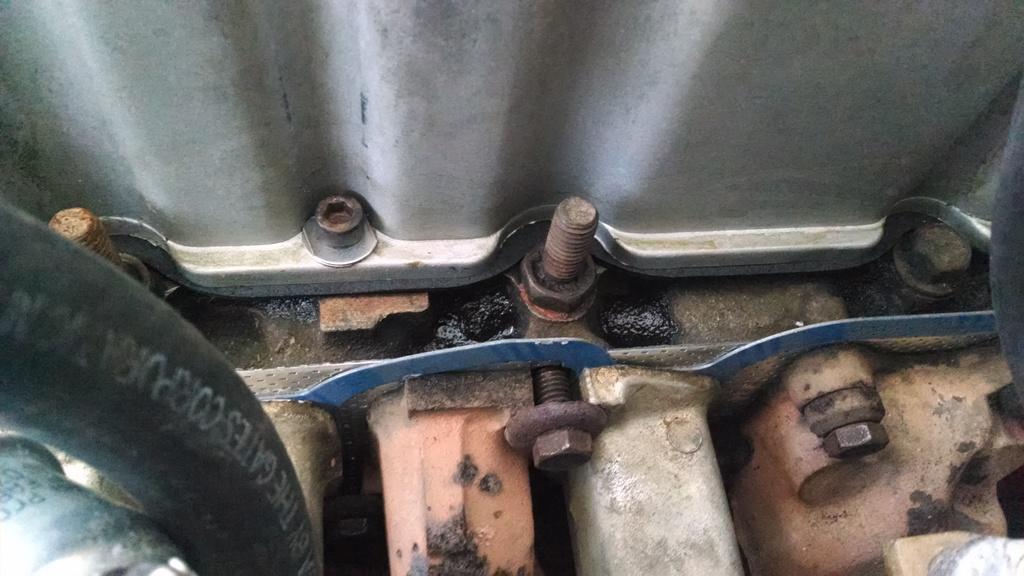
I never was too confident in this gasket, just didn't seem "right". Upon disassembly, it appears that most of the leakage occured between the gasket and the valve cover.
I am now going back to a cork gasket, glued to the valve cover. First step, glue the gasket to the valve cover, let it cure for 24 hours.
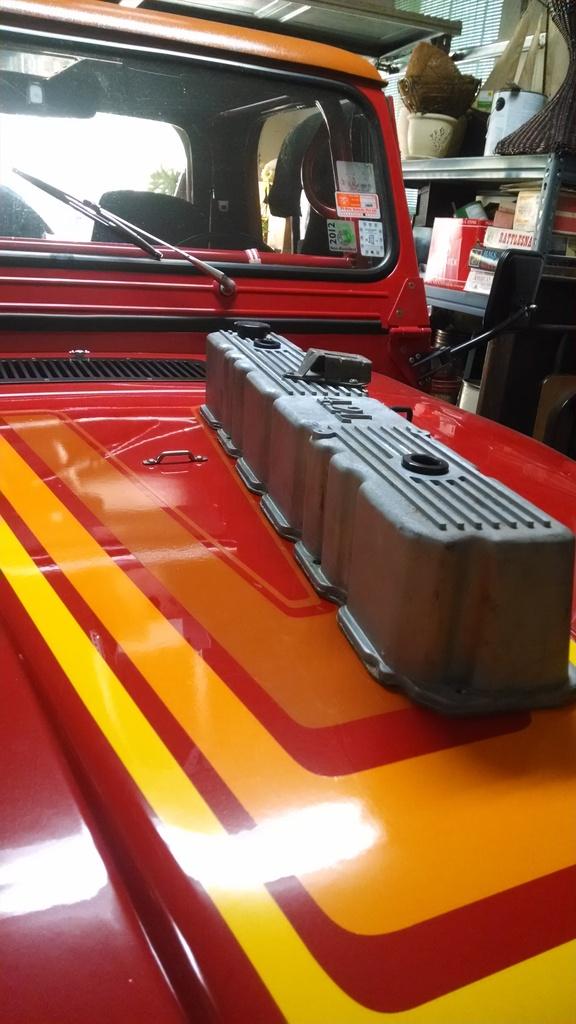
I will probably also put a skim coat of RTV on the bottom of the gasket where it meets the cylinder head. Might not be necessary, but that's how I assembled the aluminum valve cover to my red Scrambler's cylinder head, and after 28,000 miles, no leaks. When I say skim coat, I mean smearing on a thin layer with my finger. I also think that the 3/4" long 5/16 cap screws are a bit too long, so I am going to cut off a couple of threads on each one. They are bottoming out in the holes a bit before a good cinch down is reached. The 1/4-20 holes I drilled in the front/back work perfect with a 3/4" long fastener.
Anyway, hope to finally fix the "smoke signal generator", then I can do some basic tuning, then get this rig back to Josh.
I did run the engine through a warm up cycle with the leaking valve cover. After adjusting the fast idle, this thing warms up much better. Before the adjustment, the fast idle was not engaged at all. So, you had full choke on cold start up without the corresponding faster curb idle speed. Much better now.
That's it for now
The cylinder head on this '81 Scrambler did not have the front or back valve cover mounting bolt holes present. This bugged me, so I decided to drill and tap these two holes.
I used an old cylinder head to determine how deep I could go: 5/8" deep hole with approximately 3/8" threaded. I used pieces of tape on the drill bit/tap so I wouldn't go too far.
Front hole was easy:
The rear hole is a PIA to create if the head is still attached to an installed engine. But, I was able to borrow an angle drill which allowed me to drill this hole. The angle drill is a bit trickier to use, so practice might be in order if you have never used one before.
And the tapped rear hole. You can also see the magnet I used to catch all the metal chips. I would drill a little bit, clean up, drill a little bit, clean up..........The cast head is pretty easy to drill and tap, but I also used a new bit and new bottom tap, cheap insurance.
Finally, the installed with 7 bolts valve cover, with "miracle gasket.........
Which promptly leaked like a stuck pig on the intake/exhaust manifold side!!!!!!!!!!!!!!
I never was too confident in this gasket, just didn't seem "right". Upon disassembly, it appears that most of the leakage occured between the gasket and the valve cover.
I am now going back to a cork gasket, glued to the valve cover. First step, glue the gasket to the valve cover, let it cure for 24 hours.
I will probably also put a skim coat of RTV on the bottom of the gasket where it meets the cylinder head. Might not be necessary, but that's how I assembled the aluminum valve cover to my red Scrambler's cylinder head, and after 28,000 miles, no leaks. When I say skim coat, I mean smearing on a thin layer with my finger. I also think that the 3/4" long 5/16 cap screws are a bit too long, so I am going to cut off a couple of threads on each one. They are bottoming out in the holes a bit before a good cinch down is reached. The 1/4-20 holes I drilled in the front/back work perfect with a 3/4" long fastener.
Anyway, hope to finally fix the "smoke signal generator", then I can do some basic tuning, then get this rig back to Josh.
I did run the engine through a warm up cycle with the leaking valve cover. After adjusting the fast idle, this thing warms up much better. Before the adjustment, the fast idle was not engaged at all. So, you had full choke on cold start up without the corresponding faster curb idle speed. Much better now.
That's it for now
Have you tried checking with a straight edge to see if valve cover is warped. I have a sick feeling that might be part of the problem. If so hopefully with tightening it down good and your rtv it'll fill the leak. That's a nice looking angle drill. Does it work off air (didn't see a air fitting). Looks like even the angle drill was a tight fit.
- City
- Biloxi
- State
- MS
You should have it ready for a sandblast test run and shakedown come August.
It will be done way before that, and back in Josh's hands
Josh is back living at the "Top" of Alabama, so he is closer to Michigan then me
