

You are using an out of date browser. It may not display this or other websites correctly.
You should upgrade or use an alternative browser.
You should upgrade or use an alternative browser.
Never Ending Scrambler Build
- Thread starter jammer1
- Start date


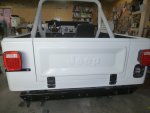
Bad news, a major Hiccup happened with the paint job. Something is either bleeding through the paint or the paint is bad and has a color problem. I repainted the jeep last march because of the difference of color (Fenders, hood, grill and tailgate were a dirty, off white). This didn't show up till months later so I re-shot the truck with the tub, fenders and grill attached. Then I wet sanded it all and did a rub and buff. Came out pretty good. End of March started my work season so the jeep sat in the heated section that I pass through to turn shop lights on maybe twice a week, never paid attention to the jeep. When I started on the jeeps in November noticed the pieces were darkening again. Must take a number of months since the jeep stays out of the daylight. I had a friend (he taught me how to paint by spray gun) come over and look at it and he's guessing a chemical reaction is happening and bleeding through the paint. He tried buffing with a wool pad and super duty compound and only got a hair more gloss but no color change. It's unusual since it's the bolt on pieces with a little at the tub-fender line (I didn't buff it out as much for fear of going through the paint). Went to the paint store and had them look at it (including calling other stores and painters for opinions) and they are under the impression somethings reacting or somethings wrong with the paint. I have almost another gallon of the paint but it's starting to skin and what they call chunking. They're going to match the paint in a ss urethane (I painted a ss acrylic enamel). Looks like I'm going to pull the hood and tail gate and shoot them and see how it comes out. They originally said (my buddy also said) to re-shoot the tail gate and see how it comes out but after doing it twice to me that doesn't make sense. Here some pics, the full rear shot is at the end of March, the corner of the tail gate is today


I reduced the epoxy primer to use as a sealer. After checking with a friend (been painting since 15 including owning and painting in his own auto body shop), paint supply store and them checking with another store and two of their customers can't figure out how it is happening on individual panels all prepared and painted the same and at the same time. I have the hood and tailgate removed, grease and wax remover (2 times, wiping when still wet) then sanded and used grease and wax remover again. Everyone recommended not using a sealer, just repaint. Today I shot SS urethane. Has the paint shop mix as color as close as they could color match to the windshield frame and dash (both have not yellowed). Has a nice gloss and reflection (compared to SS enamel) but was only a hour old. May have to wait a couple months to see if it tries to yellow again. I'm hoping my friend is correct that I may have not mixed the gallon enough to completely mix the pigment. The yellow can settle toward the bottom. As I used the gallon (couple different paintings) I may have been going a little more yellower (dirtier white) with each painting (3 paintings). Still doesn't explain the difference of the parts and the tub and why you can rub it out and the color was close, come back 7 mths later and it's darker. Hope this works.

 Yesterday I degreased and sanded the hood and tail gate. Mixed up the urethane paint and shot the parts. Urethane is much thinner than the enamel, took a little to get use to. No runs (surprised because of how thin). Noticed fish eyes (even though I used fish eye reducer). Drained the tank and washed with the grease/wax remover 3 times before paint (1 before sanding, 2 after) so I sprayed a extra coat to try to wet sand out. If not for fish eyes and some dust the gloss and mirror reflection came out so nice I may have not wet sanded it.
Today I started stripping the jeep for the sanding and repaint. All I have left is the mirrors. Going to tape off the windshield and the dash (only parts other then the roll bar that are painted, they came out correct). Going to make a cardboard back for the grill and paper/plastic off the rest. Hopefully this week end (monday at the latest) I'll paint the rest.


 Got the jeep degreased, sanded and taped off. Ready for painting tomorrow. Funny thing is when fenders are sanded with 400 grit the color between sections of the jeep are pretty close compared to how they were before the sanding.
Got her painted today. Came out pretty good except for a couple runs on the pass corner. Never realized the paint gun regulator loosened at the gun end (never heard the leak till the compressor shut down). Tightened it up and finished unfortunately the 3 psi loss was enough to spray a heaver coat and it ran in 4 spots. Not the end of the world just more work. 
 It also happened to be the darker corner of the shop, never seen the ones by the fuel filler till it was done and did final walk around.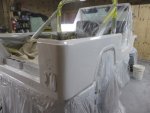
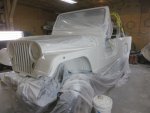
. Tightened it up and finished unfortunately the 3 psi loss was enough to spray a heaver coat and it ran in 4 spots. Not the end of the world just more work. It also happened to be the darker corner of the shop, never seen the ones by the fuel filler till it was done and did final walk around. 
Today I removed the tape and plastic. Tape didn't pull any of the paint off that's good. Used 1000 grit to sand out the runs and sanded the body with 1200 grit (hood and tailgate I'll sand last). Runs came out good and no sand through (Major relief). Urethane shot smoother than the enamel. Either the newer urethane is easier to shoot than the old school enamel or I'm getting better at it (probably a combination of the two). 
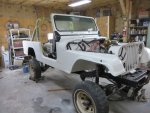

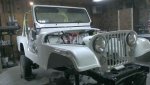
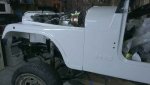
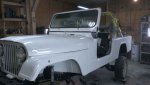

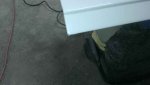
Got the jeep back together (where it was before the repaint). Moving on to the cj7 till I get more parts in. Going to flip the tie rod at the knuckle, just waiting for the reamer and inserts to get in. 

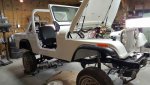 Also touched up where I sanded through
Also touched up where I sanded through
- City
- W-S
- State
- NC
You going to keep tie rod stock or go HD TRE/centerlink?
I installed the rugged ridge hd tie rod. I decided with 35" tires I installed the hd tie rod that it made no sense to not install the hd drag link. I know the rubicon express lift will settle just didn't like the angle of the drag link. I haven't decided if I'll flip the actual tie rods.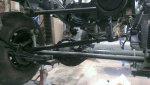

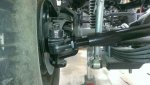
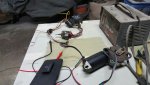
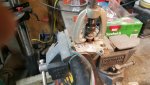

 Still waiting on the reamer and inserts for the drag link (flip). Got a wiper delay and motor (thanks Jersey) and extra parts for future use. Pulled the newer motor from the cj8 (was originally the cj7 new motor) and installed the motor. It's amazing how not having the correct size tool makes a simple job into a 40 min task. The motor arm was frozen on the motor. Didn't want to risk damaging the motor by excessive prying and all my gear pullers were too large. Ended up grinding the edges on my flare tool (happens to be the correct size feet, just too thick to fit between the arm and motor housing) and it fit perfect. Popped right off. Have it all installed except pulling the old switch out of the dash and putting the delay switch in (Can't find my DAMM allen pack to loosen the knob on the switch). Also finished the mount and mounted the heater control valve I'm going to use to shut the heat off. Cut and ran the hoses to the heater core than realized I ran short on clamps. Can't wait to get the reamer tool and see how that works.