• Notice for iPhone users: DO NOT use the image size reduction option when uploading photos to the forum. This causes portrait images to post as landscape. We have added a warning to the image insert pop-up as well.

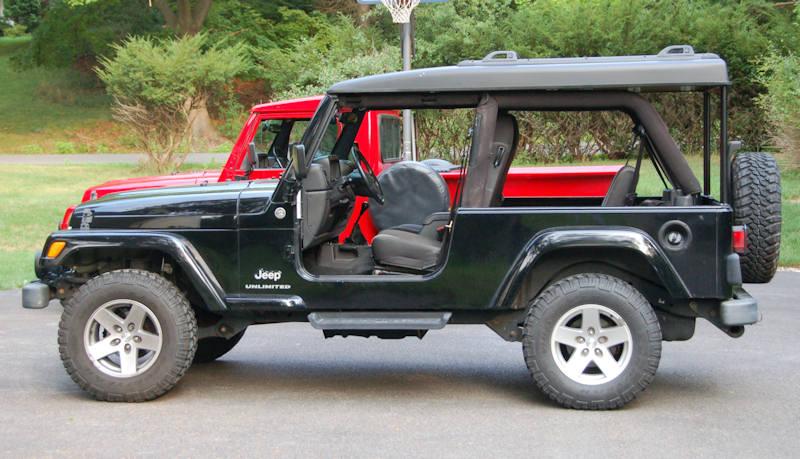
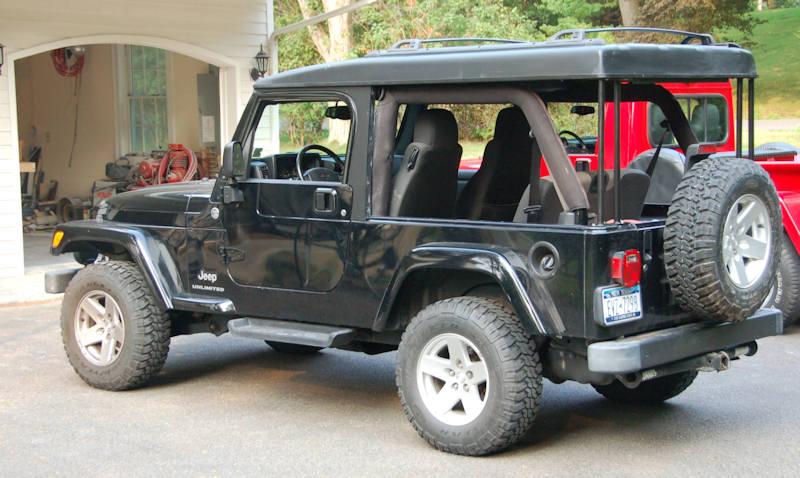
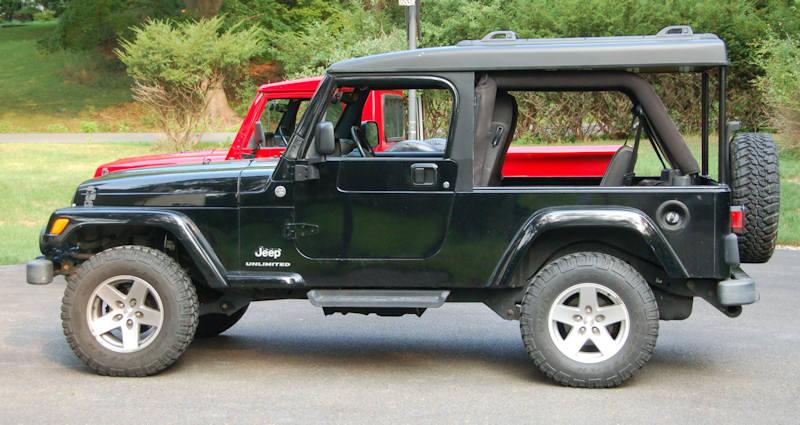
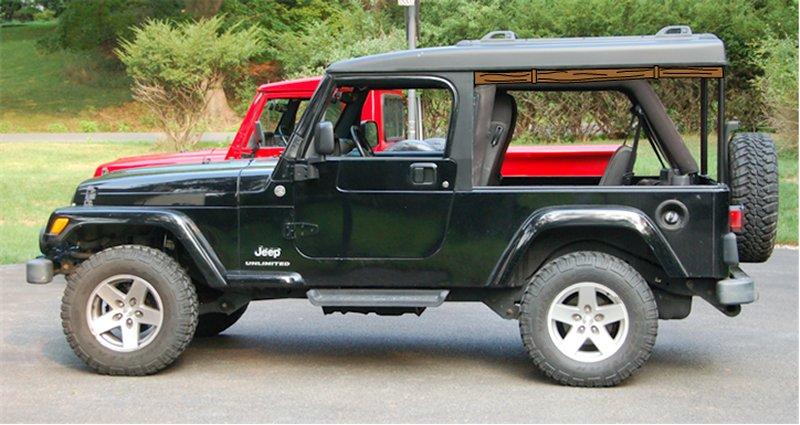
New World Cabs?

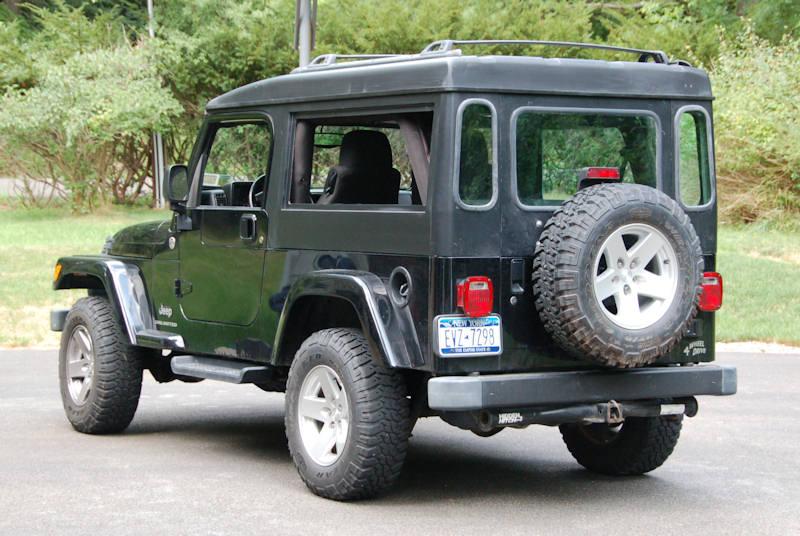
NICE.. Now were talkin... can see the lines on the roof very well now.

can now get a good visual on drip rail and proportions of the height of the roof panel in regards to the drip rail..

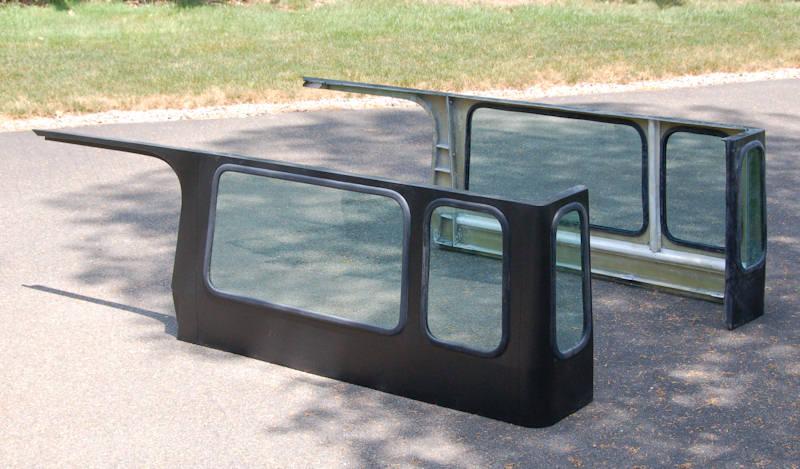
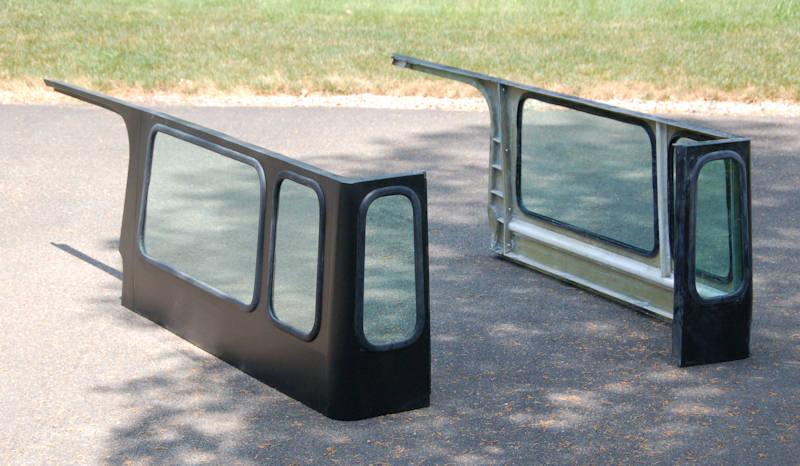
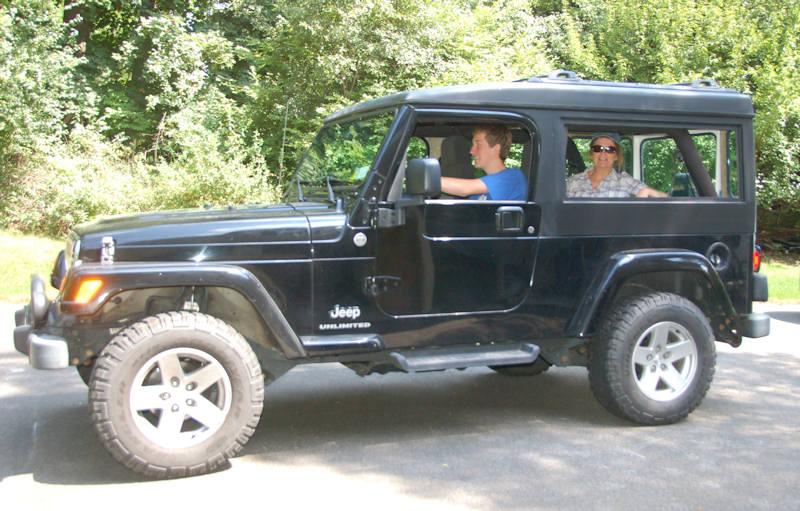
The very first picture of the panel version really really does take me back visually to an old panel van delivery truck.
Like this '29 Chrysler? :crazy:

attachment.php


Surprising how many similarities there are, considering there's 81 years between the two...

- Similar roofline
- Flares mimic the fenders on the '29
- "Spoked" wheels on both
- "Running boards" on both
- Beltline body detail continues along door and to back of van body
- Flat glass windshield


can't wait to see it with the glass in there too.
I plan to cut the holes and install the windows early next week, probably Monday.

Very nice very nice...
Thanks!
 
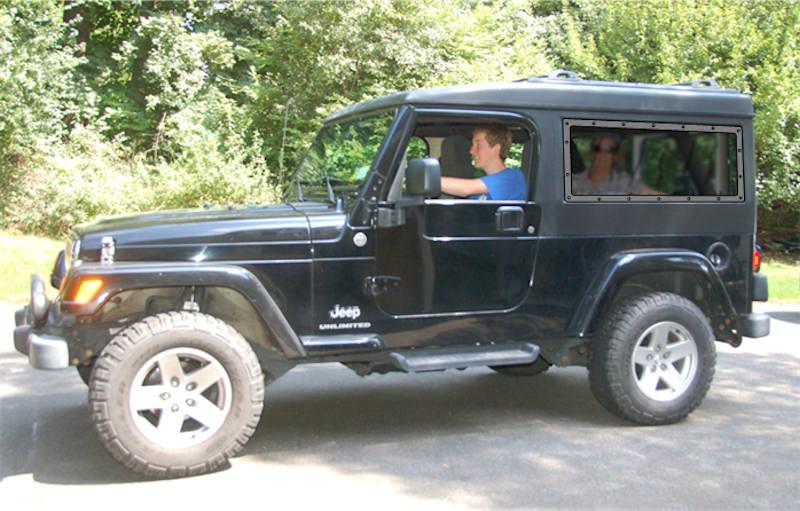
I got six of the seven windows installed in the side panels today. I'll install the window in the barn door on Monday when I put the top on the Jeep again.

Glazing3-1.jpg


Glazing4-1.jpg
 
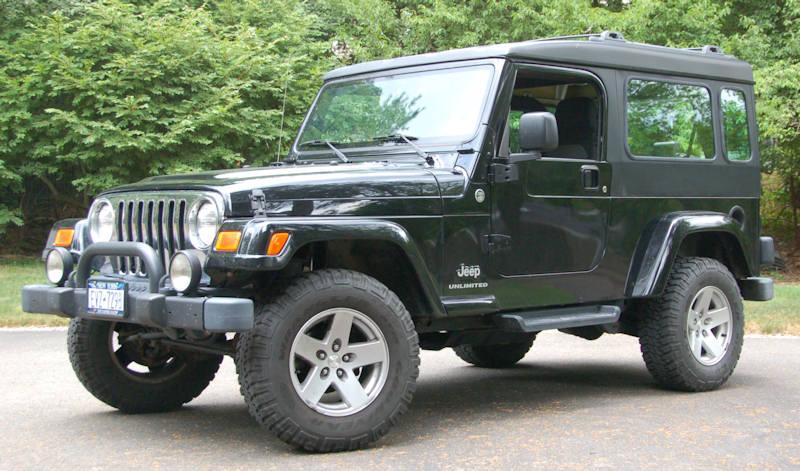
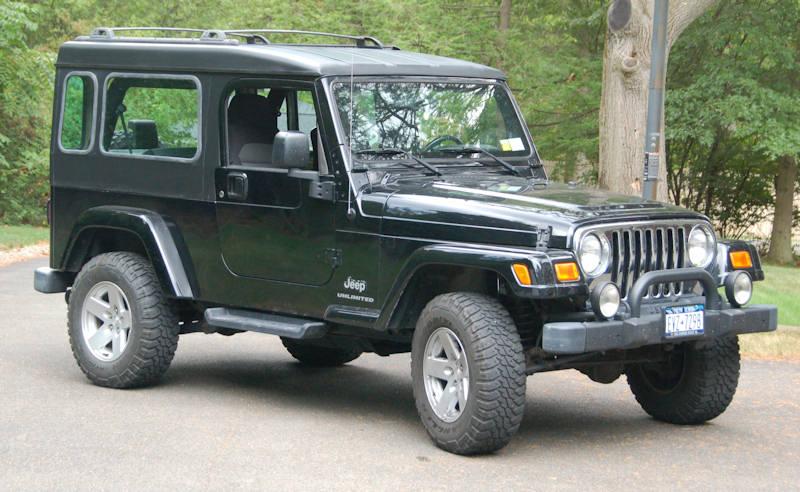
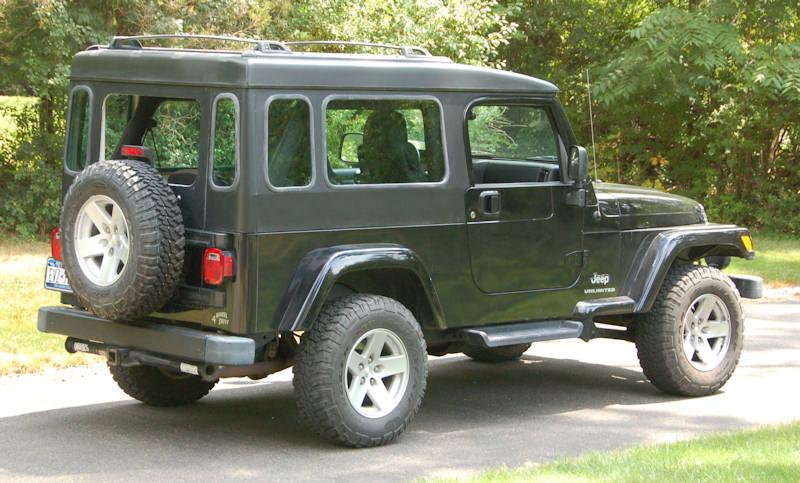
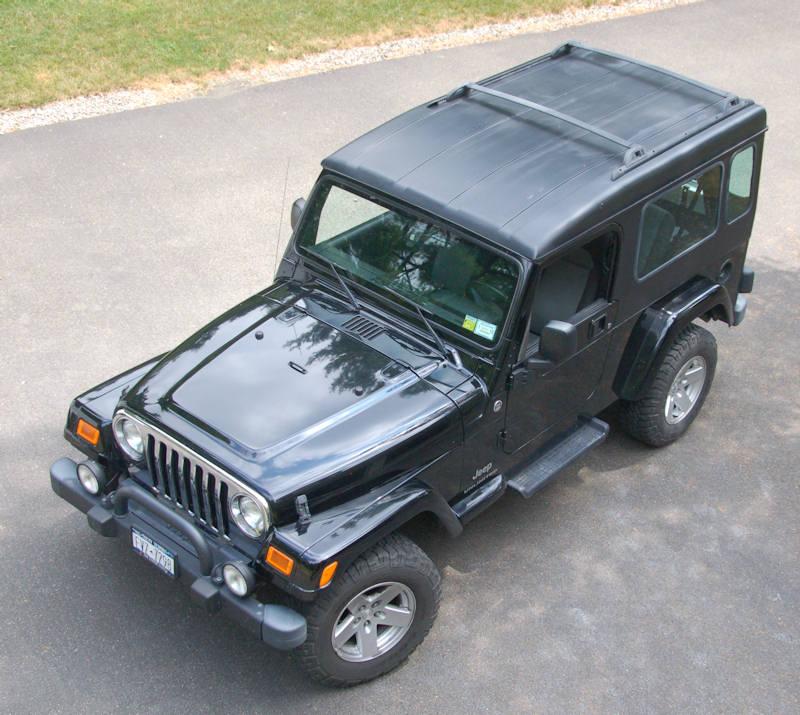
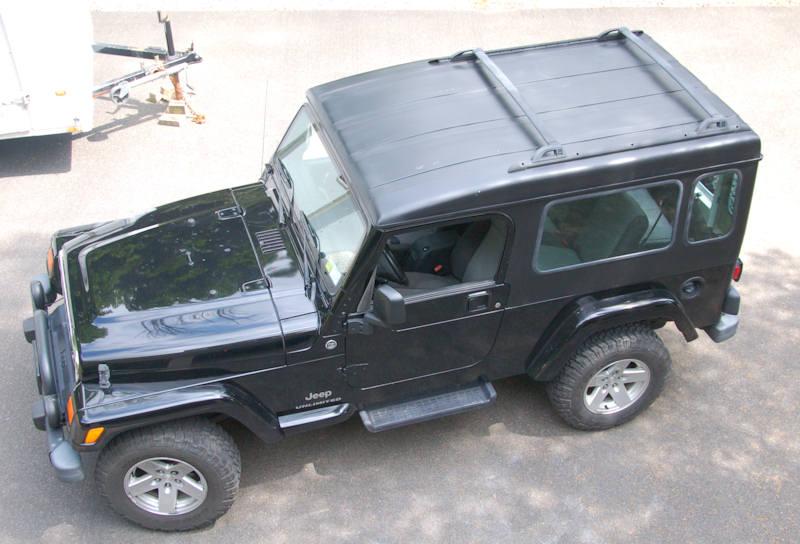
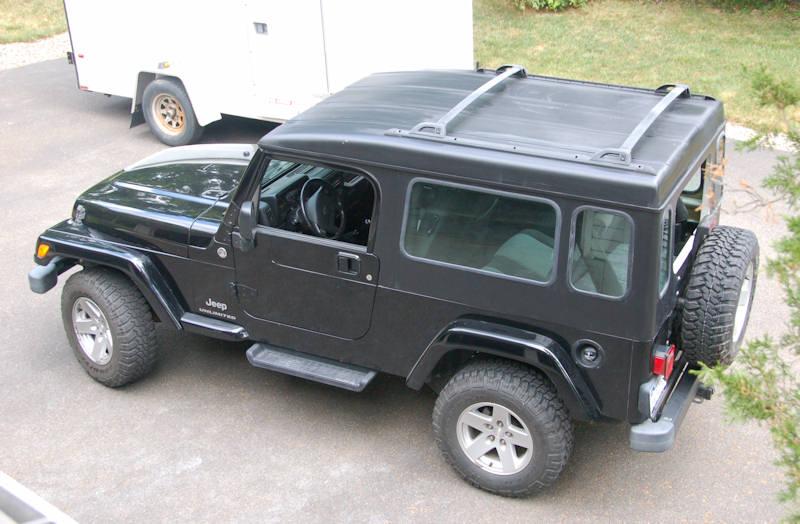
Here are some photos of the top with windows on the Jeep:

Glazing10-1.jpg


Glazing11-1.jpg


Don't have the rear door glass in yet:

Glazing14-1.jpg
 
Wow...that is beyond perfect. Jeff, I have the ultimate respect for your vision and fabrication abilities.

Where did you get the window moulding from?
 
Wow...that is beyond perfect. Jeff, I have the ultimate respect for your vision and fabrication abilities.

Where did you get the window moulding from?

Thanks!

The window molding is ordinary window gasket, I got this at the local glass place, but it's also available at C.R. Lawrence, Restoration Specialties and many other places online.
 
A couple of weeks ago in post 454 I wrote about planning to mold a different type of side window panel to test - this one would have a snap-in soft window instead of fixed glass so you could have a hardtop but also quickly snap out the windows for open air driving. Here's what the hardtop looks like with that side panel in place:

SoftWindows11-1.jpg


SoftWindows10-1.jpg


And here's a simulation of what this side panel would look like with the soft window snapped in place:

SoftWindowsSim1-1.jpg
 
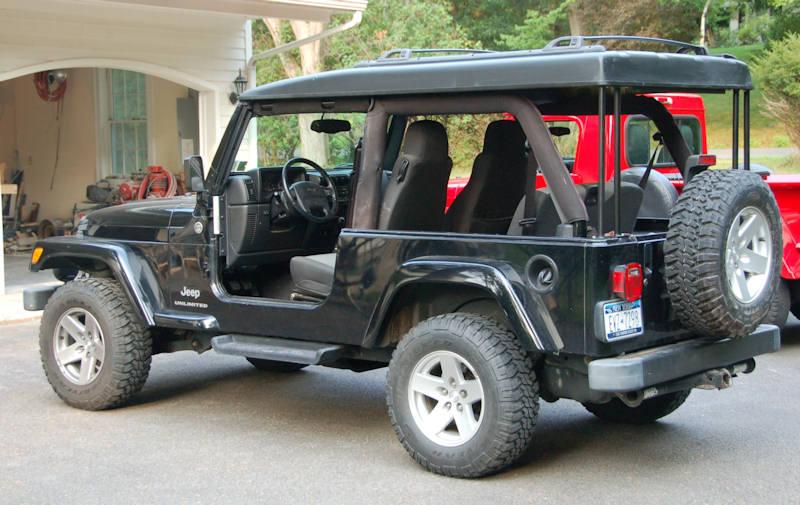
I put together some hardware so the roof panel from the Safari Cab can be configured as a hard bikini. In some photos I've got the doors on along with the door surrounds, an in others I've left the doors/surrounds off.

BikiniOpen2-1.jpg


BikiniOpen3-1.jpg


BikiniDoors2-1.jpg


BikiniDoors3-1.jpg


In the case where the surrounds are left off, the top is secured to the connector bars with brackets that mount in the same location as the factory surrounds. These brackets bolt to the underside of the drip rail.
 
love the "soft top" side panels...
not really feeling the hard bikini. looks kinda strange with the factory cage padding...

its amazing the amount of extra head room with the new top!
 
The Hard-kini...

love the "soft top" side panels...
not really feeling the hard bikini. looks kinda strange with the factory cage padding...

its amazing the amount of extra head room with the new top!

I kinda like the Hard-kini look but I agree that it looks a little...odd(?) in the pics. Is there really THAT much room between the top of the roll bar and the inside of the roof or is it just an optical dillusion...uh, illusion?
Still top notch work JS...:cheers:
 
The bottom of the drip rail of the roof is 1/4" above the top of the roll bar when the padding is off. Probably you'd normally run with the side curtains rolled up, which would conceal the top of the roll bar:

BikiniDoors3a-1.jpg


Having the bottom of the roof at that height enables a half-cab to be made that does not require the removal of the roll bars. Here's some photos from yesterday when I was testing the roll bar pass-through feature with a half-cab corner:

Here's what the half cab corners with the roll bar pass-through look like on the Jeep.

HalfCabCorners-1.jpg


There's about 4.5" between the front of the corner and the back of the surround, that would be filled with a short side panel. For the CJ (Scrambler-length) half cab, these two parts bolt directly together, but for the 61" TJ/LJ cab there's a side panel. I didn't mold a side panel because it wasn't necessary to prove the pass-through design concept.

Installation of the side panels is very easy, they go under the roll bar at an angle and tip up to vertical, then the sealing cap is put in place on top of the roll bar. The roof would go on next.

And here's a very rough 3-d concept, I've filled in the missing pieces to complete the top:

HalfCabCorners2-1.jpg
 
That Hard-kini is incredible! All it needs is a longboard and you have the perfect beach patrol. I'll vote for those options over and over. You keep up the good work.
 
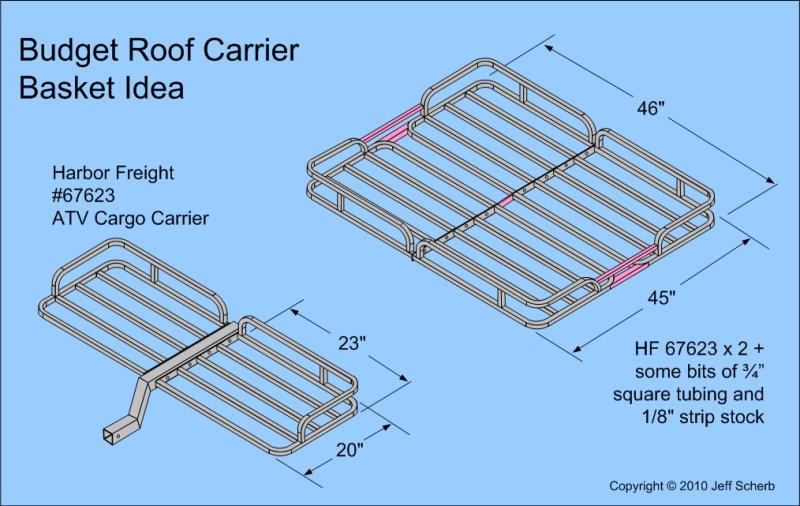
I wanted to try out a roof rack cargo basket on top of my Safari Cab, but didn't want to pay huge bucks for one, and also was having trouble finding one that was the perfect size. So I came up with an idea for a budget roof rack basket using two inexpensive Harbor Freight ATV Cargo Carriers, maybe somebody else will find this idea useful:

RackIdea1-1.jpg


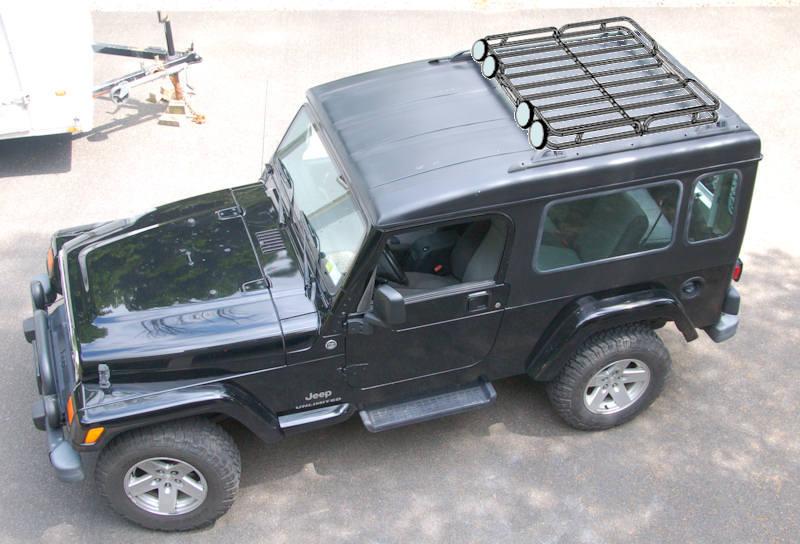
So this idea will work with any rack that's similar to the XJ rack, which is what I've put on my hardtop. Here's a rough drawing/photo simulation of what the rack would look like on my Jeep:

RackMockup1-1.jpg


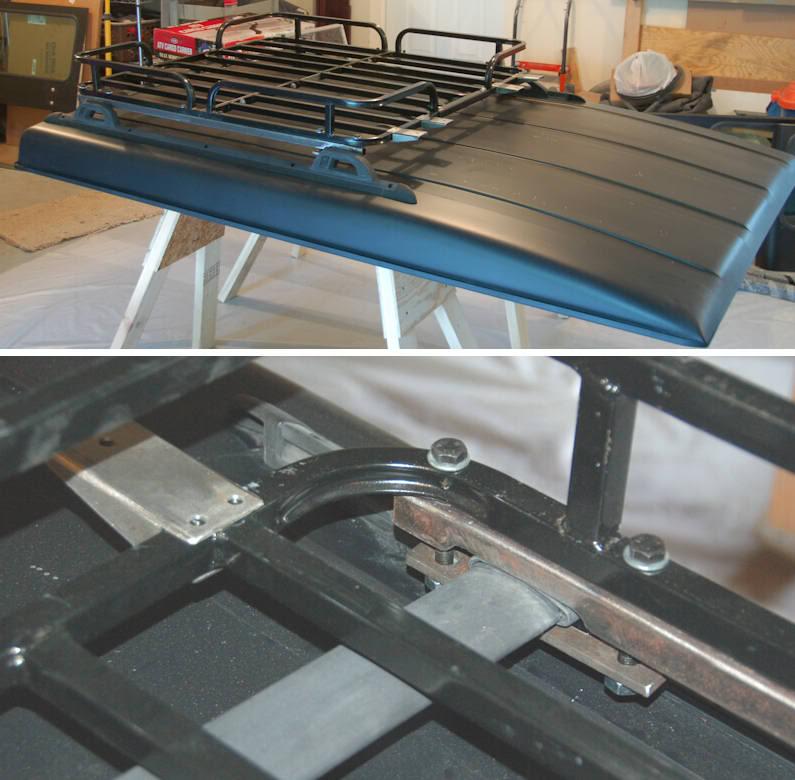
I finished up the rack basket today, all it needs now is priming the new parts and painting. The bottom photo shows a close-up of how it attaches to the XJ rack bars, after it's painted I'll put some rubber on the clamp surfaces to cushion it a bit.

Here's a photo of the rack mounted on my roof panel:

BasketDone-1.jpg


One thing I like about this basket is how the "fence" doesn't go all the way around and leaves a "valley" down the center - this will make it easier to carry long items like 2x4's on the rack.

All this took besides two Harbor Freight $32 racks ($39.99 regular price - 20% off coupon) was:

- 1 48" piece of 1/8" x 1" steel (to bolt the center together)
- 2 48" pieces of 1" square steel tubing (to strengthen the sides/form the mounts)
- 8 3/8-16 x 1" bolts/washers/nuts to bolt the baskets together in the center
- 24" of 5/16" x 1" steel strip to form the bottom of the clamps

All of the original bolts/nuts/washers supplied with the HF baskets were also used.

Total cost of the project was about $75.

The only modifications required to the HF racks were drilling holes to mount the side stiffening/mounting rails.

The light brackets (you can see one in the photo above) were made from 8" of 2" square tubing split lengthwise into a 1" channel, and will be attached with 8 1/4-20 x 1 1/2" bolts/washers/nuts. I'll drill the holes in the basket for the light brackets when I decide to mount lights on it. I'm thinking these lights would be a good size: 55 Watt 5" Fluted Light by Pro Comp and Other Jeep Parts and Jeep Accessories by 4 Wheel Drive Hardware-RH2

Jeff

 
Hmm...

Nice idea JS! Never thought of that and I like the way you pulled it off! Cuts way down on the needed fabrication too.
So does it appear that it is expandable? As in, could you use say 3 for an even longer rack?
What would you guess the weight is of it?
Other nice thing about the HF unit is it is likley just painted black, not powdercoated? That means you won't feel so bad when you cut and grind and weld...nothing a little shot of the rattle can can't fix! :thumbsup:
 
Nice idea JS! Never thought of that and I like the way you pulled it off! Cuts way down on the needed fabrication too.
Thanks!
So does it appear that it is expandable? As in, could you use say 3 for an even longer rack?
I suppose you could, but you'd have to modify the extra racks you'd be putting in the middle - you'd have to cut off the "fences" and deal with the round corners. Still less fab than building it from scratch probably. Or you might find another brand of cargo basket that's more suitable to assemble into a longer basket. I chose this one because as you can see it worked out to be the perfect size for my XJ rack, and it was also the cheapest cargo rack out there since it was from HF and for an ATV rather than a car or truck.
What would you guess the weight is of it?
I'll weigh it when I remove it, but it isn't too bad - 30-35 pounds maybe?
Other nice thing about the HF unit is it is likley just painted black, not powdercoated? That means you won't feel so bad when you cut and grind and weld...nothing a little shot of the rattle can can't fix! :thumbsup:
Not sure, but it is probably paint.
 
Mine failed...

I like that you found something a little un-related and adapted it. I made the rack for my FSJ out of steel (gas?) pipe and some gutter brackets I had from WP Warrior I think. It looks ok but I think mine failed as it is just too stinking heavy. And the floor doesn't do as well as I think it should, too much flex.
 
I like that you found something a little un-related and adapted it. I made the rack for my FSJ out of steel (gas?) pipe and some gutter brackets I had from WP Warrior I think. It looks ok but I think mine failed as it is just too stinking heavy. And the floor doesn't do as well as I think it should, too much flex.

I think because the original HF racks are designed to go on the back of an ATV, they're fairly lightweight, even though they are steel.

I did a couple of things to increase the strength of the HF parts in this configuration:

- I put 1" square tubing under the sides of the basket - because the two halves of the basket just bolt together, it could get "swaybacked" without some stiffening underneath. These pieces of tubing also form the mounts that sit on the XJ crossbars, in the detailed photo you can see how I put a notch in the bottom of the tubes to fit over the crossbars.

- I made those notches the right depth so that the center of the rack rests on the top of the arch of the crossbars, this provides center support and will prevent it from sagging in the middle.
 
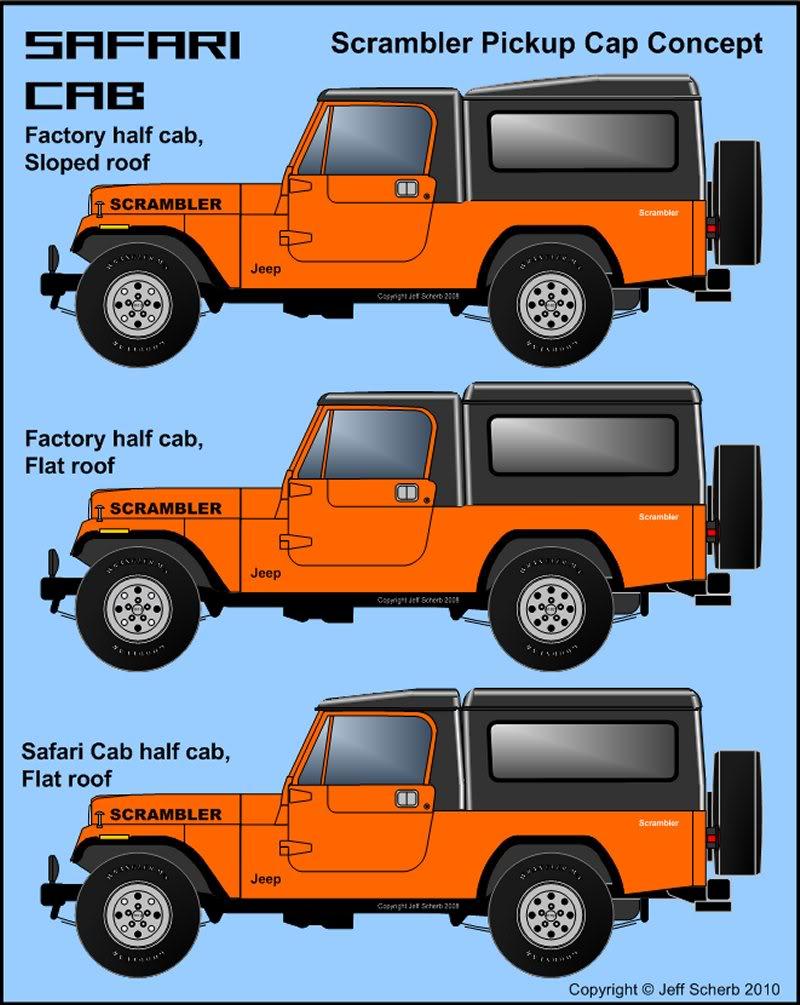
Terry (trust) asked me an interesting question yesterday - could the Safari Cab molds be used to make a pickup cap for a Scrambler?

I thought about it a while and the answer is yes, with a new front wall mold. The front wall would be a part that fit between the half cab and the roll bar, and had provisions for sealing to the tub and/or half cab. Would have to do some design on that, but seems quite possible to do.

Anyway, here are three rough concepts - the top one is the factory Scrambler half-cab with the Safari Cab sloped-front roof; for the second one I've molded the roof flat, and for the third one I've swapped the factory half-cab for the slightly taller Safari Half Cab.

I wasn't sure what type of window(s) would work best on this, so I just put in a large single window.

ScramblerCap-1.jpg
 
Of course you can...

We just throw the nutty ideas at you and you just keep hitting 'em outta the park! GO JS...GO!
I can't decide which version I like though. What would be great would be to have the rear (here we go again) function as sorta a "flip-pack" tent.
Or what if the rear top stepped up even more ala Rover or TLCs to fit "troops" in the back facing each other...? Hmm..

after a few minutes I think I like number 3 better...seems to flow visually more correct?
 
Last edited:
I love the look of the last one but at that point you might as well have the full top.
 
Back
Top