• Notice for iPhone users: DO NOT use the image size reduction option when uploading photos to the forum. This causes portrait images to post as landscape. We have added a warning to the image insert pop-up as well.

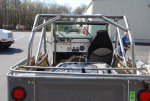
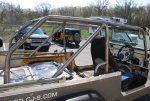
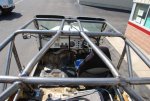
Postal full cage-with a couple twists

I made a few little (poorly welded) additions to the cage this weekend. I wanted some tie down points and a good place to mount my extingusher. I was happy with the solution I came up with for the tie downs to make them easily removable (nothing earth-shattering)

Stupid camera battery died, so pics to come.

Tonight I got it painted grey to match the body armor. Reassemble tomorrow night and start getting ready for the 4.0 swap.
 
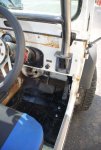
Clever solution to the glove box door, I've been thinking of solutions to mine fo rthe same reason, the cage interferes, or will when done, dur to the half door thickness. I replaced the box itself with a plastic one and was going to just use an elastic net ala a Bronco II but haven't found one yet, may go your route instead. does it close well and latch ok or do you find that the play in the hinge causes alignment issues such that you have to jockey it around to get it to latch? Moreover, does it ever spring open on it's own?

And all this time I thought it was your good looks that kept you around..... who knew!
 
Last edited:
Clever solution to the glove box door, I've been thinking of solutions to mine fo rthe same reason, the cage interferes, or will when done, dur to the half door thickness. I replaced the box itself with a plastic one and was going to just use an elastic net ala a Bronco II but haven't found one yet, may go your route instead. does it close well and latch ok or do you find that the play in the hinge causes alignment issues such that you have to jockey it around to get it to latch? Moreover, does it ever spring open on it's own?

And all this time I thought it was your good looks that kept you around..... who knew!

The ears on the stock hinge that are left serve as stops to stop it in the same position as before, so it latches closed just fine. I can't see how it would pop open now because everything is in the same spot as before. Maybe if it took a shot from the side, but the cage pretty well prevents that. I have yet to really drive it with anything in the box, so I can't really say that for sure though.

I don't think my looks would keep me anywhere...much less here. ;)
 
Finished

Photos of some of the things I added and paint to match the armor.

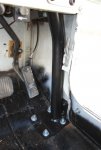
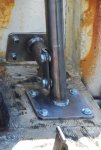
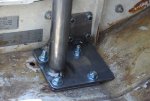
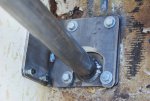
I always have wanted better/more tiedowns in the back, but I wanted them to be removable in case they were in the way of something or whatever. So I came up with a simple way to do tiedowns (and possibly other things using the right sized bolt/threads) by cutting down some eyebolts and welding nuts to the baseplates of the cage and some smaller ones along the horizontal member between the B and C pillars.

attachment.php


attachment.php


I welded some bolts to the cage to mount the hi-lift.

attachment.php


I also welded on parts of some ubolts to use for mounting the full bikini top.

attachment.php


Painted after the additions.

attachment.php
 
Good idea, Eric. I like the bikini tie downs.
 
Looks good! I hopeyou don't mind me stealing a few ideas for when I get my cage done!

Do you know if the hard top still fits over all this?
 
Thanks, have at the design... not anything of my making other than a few little things.

I don't know for certain about any hard top, but I'd bet good money that it fits, Matt Klein on here got one and a soft top still fit on it.
 
Do like the work you've done. I've also seen somewhere, the A pillar being bent in an S fashion through the dash mounting to the floor as one piece. That was pretty neat.

are you going to tie in a tire carrier to the cage?
 
Do like the work you've done. I've also seen somewhere, the A pillar being bent in an S fashion through the dash mounting to the floor as one piece. That was pretty neat.

are you going to tie in a tire carrier to the cage?
I just don't like bent tubes when I can help it. I feel like the sheer beef of the braketry around the dash, as well as the tie-in near the corner of the cowl (even if it's only the dash sheetmetal) is a stronger option. I'd have worried more if it was me trying to weld it all up, but I took it to the pros for just that reason.

I'm still needing a good solution for a tire carrier. I kinda screwed myself when I used the bumper I did because it has no provision for adding a tire carrier. I was thinking I'd cut a hinge into the bumper (which is also serving as my rear crossmember/body mount) to add a carrier, but haven't tried to work that out yet. Ultimately I want this on 37s (what I geared for) and it would probably be a good idea to wait until then to figure it out.
 
Eric
Take a look at the hitchrack ("ll have to go find a link), it's a swing out that goes in the trailer hitch. They are incredibly expensive but I built one for my daughter's scout 800 for about $100-150 and while not nearly as nice as the original and WAY overbuilt and thus to heavy, it works fine though

I think I will build another, lighter one, for my jeep for long trips and just keep it flat in the bed for day trips or use my rollbar mount and take out the rack
 
Interesting, I didn't find it on a search, hope you can score a link.
 
I can't believe you couldn't find it Eric, jsut because I gave you the wrong name.......

Try looking for the Hitch Gate series on tiregate.com, wouldn't let me copy the url for some reason but it's there. What I did was print all the pics (which happen to be on a Scrambler IIRC) and using my jeep I scaled the dimensions (roughly) and more or less copied it. Dopey me did not take pics and it's now gone to South Dakota with teh Scout
 
Eric,

Where did you get your seat covers? It looks like I have the same Best Top seats (that have a tendency to stain really easily). I hadn't really looked into covers, but I need to. It seems like even a cold gallon of water sweating in the summer will leave a permanent ring.

Your cage looks great, while it's pretty low on my wish list, I would like to do something like that one day. Will you go with 37" tires on your D44's or upgrade further?
 
I can't believe you couldn't find it Eric, jsut because I gave you the wrong name.......

Try looking for the Hitch Gate series on tiregate.com, wouldn't let me copy the url for some reason but it's there. What I did was print all the pics (which happen to be on a Scrambler IIRC) and using my jeep I scaled the dimensions (roughly) and more or less copied it. Dopey me did not take pics and it's now gone to South Dakota with teh Scout
Interesting. Definitely never seen that setup before. Must think about that one... thanks!
 
Eric,

Where did you get your seat covers? It looks like I have the same Best Top seats (that have a tendency to stain really easily). I hadn't really looked into covers, but I need to. It seems like even a cold gallon of water sweating in the summer will leave a permanent ring.

Your cage looks great, while it's pretty low on my wish list, I would like to do something like that one day. Will you go with 37" tires on your D44's or upgrade further?
Those are crappy part-store clearance bin covers that Kate talked me into prior to my first wheeling trip with the postal and they're probably the best $20 I've spent on it. They've held up ok, not great, but have served me well for sure. No intention of replacing them anytime soon. (and yes, they're Bestop seats)

Thanks for the cage compliment, taken a long while to get it, but glad I have it finally.

The 44 is staying put. I don't wheel real hard and the one outer axleshaft I snapped was all on me, not the axle's fault. I knew better than to try what I did (hard on gas against vertical rock with wheels cut hard... dumb). So if I go to 37s, it'll be on this axle.
 
Eric & Matt,
Good looking cages! Now that you guys have a few months on them, anything you would change or do different? I'm in the planning stages of a cage for mine.........
 
Last edited:
The only thing as far as the cage design goes is that I should have thought to tell the builder to turn the grab handles in the upper corners of the A pillars in more. I've smacked my head on them a bunch (getting in and out) and for finger safety they should be in further away from the outside of the cage.

Other than that, powdercoat vs. paint, I need to add more padding to the front stringers, clocked the crap out of my head playing in the snow a couple weekends back (probably not an issue for most folks shorter than me), I bought some cool swivel cupholders I need to figure out how/where to add, I'd have liked to think through possible locations for speaker mounting too. I can probably still work it out, but would have taken me too much time planning.

Generally, I'm really happy with it so far. :thumbsup:
 
I recall a CJ-7 in a magazine several years ago that had speakers mounted in the roll cage. They had added a tube in at a 45 where the B-pillar and the spreader above your head meet. "Skinned" the "triangle" w/something like 16 ga and put in a speaker. It looked pretty clean.

Thanks for your feedback.
 
Ok, reuploading pictures to this thread by request, I don't have time to go through and edit each post right now to get them in place, but it should be easy to sort out.

DSC_2367.JPG

DSC_2371.JPG

DSC_2372.JPGDSC_2373.JPG

DSC_2374.JPG

DSC_2375.JPG

DSC_2376.JPG

DSC_2379.JPG

DSC_2380.JPG

DSC_2381.JPG

DSC_2382.JPG

DSC_2384.JPG

Throwing this in for the cuteness and the reasons for the full cage in the first place.
DSC_2385.JPG
 
Back
Top