• Notice for iPhone users: DO NOT use the image size reduction option when uploading photos to the forum. This causes portrait images to post as landscape. We have added a warning to the image insert pop-up as well.

Project Panel Replacement

cb curious what prep you are planning to do for between the floor and the roll bar considering this is such an rust prone area in CJs ?
 
cb curious what prep you are planning to do for between the floor and the roll bar considering this is such an rust prone area in CJs ?
I normally use ZeroRust on the metal first before I paint it for the underside... I probably will do this to the bottom of the feet of the rollbar.
I will also drill the hole in the middle of the panel for water to drain out.

If I keep this Jeep, it won't see winters and stay inside, so it won't rust :)

cb
 
Well we don't see winter here, and my CJ lives in a garage and I have had my roll bar out 3 times to treat for rust. Usually when i come in from the rain I even wipe up the water and stick a fan inside the tub to help dry things up. I know I'm pretty anal when it comes to a Jeep I bought new. CJs can rust probably even in perfect conditions.
 
I was listening to someone talk the other day about a duck on a pond and how graceful what you see is above the water and under the water they are kicking like crazy to look and appear calm above the surface.

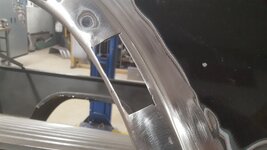
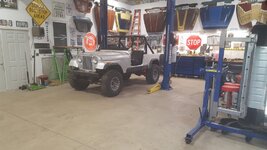
This is what I think this picture represents:

20220101_173412_resized.jpg

On the surface it looks good... it appears somewhat normal. :)

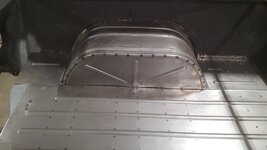
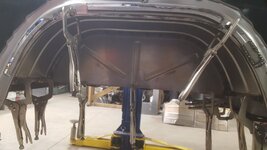
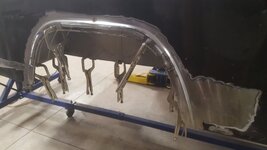
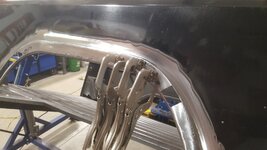
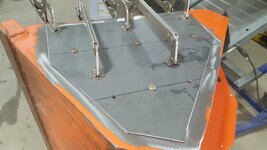
Behind the scenes however:

20220101_173441_resized.jpg
20220101_173435_resized.jpg

20220101_173426_resized.jpg

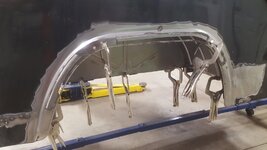
I have a lot of fixing to do, but had to try to mock it all up to see how it all fit.

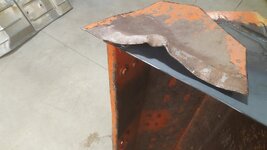
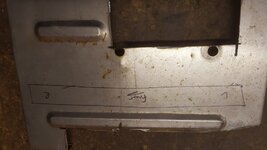
I cut out all the bad metal. Stuff was welded/bondoed/rusted/crusted/and filled with something else that was pretty hard to cut through.
Needs a lot of cleaning up and then welding back in good metal, but all in all, I need motivation and that is what that first picture is.

Also motivation for @Dave The Sparky for his wheel arches on his project.

HAPPY NEW YEAR!

cb
 
Not my area of expertise...

1641739589020.jpeg

20220103_193411_resized.jpg

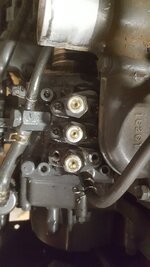
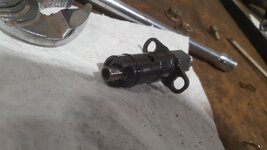
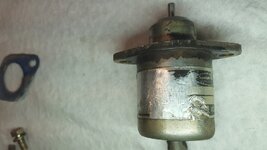
Orings were leaking, fuel all over the floor... took it apart for new orings and noticed that the whole injection pump isn't working as expected, nor is the fuel shutoff... so a few things on order.

20220106_174129_resized.jpg

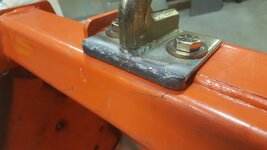
Also crashed the bucket moving some things around, so needing a new bucket and lift points... got them drilled and in place, need to to more reinforcing and welding...

20220108_160549_resized.jpg

Hooks on a bucket has saved my back more times than I can even count.

cb
 
But did get back to the welding...

20220108_160603_resized.jpg

20220108_170252_resized.jpg

Just tedious at this point... replacing metal, welding, grinding, repeat.

20220108_171423_resized.jpg

We had a lot of other fun things happen this week/weekend with the snow/ice and now the house heat (powerventer) is acting up... so onto get heat before the sleet and freezing rain shows up...

cb
 
Had to take a break on the Jeep and do some maintenance on non-related items.
I am hard on my equipment, I admit.
Also, new stuff isn't built like the old.
But... I also learn from my mistakes.

So, adding reinforcement to the new bucket... saw a few people mention/do this in some tractor forums and it seemed like cheap insurance.

20220115_175042_resized.jpg

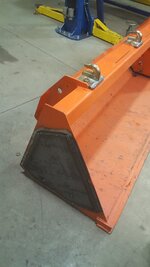
I had similar thickness (1/8") plate in 16x16 roughly... cut it down and left room to weld... drilled some holes for plugging so it doesn't bow out and go anywhere.

All in all, I am happy.

20220116_153752_resized.jpg

I have to do the other side and then do some reinforcing on the 3 hooks I added last week... they will bend/move without some support in the first 1/2" under them.


So, the "why"?

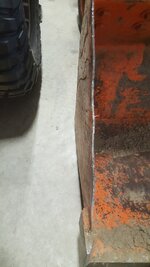
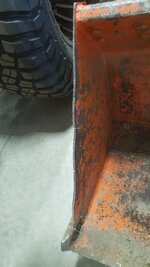
Old bucket "smiled" on me... after me overloading repeatedly.

Hard to see, but it has waves on the sides....

20220116_153914_resized.jpg

20220116_153919_resized.jpg

and then the disaster when moving the SJ project... I can't even bring myself to show the picture of that damage to the Jeep.

20220116_153930_resized.jpg

So after the new bucket is fixed, I will repair the old bucket.
Just a little house keeping... and then back to our show :)

cb
 
YIKES!
Looks like you're performing surgery on that injection pump. Good luck with the repairs
 
YIKES!
Looks like you're performing surgery on that injection pump. Good luck with the repairs
Injection pump was really gummed up for sitting before I got the tractor... it sat for about 3-4 years unfortunately after the man that owned it passed away... so I learned a lot about injector pumps while doing the work. The fuel shut off rail was pretty stuck(it is supposed to slide with ease), which in turn kind of made the actual switch not work as it should... and then the injector o-rings were old and worn, so they leaked fuel. I tried to just do the injector o-rings, but after getting it all back together, it would just not idle as expected. So apart it all came and it had a lot of "gum" as well as bits of debris... needed a good cleaning really.

Anyway, fast forward, I can turn the key now and it fires right up and idles beautifully... the bucket I am fixing as well (still).

I hope to have this all wrapped up by the end of the weekend so I can get back to Jeep related work.

---

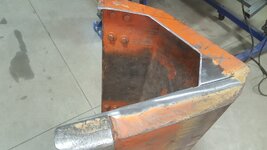
Cutting out the bad metal
20220118_175207_resized.jpg

quite a difference.
20220118_184838_resized.jpg

and finally now getting ready to add a plate to it to reinforce it.
thumbnail_20220119_170509_resized.jpg

I have cut the same plate for the other side, so will do that as well. Now it is just welding up this side and some primer/paint.


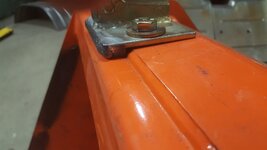
I also reinforced the hooks with some plate underneath on the other bucket.
20220117_180012_resized.jpg

20220117_180015_resized.jpg

20220117_180026_resized.jpg

The hooks and side plating (as well as the inside), needs reinforcement.

I will freely admit, I seriously underestimated how long all this would take.
Heavier duty metal fab takes a lot of cutting/fitting/welding, etc.

cb

 
Excellent work!..I am sure it is getting a nice dump of a white stuff test as we speak! :poop:
 
Snow cleanup took a while, but we are through it... so I moved a few things around.
Need to get the engine out of the Scrambler for someone, so it goes under the knife for teardown.
It is 2 fold really... I need to assess the frame as well.

20220130_152851_resized.jpg

This was interesting... and time consuming...

20220130_150419_resized.jpg
20220130_150426_resized.jpg

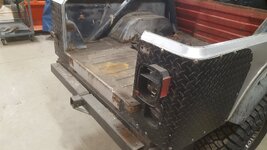
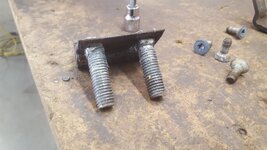
Oversized Carriage Bolts that you could get a socket on through the rear tailgate plates.
It was a headscratcher... but it was cool to see the part number in the rubber... most of the ones I take off don't have them anymore.

cb


20220130_152913_resized.jpg
 
Got some more angle last night and finished the bracing and got it balance on the rotisserie. I have to say this went A LOT faster than the last time I did this... 2 post lift is truly a back (and time) saver. I did it all by myself and didn't have to call any buddies... AND... I had beer left over as it didn't mysteriously disappear when the help left :)

All kidding aside, I am very fortunate to have this lift now... been a long time coming, but finally starting to reap the benefits.

And somehow it all turned out level... go figure...

View attachment 98837


View attachment 98838


View attachment 98839

View attachment 98840

View attachment 98841

View attachment 98842

View attachment 98843

View attachment 98844

View attachment 98845

There are a couple spots, but for the most part, this thing is in pretty nice overall shape.

cb
What size angle iron are you using?
 
What size angle iron are you using?
Good question... if you read post #59, you see that I messed up and got 2 different sizes.

So I think it was intended to be 1.5", but I think some is smaller... I would have to measure.

cb
 
My progress over the last couple nights.
There isn't a consistent size or non-rusty bolt anywhere to be found.
Everything is taking 3x longer...

thumbnail_20220201_182433_resized.jpg

The rollbar is proving very challenging as well.

cb
 
My progress over the last couple nights.
There isn't a consistent size or non-rusty bolt anywhere to be found.
Finding 20 different bolt sizes where they should all be the same size is time consuming and frustrating. Nothing like having to constantly change wrenches while removing the "same bolt' over and over again.
 
Back
Top