• Notice for iPhone users: DO NOT use the image size reduction option when uploading photos to the forum. This causes portrait images to post as landscape. We have added a warning to the image insert pop-up as well.

SJScrambler - Getting Started

Step #1: Find & Purchase.
Step #2: Disasemble & plan.
Step #3: REPAIR
Step #4: Prime & assemble & disassemble
Step #5 Paint & reassemble.
Step #6: Mechanical & Wiring
Step #7: Option 1: Drive and enjoy.
Opyion 2: Sell and return to step #1


Sounds like pretty simple plan. Let the Awesomness begin. :wave:
 
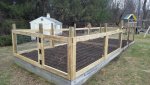
Well, I have done nothing with the Jeep in the last week... in the freezing cold I got the garden more buttoned up from foreign invaders... those groundhogs and woodchucks hopefully will be a whole lot skinnier this year.

cb

20180415_163201_resized.jpg
 
That will help to keep the deer out (our number 1 problem). Solid plan.
 
That will help to keep the deer out (our number 1 problem). Solid plan.
Yes, we have deer as well, but we have a crab apple tree and they tend to stick to that... or the arbrovides during the winter (destroyed them this year)... so that is on the list as well to replace arbrovide with blue spruce or something no one wants to eat... Scotch pines or the like.

I just want my stuff to stay as is and not have to constantly replace.

cb
 
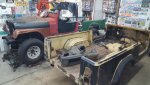
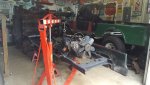
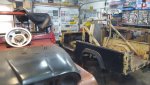
So, the last of the Jeeps is in the shop of the 4-5 I bought over the last few months.
I made up my mind, it is time to get back on the kid truck project. I need to create, not destroy anymore.

So, snapped up a few photos and I hope to get moving on creating the bed for the truck soon.

Stay tuned...

20180828_181019_resized.jpg

20180828_181008_resized.jpg
 
Just before anyone asks... the Scrambler body is in a bit tougher shape than I had hoped for... but the frame has been gone through and there is one patch I can see... the narrow tracks are sold I believe and the drive train 258/T5/D300 will be taken out and put up for sale.

If anyone is looking for a nice frame in the northeast to start a build with, this one would probably work.
Needs a new rear cross member as this one is missing.

I will get more pictures of it when I get the body off of it... hopefully after the weekend.

cb
 
Got a bit done last night... pulled the front axle, got the heater stuff out, got the roll bar out... everything is rusty, just taking longer that normal.

20180831_191837_resized.jpg

20180831_191921_resized.jpg
 
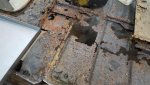
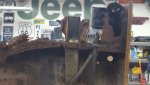
Almost stripped down... parts are up on CL... but wanted to show how bad rust gets here in the northeast.
In all the Scramblers I have had, I have never seen the connector from floor to bed area rust out... this was the GOOD side, the other side was completely gone!

20180901_151833_resized.jpg
 
Just have to pull the motor today and get the bed down on the dolly to start replacing sheet metal for the bed!
It was a good day... got a lot of scrap taken away, got the bed off, dana 300 out, axles out, etc... today I hope the garage to be in good shape.


cb

20180901_151754_resized.jpg
 
Started cutting a bit... not much to report.
It was very hot last night... got all my chores done and was hoping to get more on this, but I kept sweating into my glasses... finally gave up and went in.

cb

20180904_175737_resized.jpg
 
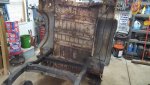
The good news is that it came off pretty easily and I marked where the new brace will go and now I can get the 2 sides in place and put the brace where it belongs and get the old floor at least screwed into that until I can replace the main floor.

This will be a ton of work, but will be good in the and, the bones of this tub are straight and will make a good bed for the truck.

cb

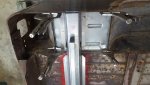
20180905_184909_resized.jpg

20180905_184916_resized.jpg
 
I kid you not... this was what I found when I cut off that main brace to replace it... actual stuff in there... mice do this?

View attachment 66485

It's amazing what critters will do... I drove around with a bird's nest behind my front fender for 2-1/2 years, and I only noticed it when I was replacing my body mounts last month. Who knows how long it was there before I bought the Jeep?!? :shrug:
 
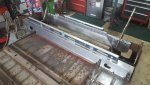
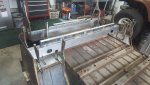
I got a bit done last night.
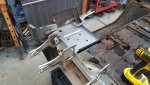
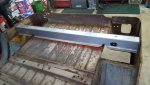
Fitment of the panels is spot on... will have to drill some holes next for the rollbar and weld on some capture nuts on the bottom and get that all locked down.

Will move the rear portion after that and then onto the front step down piece.

Then the floor, then the front rollbar supports, then the wheel tubs.

It is a good project to pick up here and there and pick apart.

20180906_173508_resized.jpg
20180906_173513_resized.jpg
20180906_173521_resized.jpg
20180906_173533_resized.jpg
 
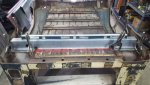
I did these the other day, forgot to post them... making some progress with the plates and getting the old stuff out and the new stuff in.
It's gonna take a while, but all in all, not too bad.

cb

20180916_173514_resized.jpg

20180916_173522_resized.jpg

20180916_173530_resized.jpg
 
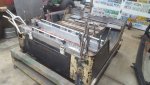
So little time these days, but was able to make a bit more progress to make sure thins are square and such... more than likely this will end up on that other Scrambler frame hanging out waiting to sell to make sure it is all square before final assembly.

Still a ton to do with the front portion... rear is looking well.

20180919_073129_resized.jpg

20180919_073135_resized.jpg
 
Back
Top