• Notice for iPhone users: DO NOT use the image size reduction option when uploading photos to the forum. This causes portrait images to post as landscape. We have added a warning to the image insert pop-up as well.

SJScrambler - Getting Started

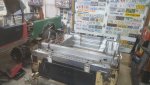
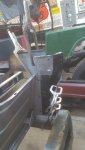
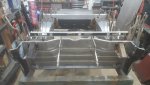
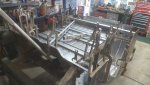
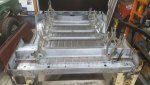
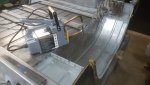
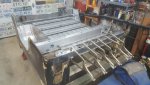
However, the shop is humming along... got some welding done today and trued it all up with a divider to make sure we are square... so far so good.

cb

20181104_161757_resized.jpg
20181104_160653_resized.jpg

20181104_160649_resized.jpg

20181104_160643_resized.jpg

20181104_160640_resized.jpg

The divider won't be used in the final configuration of the bed, it is just being used to hold everything together so I know it is square and straight.

cb
 
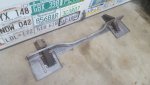
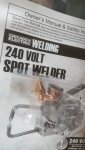
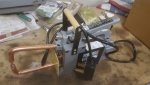
I got a new toy yesterday... cheap unit, but seems to work good for what I need to do. I also have the other Scrambler to do as well... so it will come in handy.

I am making good progress... have to get ready to test fit the floor and I think we will be good to burn it all in and get it mounted and see how we will do the front portion.

cb

20181105_173315_resized.jpg
20181105_173513_resized.jpg

20181105_184558_resized.jpg

20181105_184656_resized.jpg

20181105_184702_resized.jpg

20181105_184710_resized.jpg

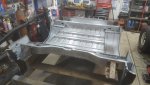
Everythign is pretty level and squared up... I have some prep to do in the rear where I haven't removed all metal from the old setup, but the floor should just "drop" in... well, I think I am going to use a engine hoist and lift it up into place upside down and then clamp it in and level it all out... well, that idea came to me in my dream, so I am still formulating it.

cb
 
So, tried to do the floor last night... I think I need more clamps ;)

cb

20181106_185539_resized.jpg

20181106_185546_resized.jpg

20181106_185556_resized.jpg

20181106_185602_resized.jpg

It all worked really well and the Classic Enterprises floors and parts are top notch... the only thing I noticed is in the rear... the floor is probably the correct length and me using YJ b pillars and their parts and original sides and those original rears that are beat up (it is hard to see) but I am off by a bit... now I will be replacing the corners once it is all mounted up, but it does seem to be not lining up correctly and a bit short.

cb
 
I'm not sure if this thread encourages me to fix the rust on my 8 or make me dread it even more. :LOL::oops:

Amazing work though! (y) Anxious to see it all buttoned up.
 
Really good to see you back at it CB. BTW, I've moved to Richmond, VA -- probably close enough for me to come drool on your work some more... :P

 
Really good to see you back at it CB. BTW, I've moved to Richmond, VA -- probably close enough for me to come drool on your work some more... :P


I hope you brought the Scrambler with you!
I am hoping to make some good progress on the Custom CJ8 Truck this winter.
I finally got all the other Jeeps torn down and mostly sold off and scrapped.
I need to get back to "constructing" and not "destructing"

cb
 
I was wondering why there was a shortage of clamps at Lowes & HD a few months back :)
 
Really good to see you back at it CB. BTW, I've moved to Richmond, VA -- probably close enough for me to come drool on your work some more... :P

Really! There’s a bunch of us around here. I’m just west of town.
 
Got it all locked down where I want the 4 side corners and wheel tubs... will blow it all apart tonight and paint the jams and connecting pieces and then start to reassembl for the final time.

I will put it on that frame I have lying next to it to check for fitment as well... also so I can create the front of the truck bed and get the roll bar mounted up and mock that in place as well... should be fun.

20181107_183318_resized.jpg

20181107_183524_resized.jpg

20181107_183531_resized.jpg

20181107_183557_resized.jpg
 
almost ready for the final weld... disassembled, painted all jams with weldable galvanized primer, and reassembled... hopefully tonight or tomorrow I get to see how good that spot welder is.

cb

20181109_174746_resized.jpg
 
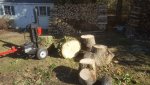
I worked all weekend removing a tree, cutting, splitting and stacking... sore and tired, but wanted to get a bit done on the welding... thing worked great.

No complaints on the unit... but it is HEAVY, and holding it and running the switch really gives your shoulders a workout... forearms as well. After all the wood which some of the pieces weighed as much as me, I only had one side in me... I will do the other side tonight I am hoping.

Also, it gets HOT... they said 5 seconds on and 5 seconds off for the cycle time, but I was finding you should let it rest more in between... when I was done, had a beer (or 2) and waited purposely to see how long it took to cool down... when I went in to clean up, it was still very warm to the touch, so something to keep in mind.

20181111_120758_resized.jpg

20181111_130827_resized.jpg

20181111_160111_resized.jpg

20181111_160215_resized.jpg

20181111_160233_resized.jpg
 
Also, the metal really needs to be clean and bare metal. Any sort of debris caused a delay in it starting to spot weld. This makes sense and is pretty common sense, but figured I would mention it. It won't go through automotive paint, only the zinc weldable primer.

Awesome purchase.

cb
 
So, did some more last night... takes a very long time to square it all up and do the spot welding, but it is coming along.
Probably one more night and we will be able to get to the frame to get that ready to mount this all up and see if all the calculations were correct.

cb

20181112_181057_resized.jpg

20181112_181137_resized.jpg

20181112_191342_resized.jpg

20181112_191349_resized.jpg

20181112_191401_resized.jpg
 
Back
Top