• Notice for iPhone users: DO NOT use the image size reduction option when uploading photos to the forum. This causes portrait images to post as landscape. We have added a warning to the image insert pop-up as well.

SJScrambler - Getting Started

So much fun. I like your idea to fit the tug doors and see if they fit or not. Then if you want to fit the CJ doors, my recomendation would be to remove the top section, raise the doors up so they fit the opening/body lines, line up the windshield, see if the vertical section of the top will line up for a nice gap, and then fit the top section (hoping you can get a little more opening from the windshield to the back (vertical section). With the top section off, you have more adjustment with body mounts to open or close the door opening. This is probably going to take your sheet metal skills to modify the top sections to get a nice gap all around. Conclusion, start at the bottom and work your way up. No doubt, you can do this.
 
So much fun. I like your idea to fit the tug doors and see if they fit or not. Then if you want to fit the CJ doors, my recomendation would be to remove the top section, raise the doors up so they fit the opening/body lines, line up the windshield, see if the vertical section of the top will line up for a nice gap, and then fit the top section (hoping you can get a little more opening from the windshield to the back (vertical section). With the top section off, you have more adjustment with body mounts to open or close the door opening. This is probably going to take your sheet metal skills to modify the top sections to get a nice gap all around. Conclusion, start at the bottom and work your way up. No doubt, you can do this.
Well... that is much clearer than how I worded it. :banghead:
Do I get points for the picture? :shrug:
 
I think FLCJ8 is spot on. When Jeff put the world cab on his CJ8 he used regular doors and only had to make the filler pieces. I spoke with a guy in Oregon that modified his CJ7 fiberglass top to fit CJ10a doors (oddest Jeep conversation I think I’ve ever had) and he said he only modified the corners, so I doubt there are angular differences. I also doubt there are differences between the CJ10/CJ10a/World Cab doors, it would be to burdensome for a manufacturer to make so many similar, but different parts, especially given the low volume of each variant.

Starting out with the original 10a doors is an excellent first step. (I personally think they look great, even with the square corner.)

In the end, we all have total faith in your ability to solve the problem.
 
Kim and Flcj8 together had the same idea I was thinking this morning. I had the same problem with the fiberglass tub and steel doors. Take the top off, tilt the windshield frame forward, Rotate the doors so the body line (under the door handles) are in line with the rear tub line. Bring the windshield frame back to align as close as you can to the upper part of the door. I'm guessing lifting the rear of the hard top a little will bring the front lip more in line with the top of the windshield frame. Will be interesting to see how you fill the gap of the rear corner and the top of the door. I can't imagine the top of door will ever be a consistent distance from the hard top? I know what ever you do will be impressive (no pressure here:whistle:).
 
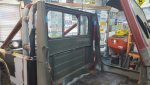
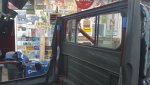
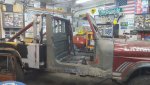
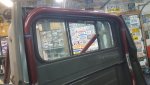
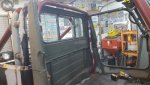
OK... so I did a lot of what everyone suggested.. pictures are of later on after a lot of swapping around.
I was pretty angry and dirty hands and didn't have time to snap all the "in between" pictures of taking things off/on with the different doors and windshield frames.

So... here goes... I did the following:

1) Removed doors
2) Dug out old doors that came with top
3) Removed old windshield and put other one back in place
4) Attached hood hold downs
5) Put it all together and had same issues with the older doors.
6) Noticed that the rear piece of the cab was not perfectly vertical

EUREKA moment... weather stripping!!!!

So, when the top was removed and disassembled there was about 1/2" think weather stripping on the rear that helped to seal it... that combined with the weird metal work they did caused it to pitch forward to meet the vertical line of the door.

Of course I removed it and didn't give it a second thought... it was old and ripped and dried out.

So...

1) Loosed bolts on rear of the cap and decided that my plan to work back to front was not warranted.
2) Put new lower door hinges on... found out that the ones I were using were wallowed on and slopping around
3) Put new doors back on
4) Lined up doors on the "beltline" to have the horizontal line front to back
5) Set windshiedl in place about where it went
6) Attached top to the front with screws.

This is where I noticed the disparity.
The rear was not even close to the vertical part of the door... closer on the driver side, but the passenger side was an inch off easily... so this was the main cause.

So... took it apart again and put in some paper toweling to act as the weather stripping to pitch it forward.

The top then lined up on the passenger side and the driver side was close... need a screwdriver in the hole trick to move it forward.

So, it all fits and is close.
Passenger side is a lot nicer and the gaps are pretty nice.

The driver side is tight in the front and the rear... but both doors open/close and don't rub.

cb
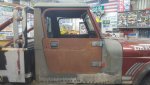
20191226_141711_resized.jpg

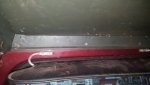
Across the front... if you really look close, the passenger side is up slightly... but I only have 1 screw in this windshield frame in the middle... there were no holes drilled that lined up except for the middle hole... that is going to be fixed moving forward.
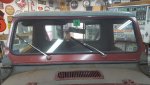
20191226_141722_resized.jpg

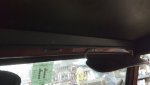
More prevalent here with it being tighter gaps, but it all works... the interesting part is the CJ doors slope down on the top vertical and the CJ10a top is level... so are the CJ10a doors... they are same measurement fron tto back from top to bottom whereas the CJ goes down 1/2 over the whole length roughly.
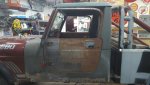
20191226_141732_resized.jpg

20191226_141738_resized.jpg

20191226_141754_resized.jpg

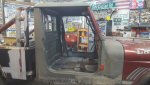
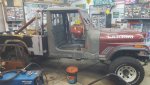
The full side shot... I am happy now, the bolts are in the rear of the cab portion on the top and bottoms (there are a ton to put in, but I have 2 in each of the corners(top/bottom) as I cut the center section on the bottom and that has to be fixed once I blow it all apart.
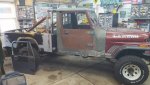
20191226_141802_resized.jpg

Round of applause for the original pieces ;)

20191226_141808_resized.jpg

20191226_141816_resized.jpg

So the lesson here I guess is that although I picked a starting point, I picked the wrong one.

Work front to back, not back to front and it will work out better I guess.
I did lock down the back, but it was locked down cocked back at an angle, so that from the beginning was never going to work.

Set the doors, then the windshield, then the back, then the top... then it works.

So, this is all good and great, but now we have to get the case built.
I received some weldable goodies from Rockhard 4x4.

cb

 
This is coming along well. How does the CJ10A top mount to the windshield frame? Is it similar to the fiberglass half cab or does it mount like the postal top?
 
Yeah, very similar, a strip with like 6 holes for tap screws... it is a bit more beefy as it is all metal vs. the fiberglass, but very similar concept.

cb
 
One last Christmas goodie...

20191227_160717_resized.jpg

Not sure what I will do with it, but it was cool and didn't want to pass it up... figured I would do something for one of the kids for their room.

cb
 
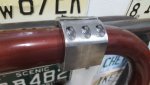
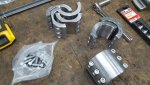
Goodies from Rock hard to adjust the rollbar/cage... I needed larger collars for the CJ7 rollbar I will use as the back part.

I also got some 3" collars for the Scrambler rollbar so I can use them to make a mount for the KC hi-lites.

cb

20191227_161530_resized.jpg

20191227_161803_resized.jpg
 
Someone asked about how/where I cut the bulkhead... hard to get a picture of it with the top on, but I just trimmed it so it would work for now.
I will use an old Scrambler bedside I have to fix this once I do all the mockup and before I do some body work.

cb

20191227_160734_resized.jpg
 
Rollbar modification time.
I am going to use a back part of a CJ7 and the front part of the Rockhard kit as this is how I can get it to work inside the CJ10a top.

NOTE: This is not going to be a structural piece nor do I think that a rollbar that AMC produced is going to help/save in the event of a crash/rollover. There are 2 primary reasons I am doing this.

1) I like the grab handle that they offer to get in/out of the Jeep... especially as I get older.
2) 3 pt. seat belt mount. In the event I take the top off of the Jeep, the CJ10a top has the top bolt hole for the 3pt. seat belts. It was never designed to come off essentially. I want that option, although with how heavy/bulky this is to do, removing the top will take 2 people and ladders when this is done... top part will have to come off, then the back piece and then probably some sort of custom bikini top... not sure on that yet.


Pie Cuts

20191228_161107_resized.jpg

20191228_170349_resized.jpg

20191228_170409_resized.jpg

Bolted it to the floor and used a wood block to help adjust it to almost parallel... then a bit deeper on the slices to allow for perfect vertical alignment.

20191228_170420_resized.jpg

20191228_170426_resized.jpg

20191229_152045_resized.jpg

Wood blocks removed... I have never done anything like this, so I am just kind of figuring it out as I go.

In this ^^ picture, the rollbar is in place and vertical and tacked in place, but the height it too much for inside the cab.

cb
 
Last set of pictures for now, just trying to catch up.
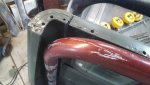
The rollbar top part hit the inside of the vertical walls of the top, they will need to be pie cut.
Also when all said and done, the rollbar is a bit shorter from a side view shot than I had originally pictured it in my head.

20191229_153500_resized.jpg

20191229_153517_resized.jpg

20191229_160813_resized.jpg

20191229_160822_resized.jpg

20191229_164736_resized.jpg

It does all fit inside and will need a bit more massaging and tweaking, but I have to see how the rockhard pieces and the modified pieces I have work together... it might not work, but we will see... weather is nasty out right now, we will see if I can get out for some time tonight.

cb
 
I guess I was thinking the cab was going to be roll bar free, but to get 3 point you need it.
 
I have taken off the back part 10x if not 100x... I am getting closer, I won't waste time with pics that are all the steps in between.

20191230_175341_resized.jpg

20191230_180151_resized.jpg

Found out I needed more height to intersect... so another rollbar was harmed in the making of this case... fortunately I had a "parts cage out back"... I keep all the pieces/parts I use as I know that someday I will need them for something.

20191231_182123_resized.jpg

20191231_182128_resized.jpg

I still have to "pinch" the middle... meaning that the top part of the bar is touching the sides of the vertical rear piece.
I will slice out an inch from the middle of the rollbar and use ratchet straps to snug them up... this will allow for the rockhard4x4 piece to really meet the top of the CJ7 tube and I can use a RH4x4 clamp and weld it all up... then rinse/repeat on the other side.

After that there is a cross bar in the front and the top piece that still need to be modified to work.

This is a ton more work than I wanted to do, but I think in the end it will be a nice addition to what will be a unique ride.
It will allow for easier ingress/egress with the handle and might be a few percent more safe having the bars in there.

I do know it stiffens up the tub from my other experiences with the cage in the other rigs.

Happy New Year! Hope everyone had a good time and lets get more projects moving this year!

cb

cb
 
I really like how you're reshaping the factory roll bar. Top notch work. And I can definitely see how it would take a ton of time to fit the front cage up just right. Well done / doing!
 
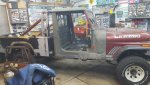
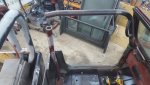
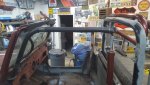
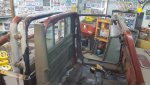
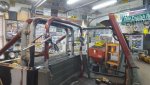
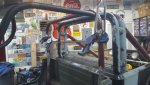
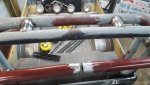
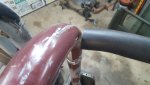
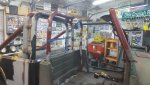
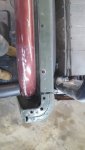
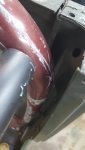
continuing on... more of the "behind the scenes" use of pretty much anything to get the stuff in alignment to then tack weld.
I know a lot of these pictures look the same, but I am getting very close to where I want to be.
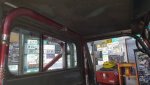
The rollbar has a fingers worth of space all around now so the bar doesn't hit the back glass metal piece.
Top fits as well with no touching and now the main bar in the cab is the same height as the rear roll bars for a more aesthetically pleasing look.

cb

20200101_153658_resized.jpg

20200101_153707_resized.jpg

20200101_160124_resized.jpg

20200101_160129_resized.jpg

20200101_160830_resized.jpg

20200101_161451_resized.jpg

20200101_161455_resized.jpg

20200101_161508_resized.jpg

20200101_162054_resized.jpg

20200101_162218_resized.jpg
 
only 10 attachments per post... continued for the last one.

20200101_162224_resized.jpg

NOTE: The Kubota hydraulic bucket is my step stool into the truck...

All the parts that I have done fit well... I need to trim up the RH4x4 bar that I have cut already probably another 1/2" and that can be tacked... then the cross bar across the front to the other bar and get that fitting. The roll bar is out of square about 1/4-1/2" on the driver side so that needs to be pulled forward just a tad to have even spacing compared to the passenger... so I need to get the passenger set first then do the driver... opposite of what I have been doing, but it will get everything square and lined up.

Then work on the top section starts.

I would love to be done with the cage this weekend.

cb
 
Back
Top