• Notice for iPhone users: DO NOT use the image size reduction option when uploading photos to the forum. This causes portrait images to post as landscape. We have added a warning to the image insert pop-up as well.

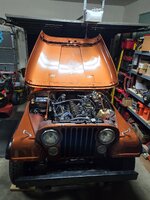
Spankrjs 1985 Spring Special CJ-7

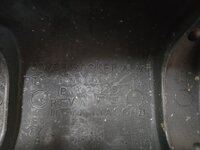
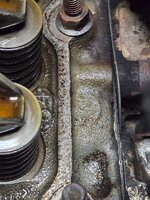
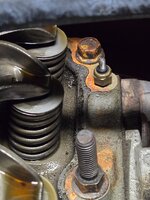
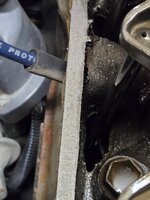
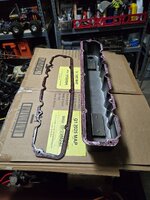
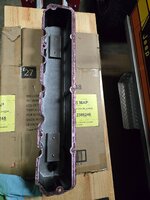
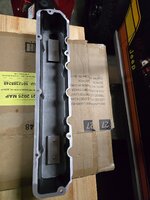
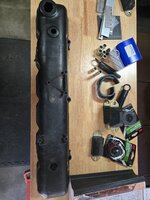
Still have this OEM plastic valve cover in my garage, pretty sure I bought it new a long time ago, briefly used it on something, then removed it.
20261025_101253.jpg

20261025_101329.jpg

20261025_101337.jpg

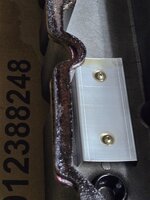
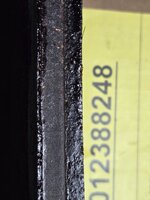
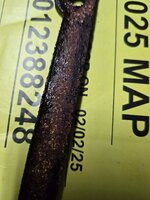
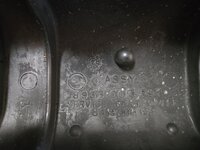
Part #'s:

20261025_101809.jpg

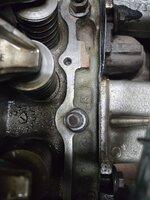
This cover has the front bolt hole, rear bolt hole, three passenger side bolt holes, NO top holes. Not sure what it it is for.

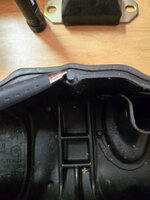
Little locating pegs on the driver side of valve cover.
20261025_102032.jpg

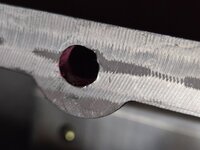
These pegs are way smaller then the holes in the head in these locations, not really a positive locator, more like a suggestion.

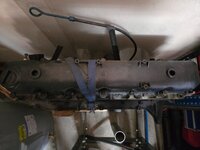
Valve cover that is on the original engine out of my green 1983 Scrambler, same type:
20261025_102143.jpg

I gooped this cover down with RTV, no gasket, no leaks.

The 1986 CJ7 in my yard has the same valve cover BUT it has the two top holes for the threaded rocker bridges, too.

Sitting overnight, still seeping.
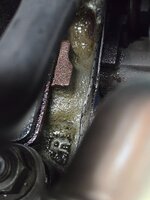
20261025_102235.jpg

If the aluminum valve cover is not cracked, I will reinstall it with either the black FelPro gasket that I have, or wait on the Real Gasket I ordered Friday night to show up. The real Gasket is orange silicone, intalled dry. I am using this gasket with this same valve cover on my green Scrambler's 258 with no leaks so a proven set up IMO.

If this valve cover is cracked I will give the OEM plastic valve cover another try. Will not use any type of gasket, just straight RTV on the head then the plastic valve cover.
 
The FelPro worked. Very thin layer of something. Can’t remember, it was in Dallas night before driving to Moab. Cork was cracked and leaking. Months later you and I went exploring inside the engine and I went back with the Orange one. Works great because you can install and loosen if needed, to move into the correct position and snug it back down, no sealant so no problem re-getting into the correct position. :thumbsup:
 
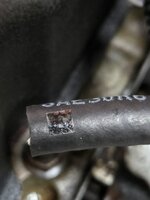
Note to self: black labels do not show up well on black vacuum lines!!

20261026_174411.jpg

Oh well, only about 8 or 9 lines, so I can suffer through it. Blue painters tape would have been better but that stuff got pricey!!

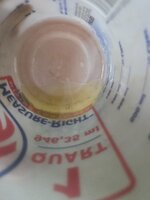
Pulled off the fuel filler, old fuel definitely has a yellow tinge to it.

20261026_181718.jpg

Once I get this Jeep back outside I will siphon out the remaining fuel, not much in there, maybe 3 gallons. So, that yellowish tinged fuel is probably one part old fuel to two parts new fuel.

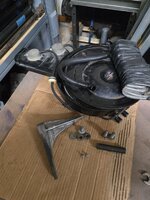
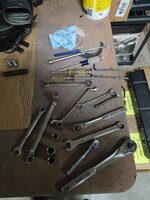
Not too many parts had to be removed.

20261026_184938.jpg

Not too many tools used.

20261026_184943.jpg

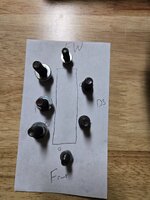
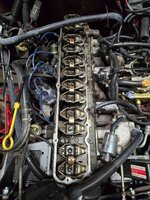
Valve cover bolts out and locations labled.

20261026_185013.jpg

Had to whack the valve cover a few times with a rubber mallet to break the seal loose. Kind of surprised me, since it is leaking. Was able to remove the valve cover without draining coolant/disconnecting coolant lines.

20261026_183453.jpg

Driver side, hot side, some remnants of the cork gasket cooked to cylinder head.

20261026_183525.jpg

20261026_183543.jpg

Looking back toward the firewall, near temp gauge sending unit, you can definitely tell where the gasket was!

20261026_183531.jpg

Passenger side of cylinder head, not as hot side, no cooked on gasket material.

20261026_183546.jpg
 
With the valve cover off and upside down, you can tell where the oil was seeping out. Gasket is wet with oil where it was smooshed/sealed to head.

20261026_183726.jpg

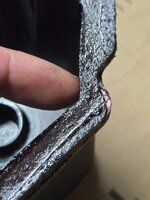
Front corner, driver side, definitely leaking here. Gasket does not show an "inner ridge", where my finger is pointing. Maybe gasket got hard, not sure. The gasket definitely does not have any squishiness to it anywhere.

20261026_183758.jpg

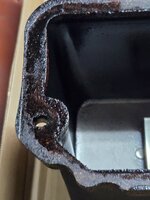
Back corner, another leak spot.

20261026_183809.jpg

Passenger side, no leaks. Note the nice inner and outer ridges of gasket where it was smooshed down perfectly on head flange.

20261026_183731.jpg
 
  • Like
Reactions: SKT
I was able to pry the gasket off the cover in one piece, using just my fingers.

20261026_184501.jpg

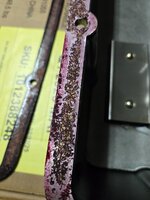
The red/pink hue on the valve cover and cover side of cork gasket was from the Permatex gasket cement I used. That stuff worked great.

You can see, pretty uniformly around the entire valve cover flange, remnants of cork gasket material still stuck down.

20261026_184505.jpg

I used Permatex Aviation Sealant on the cylinder head flange/that side of the gasket. The gasket did not stick as well to the cylinder head. Picture below, you can see remnants of the Aviation sealant on either side of where the gasket was compressed to the head. Maybe cork soaked up the sealant here?

20261026_184509.jpg

Will need to check the specifications, maybe the Aviation Selant is not the right product at this location due to high temperatures? I'm really thinking that the cork just got old and hard. It was the Chineseum gasket that came with the aluminum valve cover kit so....

One other note: I was able to remove the valve cover and gasket with the coolant lines intact. If using a "dry install" gasket, which I plan on using here, I can reinstall it with these hoses kind of in the way. But, if using some type of goop, the hoses would have to come off to get a good straight install. Also, if using goop, I would probably remove the transmission mount bolts and jack up the engine level to enable better odds of success.

20261026_184954.jpg

That's it for now.
 
De-oiled the valve cover.
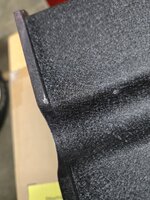
20261027_173934.jpg

Cleaned up the cylinder head flange.

20261027_184022.jpg

20261027_184025.jpg

A few minutes with a razor blade, acetone on a rag, valve cover cleaned up.

20261027_184507.jpg

20261027_190430.jpg

That red Permatex adhesive works well, stains everything it touches red, but cleans up pretty easy with acetone. Bolt holes that I didn't clean still have a nice red/pink stain.

20261027_190438.jpg

Compared to RTV, much faster clean up job this go around. About 2 hours and my OCD was satisfied.

No damage to the valve cover from the driver side idler pulley bracket, but two minor marks on the valve cover flange where I reckon that bracket makes contact.

20261027_190509.jpg

20261027_190517.jpg

Waiting on the new gasket to show up, that's it for now.
 
Details on this dry gasket of which you speak? Link?

Link to gasket:


Link to install on my green Scrambler, post #595:


Been on for 5 years, no leaks. Green Scrambler has a 258 and the same exact valve cover gasket installed.

Thanks to @Jeeperdd for letting me know about this product!!


Apparently, I have used that Felpro rubber/cork gasket a long time ago with a plastic valve cover with good results. BUT, I only put maybe 200 miles on this set up, post #87:

 
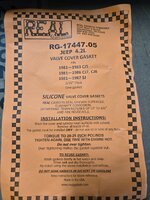
The new valve cover gasket showed up today.

20261029_162631.jpg

Instructions.

20261029_162636.jpg

Install the gasket dry, make sure the cylinder head and valve cover are both dry.

20261029_163104.jpg

Place the valve cover on top. The gasket lines up perfect with the head and valve cover holes, but you will need to kind of pull/push it into position. The weight of the valve cover will hold the gasket in the correct position as you gently manipulate it into place.

20261029_163300.jpg

I start with the passenger side center bolt, then the two driver side bolts, then the two outer passenger side bolts, and finally the front and back bolts. Get the first bolt in and loosely threaded, then the next, etc. Keep the gasket in place. I will tighten each bolt a bit, go around to the rest, and then a bit tighter on the next round etc. Once the bolts are even a little snug, the gasket will not move around. Just work it, not too hard.

20261029_172042.jpg

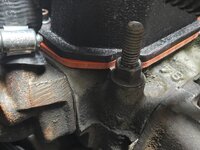
If installed correctly the gasket will not be bulging out anywhere, should follow the valve cover and cylinder head flange fairly accurately.

20261029_172053.jpg

20261029_172103.jpg

20261029_172111.jpg

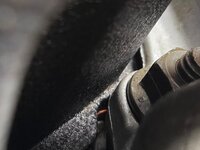
In the last picture, notice the black blob on the intake manifold. This is plastic/rubber melted to the intake. I mentioned earlier, pretty sure this Jeep had an engine fire some time in the past. This blob, the melted damaged MCU harness, all new pulse air tubes/valves/pipes, different color cylinder head, and new pulse air vacuum solenoid assembly on top of the valve cover. Just a hunch.
 
Last edited:
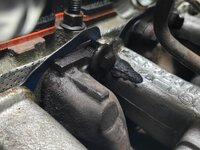
This serpentine belt idler pulley bracket assembly on the driver side is nerve racking. Make sure the aluminum bracket clears the valve cover flange.

This orange gasket is 3/16" thick, the old cork gasket was a 1/4" thick. This gave me a bit more clearance between the aluminum bracket and the valve cover flange. Same thought line, make sure your valve cover bolts are not too long and bottoming out before the valve cover gets compressed to the gasket/flange.

Good clearance between the aluminum bracket and valve cover flange. I still spaced this aluminum bracket up with one washer on each head stud, better safe then sorry!

Whole assembly I am referring to:

20261029_174527.jpg

Rear stud/nut:

20261029_174542.jpg

Front stud/nut:

20261029_174600.jpg

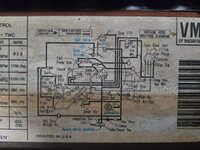
Then the fun of hooking back up all the vacuum lines, fuel lines, and electrical connectors. It wasn't that bad, the craft store letter stickers did help. Original underhood emission sticker is also useful, but labeling before hand is better.

20261029_184025.jpg

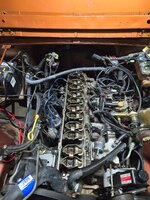
Back to square one, definitely a bunch of stuff on a California emissions 1985 CJ!!

20261029_185343.jpg

The valve cover gasket mentions an inch pound torque spec, I did not use it. I used long Allen wrenches to snug the bolts down hard, twisting the short end of the wrenches for leverage. I then put pliers on the short end of the wrenches and gave each one just a bit more oomf. Started the engine, as it was warming up, kept checking bolt tightness and would snug them a bit as needed. I let it idle at operating temperature for a few minutes, checked bolt tightness, all good.

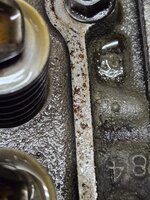
Best picture, no more valve cover leaks!! The cast "R" and surrounding areas were previously holding puddles of engine oil, so definitely a nice sight to see.

20261029_191500.jpg

Pulled the Jeep back in the garage, shut it down. I will check the bolts again once it cools down, and will periodically check them the next few times I drive it. This gasket has been working great on my green Scrambler so it should work just as well on this Jeep.

Still getting a little oil burning smell, and a bit of external underhood smoke, not surprised, especially since I have not cleaned all the leaked oil off the engine block yet. One place that looks oily which I thought was odd, the "heat stove" piece which is attached to the forward bottom part of the exhaust manifold. I will definitely try to degrease this part well, not sure how it got so much oil and crap on/in it??

20261029_191426.jpg

That's it for now.
 
De-oiled rhe engine first thing this morning.

20261031_093244.jpg

Definitely had some oil leakage, primarily on driver side.

20261031_093253.jpg

Orange valve cover gasket matches the side stripes.

20261031_100206.jpg

Nice and clean, no more valve cover leaks, so good job on that project

20261031_100227.jpg

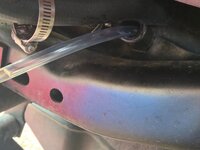
Step two, siphon out the gas tank, RedneckRay style!

20261031_105535.jpg

20261031_105811.jpg

20261031_105520.jpg

Got all I could out of the 20 gallon fuel tank, not too much, and didn't look too bad.

20261031_111822.jpg

20261031_111818.jpg

Maybe 1.5 gallons.

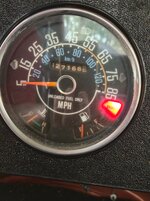
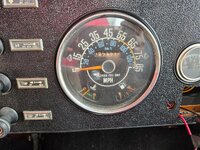
Got the Jeep back level, let it idle about 20 minutes, left the house for a gas station with a gas can in the cab just in case, what the needle was reading.

20261031_112427.jpg
 
Last edited:
Filled up the tank, gas gauge still working.

20261031_120810.jpg

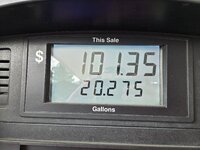
What it took to fill it up, pretty sure most of the old gas is gone!

20261031_120153.jpg

Filled it up with 90 octane non-ethanol gas, about $5 per gallon. So, I'd say the OEM 20 gallon tank was about empty after the siphon job.

Still had a little bit of smoke out of the exhaust heat stove, finally stopped, whatever crap I sprayed in there finally burned off.

20261031_121909.jpg

Not all rose gardens in RedneckRay land:

20261031_122700.jpg

20261031_122707.jpg

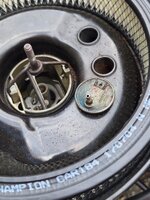
Yep, the downstream (catalytic converter) pulse air tube is spitting out rust flakes inside the air filter, straight into the carburetor. Fun.
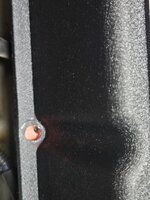
Taped off the back of the air cleaner housing where the pulse air tubes plug in temporarily.

20261031_124559.jpg

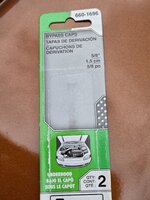
Plugged up the pulse air tubes with these vacuum caps. Probably not needed but I didn't want exhaust fumes dumping under the hood.

20261031_124632.jpg

20261031_124604.jpg

With that band aid installed, still wanted to drive the Jeep some. Dumped some carb cleaner in the gas tank with the new fuel, sprayed some carburetor cleaner down the carburetor, hit the road.

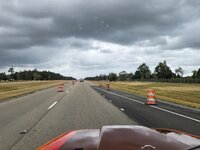
Drove about 50 miles or so, runs great at high speed.

20261031_130713.jpg

Trying to beat the rain!!!

20261031_130720.jpg

So, Jeep fires right up and idles perfectly. Accelerator pump sprays out solid streams. Jeep runs great at high speeds. But, at low/intermediate speeds it is bucking and surging pretty good. Since the pulse air tubes sprayed rust down the carburetor throat, probably need to pull the carburetor apart and see if some of the little passages are plugged up. Good place to start.
 
Before tearing the carburetor apart, wanted to mess with the pulse air system.

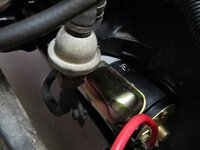
Upstream and downstream lines have a one way check valve, little bell shaped doo-hickey. These are supposed to prevent exhaust gas from backing back up into the control valves and ultimately the carburetor.

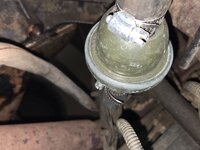
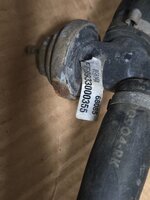
This is the driver side one way valve, catalytic converter line, referred to as the downstream portion of the system. Someone has replaced this valve in the past.

20261031_151432.jpg

This is the passenger side valve, upstream portion, this line dumps into the exhaust manifold below the O2 sensor. This valve looks original, still had the OEM band straps securing the rubber hose to the valve.

20261031_151450.jpg

The components that make up the pulse air system are probably the most vulnerable to damage, especially these metal one way check valves and the corresponding metal tubes that tie into the catalytic converter/exhaust manifold. Exhaust gas is hot and corrosive, not the best combination for steel components.

The pre-Jeep Addict owner of this Jeep spent a lot of money on this stuff. This Jeep has a completely new exhaust system from the manifold all the way to the tail pipe, including the small pulse air steel tube pipes. So, I want to try to keep this stuff functional and intact. Besides, the pulse air system makes cool sounds, like a low/deep/"bombombombom" sound. Something you only hear on a 100% stock intact Jeep. So, let's see what I can do.

Replacement parts, especially new, pretty tough to find. I have always been curious about what is inside these valves, so I pulled one off my low mile 1986 rust bucket plow Jeep. It was already damaged, so let's see what's in here.

This is the upstream valve off the yard Jeep. The upstream and downstream valves are the same. This one has had some work done on the metal tube that ties to this valve on the exhaust side.

20261031_161159.jpg

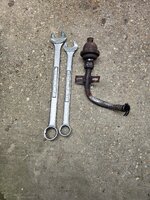
From the factory, the valve has male threads, the pipe has a flange nut. I have no idea if you would ever be able to unscrew this joint in the real world, especially after 40 years. I tried, no Bueno.

20261031_161204.jpg

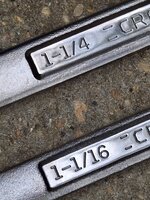
Big nuts, big wrenches, thin flimsy steel, good luck. In the picture above you can see where I rounded off the hex on the valve.

20261031_161208.jpg

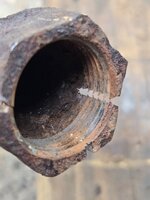
I wanted to kind of keep stuff intact, just to verify thread sizes. So, Dremel to the rescue.

20261031_163942.jpg

20261031_163938.jpg

20261031_163951.jpg

I cut slices through the nut, spread the gap with a screw driver, was able to unscrew the valve. Should at least be able to verify what size threads this stuff is, pretty big pipe thread I reckon.

20261031_163959.jpg
 
Last edited:
So, since this valve is already damaged, and I still want to know how it works, can't really see anything yet.

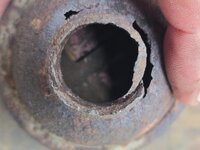
Top side, where hose goes.

20261031_164007.jpg

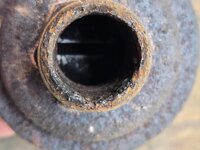
Bottom side, pipe thread end.

20261031_164014.jpg

Lots of rust inside the bell.

20261031_164017.jpg

Cut off wheel on the dremel, cut the top off the bell.

20261031_164500.jpg

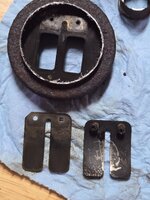
I always assumed it was a rubber spring loaded diaphragm or something, turns out all it is is two brass/copper flaps that are springy, and want to stay shut.

Very light pressure will open the valve flaps.

20261031_164506.jpg

20261031_164511.jpg

So, these flaps are drawn open by exhaust gas pushing out the exhaust system. They spring open to allow fresh air down the pipes to better combust exhaust fumes inside the exhaust pipe and catalytic converter. They should not allow stuff back up. But, one of my valves on my Spring Special does, how can this be?

Let's cut the bottom off the valve and see.

20261031_164905.jpg

So, below the copper flaps is some type of more rigid copper/brass plate that does not move. I reckon it keeps big chunks or backfires from blasting up thought the flaps.

Close up on the non-movable deflector shield.

20261031_165132.jpg

And, when you push the flap open, it only opens until flap meets deflector shield/limiter piece. I am pushing flap open from the top with a little screwdriver in the picture below.

20261031_165145.jpg

Flaps and deflector shield removed. All these components, including center plate, are copper/brass. If only the outer bell enclosure was made of a more durable material.

20261031_170021.jpg
 
Last edited:
And back together 😆

20261031_170424.jpg

Well, that's all fine and dandy, I see how this thing works now, but how come mine is allowing crap to blow up through this one way valve?

My best guess: some crap/rust/crud was trapped between the flap when it was in the open position, so now the flap can't shut, allowing exhaust gas to push upward through the held open flap, and blow rust and exhaust gas into the air cleaner. That's my theory?

So, how do I fix it? Let's take the stuck valve off the Jeep.
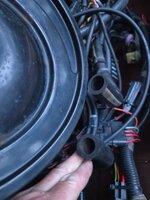
I removed the entire assembly: upper hose, control valve, lower hose, and one way valve.

20261031_172602.jpg

OEM parts numbers:

20261031_172608.jpg

20261031_172612.jpg

I reckon when someone replaced this valve in the past, they broke the nut off the metal tube. Thus, they installed a brass fitting and a piece of hose to connect the valve to the metal pipe that runs out to the catalytic converter.

20261031_172626.jpg

Part number off the valve.

20261031_172656.jpg

20261031_172756.jpg

I tapped this valve out on the concrete, yep, full of rust and crud.

20261031_174222.jpg

20261031_174247.jpg

I sprayed the valve out with a water hose, then carburetor cleaner, and finally brake parts cleaner, got all the crap out of it. Flaps are intact and functional, bell intact.

No matter how rust free the Jeep is, and this one is pretty much immaculate, the exhaust components will not last. They get hot, then cool, draw in moisture. All of these components are just raw steel which will rust out eventually. You could soak this valve in something like Evapo-Rust, really get the inside cleaned up, but it will just rust again. Borrowed time I reckon.

So, cleaned out the valve, reinstalled it, and it is working again. No more rust chunks or exhaust gas blowing out the air cleaner hose.

20261031_180713.jpg

With your finger over the end of the tubes, you can feel the system pulling in air. The upstream tube, that goes right at the top of the down pipe below the exhaust manifold, really pulls hard. The downstream hose that goes to the catalytic converter, pulls in about half as hard I reckon.

Even with the one way check valves operational, you will still probably get a little exhaust gas leakage into the air cleaner. No way around it. Seeing those valves apart, the little brass flaps are not air tight. The system should only open the control valves to time with the exhaust pulses to draw air, but let's be honest here: this is 1980's slow electro-vacuum components. Mine seems to work well, pulls air down hard, but I can still feel a little positive pressure at the air cleaner end of the hose. Not a lot, and no smoke, but not 100% perfect, either.

Anyway, glad I was able to salvage this valve and keep the system operational, at least for a little bit longer. These valves are about impossible to find new, or undamaged. If only the outer bell is damaged, I guess you could try to patch it up with JB Weld or something, maybe? Whatever you use, just remember, these valves get just as hot as the rest of the exhaust system since all these parts are metal and connect together.

Anyway, that's it for now.
 
Back
Top