• Notice for iPhone users: DO NOT use the image size reduction option when uploading photos to the forum. This causes portrait images to post as landscape. We have added a warning to the image insert pop-up as well.

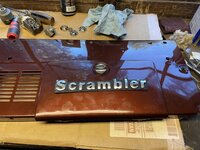
Tammy Scrambler Gets a Facelift

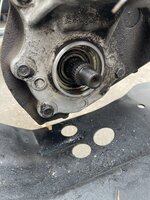
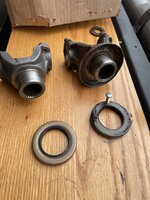
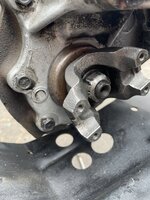
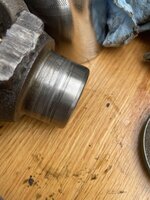
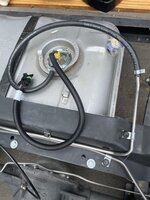
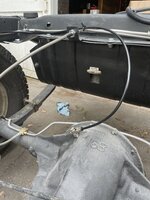
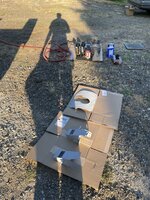
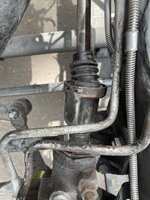
This last weekend I had some time to button up a few more tasks in anticipation of the painted parts. The list is long but these were on the front of my brain. Rebuilt steering coupler, new boot and installed shaft. I have to move it in and out of my tiny space to be able to work on it so the spud wrench is my temporary steering wheel 😂😂. Also took the opportunity to tighten the steering box some, assuming I’ll fine tune when I get a real steering wheel. The d300 was leaking out of the front output shaft. New seal and knuckle to replace the worn. Didn’t have too much play but it definitely had a groove. Installed and plumbed the in tank fuel pump for the Sniper efi system that will help manage the engine. Plumbed the air line and routed it to the engine compartment for the ARB locker. Still trying to figure out the best place for the cute lil compressor.
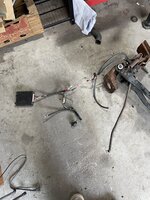
I also sorted out the pedals and linkage and took note of which ones needed cleaning/painting/ rebuilding and got rid of the wires and vacuum lines for the cruise. I’m not going to re install the cruise it just doesn’t fit my driving needs.

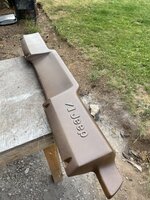
I have the MORE 1” lift kit and I’m going back and forth on if I want to install it or not. I have a 2.5” lift/stock wheels and want to run the 33”s and am not sure if I have the clearance to do so without, but don’t know if I have to drop my clutch bracket to match if any other alterations need to be done that I’m missing. Any input is greatly appreciated.

Gonna watch the weather and next chance I get start shooting some interior so I can piece this bad baby back together! Will sleep well tonight dreaming of that shiny tub!
 

Attachments

  • CEAE5CD7-A435-47F2-91CB-415231F24117.jpeg
    CEAE5CD7-A435-47F2-91CB-415231F24117.jpeg
    171.8 KB · Views: 19
  • 61800318-4F77-49B6-AD9D-849224E01F17.jpeg
    61800318-4F77-49B6-AD9D-849224E01F17.jpeg
    196.5 KB · Views: 17
  • AECA4CD0-50B4-4B7C-BAB8-45789831A168.jpeg
    AECA4CD0-50B4-4B7C-BAB8-45789831A168.jpeg
    219.4 KB · Views: 15
  • BA9944B5-04C4-493D-B729-E00BAFE495A0.jpeg
    BA9944B5-04C4-493D-B729-E00BAFE495A0.jpeg
    179.5 KB · Views: 14
  • A78C8A29-10E7-4CE1-B680-8C76327E5231.jpeg
    A78C8A29-10E7-4CE1-B680-8C76327E5231.jpeg
    156.1 KB · Views: 14
  • D5099BFD-74A1-4A88-BFE3-0D8828F237C0.jpeg
    D5099BFD-74A1-4A88-BFE3-0D8828F237C0.jpeg
    142.1 KB · Views: 16
  • 8E3D0D2D-84FA-4C4C-8EDF-3669E50C3C8F.jpeg
    8E3D0D2D-84FA-4C4C-8EDF-3669E50C3C8F.jpeg
    150.4 KB · Views: 17
  • 855C9252-DF14-407C-A9EE-1340F2725754.jpeg
    855C9252-DF14-407C-A9EE-1340F2725754.jpeg
    171.5 KB · Views: 17
  • F432E260-E70D-424D-9FFB-83A22FF83281.jpeg
    F432E260-E70D-424D-9FFB-83A22FF83281.jpeg
    240.9 KB · Views: 18
  • 1623296244084.png
    1623296244084.png
    101.4 KB · Views: 19
Last edited:
This last weekend I had some time to button up a few more tasks in anticipation of the painted parts. The list is long but these were on the front of my brain. Rebuilt steering coupler, new boot and installed shaft. I have to move it in and out of my tiny space to be able to work on it so the spud wrench is my temporary steering wheel 😂😂. Also took the opportunity to tighten the steering box some, assuming I’ll fine tune when I get a real steering wheel. The d300 was leaking out of the front output shaft. New seal and knuckle to replace the worn. Didn’t have too much play but it definitely had a groove. Installed and plumbed the in tank fuel pump for the Sniper efi system that will help manage the engine. Plumbed the air line and routed it to the engine compartment for the ARB locker. Still trying to figure out the best place for the cute lil compressor.
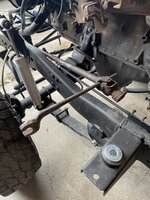
I also sorted out the pedals and linkage and took note of which ones needed cleaning/painting/ rebuilding and got rid of the wires and vacuum lines for the cruise. I’m not going to re install the cruise it just doesn’t fit my driving needs.

I have the MORE 1” lift kit and I’m going back and forth on if I want to install it or not. I have a 2.5” lift/stock wheels and want to run the 33”s and am not sure if I have the clearance to do so without, but don’t know if I have to drop my clutch bracket to match if any other alterations need to be done that I’m missing. Any input is greatly appreciated.

Gonna watch the weather and next chance I get start shooting some interior so I can piece this bad baby back together! Will sleep well tonight dreaming of that shiny tub!
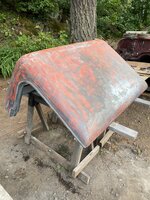
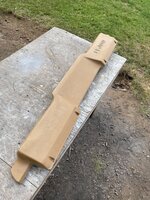
With the body lift, you will need to adjust your radiator fan shroud, if you have one. Basically, add four new mounting holes to the shroud., lowering it 1", so that the engine/chassis mounted fan will realign with the now 1" taller grill that the radiator/shroud bolt to.

If you do not have a mechanical/belt driven cooling fan. disregard.
 
Waiting for a stretch of good weather to get my interior and bed painted. Knocked out a couple more little random projects this weekend. I have a major problem getting sidetracked on little details to the big picture, but I guess they all need to be done in the end…
Sanded down all the old layers of crap on the top. Cleaned the interior and patched some small drill holes and excess mounting holes in the fiberglass. I’m going to try and install some aluminum (softer?) rivnuts in the window mounting area as well as the single hole in the lip right behind the door. I’ve gone through 3 sizes of screws over the last few years watching them wallow and fall out so hoping this helps.
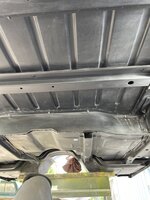
Patched and cleaned and vinyl sprayed the dash pad with SEM Cordovan brown, which is almost a perfect match for the seats and door panels I’m having reupholstered. Crawled around under the tub and scuffed, cleaned and seam sealed. I’ll also spray Eastwood’s Rubber under carriage spray this week. While I had the seam seal out I remounted and “massaged” in the bulkhead. Put down a heavy bead underneath and on the sides, screwed down, and wiped down/resealed the seams. Hoping to get rid of the puddles and future rust in these areas so it got a little sloppy but I think will look good under a few coats of Lizard Skin and Raptor liner.
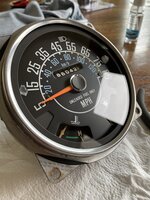
Also sorted out my dash panel parts and got really into shining up the speedo! I wanted to go Speedhut, but have already blown waaaaay past my budget and this shiny thing made me feel better about my decision.
sun is out tomorrow for the remainder of our forecast with light/no wind. Gonna tape and spray hopefully all coats by the weekend!
I’ve been moving fast in these stages and forgetting to document as well. I’ll try better as Tammy starts coming together these next coming weeks.
1688BBAD-F756-4335-8FD9-89E32A6A5E86.jpeg8B13942D-D336-4401-B190-E11B4788C8DC.jpeg8B9292B2-9F87-4CF5-B76F-DD11CB354A93.jpeg276A63F7-9224-4CE0-AD8C-0FB1A2B65BC7.jpeg9C1CD7C6-2ADB-4E14-A4F4-1AA0E543D771.jpeg
 
Last edited:
How did your doors fit on that tub? Did you have to do any tweeking to get them to close well?
 
How did your doors fit on that tub? Did you have to do any tweeking to get them to close well?
The doors were a pain for sure, and I' m still not 100% confident I can get it to where I'm happy. They never really fit well in the original tub and it was obvious that the PO had tried many things to make it work. It always hit on the hardtop right at the striker and had a slight gap at top.

I had the hinge plates off both the door and the tub for painting so I had a chance to do some propping and aligning. Definitely had to open up some of the holes on the tub a bit toward the door opening to get some better alignment on the window hinge and the bottom hinge. I could never get the same line all the way around but it was close enough for me. My main goal is to have seals touch enough to make it "dry" inside.

The new tub door opening was about an 1" wider from hinge to striker. The pillar that mounts the striker was back another 1" (measurements are ballpark for convo) beyond what the original pillar was. This made the striker plate not sit flush and wrap the pillar, but bump closer to the door opening. It still makes flat contact on the 3 mount points and puts it against the little cutout on the opening for the pin. I will have to play with some spacer washers to extend the pin and get an exact catch, but didn't focus too heavily on dialing that in since I knew I would be taking all the plates and pins and hinges and such off , have painted, and then have to do it over again. I got it to the point where I saw it had my best chance to work without running around in circles beating my head against the thing... hoping I don't regret that decision.

One thing that is also weird is that there is space between the body mount and the rubber bushing directly below the rear door pillar, but sits flat on all others. When I bolted down to test the alignment of the body mount inserts, it felt as if I couldn't get full contact on these mounts on each side. But by cranking a bit, the door space closed down a bit closer to the original space measurement. I read somewhere that some people use spacers to make up this space and get proper alignment? I measured everything, tub and frame to the ground and it's the same. I didn't want to crank down too hard for fear of breaking welds or bending weird spots on the tub.

I'm not sure if any of this is making sense without walking through more thoroughly with pics, but I'm sure I'll have to document these struggles all over again.
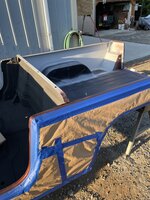
 
The doors were a pain for sure, and I' m still not 100% confident I can get it to where I'm happy. They never really fit well in the original tub and it was obvious that the PO had tried many things to make it work. It always hit on the hardtop right at the striker and had a slight gap at top.

I had the hinge plates off both the door and the tub for painting so I had a chance to do some propping and aligning. Definitely had to open up some of the holes on the tub a bit toward the door opening to get some better alignment on the window hinge and the bottom hinge. I could never get the same line all the way around but it was close enough for me. My main goal is to have seals touch enough to make it "dry" inside.

The new tub door opening was about an 1" wider from hinge to striker. The pillar that mounts the striker was back another 1" (measurements are ballpark for convo) beyond what the original pillar was. This made the striker plate not sit flush and wrap the pillar, but bump closer to the door opening. It still makes flat contact on the 3 mount points and puts it against the little cutout on the opening for the pin. I will have to play with some spacer washers to extend the pin and get an exact catch, but didn't focus too heavily on dialing that in since I knew I would be taking all the plates and pins and hinges and such off , have painted, and then have to do it over again. I got it to the point where I saw it had my best chance to work without running around in circles beating my head against the thing... hoping I don't regret that decision.

One thing that is also weird is that there is space between the body mount and the rubber bushing directly below the rear door pillar, but sits flat on all others. When I bolted down to test the alignment of the body mount inserts, it felt as if I couldn't get full contact on these mounts on each side. But by cranking a bit, the door space closed down a bit closer to the original space measurement. I read somewhere that some people use spacers to make up this space and get proper alignment? I measured everything, tub and frame to the ground and it's the same. I didn't want to crank down too hard for fear of breaking welds or bending weird spots on the tub.

I'm not sure if any of this is making sense without walking through more thoroughly with pics, but I'm sure I'll have to document these struggles all over again.
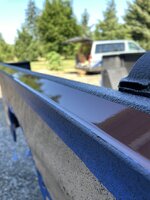
There’s a slight bit of flex in the tub under the door frame. But you are correct in flexing flat panels. The adjustment is minimal at best.
 
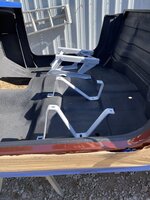
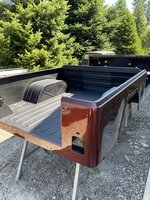
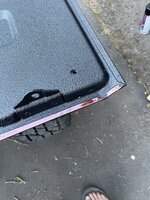
Finally had a few days that weren’t 115 degrees or blowing 30 mph to hammer out some coats. Did a few sunrise paint sessions before work to knock the interior out. Tub interior has 2 coats lizard skin, 2 of their ceramic. Than remasked and 2 coats of raptor on the bed, interior, tailgate and wheel wells.
 

Attachments

  • 930FEFAE-922B-42B5-A6DC-8C4BE16862C4.jpeg
    930FEFAE-922B-42B5-A6DC-8C4BE16862C4.jpeg
    178.9 KB · Views: 61
  • 7FB4C9FF-BE2C-49FE-84A0-24F33F4A658E.jpeg
    7FB4C9FF-BE2C-49FE-84A0-24F33F4A658E.jpeg
    121.2 KB · Views: 62
  • C5240520-47A4-4B5B-9958-7783503CBF16.jpeg
    C5240520-47A4-4B5B-9958-7783503CBF16.jpeg
    187 KB · Views: 62
  • 593CD1A5-273A-4AF5-8FC4-2BB2E020BFDF.jpeg
    593CD1A5-273A-4AF5-8FC4-2BB2E020BFDF.jpeg
    258.2 KB · Views: 63
  • 51C10012-8C98-42D2-A4D1-09986157D982.jpeg
    51C10012-8C98-42D2-A4D1-09986157D982.jpeg
    182.1 KB · Views: 65
  • F880A1B3-258C-46FD-8073-90F4B342CC85.jpeg
    F880A1B3-258C-46FD-8073-90F4B342CC85.jpeg
    263.5 KB · Views: 65
  • CE335123-73BB-47AD-8BA0-5B6A4ADC8A38.jpeg
    CE335123-73BB-47AD-8BA0-5B6A4ADC8A38.jpeg
    182 KB · Views: 63
  • 79A45DB5-6C56-4400-92EC-929AF00D38D2.jpeg
    79A45DB5-6C56-4400-92EC-929AF00D38D2.jpeg
    231.2 KB · Views: 65
  • 50105442-5DCB-4F7F-BE7F-E0F8CA5255C4.jpeg
    50105442-5DCB-4F7F-BE7F-E0F8CA5255C4.jpeg
    295 KB · Views: 62
That looks amazing! You took the masking on the tailgate to the next level. That’s the same process/placement I did- except I didn’t do the underside of the front fenders. Trying to decide on more Raptor or the undercoat stuff I used on the bottom of the tub. I can’t wait to see this one done! And maybe in person some day!
 
I know there’s a thread for redneck hack job setups somewhere, but I figured I’d keep it within my build page, since it’s my rednekin.
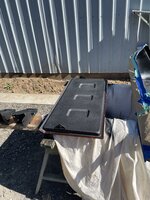
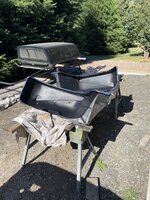
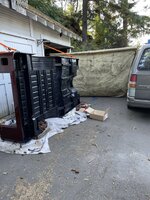
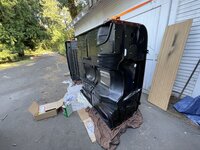
If you’ve ever been to Hood River Oregon, windsurfing capital of the world, you’d know that the wind is relentless and a down right nuisance if you aren’t a sailing enthusiast. Well I got tired of waiting for a day of gusts under 30mph to paint the bottom and firewall, so I took it upon myself to set up what I am now deeming the Hood River Paint Booth (patent pending). Tub is now complete. Let’s hope there’s minimal scuffs to the drivers panel laying on the ground ( very padded don’t worry) and it’ll buff out. Few holes to finalize and It’ll be be on the rolling chassis by the end of the week. Man I reaaaalllly need a full sized shop…. And a lift…. Maybe a crane… and definitely another beer…
566CED73-7D7B-4C6D-BA76-D163C82EA81C.jpeg379A7777-AF54-4FF8-8A88-CBC6C2BCA913.jpegB129DA1A-D19D-4BDE-A270-359A060EC553.jpeg
 
We used to go to Hood River every year for the Hop Fest. Loved the Big Horse Brew Pub- so sad to hear a fire closed it down a few years back. Our kids still go up yearly to do the fruit loop- some of those huge apples are amazing. Carol and I have been talking about going back this fall- if we do I’ll look you up! And if you’re ever out Central Oregon way- look me up!

I was going to try and plan a Scrambler get together in Redmond this Summer but Things are just too busy for me right now. Maybe next year.
 
We used to go to Hood River every year for the Hop Fest. Loved the Big Horse Brew Pub- so sad to hear a fire closed it down a few years back. Our kids still go up yearly to do the fruit loop- some of those huge apples are amazing. Carol and I have been talking about going back this fall- if we do I’ll look you up! And if you’re ever out Central Oregon way- look me up!

I was going to try and plan a Scrambler get together in Redmond this Summer but Things are just too busy for me right now. Maybe next year.
My whole family lives in Bend now and I'm usually there a handful of times so I'll try and swing on in. Who knows, maybe I'll even get this project done and we can do a mini parade through town.
Brother owns Valentines Deli, so if you ever need an amazing sandwich, look them up in the Box district and tell 'em Jess sent ya.
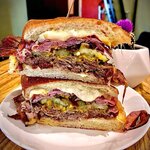
 
My whole family lives in Bend now and I'm usually there a handful of times so I'll try and swing on in. Who knows, maybe I'll even get this project done and we can do a mini parade through town.
Brother owns Valentines Deli, so if you ever need an amazing sandwich, look them up in the Box district and tell 'em Jess sent ya.
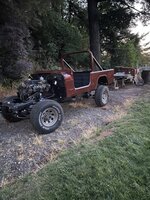
Right on! I will have to stop by and get a sandwich! Next time you’re in town, let me know!

Wow! I just looked at their FB page. Those sandwiches look amazing! The smoked Pork Cubano… might have to head over tomorrow!DE54BFBF-AE81-417D-AC56-E2A25C8AB548.jpeg
 
Last edited:
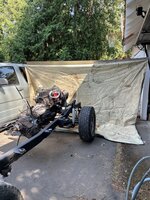
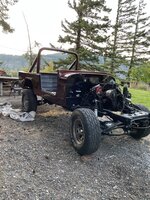
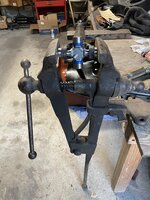
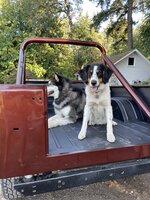
Bought a half rack of beer and talked some friends into coming over to lend some muscle. All the body bolts are now threaded and ready for final alignement. Also let the doggos get the first scratches in so it wasn’t on me. Still planning on Tammy being a daily so this was the cutest way to knock the stink off. Also pulled out the blacksmithing vice I stole from my dad a few years back for some ujoint work. I’ve never done this before so a few tries a few curse words and I got both done on the main drive shaft. I’m on celebration mode because I can see a realistic path to puttin pieces together
. DB066923-F41C-4CBF-A3F6-27688ED92D7F.jpegCBDBF2EE-38A4-44AB-A16C-D011DEF17262.jpeg84BD1C95-F24C-4A07-B6DF-E2484A5C0574.jpeg22D7BC0F-550B-48D4-B66E-1FFD0D8455F2.jpeg
 
I did the same thing with my kids. 1st thing I did after we finished the restoration was go out for ice cream and get chocolate ice cream on the new seats.

I made a car so nice one time that I would never drive it. I would NEVER drive it if it even hinted at rain or snow. I had it for years and every time I drove it I checked the bloody weather forecast. I swore I would never do that again when I sold it..... so I haven't. I drive mine rain or shine. Good for you!
 
Back
Top