• Notice for iPhone users: DO NOT use the image size reduction option when uploading photos to the forum. This causes portrait images to post as landscape. We have added a warning to the image insert pop-up as well.

The "It came home in buckets" build - a frame-off on an '81

Update: finally, I know

here in NC we have safety inspections up until 35 years old. So it needed to be inspected for the last time this year. Got that done yesterday and just got back from the tag office with a plate. Now on to shakedown runs on the road to ensure the trans is up to snuff. Then re-gear and decal install and this one is virtually done! I will install the half soft top at some point down the road.

Then on to the '82.
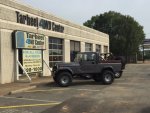
 
I'll load the Scrambler up tomorrow morning and take it to my local shop for the re-gear, 1 piece axles, and rear limited slip install. Then decals. Whew!
 
IMG_3033.JPG

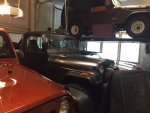
Once inside she sits beside two other CJ8s, 1 CJ7 and a CJ5. Should pick her up tomorrow.
 
back home in the garage. always fun when you spend money but don't see it. last step would be the graphics. I have a call in to my paint guy now. Hopefully he's not too jammed up and can work me in soon.

IMG_3113.JPG

4.10s with 1-piece axles in rear along with a Detroit True Trac
 
Finally! tomorrow I drop her off at my painter's place for final buff and decal install. Should have it back in a week.

IMG_3447.JPG
IMG_3448.JPG
 
Finally! tomorrow I drop her off at my painter's place for final buff and decal install. Should have it back in a week.

.
.

Awesome set-up!

Bet you are anxious to get this one finished.

Looking forward to seeing some good 'after' pics!

.
.
 
seems like the last few steps have taken forever with life getting in the way - then I remember the 5 year CJ7 build and the LIFE events that went through - puts it all into perspective.
 
Great write up on the build. Looking forward to seeing the stripes and it rolling on its own.

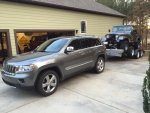
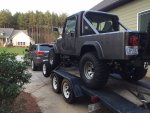
I can drive it now but still messing with the kick-down linkage as well as a few pesky things like a leaking steering box. Main reason it's on a trailer in the above pics is that I didn't have anyone to follow me to my painter who's about 45 mins away. He's supposed to send progress pics later today. :)

The HEMI Overland did very well towing the Jeep and trailer. Not that I would use it as a tow rig but it got the job done easily.
 
.
.

Did you sell the 'Vette?

.
.

technically yes, I sold the Vette. I sold it to my wife's uncle so it stayed in the family on the side it started with. I still have a set of keys and drive it. In fact it is coming to my house later this week so I can install a new heater core in it.

Long story short my plan was to complete a ground up build on it - the family wanted it kept like it is even with it's imperfections since those came duirng it's life with the family. Too much drama if I were to change things so I told the family it was for sale. The uncle paid me fair market value for it since that's what I paid my father n law for it + the updates I had completed on it.

sometimes keeping the family on good terms means more than keeping a car like that. LOL Replaced it with the SS in my sig.
 
few pics, not great quality, but at least it shows progress. My painter works for Nascar during the day and has his own shop for nights and weekends. Still has to complete the passenger side.

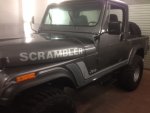
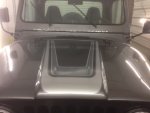
The placement of the "Scrambler" hood decal was decided based on 2 sources - where the original one was as well as an add from 1981. I've seen others that seem to be more centered on the hood front to back but I went with my 2 sources. I bring this up because I've already had someone comment on the placement after seeing pics I put on FB. Same thing with the center hood decals - seems they vary some but in the end I love it! Anywho - on to the pics

IMG_3473.JPG
IMG_3472.JPG

Rollbar is out in the pics because he's gonna try and shoot some paint up into it via the drain holes. I was noticing some rust colored water coming from them I guess from condensation.
 
Last edited:
Looks fantastic !!
May I suggest the black decal(I know it's called something else) on the upper part of the door around the door handle


Looks fantastic !!
May I suggest the black decal(I know it's called something else) on the upper part of the door around the door handle

I've gone back and forth on it. I'm afraid it wouldn't match the top very well and that would bug the crap outta me. I've thought about buying some and just taping them there to see how they look - then send back if I don't like it.
 
Very nice!
Nice to have a little helper once in a while too, brings everything back in perspective.
The decals look nice and I'm sure there was more than one guy stickin em on back in the day. And I'd bet they were all off a tad here and there so as long as it's in the ball park I wouldn't sweat it. Look at the first three pics in my thread. That was the original paint and decals when I bought her.
232323232%7Ffp%3B%3A5%3Enu%3D3237%3E594%3E348%3EWSNRCG%3D35429%3A9795338nu0mrj

232323232%7Ffp%3B83%3Enu%3D3237%3E594%3E348%3EWSNRCG%3D35429%3B487%3B338nu0mrj


Also, I've noticed the same issue with your aftermarket cowl seal as with mine. The portion that extends up onto the windshield frame is too short and leaves all the pinch weld dimples exposed. Looking at the original seal length in the decal hood pic you can see what I mean.
232323232%7Ffp%3B98%3Enu%3D3237%3E594%3E348%3EWSNRCG%3D35429%3A9796338nu0mrj
 
Not to hijack but if you want to fix that I have a NOS windshield seal I can sell you for $50.
 
I think I just realized tho that your paint booth pic shows no seal at all ? :wave: :bacon:
 
Back
Top