• Notice for iPhone users: DO NOT use the image size reduction option when uploading photos to the forum. This causes portrait images to post as landscape. We have added a warning to the image insert pop-up as well.

The "Once in a while" 1983 Scrambler Laredo Build

Where is the CRT dizzy made? Be careful of the Chinese knock off dizzys...
Lookin' great. Guess your gonna name it Ilean? Looks to be drivers side low...? :)
 
That is what i said HEI all the way,

I know, I should have listened. I was about to start wiring in the ignition module but didn't want to have to snake another set of wires across the firewall after I already have everything secured/loomed and looking good.

In the picture of the rim and tire, you have slippers next to it. I'm guessing no shoes in the garage!!! Just kidding. My garage is just as clean. Just a little messy with the overhaul of my jeep with parts everywhere.

I am in the same situation, the floor has suffered a little with the restoration. I will be able to move the Jeep out of the Garage under its own power soon so I can give the floor a good cleaning.

Guess your gonna name it Ilean? Looks to be drivers side low...?

LOL...That should be from the low air pressure in the old "roller" tires.
 
Productive night

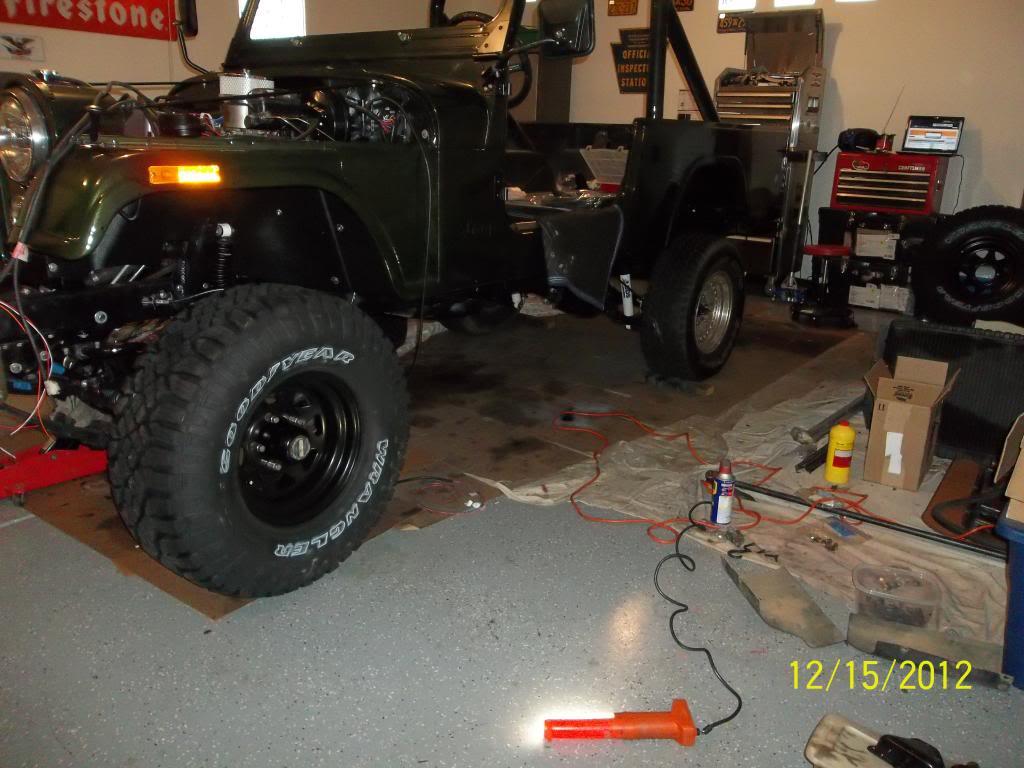
So after I discovered that I neglected to wire in the old Duraspark ignition module and decided to order an HEI distributor I turned to chucking on the new wheels and tires. I had been looking for 15x8 stock wagon wheels or old Western Wheel Turbine/cyclones but the searching for 5 good examples was a little exhausting. In the end I decided to order some Black Rock wagon style wheels which were the look I wanted in a brand new wheel. I ordered the tires and wheels from Morris 4x4 Center on Cyber Monday and got a smokin deal + free shipping on them and a lot of other parts.

Here is the first one installed.
100_0757_zpsfc601526-1.jpg


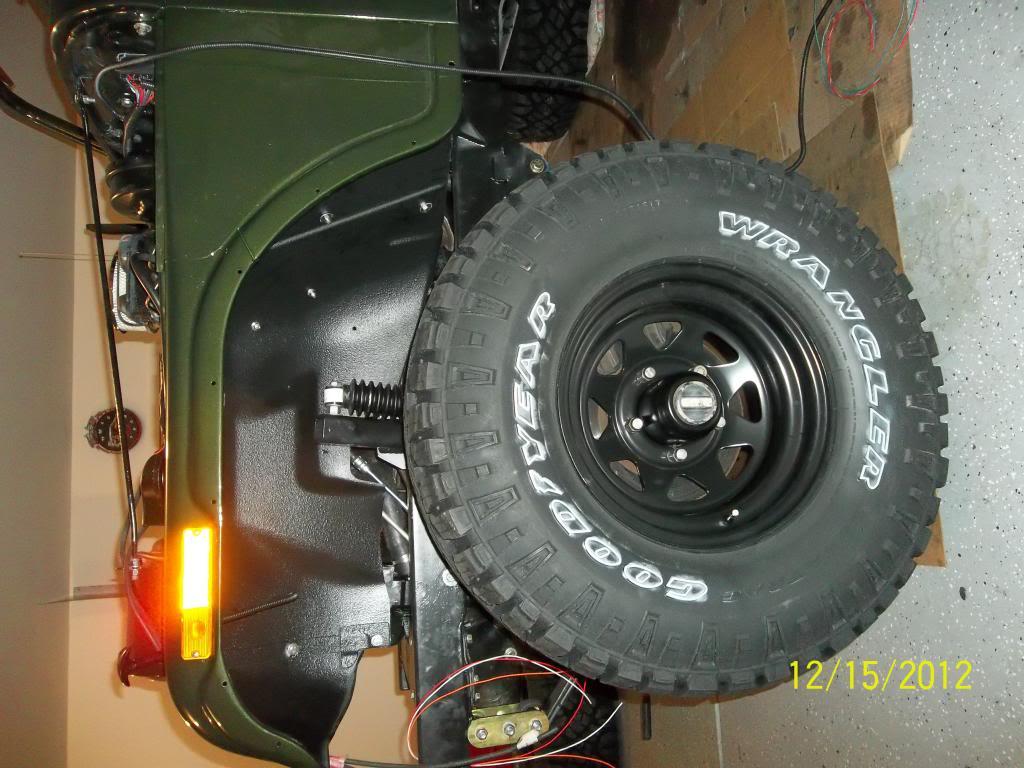
Picture of the fender, you can really see the U-POL spray in lining that the body shop put in each fender and the entire underside. I am really happy with how that turned out.
100_0758_zpsc2e48818-1.jpg


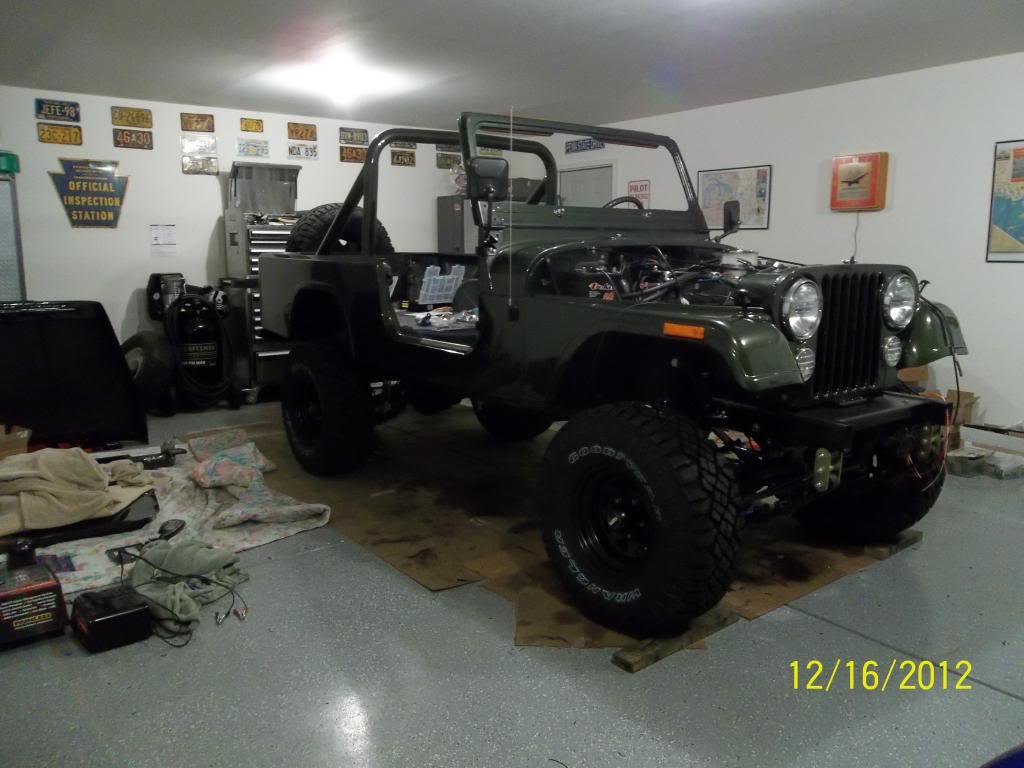
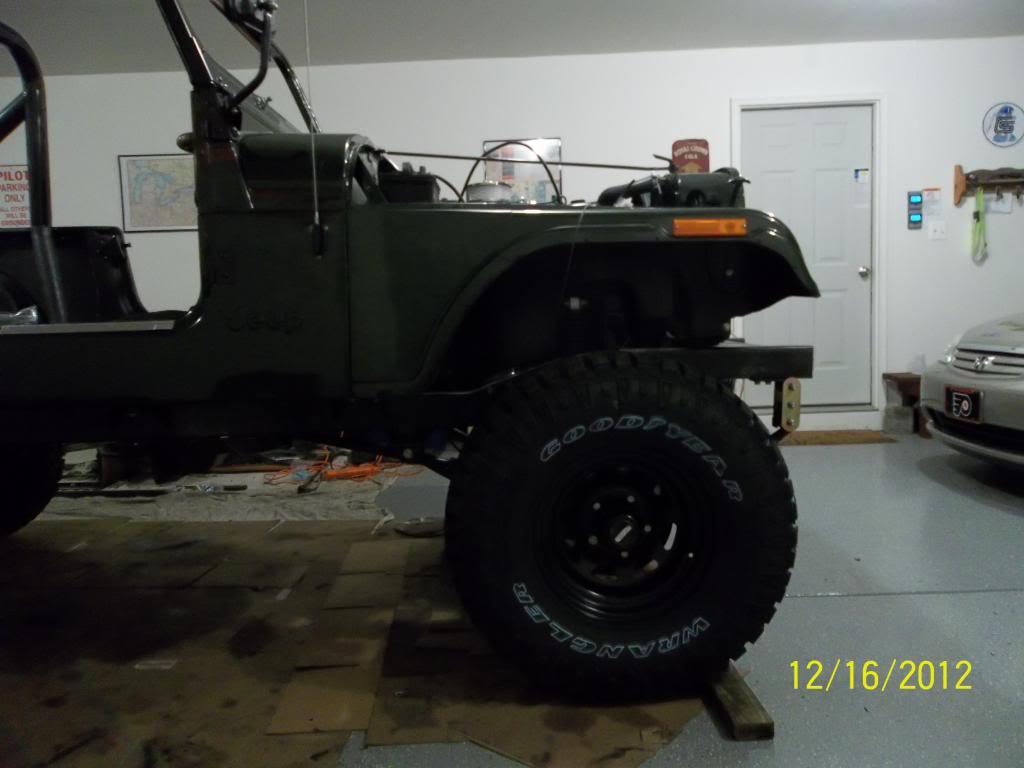
And the finished product. This was all possible, once again, to OneTon's truck which he let me borrow to get the tires mounted. Don't know if anyone noticed but there are no wheel-weights. I went with OneTon's recommendation and our local tire shop which had the balancing beads. There is a 6.5oz bag in each tire. I will let you know how they work out.

I have a 5th wheel/tire on the swing out that I ordered from TDK with the frame. It is a solid swing out that lines up perfectly and was integrated into the rear bumper which was integrated into the frame.
100_0760_zps82d77921-1.jpg


100_0761_zpse57a94a2-1.jpg


Not many more big things will be happening over the next couple days. I owe the wife a break for the holidays. Some of the things I still have to do are:

HEI ignition(then the engine should be able to run).
Bleed the brakes(might knock that out today)
Taylor the wiring to fit and re-do any temp connections that I currently have after I am sure the engine runs properly
Get an exhaust installed, or make my own.
Get a radio/speakers
Install old seats for now(a cost saving measure for the time being)
Regear to 4:10 / locker for the rear / 1 piece axles ( in the upcoming months)

I am really just looking forward to having it move under its own power for now, regardless of what gears/axles are in there(2.73's :rolleyes: )
 
Last edited:
man i like them rim and tires, If you need a hand with the brakes let me know, Just go ahead and let Steve do the 410s and exhust like mine just after Christmas. The wife will be ok with it. Better not drag you feet that baby will be hear for you know it. Then you will not be able to get to work on it, LOL LOL
 
Where are the tires? All I see are tiny little pizza cutters! Mooahahaha!!!!!!
Kidding. Looking great! So jealous of the beautiful paint and bed liner... :drool:
 
man i like them rim and tires, If you need a hand with the brakes let me know, Just go ahead and let Steve do the 410s and exhust like mine just after Christmas. The wife will be ok with it. Better not drag you feet that baby will be hear for you know it. Then you will not be able to get to work on it, LOL LOL

I sure will. You don't know anyone that has a brake bleeder do you? Otherwise I was going to use the 'ol wife pushing the brake pedal bleeding method :bacon:

eepdreamer
Where are the tires? All I see are tiny little pizza cutters! Mooahahaha!!!!!!

Now I am self conscious. Order me some 44's :cheers:
 
Last edited:
Has anyone used the bleeder valves from NAPA with the built in check valves so you can bleed the braks without any help. I have a pressure bleeder system I use.
Also, I installed the DUI ignition system and it works great and i finally got the Weber Carb tuned right.
 
Looks fantastic! BTW, I have 4 nice Turbine style wheels wheels if you are still looking, finding the 5th one may be tricky though.
 
Has anyone used the bleeder valves from NAPA with the built in check valves so you can bleed the braks without any help. I have a pressure bleeder system I use.
Also, I installed the DUI ignition system and it works great and i finally got the Weber Carb tuned right.

Yup... Russell speed bleeders. I've used them on a few of my vehicles and they work. You still have to play the get in and pump the pedal game but you can do the rig all by yourself. Not cheap but worth it IMHO. :)
 
Yup... Russell speed bleeders. I've used them on a few of my vehicles and they work. You still have to play the get in and pump the pedal game but you can do the rig all by yourself. Not cheap but worth it IMHO. :)

X2 on the speed bleeders! Worth every penny.
 
Looks fantastic! BTW, I have 4 nice Turbine style wheels wheels if you are still looking, finding the 5th one may be tricky though.

Thanks, I might take you up on that. For now I am going to have to see how well these wheels hold up, I couldn't justify another wheel purchase to the wife at this time. :eek:

Originally Posted by jeepdreamer
Yup... Russell speed bleeders. I've used them on a few of my vehicles and they work. You still have to play the get in and pump the pedal game but you can do the rig all by yourself. Not cheap but worth it IMHO.
X2 on the speed bleeders! Worth every penny.

Those speed bleeders look good. I think I am going to give this little guy a try from Auto Zone. It has a check valve installed in the bottle cap and a magnet to attach to your drums/discs. Still a pedal push game but is a one man job.

http://www.autozone.com/autozone/accessories/OEM-One-man-brake-bleeder-kit/_/N-26qw?itemIdentifier=46839_0_0_
 
The one I'm talking about, you change out all your bleeder valves and install these new ones that have a small check valve built in them. When your done you just tighten them up and leave them on the car till the next time. They are Russel Speed bleeders.
 
Last edited:
The one I'm talking about, you change out all your bleeder valves and install these new ones that have a small check valve built in them. When your done you just tighten them up and leave them on the car till the next time. They are Russel Speed bleeders.

Ditto
 
Originally Posted by zr10054
The one I'm talking about, you change out all your bleeder valves and install these new ones that have a small check valve built in them. When your done you just tighten them up and leave them on the car till the next time. They are Russel Speed bleeders.
Ditto

I googled them, they look great. I went to my local Napa and they had the self-bleeding kit with the bottle, magnet, and check valve pretty cheap. I am going to use that for now. I also got an email from CRT Performance and the HEI Distributor will arrive in a couple days. :bacon:
 
Sanity Check

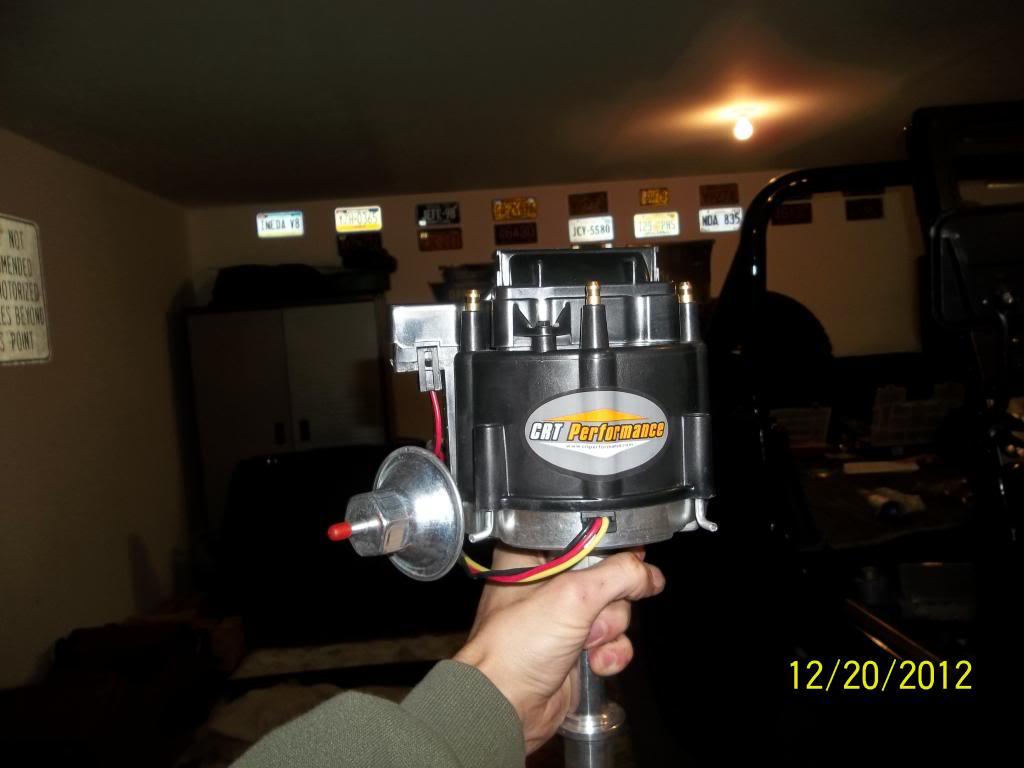
Today I received the CRT HEI distributor. Great looking unit with detailed instructions.

100_0772_zpsf8aee65f-1.jpg


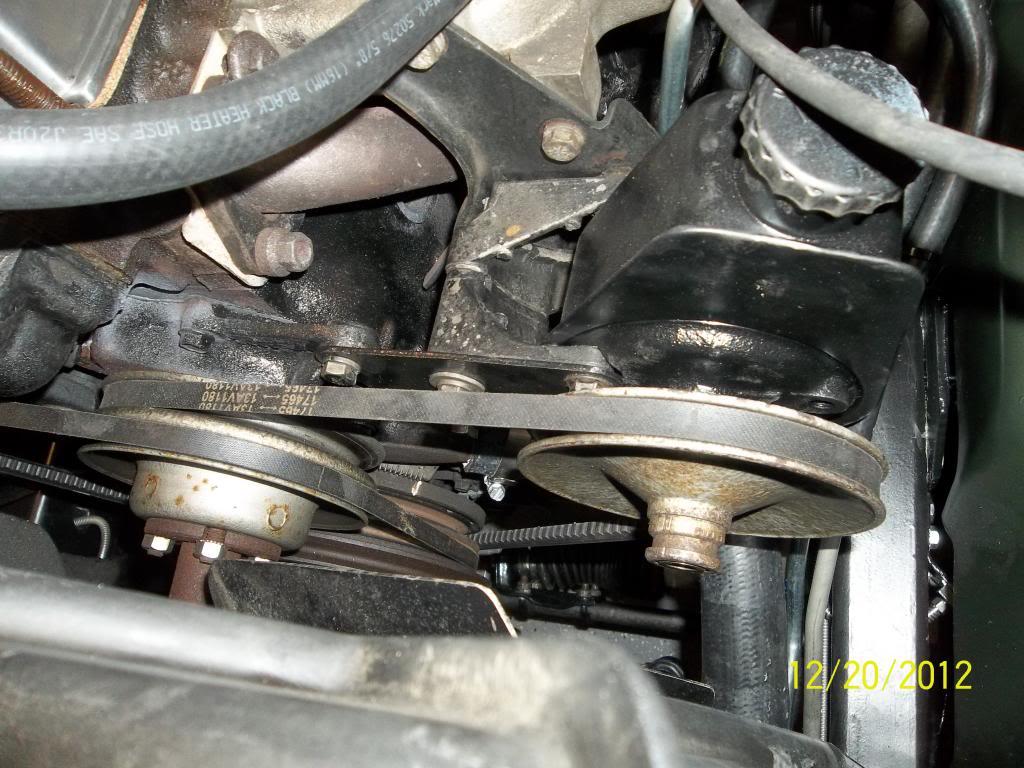
Now for a little sanity check. The instructions state to rotate the engine via the crankshaft bolt to 0 deg TDC. Which I did.

100_0768_zpsd6969219-1.jpg


The instructions say that the rotor should be pointing to the #1 terminal on the cap with the engine in this position. If not then you should continue rotating the engine until it is...here is their verbage: "STEP

4: Put the appropriately sized socket wrench on the center bolt of your engine’s lower crankshaft pulley. By turning the socket wrench clockwise, bring the timing mark on your crankshaft pulley all the way around until it is lined up perfectly with the TDC mark on the front of your engine.

STEP 5: Lift off your distributor cap and note the position of the rotor. It should be pointing directly at the #1 position on the cap which you previously marked. If it is NOT, then secure the distributor cap and repeat steps #4 and #5."

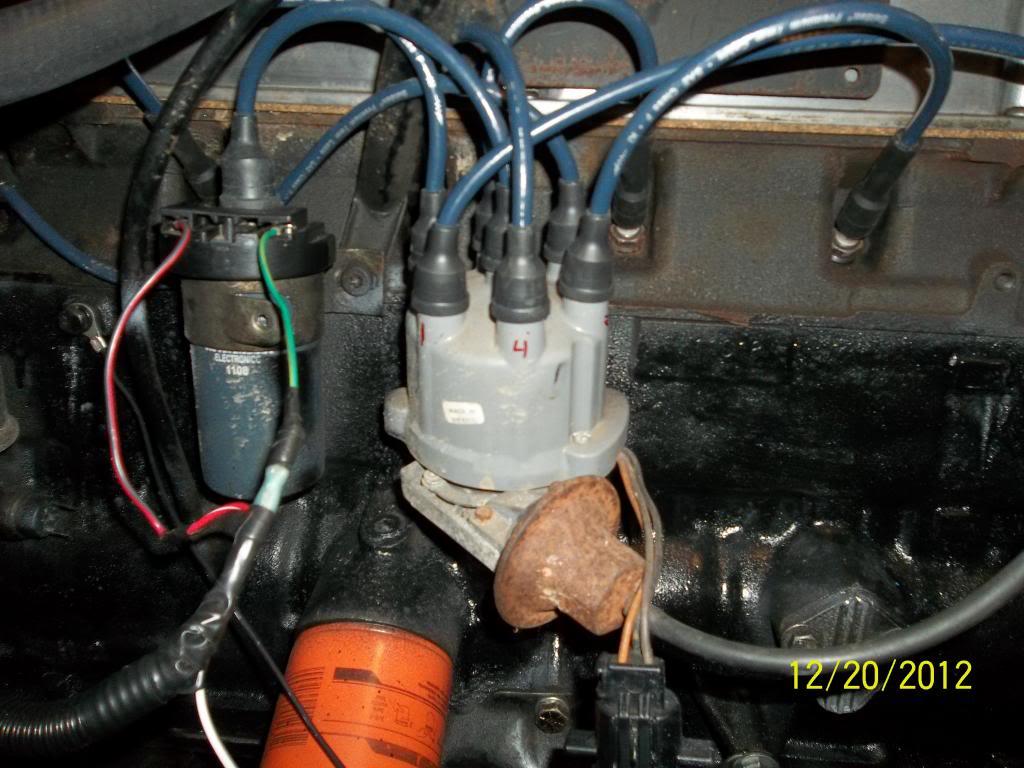
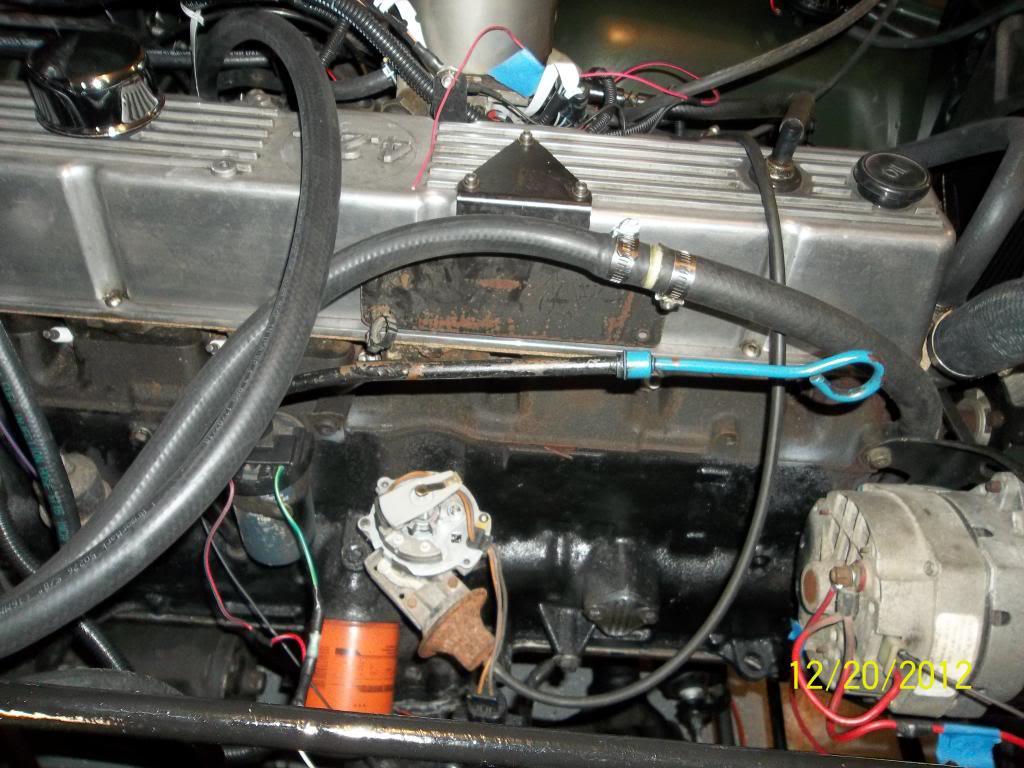
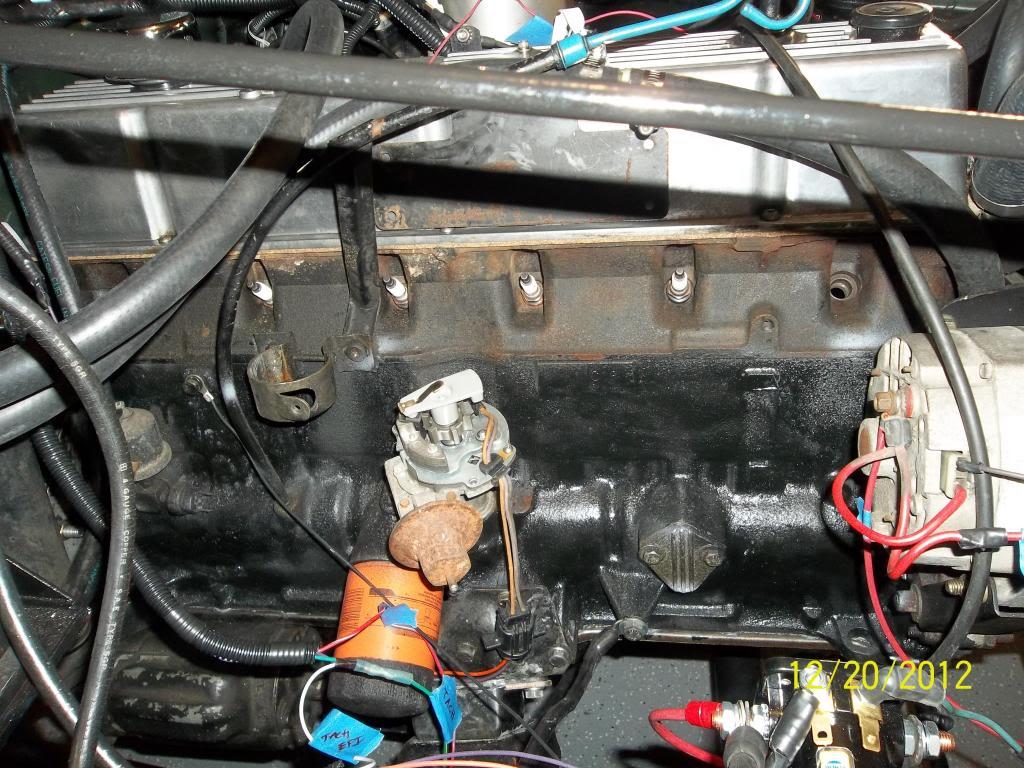
When I took the cap off the distributor, this is where the rotor was pointing.

100_0765_zps475420e2-1.jpg


100_0769_zps501ab750-1.jpg


As you can see, it wasn't pointing at the #1 terminal on the cap, more like #2 or 4. Now I am unsure if that is because the Howell EFI that was on the engine required it to be timed at 8 deg before TDC. Either way, per the instructions I just verified that the engine was indeed at 0 deg TDC for the installation of the HEI Distributor.

Here are the next 2 steps:

"STEP 8: With a flashlight, look down into the hole of the engine where the distributor fits. You will see a “slotted” shaft. Now, holding the distributor with the vacuum advance pointing at the passenger’s side of the Jeep, position the rotor so that the distributor shaft will fit into the “slot” down inside the engine. You will have to turn the rotor counterclockwise a little so that when you set the distributor into the engine, it will turn clockwise as the distributor drive gear seats into place. (Turn the rotor back approximately the amount that the gear turned as you pulled it out in STEP #7) The distributor should sit ALL THE WAY DOWN and rest nicely on the engine block. If it doesn’t, pull it out and try again until it does. Note: You may have to slightly bend your oil dipstick tube out of the way of your new distributor since the cap is much larger than your old distributor. Be very careful not to break the oil dipstick tube.

STEP 9: Place your new distributor cap back on the distributor. (make sure it’s on STRAIGHT and the NOTCH is aligned properly with distributor housing! It can be tough going on the first time, as the plastic caps tend to warp out of round) Note which spark plug wire terminal the rotor is pointing closest to. Tighten down the distributor hold down clamp and mark the spark plug terminal on the distributor cap #1. Secure the cap to the distributor."

I aligned the distributor shaft with the orientation of the oil pump shaft, easy. Dropped it in to the same orientation as the old distributor. The instructions say to then note which spark plug terminal the rotor is pointing closest to and this is the new #1 terminal. So from what I saw, the new #1 would be the terminal at the 3 oclock in this picture. The one right above the label on the right side of the cap.

100_0773_zps683b823c-1.jpg


Could anyone who has experience with this install please confirm that I am in the ball park. My concern is that the rotor of the old dizzy was not pointing at the #1 terminal, however the engine was indeed at 0 deg TDC.

Thanks

 
From the looks of the photos, you were 180 degrees out to start with. The engine makes 2 revolutions per 1 for the destributor. The piston is at TDC for the "Power stroke" and at TDC again for the "Exaust stroke". Won't run to well if you get them reversed or at all. Always when in doubt, remove #1 spark plug and put your thumb over the hole. As you approach TDC the compresion will force your thumb off the hole. If it doesn't, The exaust valve is open, hence, 180 degrees out.

I'll PM you my phone # and you can give me a call . :wave:
 
From the looks of the photos, you were 180 degrees out to start with. The engine makes 2 revolutions per 1 for the destributor. The piston is at TDC for the "Power stroke" and at TDC again for the "Exaust stroke". Won't run to well if you get them reversed or at all. Always when in doubt, remove #1 spark plug and put your thumb over the hole. As you approach TDC the compresion will force your thumb off the hole. If it doesn't, The exaust valve is open, hence, 180 degrees out.

I'll PM you my phone # and you can give me a call . :wave:

Well, I really did appreciate the PM and the ability to give you a call Toby. I was out in the garage and checked my computer to see the PM's waiting and was able to get everything swapped around (literally) to the correct TDC orientation. Here's some pictures of the correct installation:

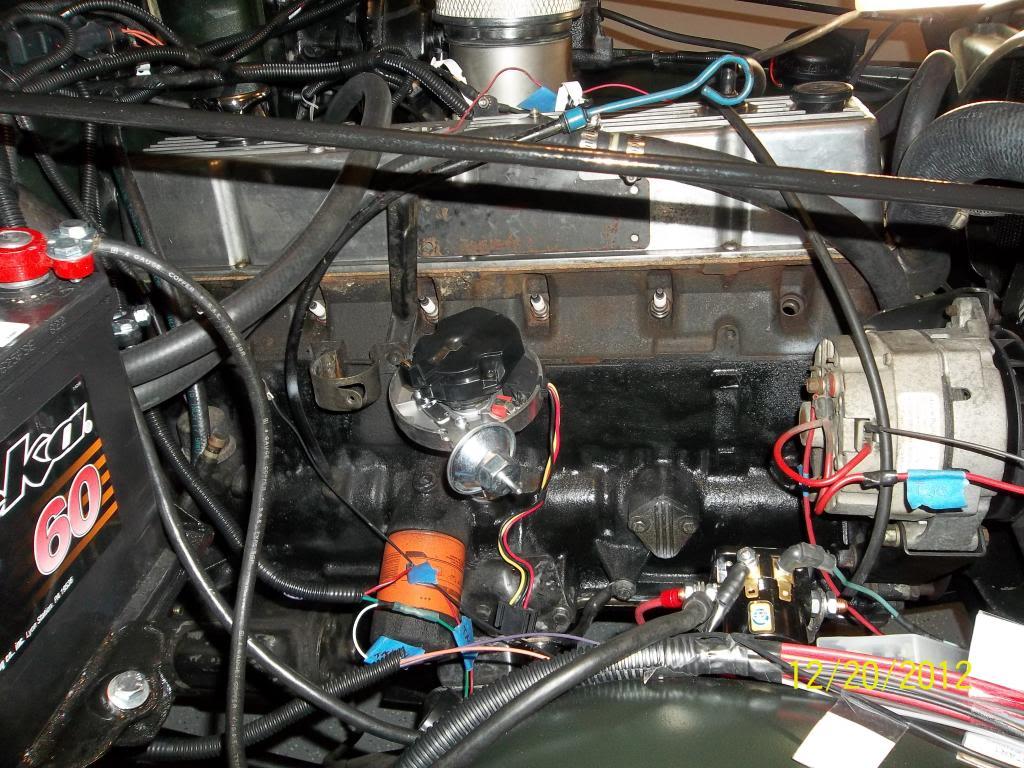
So I kept the engine at the TDC orientation, which I found out was the exhaust stroke or 180 out TDC. Which is why the rotor was pointing 180 out, makes sense. I installed the old Distributor in the 180 out TDC orientation and rotated the crank another revolution to TDC on the compression stroke. That yielded a rotor position like so:

100_0774_zps6f359b3a-1.jpg


This time it is pointing just a little past where the #1 spark plug terminal was, due to it being timed at 8 deg before TDC for the Howell EFI.

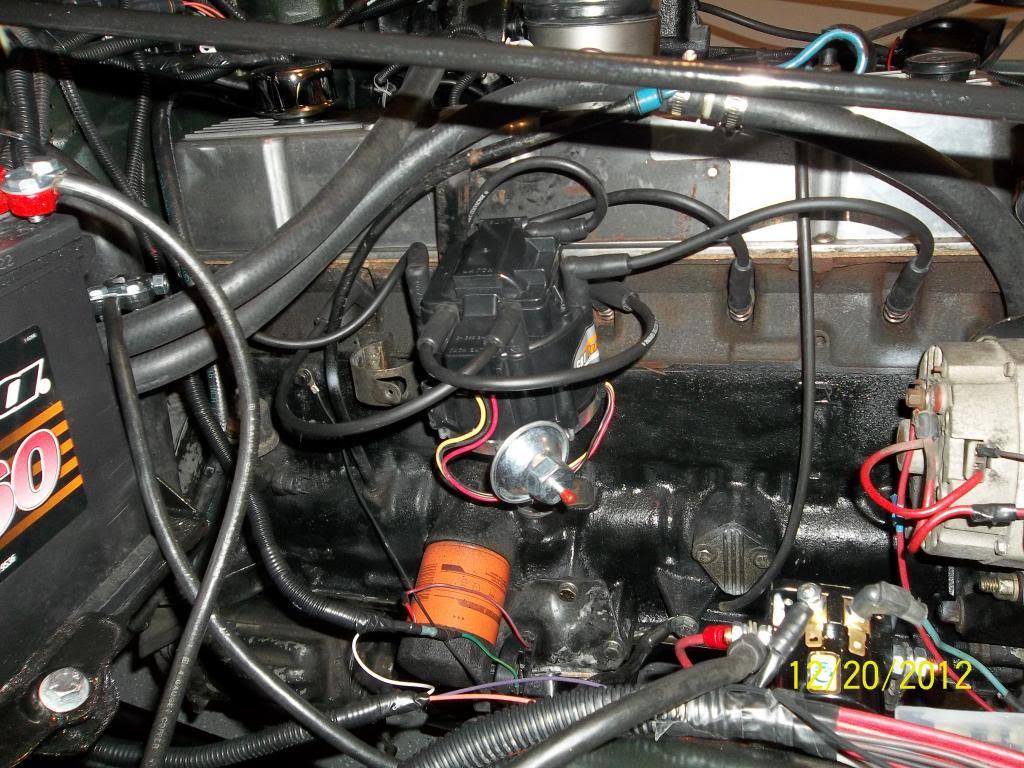
I yanked the old distributor out and got the CRT HEI unit ready to go in. Lined up the oil pump shaft spline and accounted for the 1/6th counter clockwise rotation due to the cam/distributor gears and dropped the new one in. This was the resulting orientation.

100_0775_zps3116e494-1.jpg


Looks pretty good from what I now understand.

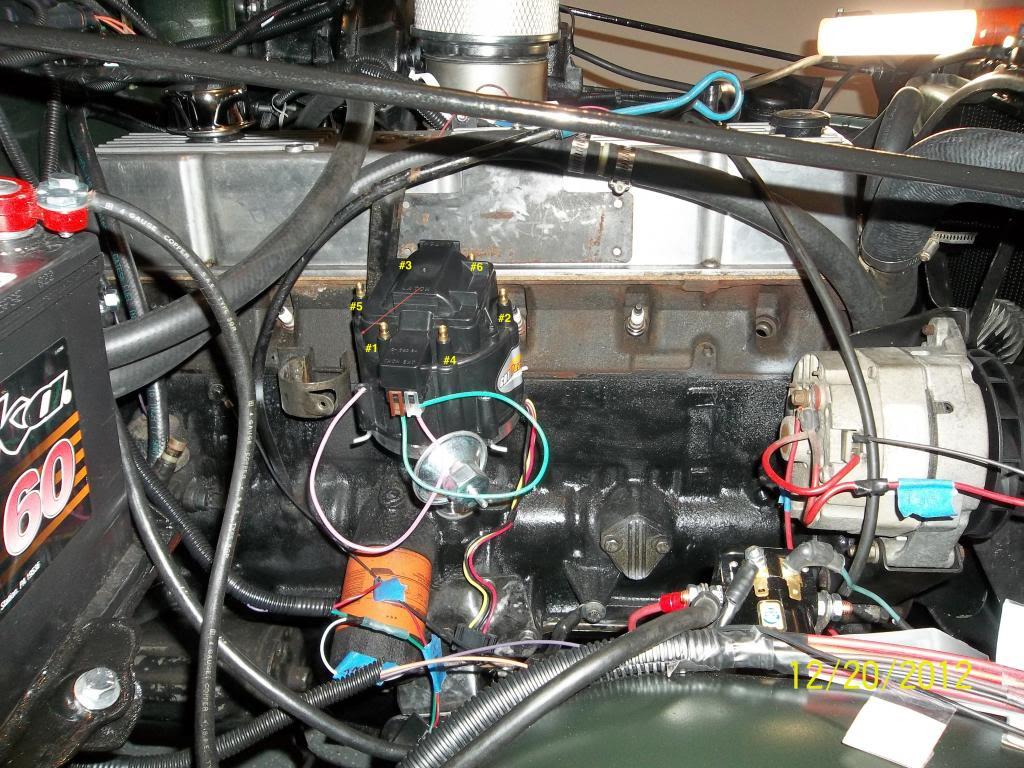
Put the cap on and labeled the new #1 spark plug terminal which is at the 7 oclock in this picture, generally pointing at the battery.

100_0776_zpseb4f7cad-1.jpg


Here she is with the wires connected in order 1 - 5 - 3 - 6 - 2 - 4 in a clockwise order from the #1 terminal.

100_0777_zps2e688beb-1.jpg


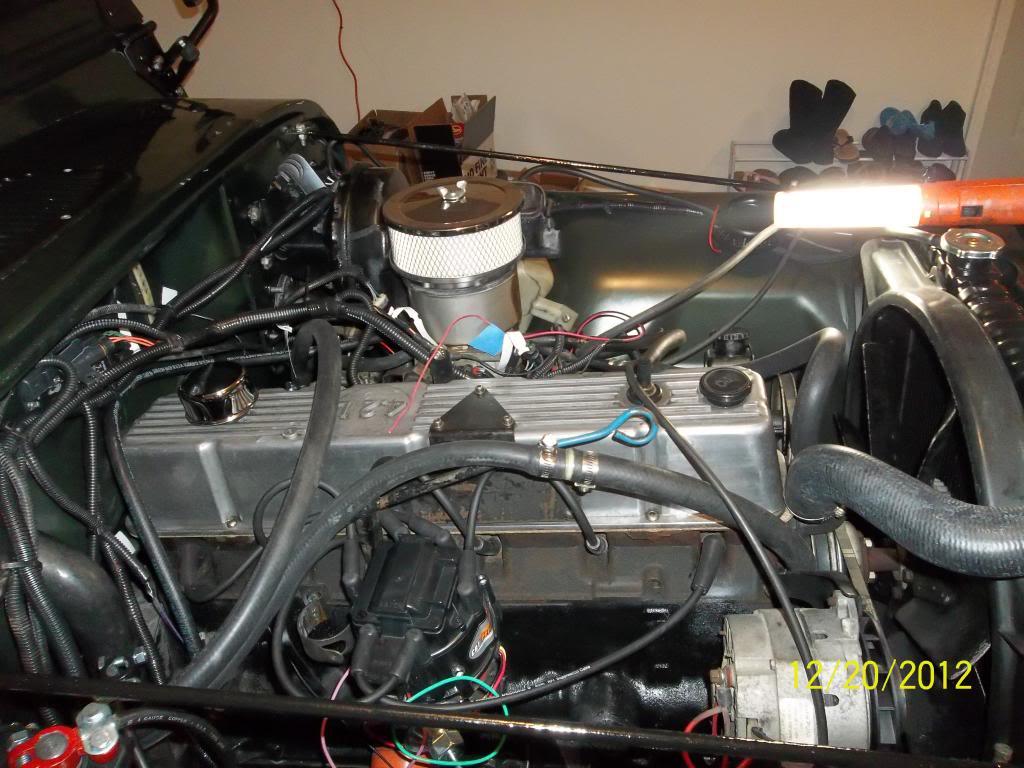
I was thinking of using the Painless wiring kits "Positive Coil" wire (red/white) for the power(purple) to the distributor. The green wire on the distributor should connect to the tach signal wires of the Painless kit for the gauge as well as the white wire(not sure if its visible by the passenger fender) which is tach signal for the Howell EFI kit.

Thanks to all who helped me out.
 
I learned the TDC method the same way when doing my HEI install too after being 180° out :cheers: Great minds! :rotfl:

I ended up going with the method of making a duct tape ball larger than the spark plug hole and slightly pushing it in the hole, then waiting for it to pop out on the compression stroke :)
 
It will fire right up! Set the timing back to 8 BTDC and you'll be smiling for years! :thumbsup: :wave:
 
Back
Top