
• Notice for iPhone users: DO NOT use the image size reduction option when uploading photos to the forum. This causes portrait images to post as landscape. We have added a warning to the image insert pop-up as well.

The t5/dana 300 rebuild

regular guy

Basic User
City
Cameron
State
NC
Day 1
Began disassembly. Here's the before picture
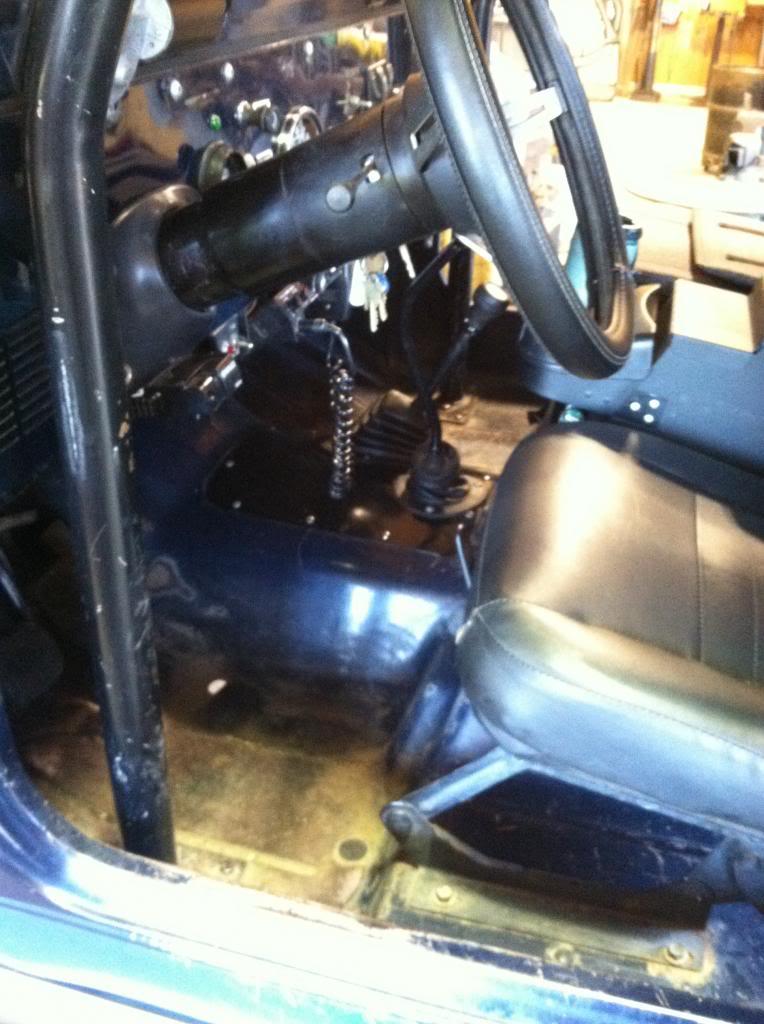
Started with removing the screws for the transmission access plate and the shifter boots. Took off the shifter knobs. From there, dropped the rear drive shaft.
Next, I tried to pull the transmission shifter, but because I replaced the isolator clip and rubber isolator, It was stuck on like crazy and I couldn't get it off. There's a learning point in there somewhere.
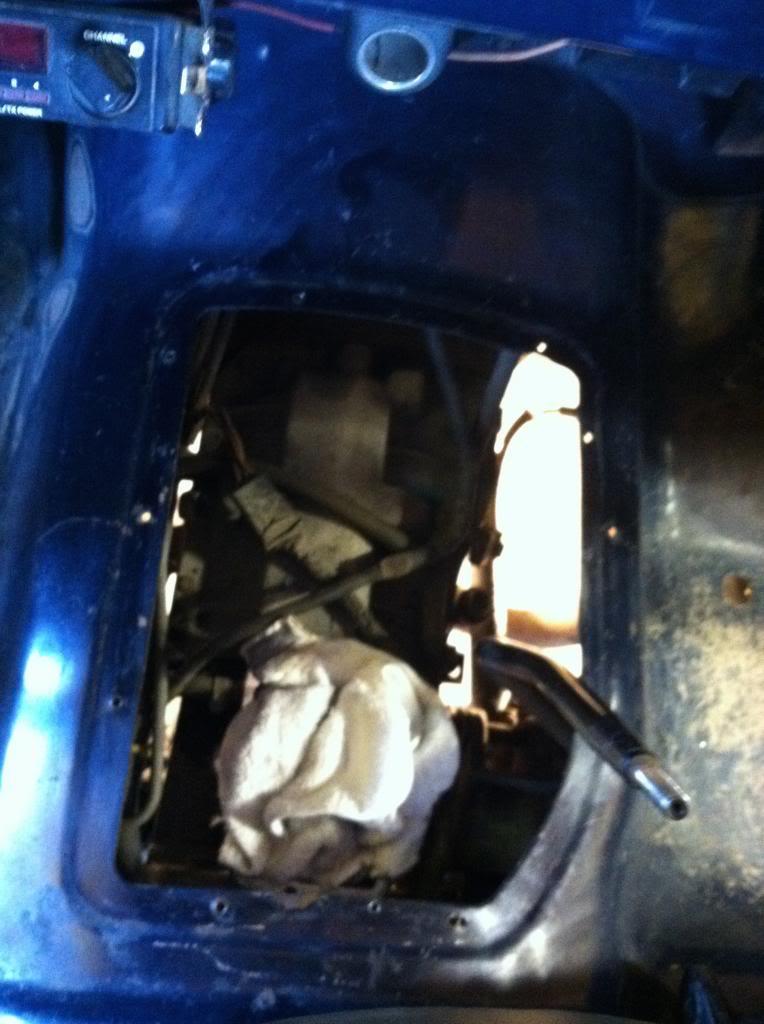
Next step was to jack up the transfer case just a hair in order to get the jack stand under the engine. Removed transmission mount bolts and skid plate bolts. Encountered second issue, First major one. My skid plate is further back than factory because of the 4.3L Vortec. On the left frame rail, the very back bolt was free spinning in the frame. After monkeying with it for about a half hour, got a cut off wheel and cut the damn thing off.
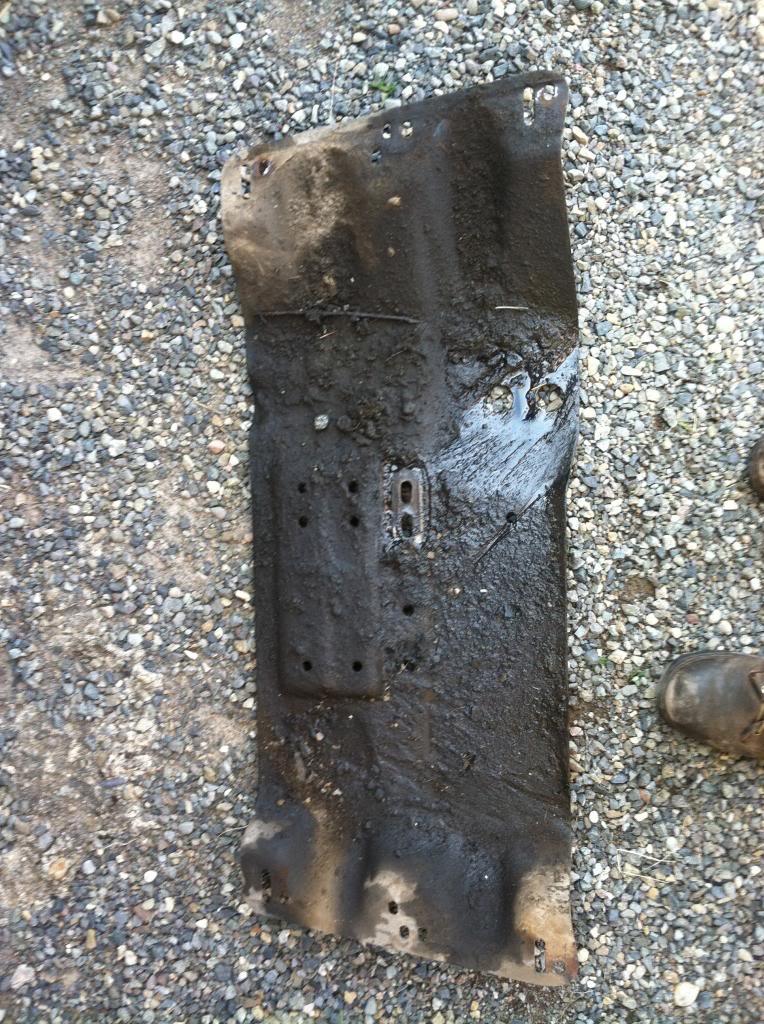
Here's what my skid plate carried around.
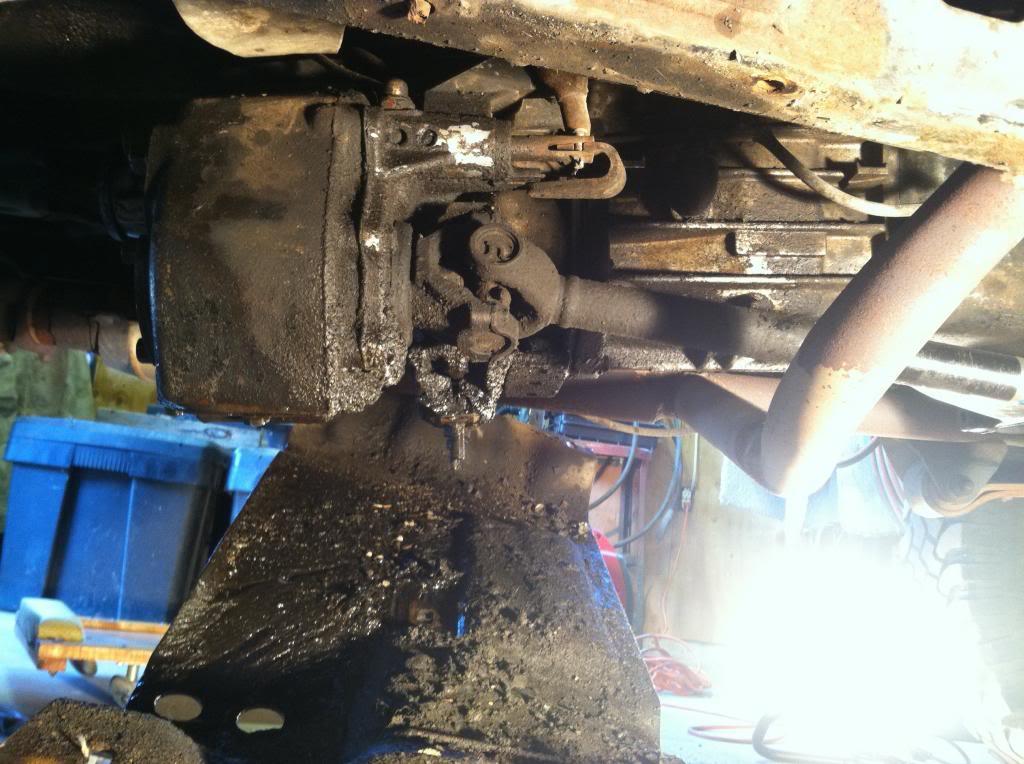
I think I might have dropped 20lbs off the gross vehicle weight
Pulled the Dana 300 with relatively little issues. Pulled the speedo cable and unplugged the electronic sender. Unhooked the vent line and the 4WD indicator. Remember to pull the stick as it's a pain in the *** to have that thing sitting on your chest on the creeper and trying to monkey around with getting the stick out of the access hole.
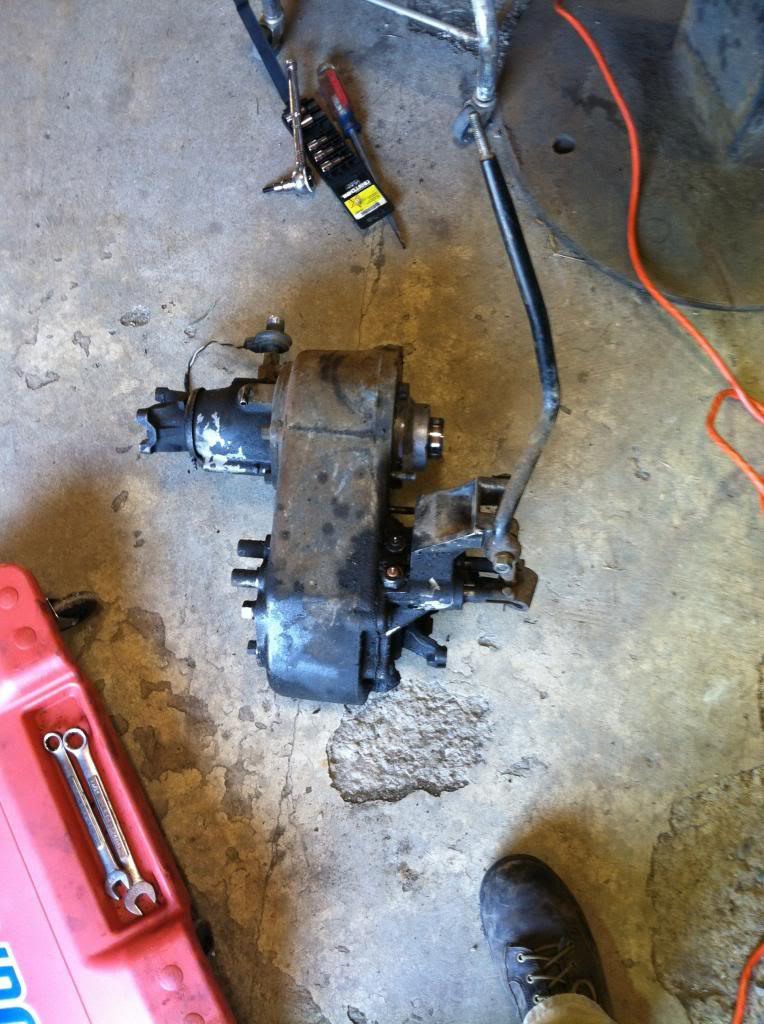
This is going back in as a twin stick
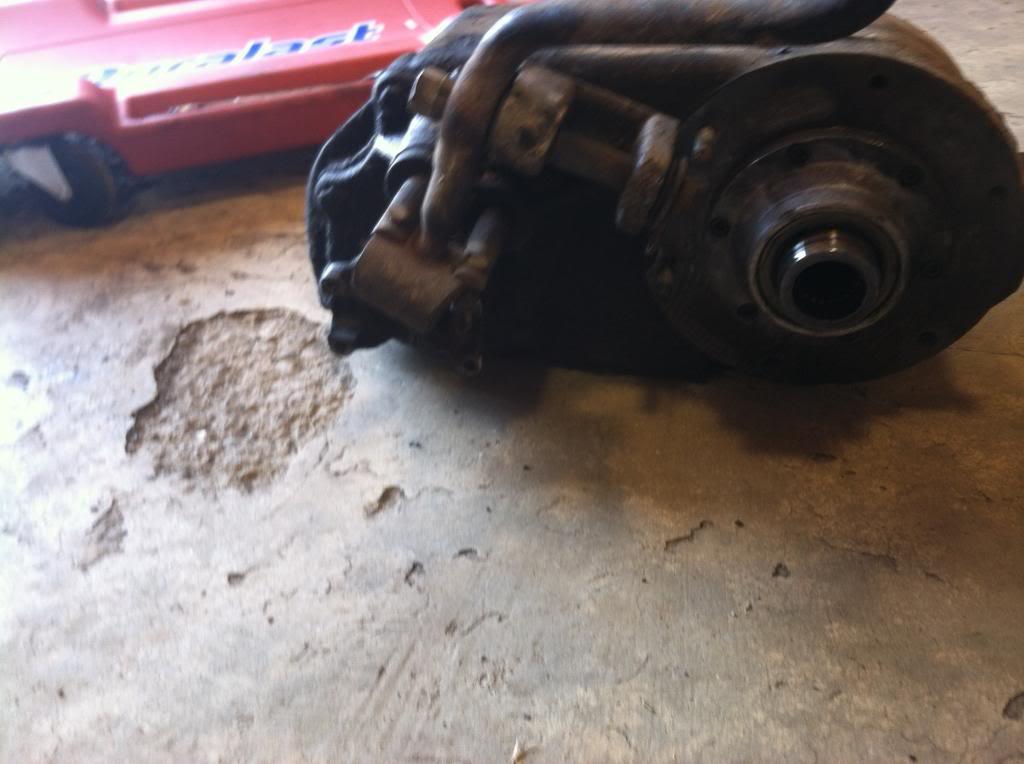
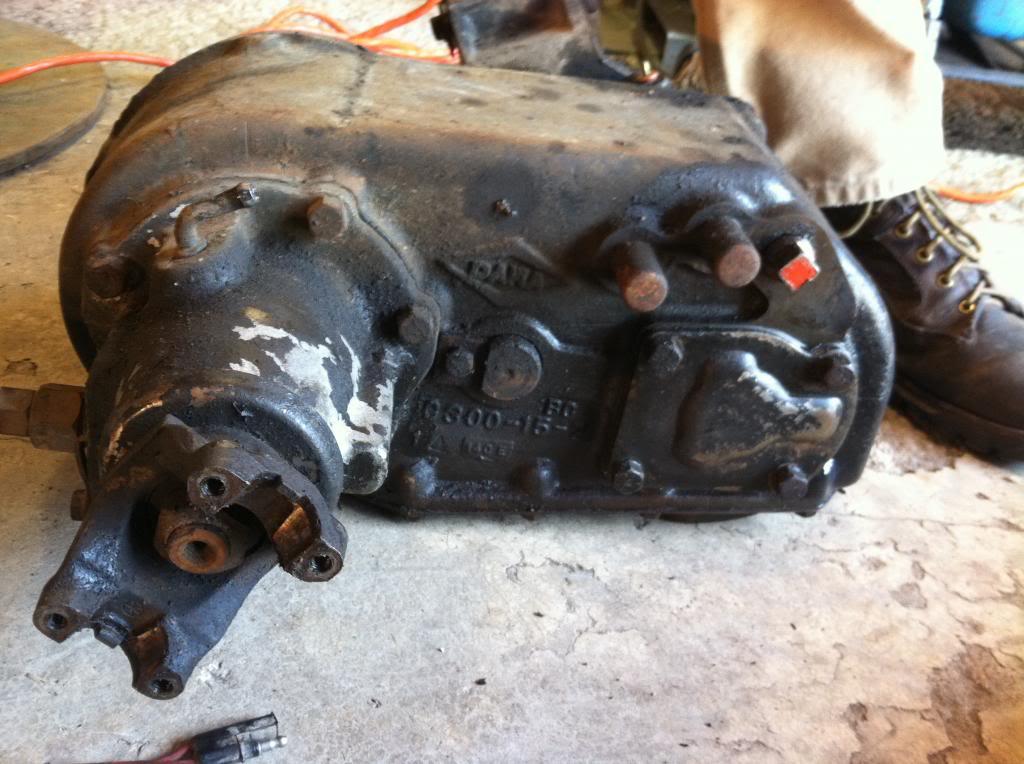
The transfer case was definitely leaking from every gasket. and the rear output shaft. It looked like the front was good and the seal to the transmission was good.
Next was the transmission. Unhooked the vent line and pulled the four bolts from the bell housing.
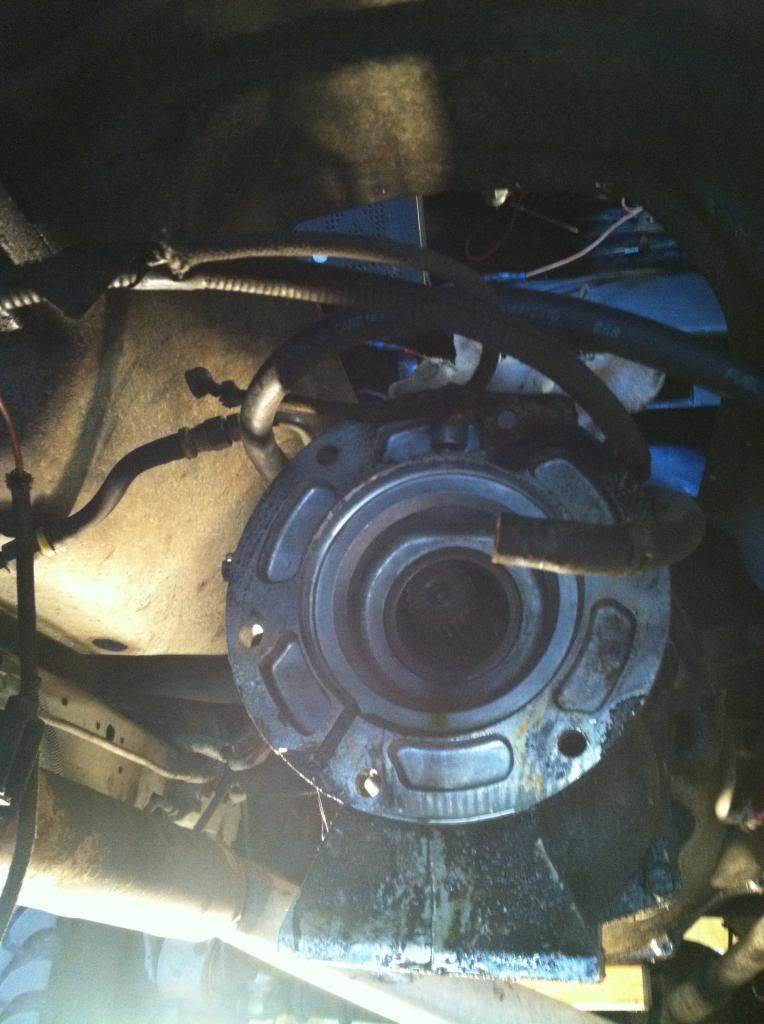
The chevy bell housing has 5/8 bolts on the tranny side and 1/2 bolts on the engine side. My inspection cover for the bottom half of the fly wheel was toast. I removed the starter to take out the rest of it. The two bolts attaching the clutch linkage to the bell housing were both loose. Pretty sure PO couldn't get a wrench back there so he just hand tightened them. I played the 5 degree of wrench turning for 15 minutes to get the top one out. Then the bell housing came out pretty easily. On to the clutch. 1/2 inch extension one hole to gain leverage and removed the clutch. Here's what a smoked clutch looks like. Hardly any plate left.
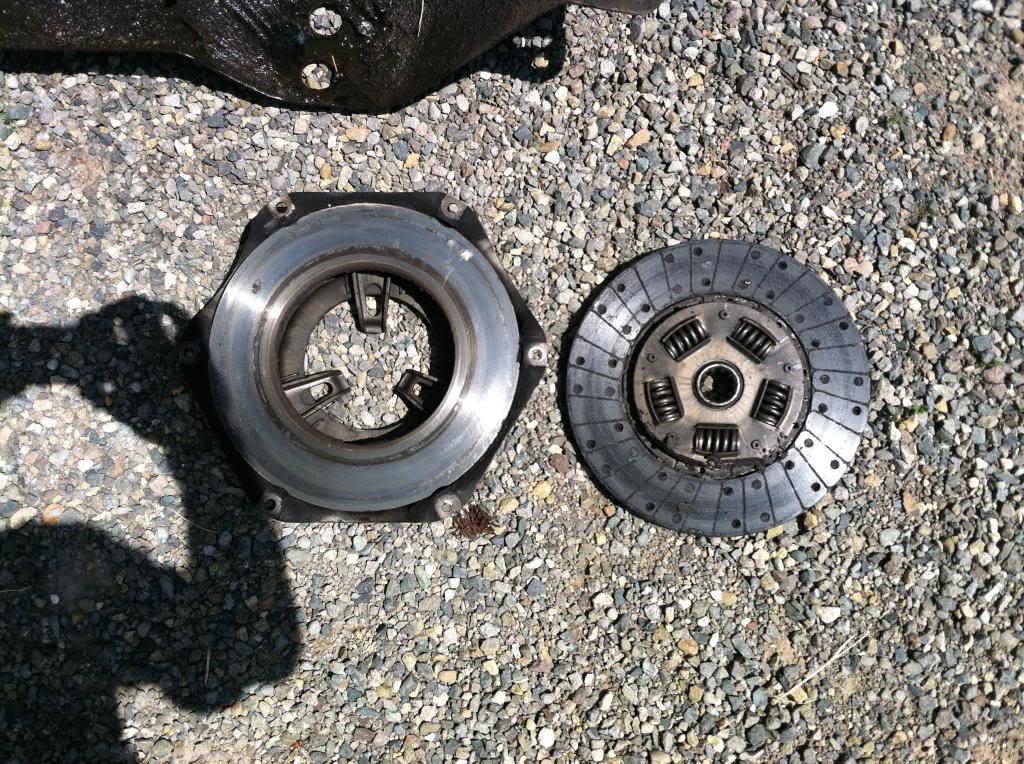
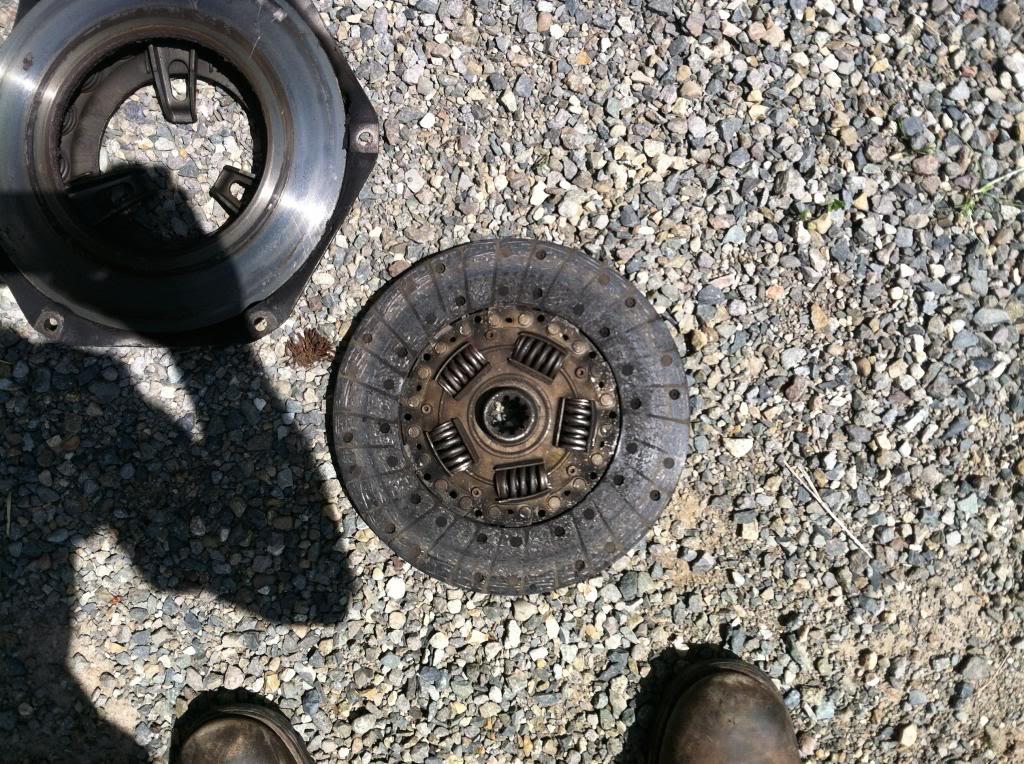
 
And bell housing. Notice all the crap built up...


And an empty transmission tunnel

Fly wheel looked good, But there were some questions...

Pilot bearing from an 94 S10 clutch kit

Transmission input shaft

Crappy photography of bearing fitting on the input shaft

And here comes the question.... There was no pilot bearing that came out. The original looks like a bronze bearing with a MUCH larger Inner diameter than the end of the input shaft. We pulled the flywheel and the bronze bearing is actually in the rear main seal/ camshaft/ much farther into the engine than I was willing to go. I've driven this setup for the past 2 years with little to no issue of excessive vibration or anything so my question is, is this bad?


Anyway, on to the transmission. Here's what one looks like. I had to pull two of the top case bolts prior to install because there were retainers for the fuel lines attached.

input side side

Output side
 
Per the instructions in my AMC T4/T5 disassembly manual, which is available for digital purchase for the measly price of free and a PM, I used a punch and drifted the roll pin out here.

Next I took out the bolts between the adapter housing and the transmission housing.


Make sure you get this little bastard out of the bottom or when you try to break the RTV seal, you might break something much worse. It's hidden at the very bottom of the case

I had to play with the shifter shaft to get the top case off, but with some fiddling, it came off pretty easily. Here's a look at the inside.

I was scared spitless that I would find shavings and broken teeth and scored shafts all over the place after reading SpankyJR's rebuild of three of these t5's, but it was underwhelming. No chips in the teeth or anything.
Here's a look at the 5th gear shifter and synchro. The second roll pin was driven out of the shifter arm. They're not kidding about putting a block under the shifter arm shaft, but it goes behind the shifter fork, not under it as it looked in the picture in the instructions.


I followed the instructions to the letter, which were pretty self explanatory. I was rolling pretty good so I forgot to take pictures. Until I got to this bolt.

This was pretty much the show stopper for the day. It broke a Craftsman T-50 torque socket at the teeth without even budging. The other side holds the shift lever for 5th gear/reverse and it is stuck as *&$%. Any thoughts on unsticking it would be great. We soaked it in Kroil penetrating lube for the night and I'm hoping it will break free tomorrow or I'm stuck on the disassembly. I'm pretty sure I can't use heat on it because of the aluminum case so.... Here's another of the offending bolt.

Here's a shot of where I'm at now.

So tomorrow, the plan is to unstick the bolt. The clean everything with purple power and brake cleaner. Scrape gaskets off and start the transmission reassembly. If time permits, I'll also start the Dana 300 Disassmbly.

Oh, Other hiccup was the carrier bearing for the clutch is a Jeep carrier bearing, which no one had in stock. I ordered one through NAPA and it should be here Monday. That was the only major hardware part that changed between the Chevy engine and the Jeep transmission. Everything else flowed pretty seamlessly.

Thoughts on the pilot bearing and the 5th gear shifter arm bolt would be greatly appreciated. More tomorrow.
 
Day 2
So we soaked the shifter arm bolt in Aero Kroil over night and I bought a new t-50 torn socket. We attacked it again and this time used an 18" breaker bar. Not the best technique with an aluminum case, but it finally popped out without any damage.

The stuff we used. It is pretty amazing and will probably be my "go-to" penetrating lube from now on.

The 5th gear/ reverse shifter arm

Here where the disassembly of the case was at.

Here was my setup for pulling bearings. These worked awesome and I highly recommend both tools if you're going to do this rebuild... And a shop press. Harbor freight 12 ton model works fine.


Aaaand the output shaft without any gears on. The one that is still on it the book specifically said not to take off because it is machined into the shaft.

The counter shaft with a whole bunch of gears laying around. This was pretty much the end of the disassembly.

The carnage.
 
And then I spent 4 hours cleaning the case, the assembly housing, the top plate and degreasing all of the internal parts. I used a mixture of solvent tank, brake cleaner, and purple power with some doses of water rinse and a light coat of wd40 prior to reassembly. Here's the after of the case.


At this point I pulled out my Crown master overhaul kit for T-5 and began replacing and rebuilding. There were minor setbacks and I kind of got in a rush due to time constraints so pictures are minimal. For that, I apologize.
Here's the output shaft after three tear downs and rebuilds for various reasons. I used the Chilton's parts diagram for part identification and the AMC t-4/t-5 disassembly manual for the instructions. They leave a lot to be desired as far as pictures and ID of parts.

The biggest thing I learned was to pay attention to the synchro rings. The brass inserts each fit a different synchro. The retainers for each are also different sizes. Before assembly, make sure that you have the correct brass ring for each synchro.Here's a picture of the cutout for the retainer.

I got everything together up to the 5th gear and I'm almost ready to put the housing assembly back on when I ran into this snag. No matter how I stack the parts for the 5th gear and synchro, I don't have enough space on the shaft for the snap ring. There is a needle bearing, race, and spacer that are all supposed to go on the end and then the snap ring, but it won't fit and the synchro is bottoming out on a machined lip on the counter shaft.
Without needle bearing race and spacer

And with...

So that's where I'm at now. I'm hoping to get this figured out and finish the transmission rebuild on Tuesday so I can dig into the Dana 300. Random notes of the day, the Crown kit from Quadratec sucks. It's missing several snap rings and two shifter fork plastic teeth. It also came with three extra of the small synchro retainers, one brass ring for the 5th gear assembly. And no O-rings for the top plate. Just my observation. Also, slow down and look at the book if in question. I screwed myself over a couple of times and made dumb mistakes by assuming I knew what the next step was before actually looking at it.
More to come...
 
Nice write up! I just rebuilt my D300, and missed a step... Cost me a couple hours and a cussing fit.
 
Day 3

Few photos today. My phone was dying and since I am doing this at a buddy's house while he's gone I had to reconnect the negative to the battery and charge my phone.
I found one of the culprits for my transmission issues on day 1 and forgot to take a picture. One of the springs for the 3rd/4th synchro was broken.

I also took the whole clutch shaft and output shaft back out, disassembled them to see if there was another thickness washer I had put somewhere else. I tried drilling out a different thickness washer to the right diameter (which thankfully didn't work.) and then it came to me about two hours in today. The stack I kept trying was needle bearings, cup, washer, and then snap ring (last, plastic oiler). I looked at the assembly housing and there is a machined race for the needle bearings in it. The correct stack after the 5th gear synchro is Washer, snap ring, needle bearings, cup, and plastic oiler.


After that, continued with reassembly. Everything went according to the instructions. I got the endplay figured out and this tool is not nearly as intimidating in real life as it is in pictures

43 thousands endplay plus 3 thousandths and my shim stack was 46 thousandths.
In order to get the top plate on with the shifter forks, you need to have the transmission in the neutral position. I couldn't find anywhere that actually explained what that was. You need to have both brass rings visible on the shift sleeves for 3/4 synchro and 1/2 synchro and one side visible on the 5th gear synchro. You will know you have it right when you can turn the clutch shaft and keep the output not moving.
Here's a neat trick for keeping your shifter aligned while trying to install the assembly housing. It keeps the shifter position in the neutral detent and keeps the ball and spring from going to very bad places.

Once it's all aligned you just pull the punch and drive the roll pin.
After it was completely assembled, I loosely installed the shifter and ran it through all the gears with no problems. Hopefully, it means it was done right and will work once installed with fluid.... finger's crossed.


I also began disassembly of the Dana 300, but phone was completely dead at that point. The Haynes manual doesn't have enough pictures, but the instructions are pretty good if you cross reference the disassembly diagram. My bottom plate bolts were barely hand tight which could be the reason for the leak. My rear output shaft was also definitely leaking. My oil smelled a little burnt and there were other random bolts that were loose. After the gaskets and seals are replaced, this is definitely going back together with loctite. I stopped tonight at the point where I need to block the case housing in order to press out the bearings and rear output shaft. More to come.
 
OK. The end of week two.
This whole project has turned into a second job and I've been working about 18 hour days between this and my day job. Dana 300 came apart with very little fuss. The shifter forks were very stiff and took some monkeying to get out of the housing. Got everything cleaned out and began reassembly. It should be noted that the rebuild kit comes with 3 sets of captured bearings that all look remarkably alike. They are not. One set is slightly smaller with a slightly smaller inner diameter than the other two. This set of bearings go in the housing with the speedo gear. The other two go on either side of the front shaft. DO NOT MIX THESE UP as it is a pain in the *** to get the smaller bearing off again without screwing it up, which I did. Also, apparently there is a way to switch the shifter rods and reverse the forks which apparently works once assembled and some @$$ clown beats them in. Not me, this was a previous owner, as I couldn't understand why the shift arm attachment was bowed out... Now I know why.
Also, after calling three scrap yards and scouring the internet, no one has or makes a bell housing inspection cover for a 4.3L with a manual transmission. I ended up fabricating one out of sheet aluminum which will be replaced with 16ga steel in the near future. Wasted about four days calling around on this one.
Also, Clutches are fun. Got a chevy clutch, didn't fit. Came with captured ring bearing for the end of the input shaft. Clutch was too big for the flywheel so got a jeep 10.5" clutch kit. Pulled the old bronze bearing, which was WAY to big for the end of the input shaft and the new bronze bearing has a smaller outer diameter. Went to Autozone to get a new one and I seriously think they hide when they see me coming. If their computer doesn't tell them what it is and where to find it, then they are hopelessly lost. Went to NAPA and they were much better. figured out a 75 chevy 265 V6 has the same bearing ID as the input shaft and OD as my flywheel so I will be picking it up tomorrow morning at 8AM.
Also, managed to crush needle bearings putting the new Ujoints on the drive shafts. That was fun.... Figured out a better way to assemble with a mondo C clamp so the needle bearing weren't getting jarred around and out of alignment, but it took three assemblies and disassemblies of the front drive shaft to make it happen.
On top of all of this, my wife's grandmother broke her leg three days ago, so I've been helping out with my kid which has limited the time I have to work on the jeep. Grandmother is doing ok now, kid doesn't want to kill me yet, so it's a win/win all around.

So, to wrap it all up, I apologize for not taking pictures of the dana 300 rebuild. Tomorrow, I should be able to start assembly of the jeep finally and have it on the road by tomorrow night.
Here are the recommendations:
1. Have your own shop. This take the commute to your jeep time out of the build.
2. Don't have the jeep you're about to rebuild be your only vehicle. Luckily, it's been sunny up until yesterday and I've been riding my harley to and from work, but it's still a pain.
3. If you have to use someone else's shop, make sure it's got everything you need. Seriously, I'm buying my buddy a bottle of scotch, because he had every random tool I could think of. The only tool I had to get was a blind hole bearing puller (I'm sure there's a joke in there somewhere) which I used the free rental dealie at Autozone.
4. Buy oil and fluids and shop rags and basic supplies at Autozone. Buy car parts from NAPA. Seriously, they actually knew what they were talking about or would consider having a conversation about what you're dealing with rather than the canned answer of "we don't have that"
5. Read the damn manual. I don't know how many times I screwed up doing the rebuild because I just reached for the next part rather than stopping and taking the time to read what the next step actually was. And I have learned that I am definitely not smarter than whoever wrote the book. If they say put the shifter forks in the case before monkeying with the shifter rods, then do it. They don't fit afterwards.
6. Crown automotive sucks. I had extra parts from both rebuild kits that had nothing to do with my transmission or transfer case. They also did not include parts I would've thought should be replaced, like ball and detent springs.

All in all, I don't regret the rebuild as it's now rebuilt from the flywheel to the differentials, but I have definitely learned some lessons on how not to do it. Take it for what it's worth
 
I can empathize with you on the lack of time for pictures.
Great write-up and recommendations.

Enjoy your Father's Day.
 
WOOOOW...!!!!!!!!! :eek: :eek: :bow: :bow:

not gonna lie.. I was JUST about to tackle this here baaaad chicken.. and then came YYYOOOOOOUUUUUURRRR post..

i DO believe I shall drag mine to the shop..
 
Well... I wouldn't blame you. Part of the problems with this one is the 4.3L Vortec that I didn't put in myself, so I'm learning as I go how it all comes together.

I got it assembled today but didn't have the heart to do a test drive until tomorrow as I would just be pissed off all night if it didn't go well. Tomorrow is another day to tackle any challenges that pop up.

Other than the daily driver issues, I would totally do this rebuild myself again. It's been such a learning experience. This is the seventh jeep I've own since I was 18 and I think I know more now about how they actually work that at any point in the past.

And plus, I can say... I did that.... even if it's a giant ball of fire that's rolling down the road. I did that.
 
Last edited:
And a quick update. 2 weeks to the day.

Began assembly. Picked up the bearing for the flywheel/transmission input shaft at NAPA. Brian at NAPA was awesome and totally won my business. Got the bearing in with no problem. Got the clutch installed and aligned with no problem. Bellhousing went on easy. Fabricated inspection cover needed minor trimming and is chintzy, but went in really well. Will be replaced with some 16 gauge steel as i just don't like the 24 gauge aluminum that's there now.
And here came the fun. I tried to install the T5 and the Dana 300 together as one. It's a heavy SOB to lug around together and impossible to align without a transmission jack and a Gorilla. So, after knocking the throw out bearing off the clutch arm for the third time, I pulled it all out and unbolted the transmission from the transfer case. Upon reinstalling the transmission, figured out that half of my problem was the throw out bearing was backwards in the arm and was not going to line up in any way, shape or form. Fixed that and the transmission magically went in without a hitch... weird.
Dana 300 got muscled up onto the back of the transmission and again, no issues. Everything got hooked up and life is good. Drive shafts reinstalled with new ujoints and attaching hardware. Point of interest here, regardless of what came off, if U bolts will fit your yokes, use them instead of the straps. They're just cheap and seem to be a potential point of failure. I will be replacing all my straps with Ubolts in the very near future.
Filled the transmission (transfer case was filled prior to install) and another neat trick that the PO did for me, was a right angle plumbing fixture for the fill port on the transmission. I will try to get a picture tomorrow, I am definitely a fan as I filled the transmission without spilling a drop.

I read for several days all the hubbub and stuff and junk about what to put into a T5 for fluid. I decided to use Pennzoil synchromesh. I'm sure there are people out there who will yell and scream, but I'll either be crying in 500 miles with a blown transmission or not even realizing that nothing's wrong as I am cruising down the road. Only time will tell.
The transfer case got 2 quarts of Lucas 80-90w. That stuff is so sticky, it should definitely provide adequate lubrication.
Once it was all installed, I went to install the skid plate and soon found that the holes were 3/8" off between the frame. I read somewhere about frames springing occasionally when the load is removed, but I have no idea why this happened. Played with trying to bend the skid plate to fit the frame and finally decided to drill the holes out to fit the bolts. Problem solved and finished up with buttoning up the transmission tunnel.

Tomorrow is the big day where we see if I turn into a fireball driving down the road of if all the monkeying around was actually worth it and it drives better than when I pulled it into the shop.
 
Good luck! Don't forget the fire extinguisher :) I am betting on a great test drive.
 
It runs again!

The transmission is pretty amazing. There is a whole hell of a lot less road noise than before. I didn't even realize it.

Two issues that I am having. One, Speedo doesn't work. Pulled the speedo gear assembly and hooked a drill to the end of the plastic speedo gear. Everything is working from the speedo gear to the speedometer. It's almost as if the gear isn't catching the gears on the output shaft. Any thoughts would be greatly appreciated. Is there a spacer or washer on the speedo gear drive assembly that plugs into the rear bearing cap?

Other issue is that the transfer case was in neutral when I started it. I shifted it into 2HI to back out. During the test drive, when I went to test the transfer case, it will go into 2HI and 4HI but not Neutral or 4LO. Again, any thoughts would be appreciated.

Other than that, I am very satisfied with the rebuild and think that it's a major improvement. Less road noise, less vibration, smoother shifting and better overall ride.
 
On the speedometer, make sure you "clocked" the speedo gear housing in the correct position. The speedo gear tooth count will determine the correct "clocking" position:thumbsup:
 
On the speedometer, make sure you "clocked" the speedo gear housing in the correct position. The speedo gear tooth count will determine the correct "clocking" position:thumbsup:

Nailed it!

So I actually got pictures this time. None of my manuals said anything about the speedo gear. Here's a picture of what Spankrjs is talking about.
The Clocking ring on the speedo actually has tooth count and a clocking line. the increments are 28-31, 32-35, 38-45 and an unmarked side. I tried the 38-45 initially because it was the largest marked one even though my gear is a 58 tooth. Of course nothing so I moved it to the unmarked side and it worked like a charm.

The built in offset which lets the clocking actually work

The hold down claw which matches up to the large detents on the speedo assembly.

The clocking line on the rear bearing cap of the dana 300. It's at the very tip of the wrench I'm holding up. The hole is where the bolt goes in to secure the hold down claw. You can see the reason for the offset between the hold down detents and the clocking lines.

Everything in place and lined up before the claw


Also fixed my Neutral, 4LO issue as well. My clutch is stiff because the springs are brand new and I was used to a worn out clutch with worn out springs. Today when I was driving it, it didn't feel like the clutch was fully disengaging the transmission, so I adjusted it today as well. Voila! Neutral and 4LO suddenly worked just fine. The only thing I did between starting it for the first time (when it was in neutral) and trying to get it back into neutral after the first test drive, was to adjust the clutch. It was a long day and a long project so I didn't make the correlation.

In other news, I'm going to need to learn to clutch like a man because this one is STIFF!! I'm hoping it breaks in after a couple hundred miles, because this thing is worse than my Harley!

Thanks for all the help from everyone. I couldn't have done this without some expert advice!
 
And here's a 700 mile update. Changed the oil in the transmission and transfer case today. Slight silvery sheen to the xfer and brass colored sheen to the Xmsn. Nothing to really worry about as the bearings and and synchros are wearing in. Had a slight leak, more of a seep on the bearing retainer plate on the back end of the transfer case. Pulled it off, resealed it and threw it back on so we'll see how that goes.

Also, a slightly disconcerting note, my bell housing is leaking oil.... When I had it torn down, I took off the flywheel and checked the rear main on the engine and it was bone dry so I'm guessing it's the front bearing cap seal on the transmission. Not really looking forward to pulling that damn thing off and working it again, but it's probably going to come down to that.

On a better note, adjustment 3 on the clutch (1st on replacement, 2nd at about 250 miles) and it is perfect! Good pedal pressure that is closer to the beginning of the push rather than damn near at the floor and positive engagement. The clutch springs are worn in and pretty consistent at this point so it should be good to go!
 
So I've been off of here for awhile. Life got in the way and I've been super busy the past couple of months. Job is forcing a move to North Carolina which we're getting ready to do in a couple days. It seems like a perfect time for 5th gear to go completely out. It's like neutral. Haven't had time to monkey with it, but all the rest of the gears work fine. I'm kind of tired of screwing around with the t5 so I am looking into an AX15 swap. I like having 5th gear or it would be a t18 all the way. I think I can do it for about $1500 with buying the transmission, adapters (keeping the dana 300) and having the transmission professionally rebuilt. Shouldn't be too much of an issue, but we'll see how it goes. Here in a couple days it's getting flat towed for 3000 miles to our new home with a stop along the way to pick up some new 33x12.50x15 BFG mud terrains. Finally getting rid of these 16 inch rims!
Once I get into the AX15 swap I'll start posting pictures on here.
 
So the move is complete. If anyone saw a Penske towing a blue scrambler over the weekend before thanksgiving, that was me. The jeep flat towed just fine. Also picked up a set of 33x12.50 bfg mud terrains along the way. I need to get 15" rims to get them mounted, but they're WAAYYY better than the one's on it.
My AX15 is at the transmission shop right now getting rebuilt. My novak adapters should be here next tuesday. My B&M shifter should be here next week. My hydraulic clutch set up should also be here next week. So next weekend looks like the time to do a transmission swap!. Should be a fun project as I now have a garage to do it in!
 
I am curious to see how the B&M works for you. I am almost to the point of needing a shifter for a nv3550 I am using behind a ford 5.0 I am putting in. There is a company called Core that makes a short throw too.
 
Back
Top