• Notice for iPhone users: DO NOT use the image size reduction option when uploading photos to the forum. This causes portrait images to post as landscape. We have added a warning to the image insert pop-up as well.

I'm now an official scrambler owner

No. Top has to come up and it's a PITA. There are three bolts that go up into the front edge of the top, under the bottom side of the upper part of the windshield frame. Stock, they were Torx, don't recall the size. Then there's two screws, one on each side that are in a tab on the front end of each of the upper door surround channels. Trick with them is that they're hidden under a "cover" that has to come off. There's three small screws that hold the cover and you have to pull it out of a channel on tje other side.

There is NO WAY I would deal with folding the windshield down unless you were already taking the top off. It's that much trouble. (Obviously, you have to do all of that to take the top off too).
 
Agreed with the windshield folding issue. One thing I'd initially considered to get my running one street-worthy (it desperately needs me to put in the fiberglass frame I already have) is to remove the windshield by pulling the hinges and leaving the top in place.

Also, that canister you've got on the frame rail is indeed a coolant heater and circulator. My dad had one on my CJ-7 when I was younger. I ditched it when I went to the SBC 350 in that Jeep.

When you get into extreme cold, the ultimate set-up is block heater, battery blanket, oil pan heater, and coolant heater.
 
Good to know. I guess the top is staying on for a while, at least until I get everything else out of the way.

I just did a compression test on the engine, I get 165-180psi on all cylinders. So keeping the stock engine is looking to be very good possibility. Also found the missing hose from the valve cover to the base of the carb, that huge vacuum leak probably had something to do with my engine not running well. After that was hooked up, the beast can finally idle on it's own! I do have some pretty loud valve train noise, can't tell if it's a sticky valve lifter or piston slap. I haven't taken the valve cover off but I'm assuming it's got hydraulic lifters? That's what I had on my older 232 so I don't imagine they'd go back to manual adjusters.

Next order of business is to drop the heater and clean out the heater core. Sounds like a strange priority, but after cleaning out the mice nest in the defroster ducts I just want to sanitize everything inside before crawling around under there. I see a gasket for the blower motor and heater tubes, are there any other soft parts that should be replaced while I'm in there? I've heard about the chevy blower motor upgrade, but since I don't think I've ever use the heater in my other jeep I don't know if I'll do it.
 
...to remove the windshield by pulling the hinges and leaving the top in place.

But you still have to get all the screws/bolts I mentioned out, you're only saving the tub screws, which are a piece of cake comparatively.

My windshield frame was Swiss cheese and I needed a new windshield to pass inspection, so I had to pull the frame ASAP and went through propping the top up before I pulled the top off the first time. There's a thread on here some where about it.
 
Accomplished a few things in the last week. Replaced the heater core, got all the vent linkages working, and replaced the #4 pushrod. Also got some new shackles

Old Shackles
P1430649.JPG"]


New Shackles
P1430652.JPG


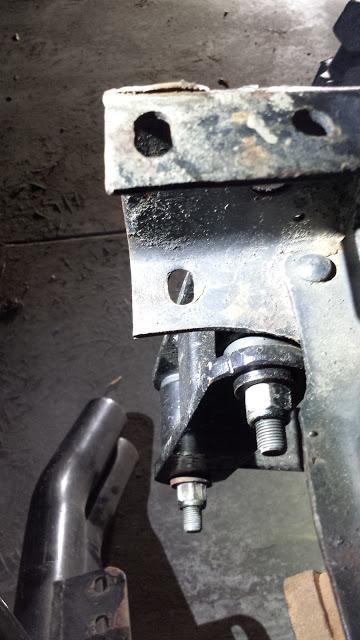
Hopefully this will fix the steering vagueness. One problem I noticed is the front frame horns seem really short. I tried putting an old FJ40 bumper on there to see if it'll fit, but it looks like the mounting holes are too close to the leaf spring hangars. Is this normal or are there additional brackets that mount to the bumper? Even on my other jeep the frame horns stick out much further, I don't think I can even put a simple C-channel bumper on there without notching the area around the shackles. Does anyone know if a stock wrangler bumper would fit with minor modifications?

20150924_220204jpg-1.jpg


Also, it looks like the PO lost the keys at some point, so they ripped apart the steering column to start it. I was looking for parts to repair it, but it looks like nobody sells the plastic shroud that surrounds the steering column. Actually, I'm not even sure what I'm missing since I can't seem to find a detailed picture of a stock steering column on the web. Can anyone take a picture of theirs? Looks like it's either 2-4 pieces around the ignition key. Not sure if it's worth it to repair or swap it out for a different column. New columns are way too much, and not sure what used columns will work.

I've started rebuilding the entire brake system, new lines, fresh cylinder rebuilds, etc. Now the question is whether I should stay with DOT5 fluid or swap to DOT3. Kinda leaning torwards DOT5 because, well that's what it came with. Also, since this jeep probably won't see a whole lot of miles, seems like less maintenance in the long run. Although all my other vehicles use DOT3, so it would be nice to have everything the same.
 
Last edited:
Big welcome back TDG! CONGRATS on finding "your" Scrambler:thumbsup:
Thanks for sharing your journey with us.... SWEET

z:ZZZ:
 
Well today marked a milestone in my jeep journey. It's the first time taking a drive in the jeep didn't end with me pushing it back home. :woohoo: It's amazing how much faster it goes under it's own power. Not much faster, but still faster.

After a very minor tuneup and tracking down some random fuel problems, I can almost say it's ready to drive. Except for the occasional stalling which I'm still trying to figure out. I'm going crazy looking at all the different vacuum diagrams on the internet, but I still can't figure it out. One of the problems I think was because the PO had the base timing set really low, like 2 BTDC, and the vacuum advance hooked directly to manifold vacuum, which basically pulled the timing to 30+ at idle. I disconnected the vacuum advance and reset the base timing to 8-10 degrees and it starts much easier now. However, the current vacuum routing right now doesn't match any of the diagrams I've seen, and I can't tell if parts are missing or different parts added. The fact that it's a right hand drive and some things aren't in the stock location makes it a little more difficult figure out. A few of the things I am finding out

1) Did the alaskan postals come with heat risers? Not sure if my exhaust manifold is stock, it's cast iron so doesn't seem like it'd be aftermarket. But there' a block off plate on the bottom of the intake manifold where I think the heat riser should have been. Sorry no pictures, I'll have to wait till daytime to take a clear shot.

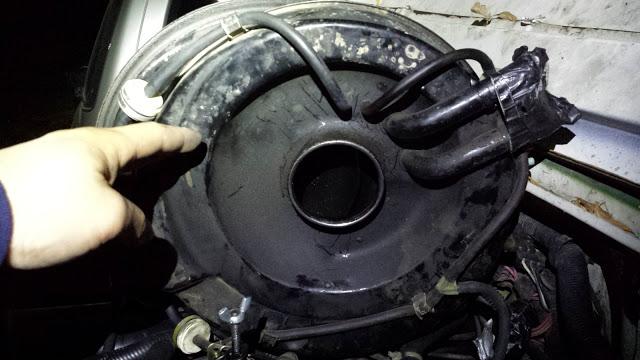
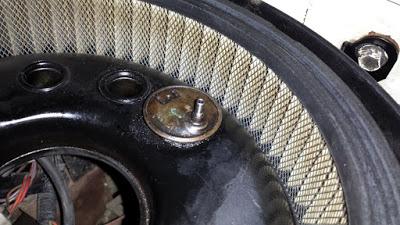
2) Where are these tubes on the bottom of the air cleaner supposed to go? The ones capped with duct tape.

20160110_000846-1.jpg


There was one hose connected to one of the tubes that lead absolutely nowhere, and I can't find anyplace that they'd plug into. One vacuum diagram mentions a P AIR CHKVLV UP/DOWN, but I have not idea what they look like.

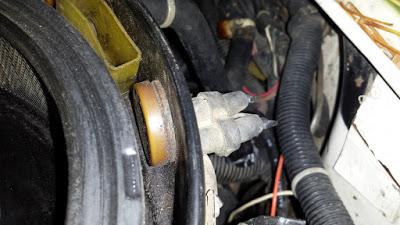
3) Is this the CTO switch? It's the only thing that remotely resembles one, but all the diagrams show 3 or 5 port switches, this one only has two. One port is connected (through what I think is the EGR TVS), the other port leads nowhere. I think it's supposed to be connected to either ported or manifold vacuum, correct?

20160114_004011-1.jpg


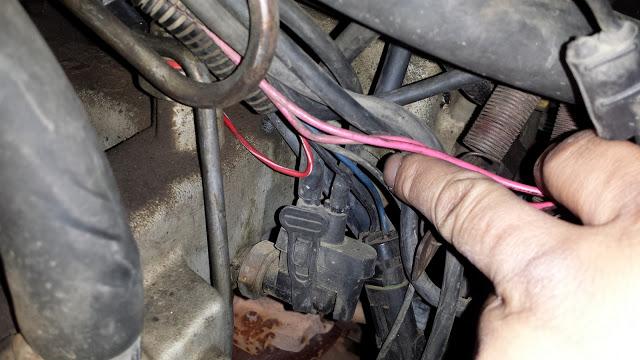
4) Just want to confirm that these the EGR TVS and TAC temp sensor?
20160114_004041-1.jpg
20160114_004030-1.jpg


Thanks for all the help. Thanks FLCJ8, Seems like parts for steering columns are NLA, so I picked up a used steering column from a CJ7, just haven't had time to install yet.

Also, regarding the picture of the shackles in my previous post. Is it normal for the shackles to be rubbing the frame? On both sides I notices that the shackles are contacting the frame. The mounts are OEM, the springs I think are OEM, so I can't figure out what else it could be. And can someone take a picture of how the stock CJ bumper mounts to the frame rails? As i mentioned I'm trying to add a bumper, but I'm not sure if my frames been cut or modified, based on the fact that the bottom mounting hole seems way too close to the shackle. I don't think I could even bolt anything with that hole because the hole would be right at the edge.

 
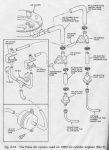
Those tubes air for the pulse air check valves (P AIR CHKVLV UP/DOWN) which is part of emissions systems. See attached diagram.


pulseair.jpg
 
Thanks to all the help here, last Friday I finally passed my emissions test. Took 3 tries at the smog test station, but I went from gross polluter with NOx almost 4x the legal limit, to well below average on almost all emissions. replacing a lot of old parts, but it's finally it's running like new, or at least what I think a new one would probably run like.

Along the way I've also rebuilt the entire steering column and fixed a lot of other little issues, and now I can say I've got a decently reliable jeep. Still have a million other things to deal with, but this is the first major milestone.
 
Congrats! That is a huge accomplishment out there in the land of fruits and nuts! One thing though...where are the pics?!?! :evil: :cheers:
 
:woohoo:

Always hated emission testing time...
 
Don't have many pics yet to share, everything I've done has been under the hood or under the body. Here are a few pics of some updated progress

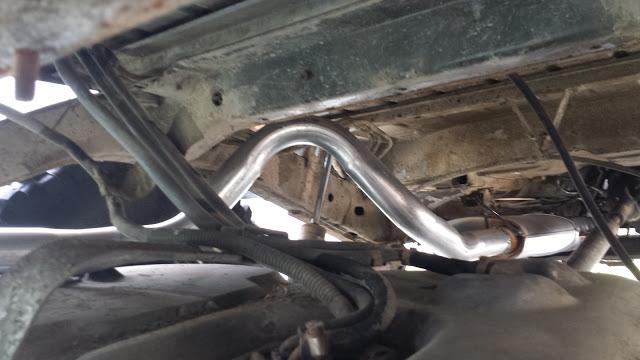
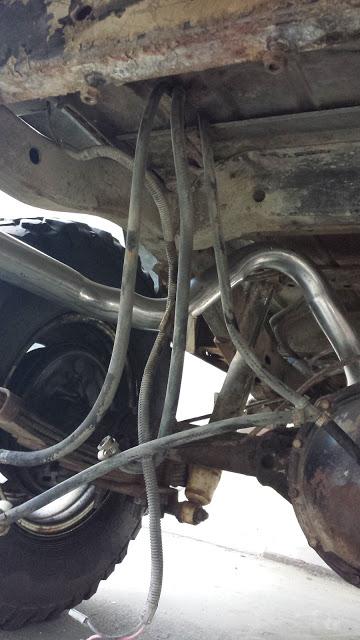
All new exhaust and catalytic
20160313_124341-1.jpg


Changed out all the old fuel hoses and rollover valves
20160313_180618-1.jpg


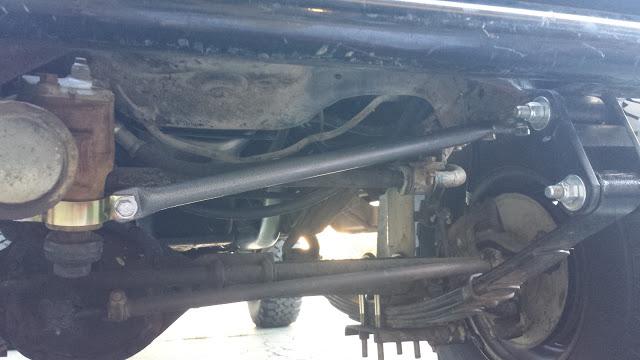
Had to modify a steering brace for the RHD. Yes i know I have to cut those U-bolts, those are also new too.
20160402_180658-1.jpg
 
Last edited:
So I mentioned earlier I rebuilt the entire brake system and got my engine tuned, now I can start focusing on the million other little projects that need to be done. I already have a ton of questions after spending a little time under the jeep.

First, I still have some vagueness in the steering. Seems to be a common problem, but I can't trace it down to any one thing. I added some 4 degree caster shims to correct the angle, and I've rebuilt the steering column and bell joint coupler. The steering box has about .008" side to side play at the pitman arm, and tie rods don't seem to be loose. Probably replace the ball joints (see below) but also thinking it might be the shackles. Sometimes it feels like trying to control a bucking bronco when it hits a dip.


Left side
20160402_085543-1.jpg


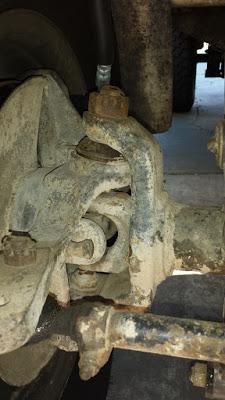
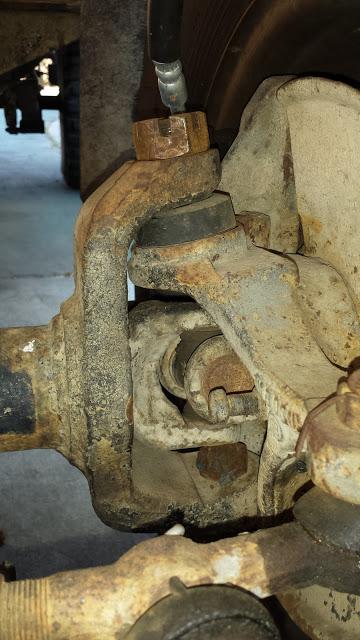
Right Side - The top ball joint is missing the cotter pin hole, dont' know why. It also doesn't look like the Dana 30 ball joints that I see online. Also, looks like the lower ball joint had been torched at some point, maybe for U-joint clearance? Thinking of just changing all of them for preventative maintenance.
20160402_085554-1.jpg


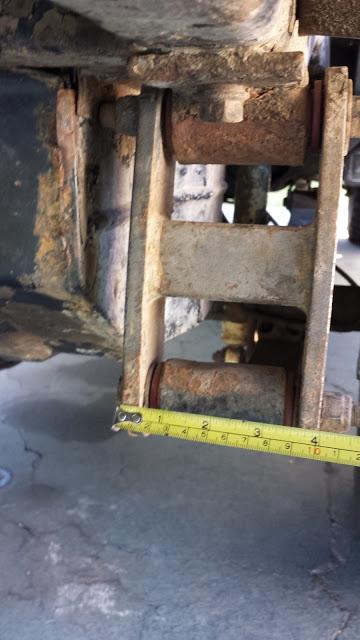
Rear shackle doesn't look like the correct width. Not sure if my springs or stock, but I also noticed the rear pumpkin hitting the gas tank skid. Going to pick up some new leaf spring bushings all around and see if that helps with the handling.
20160402_085432-1.jpg


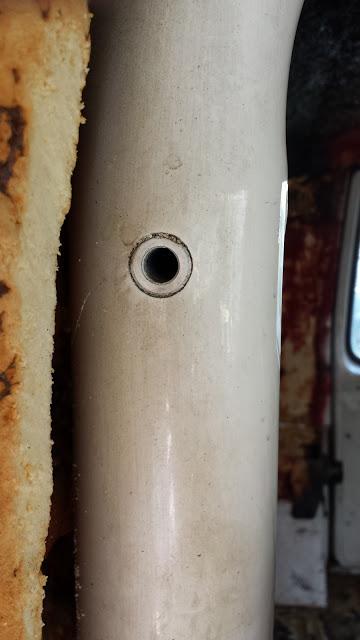
Last question. This is the seat belt mount on the roll bar, but the unusual thing is it's not threaded. Does this look stock, and would it be safe to just thread it for the shoulder mount?
20160228_130845-1.jpg


That's all for now, I'll have a million more questions next week.
 
Last edited:
Back
Top