

You are using an out of date browser. It may not display this or other websites correctly.
You should upgrade or use an alternative browser.
You should upgrade or use an alternative browser.
IAFFCJ 81 Scrambler
- Thread starter IAFFCJ
- Start date


- City
- Manassas
- State
- VA
Mig weld a nut to the broken manifold bolts. Heads are aluminum, so the welds will not bond to the head. Then turn them out with a wrench. I did two like this on Dads scrambler.
Thanks for the tip I will have to give this a shot tomorrow. I was not looking forward to trying to run a drill bit into my head or heads.
- City
- Manassas
- State
- VA
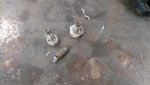
As is normal JeeperDD's suggestions worked out. All three broken manifold bolts are out and no damage to the heads. It took a frew tries to get the nut size welder set up dieled in as 2 of these were pretty in there but their out now. Onward.
- City
- Manassas
- State
- VA
Got out to the garage late today. The wife was home on a snow day so we hung out by the wood stove and just had a nice relaxing morning. But all that relaxing finally got to me and i headed out to work on the scrambler. Got the broken bolts out of the head, built a spacer so the MORE steering mount would fit, and then got looking at the oil pressure sensor. As i was resurching guages and how to get them all to work with an LS swap there is quite a bit of talk on the interwebs about the difficulty in getting the sensor out without a special socket. JeeperDD has just changed his with the tub already set and said it would be beneficial to do it before the tub is on. So i got looking and felt like i had something that would take this sensor out. 1 1/16th wrench didnt work, short socket nope, deepwell might have but mine is an impact socket. Did some research to see this special socket and thaught it looked a lot like an O2 socket. Well i just happen to have a 10 piece O2 socket set
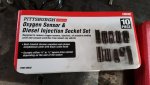
And it just so happens to have an 1 1/16th socket in there.
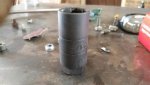
Looks a lot like the 10 dollar special socketsand works great. I have aquired a lot of tools over the years that get used once nice to get a second use out of one
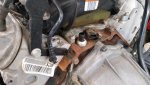
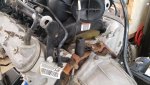
And it just so happens to have an 1 1/16th socket in there.
Looks a lot like the 10 dollar special socketsand works great. I have aquired a lot of tools over the years that get used once nice to get a second use out of one
- City
- Manassas
- State
- VA
Well I guess all the delivery men caught up on the slow down from the weather today. Transmission cooler showed up, seam sealer in two different forms, a second set of C6 manifolds (never know the CJ7 might need an LS), and all the paint to get some color on this thing.
I also bit the bullet and ordered some gauges today. I have been going back and forth as to what I wanted to do but I keep falling on that I want to build a custom dash and console that will get all my gauges, switches and levers within arms reach without having to bend down much. So while i did go with Speedhut gauges there are some custom designs and not traditional CJ stuff. If I can make the vision in my head come to fruition they should make for a pretty cool and functional cockpit.
While the list of needed parts is getting smaller there are still a bunch of big ticket items on there. Sure am glad I stopped keeping track of the cost of this project.
I also bit the bullet and ordered some gauges today. I have been going back and forth as to what I wanted to do but I keep falling on that I want to build a custom dash and console that will get all my gauges, switches and levers within arms reach without having to bend down much. So while i did go with Speedhut gauges there are some custom designs and not traditional CJ stuff. If I can make the vision in my head come to fruition they should make for a pretty cool and functional cockpit.
While the list of needed parts is getting smaller there are still a bunch of big ticket items on there. Sure am glad I stopped keeping track of the cost of this project.
- City
- Manassas
- State
- VA
Did some hard door repairs today. As the weather still isnt where it needs to be to paint i figured i should uae this time to get everything that is going to need paint ready si i can try and do this in one shot. Today was hard door preperation
Both doors the window hoop was startkng to break away from its spot welds. Turns out there are 2 holes that work great to put a bolt on to get everything lined back up and burn um back in place
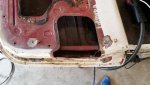
Both doors also had the normal crack by the vent window but along with that a matching crack on the outside as well. Both cracks repaired and a piece of angle iron welded inside the door to stiffen it up. (Idea stollen from Gaucho thread. However my doors are made a little different than in the example so had to improvise to make it work.
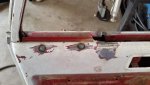
Also welded the joints between the hoop and door to keep the water out. They came out pretty good i think. Now to sand add a little filler and prime these up.
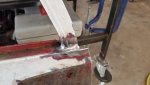
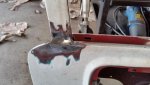
Both doors the window hoop was startkng to break away from its spot welds. Turns out there are 2 holes that work great to put a bolt on to get everything lined back up and burn um back in place
Both doors also had the normal crack by the vent window but along with that a matching crack on the outside as well. Both cracks repaired and a piece of angle iron welded inside the door to stiffen it up. (Idea stollen from Gaucho thread. However my doors are made a little different than in the example so had to improvise to make it work.
Also welded the joints between the hoop and door to keep the water out. They came out pretty good i think. Now to sand add a little filler and prime these up.
- City
- Manassas
- State
- VA
Worked on the tailgate some today. The paint was flaking in a bunch of spots and there was a lot of little spots of rust. So i started cleaning them up and well no more paint. Nessisary? Not sure but i dont have to worry about the old paint's adhesion now. 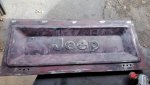
- City
- Manassas
- State
- VA
Spent the day sanding parts to get ready for paint. Its interesting the different colors that are showing up. Looks like some black primer a little red primer some blue paint some green and then different grades of white over each. So far i have the tailgate grill and windshield frame sanded to 80 grit. Going to get the hood and doors to the same point then move on to the smother grits to prep for primer. As its taking longer than i thaught going to try and get the small parts primed.
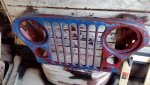
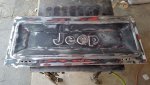
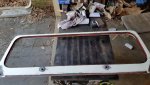
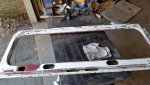
I also coated the inside of the tailgate and windshield frame with eastwoods internal frame coating. Hope to keep them from rusting away.
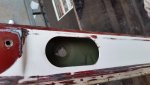
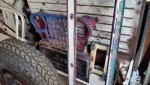
And the days work all together. Good thing im not doing this for a profit i am way too slow at this paint prep.
I also coated the inside of the tailgate and windshield frame with eastwoods internal frame coating. Hope to keep them from rusting away.
And the days work all together. Good thing im not doing this for a profit i am way too slow at this paint prep.

- City
- Bedford
- State
- NH
That last picture almost looks like a phone app was put on it to make it crazy colors... very neat picture... like rustic old barn look, but with some color.
cb
cb
- City
- Manassas
- State
- VA
That last picture almost looks like a phone app was put on it to make it crazy colors... very neat picture... like rustic old barn look, but with some color.
cb
Thanks it was purely by accident.

- City
- Manassas
- State
- VA
So today I tried my hand at body filler for the first time. Well it seems the straighter you try to get a Jeep hood the more things that could be fixed pop up. I finally had to call it for the day. I think I have everything ready to move to the next level of sand paper. As I have absolutely no idea what i am doing it is very hard to figure out when you are done with each step.
So I have read everything from prime after 80 grit to sand all the way to 400 before primer. As I am not looking for a show car shine I think Ill go the middle ground and go to 180 then filler primer. I am itching to get some color on this thing but am trying to be patient and not cut corners on the paint prep.
Sorry but no picture today I will be sure to make up for it next time.
So I have read everything from prime after 80 grit to sand all the way to 400 before primer. As I am not looking for a show car shine I think Ill go the middle ground and go to 180 then filler primer. I am itching to get some color on this thing but am trying to be patient and not cut corners on the paint prep.
Sorry but no picture today I will be sure to make up for it next time.
- City
- Manassas
- State
- VA
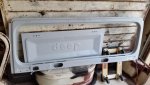
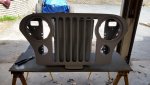
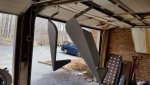
First round of primer today. Mixed it as high build but i think it may have been a little too thick. Ended up bery rough will try to sand it and see how it comes out. May have to do another coat. Reduced the primer down a little for the hood. Still a little rough but much better will see what sanding brings out.
- City
- Manassas
- State
- VA
Lots of sanding today. Due to the primer not laying flat I had a lot to sand. So far so good. Things are looking flat smooth and only a couple spots that I sanded too deep. Going to get everything sanded then get the bottom of the tub ready for primer then hit the bottom and re coat what needs it. As for my first time ever painting like this it's going OK. 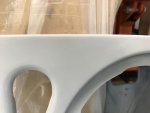


- City
- Manassas
- State
- VA
That thing is going to be to pretty to rub up against rocks
I can only hope it turns out that well. All this sanding but not quite as much confidence
- City
- Manassas
- State
- VA
Spent most of the day sanding again. I got most of the tricky parts done I think. Sure does take a long time to get all the small areas of the tailgate grill and windshield frame smooth. I have made it to the hood and can say that the different mix when shooting the primer has made for a much more enjoyable sanding experience.
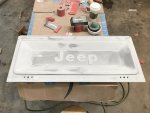
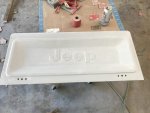
So I have a new appreciation for the difference between flat and smooth. The picture above is after most of the tailgate has been blocked with 320 grit. It is quite evident that this panel is far from flat. I knew this from the start as I am building a trail rig I didn't fix every dent. So rather than flat I have been concentrating on smooth. Not sure how well it shows up but here is the same tailgate after hand sanding with 320 with no block.
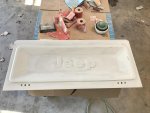
Then put some guide powder on and hit everything with 400 grit. It sure does feel smooth. I can only hope all this pays off when the color goes on.
So I have a new appreciation for the difference between flat and smooth. The picture above is after most of the tailgate has been blocked with 320 grit. It is quite evident that this panel is far from flat. I knew this from the start as I am building a trail rig I didn't fix every dent. So rather than flat I have been concentrating on smooth. Not sure how well it shows up but here is the same tailgate after hand sanding with 320 with no block.
Then put some guide powder on and hit everything with 400 grit. It sure does feel smooth. I can only hope all this pays off when the color goes on.