

You are using an out of date browser. It may not display this or other websites correctly.
You should upgrade or use an alternative browser.
You should upgrade or use an alternative browser.
spankrjs's Biloxi, MS '83 Scrambler
- Thread starter spankrjs
- Start date

Belizeit
CJ-8 Member
- City
- River Ridge
- State
- La
Soda blasting or dustless blasting works the best.
How about Cold Jet dry ice blasting? Dry ice disappears.

- City
- Biloxi
- State
- MS
Soda blasting or dustless blasting works the best.
How about Cold Jet dry ice blasting? Dry ice disappears.
That probably works fine for paint removal, but not for de-greasing/cleaning


I prefer sand blasting for paint removal

- City
- Biloxi
- State
- MS
We had really great weather this weekend, so I took advantage of that to clean, polish and paint a bunch of stuff.
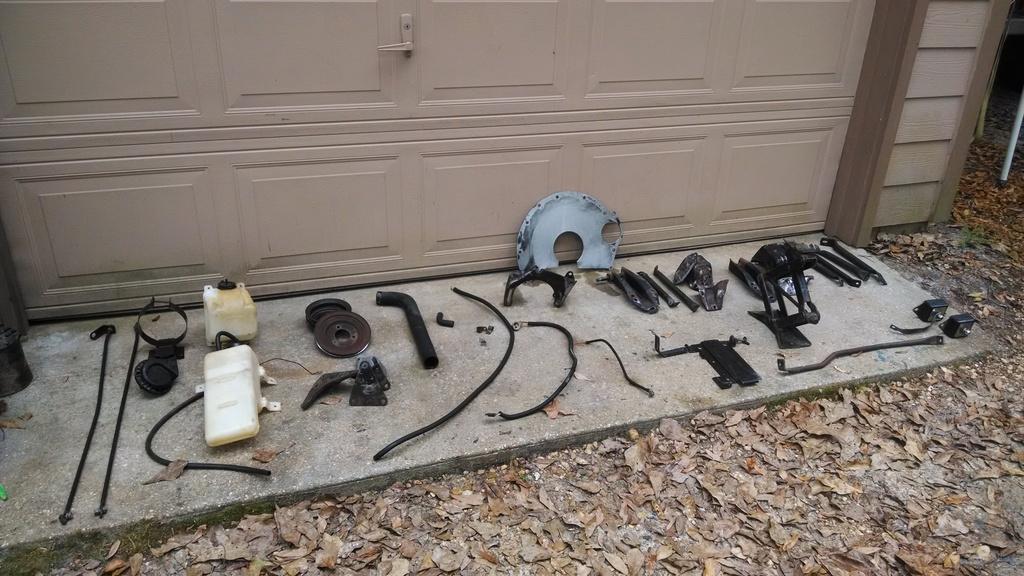
A bunch of cleaned parts:
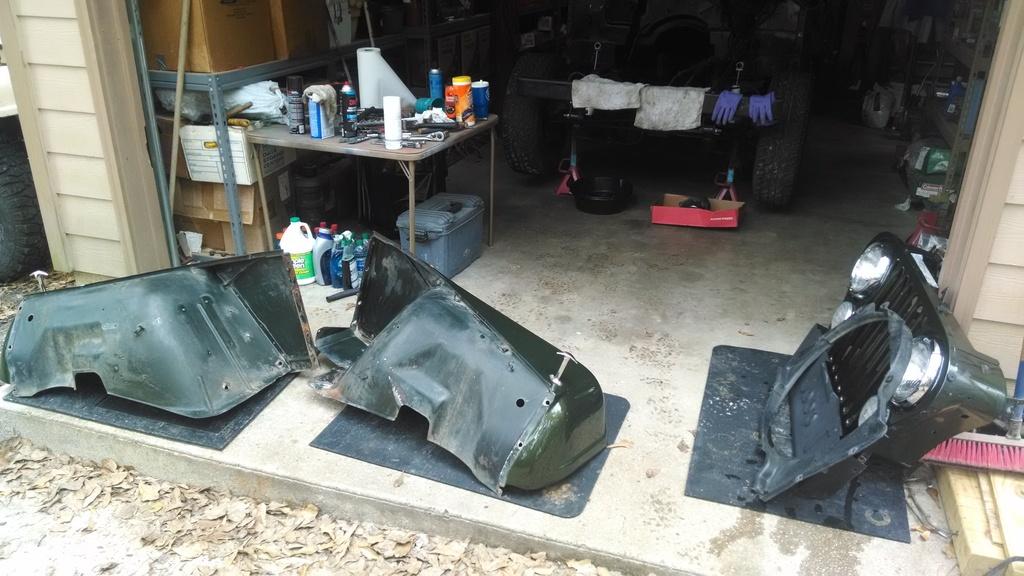
I cleaned the inner fenders, but they still looked like crap:
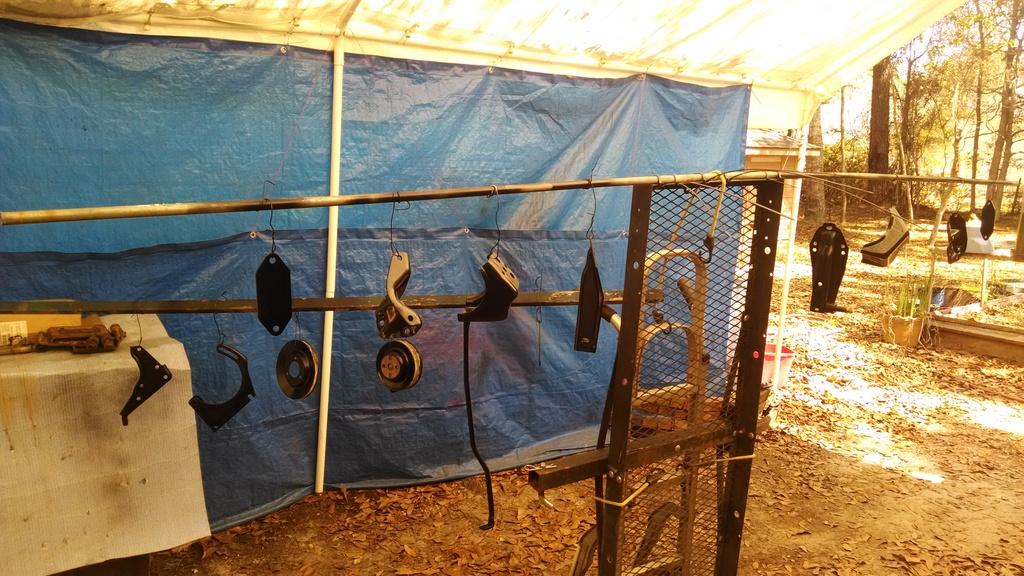
And painted a whole bunch of parts. None of these were rusty, just chipped/faded/missing paint:
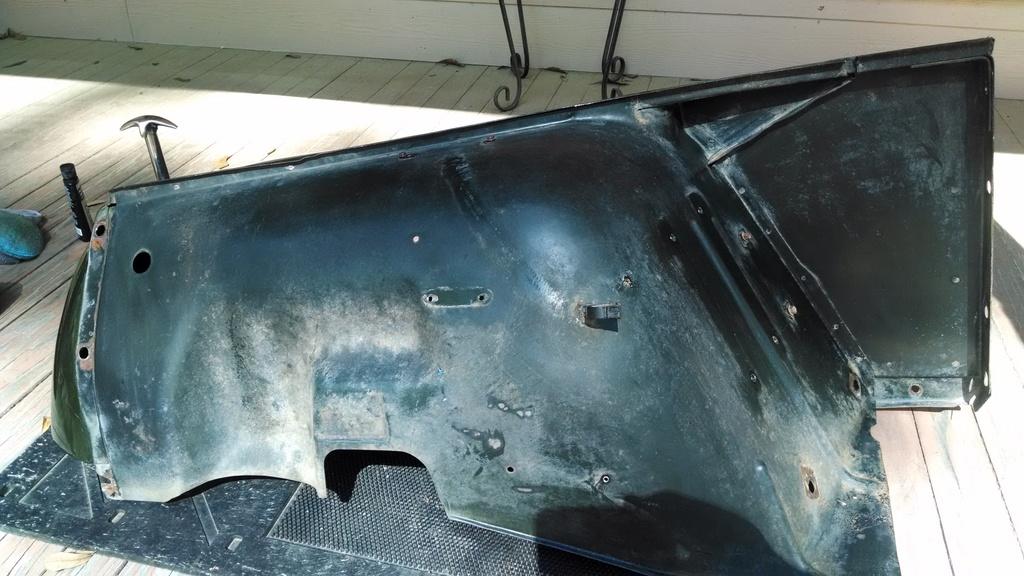
The inner fenders still looked like crap after a thorough washing/scrubbing. So, I broke out the polish, spent about two hour on each inner fender, they came out looking great. The polish can't do anything for the missing paint, but all in all, a huge improvement. Damn OCD.
Passenger side fender before:
Passenger side fender after:
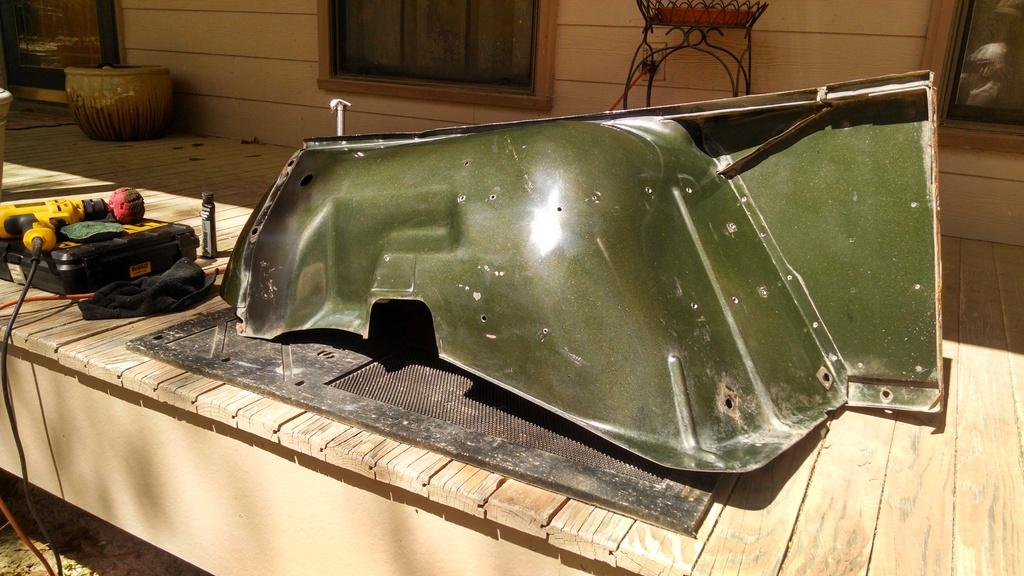
You can clearly see the factory black primer on the inner fender where the grill attaches. I found a lot of this black primer where the factory paint did not get sprayed.
Driver side fender before:
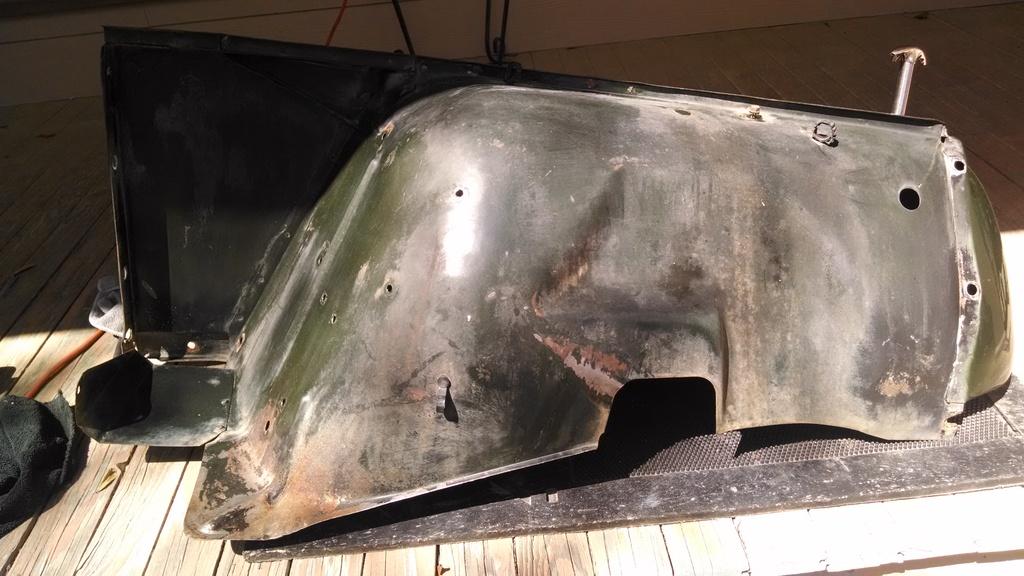
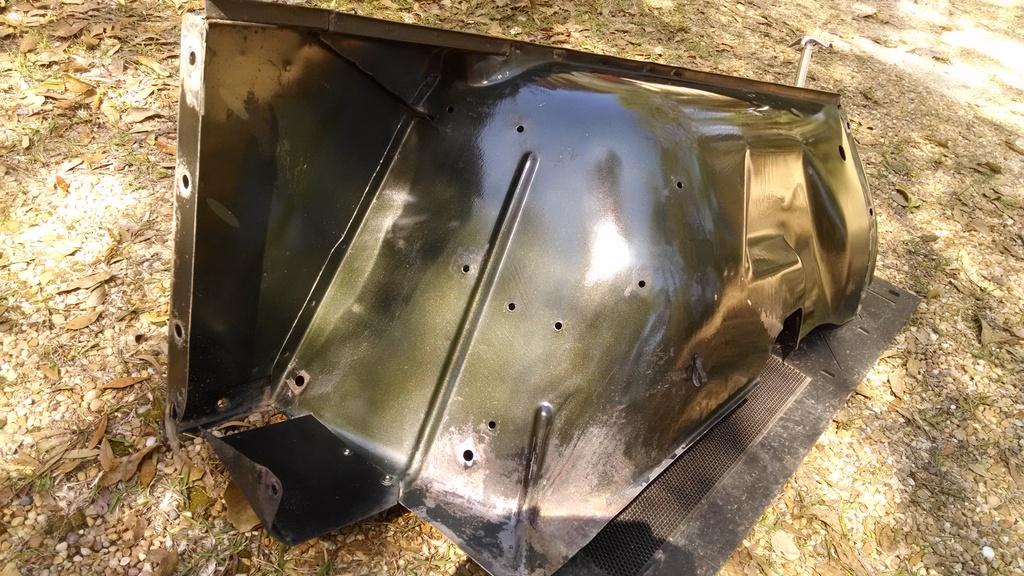
Driver side fender after:
And, since I cleaned the fenders, spent about 30 minutes and polished up all the fender/battery tray braces. After is on the Right, Before is on the Left:
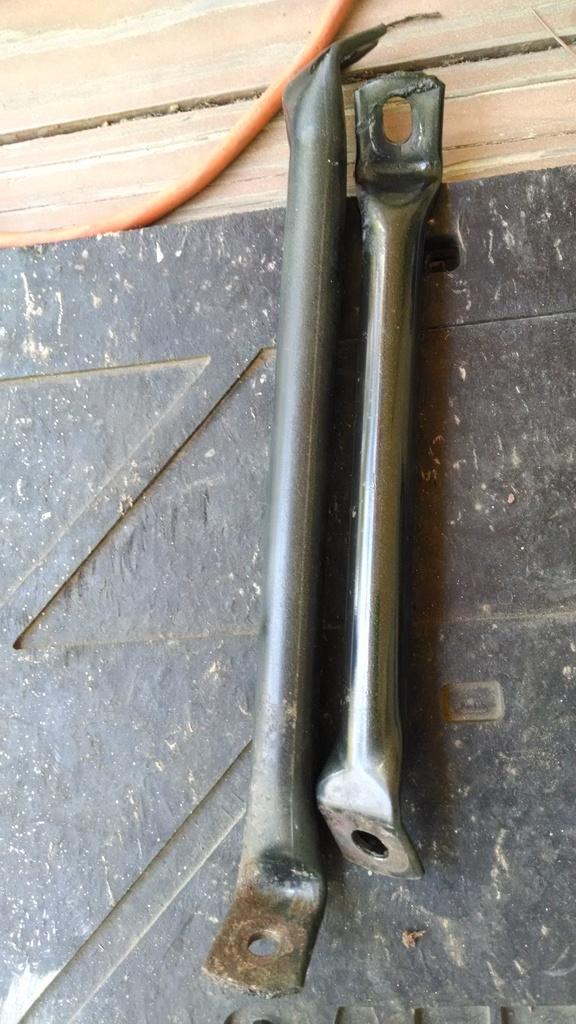
You can clearly see the black primer on the right, compared to the Sherwood Green on the left. Factory painters did a crappy job:
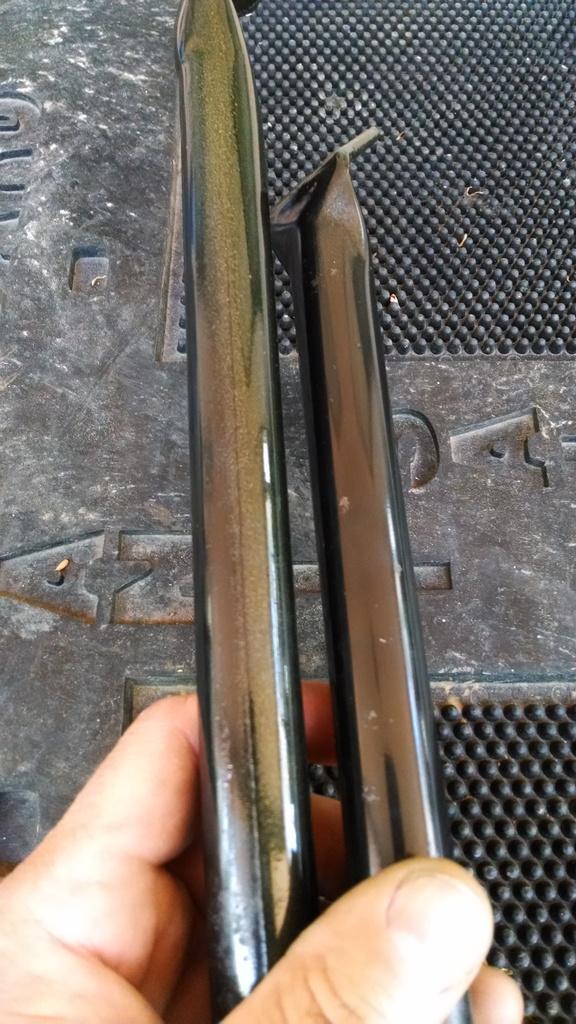
I am pretty happy with the polished parts. While they are not "perfect", they are way better then before. I think it was well worth the effort. I hate seeing an open hood with a nice looking engine but crappy looking inner fenders/fire wall. The funny thing is you will never see probably 75% of the polished paint since it will be hidden by all the under hood stuff!!!!
I have almost cleaned all of the parts. Still some more cleaning to do, though. So, no reassembly yet. I am hoping to have everything cleaned/organized so that when I finally get the engine back, reassembly will go quickly.
Still more work to do, that's it for now
A bunch of cleaned parts:
I cleaned the inner fenders, but they still looked like crap:
And painted a whole bunch of parts. None of these were rusty, just chipped/faded/missing paint:
The inner fenders still looked like crap after a thorough washing/scrubbing. So, I broke out the polish, spent about two hour on each inner fender, they came out looking great. The polish can't do anything for the missing paint, but all in all, a huge improvement. Damn OCD.
Passenger side fender before:
Passenger side fender after:
You can clearly see the factory black primer on the inner fender where the grill attaches. I found a lot of this black primer where the factory paint did not get sprayed.
Driver side fender before:
Driver side fender after:
And, since I cleaned the fenders, spent about 30 minutes and polished up all the fender/battery tray braces. After is on the Right, Before is on the Left:
You can clearly see the black primer on the right, compared to the Sherwood Green on the left. Factory painters did a crappy job:
I am pretty happy with the polished parts. While they are not "perfect", they are way better then before. I think it was well worth the effort. I hate seeing an open hood with a nice looking engine but crappy looking inner fenders/fire wall. The funny thing is you will never see probably 75% of the polished paint since it will be hidden by all the under hood stuff!!!!
I have almost cleaned all of the parts. Still some more cleaning to do, though. So, no reassembly yet. I am hoping to have everything cleaned/organized so that when I finally get the engine back, reassembly will go quickly.
Still more work to do, that's it for now

- City
- Gonzales
- State
- La
You clean and degrease before blasting.That probably works fine for paint removal, but not for de-greasing/cleaning
I prefer sand blasting for paint removal


- City
- Biloxi
- State
- MS
Looks great Man. That polish did wonders on those fenders.
Appreciate it


It was a lot of work, but it looks much better

- City
- Baton Rouge
- State
- La
That looks great. To bad you'll never see them once they are reinstalled.
- City
- Biloxi
- State
- MS
Still waiting on my engine, been busy doing "not so interesting stuff": such as, cleaning all the old bolts/hardware:
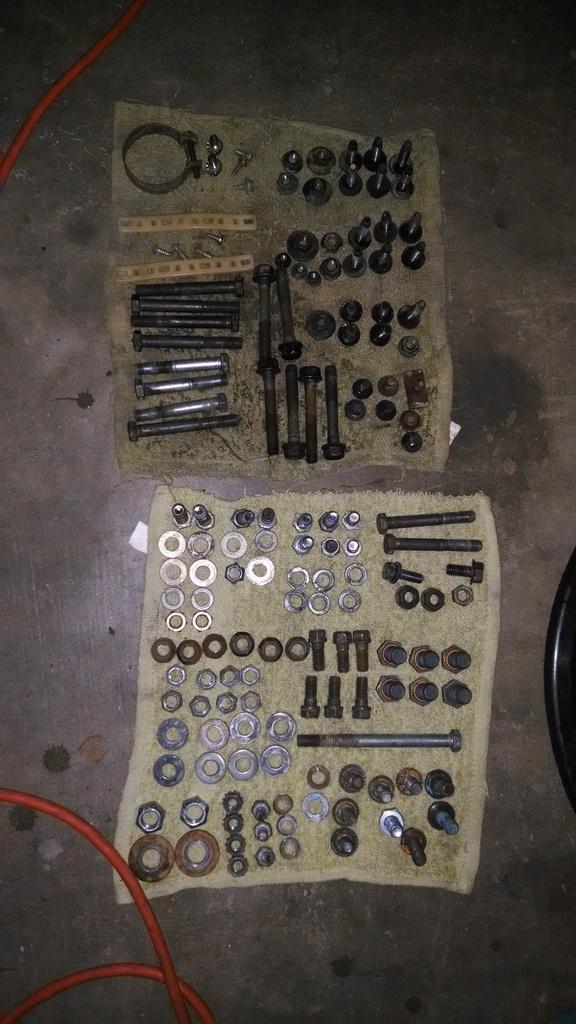
I am going to replace most of the engine/frame related bolts, but clean and polish all of the painted body bolts. The body bolts should clean up nice.
While I had the front clip off, engine out, and cleaned the frame, I noticed something disturbing about the frame rails:
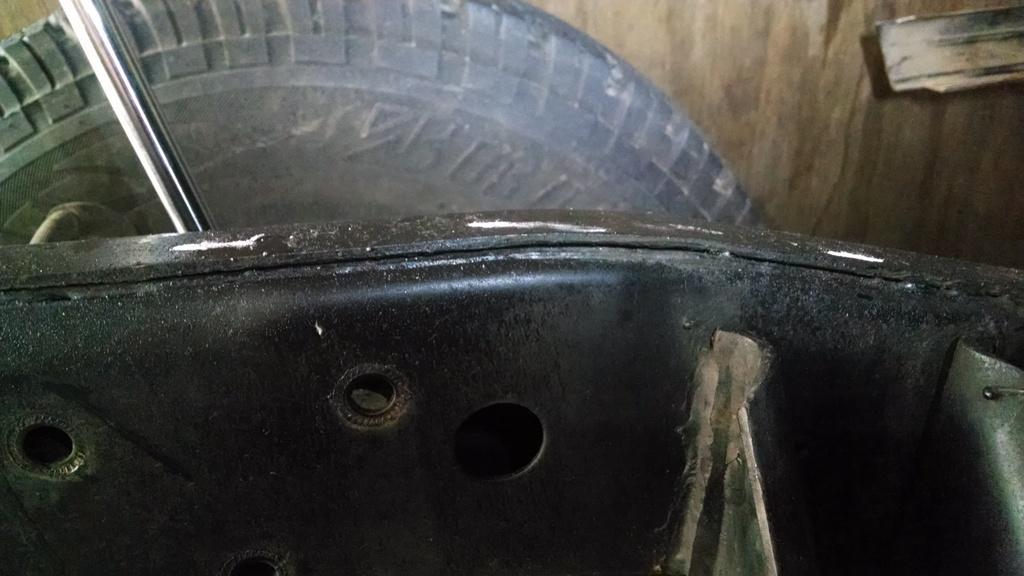
The factory did not weld the upper seams of the front frame rails on this Scrambler worth a sh-t The above picture shows the passenger side frame rail. It was lacking weld from roughly the front shock mount all the way back to the firewall. On the driver side, it was only missing weld from the engine mount to the firewall. When I say "missing", there were tiny spots of original weld, but not much
Anyway, with the front clip/engine out of the way, no better time to fix this issue. I had my buddy Chris Frizzle come over and MIG weld it up. We just stitched it, didn't really think it would be necessary to lay a continuous bead down:
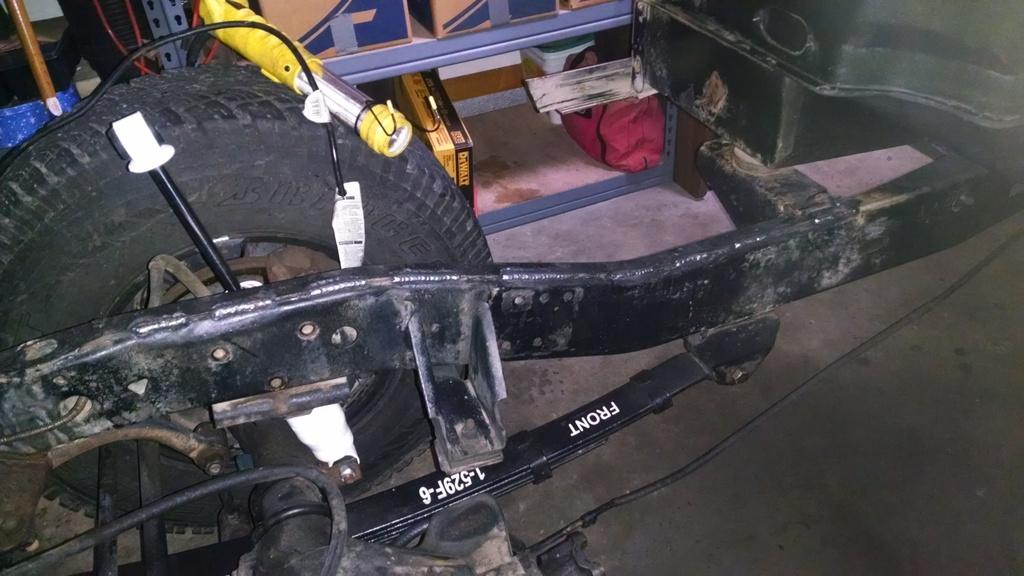
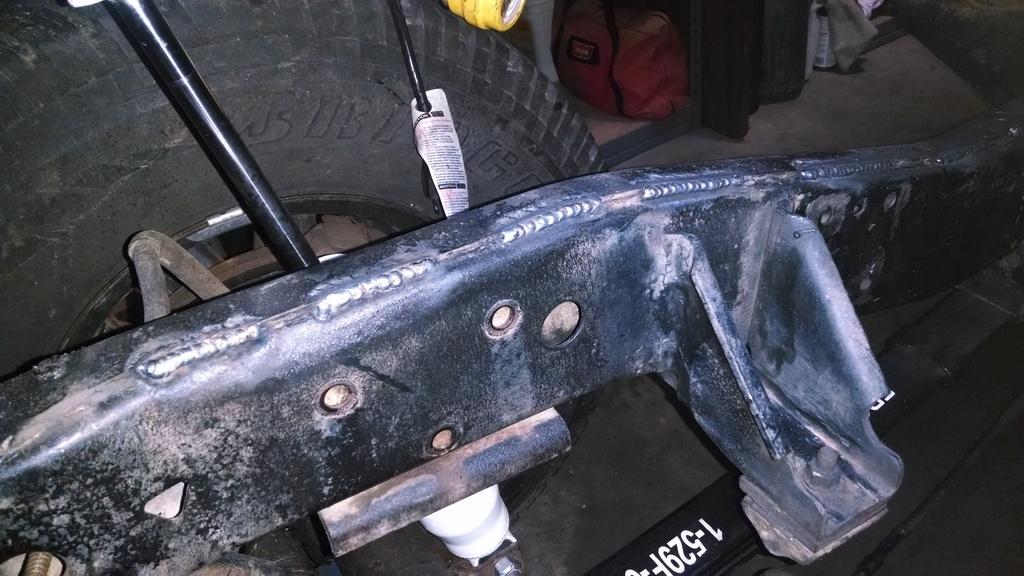
He is not a professional welder, but did a great job I am going to clean up the welds a little bit, then paint them black. I am sure if I would have left the frame like this, it would have eventually cracked somewhere. Lucky for me, the frame rails past the firewall seem to be welded up much better. I am glad I never wheeled this Scrambler hard, that missing weld could have caused some major frame damage. Judging by the overall condition of the rest of the Scrambler, I don't think it ever had a "hard" life. I do know it went wheeling; every once in awhile I will find some good old red Mississippi clay hiding somewhere 
Always something
Once I get the frame welds painted up, I can at least start some reassembly while waiting for the engine.
That's it for now
I am going to replace most of the engine/frame related bolts, but clean and polish all of the painted body bolts. The body bolts should clean up nice.
While I had the front clip off, engine out, and cleaned the frame, I noticed something disturbing about the frame rails:
The factory did not weld the upper seams of the front frame rails on this Scrambler worth a sh-t
The above picture shows the passenger side frame rail. It was lacking weld from roughly the front shock mount all the way back to the firewall. On the driver side, it was only missing weld from the engine mount to the firewall. When I say "missing", there were tiny spots of original weld, but not much Anyway, with the front clip/engine out of the way, no better time to fix this issue. I had my buddy Chris Frizzle come over and MIG weld it up. We just stitched it, didn't really think it would be necessary to lay a continuous bead down:
He is not a professional welder, but did a great job
I am going to clean up the welds a little bit, then paint them black. I am sure if I would have left the frame like this, it would have eventually cracked somewhere. Lucky for me, the frame rails past the firewall seem to be welded up much better. I am glad I never wheeled this Scrambler hard, that missing weld could have caused some major frame damage. Judging by the overall condition of the rest of the Scrambler, I don't think it ever had a "hard" life. I do know it went wheeling; every once in awhile I will find some good old red Mississippi clay hiding somewhere Always something
Once I get the frame welds painted up, I can at least start some reassembly while waiting for the engine.
That's it for now

- City
- Biloxi
- State
- MS
Finally got back to work on this Scrambler
I picked up the Red Scrambler's old engine from Hesco, Birmingham, Alabama, last week. They completely rebuilt it. I will have to post up the list of work performed, but suffice to say, it was completely gone through, and broke in on a dyno. It is still basically a stock 258, but with MPI.
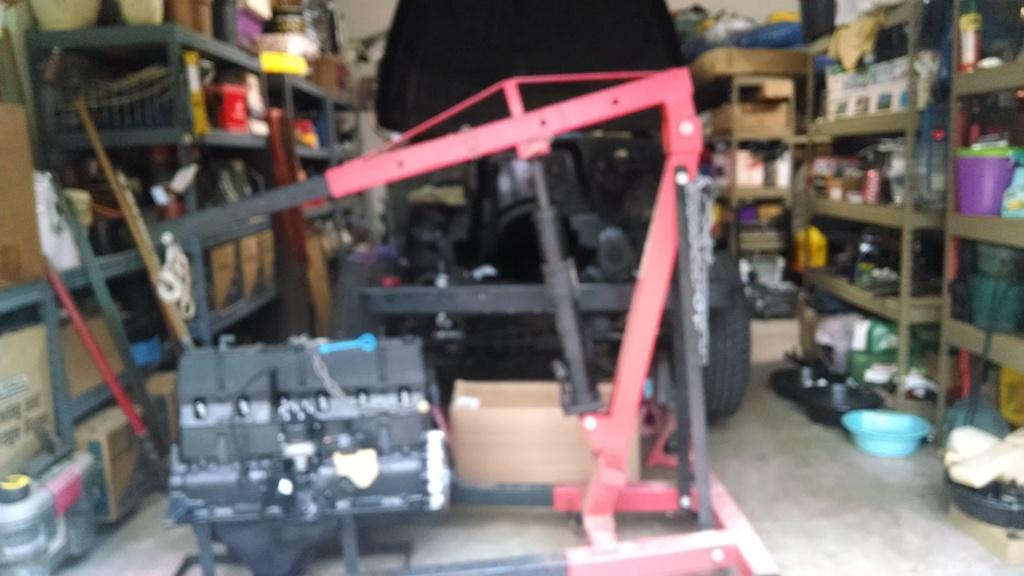
Garage cleaned up, ready to install:
Forgot to take an "installed" picture, oh well. I am just going to post up some high lites/interesting stuff.
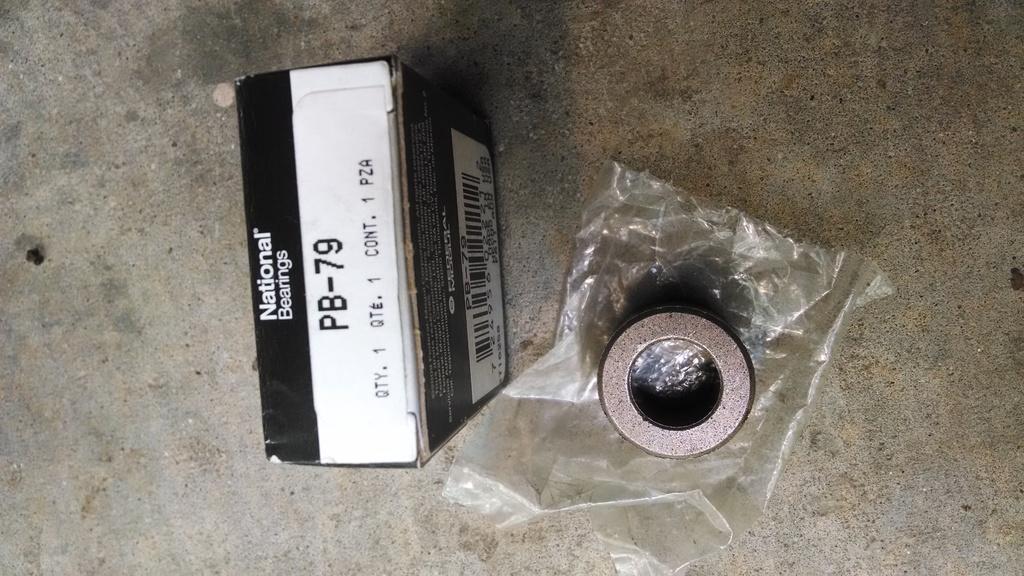
I used this pilot bushing, and packed it with 30 weight oil, per MySunshine's recommendation:
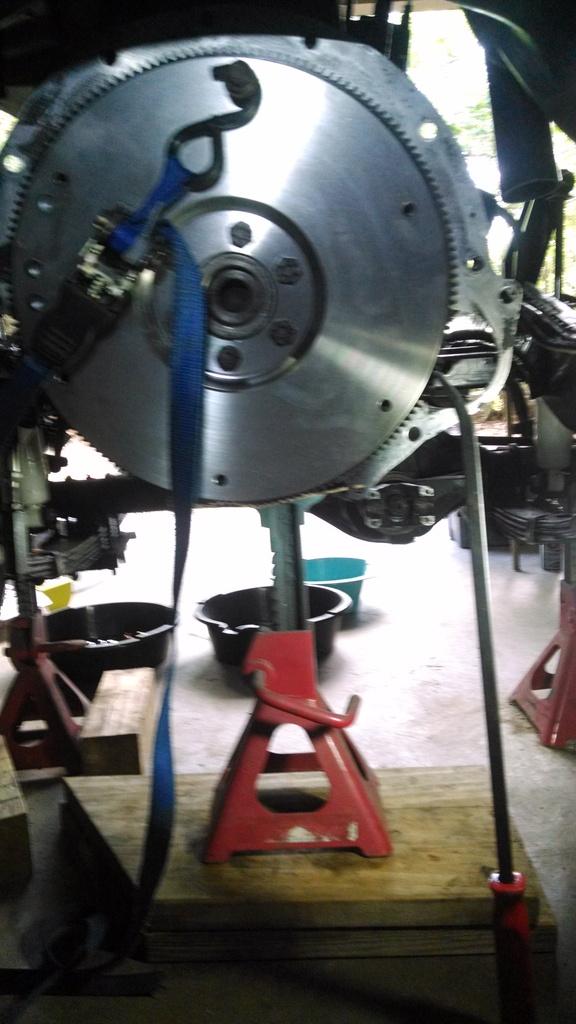
I used a large pry bar, standing up vertical, plus a ratchet strap, to hold the flywheel/crank stationary to torque to flywheel bolts:
Pilot bushing installed, a bit of excess oil came out after installing it:

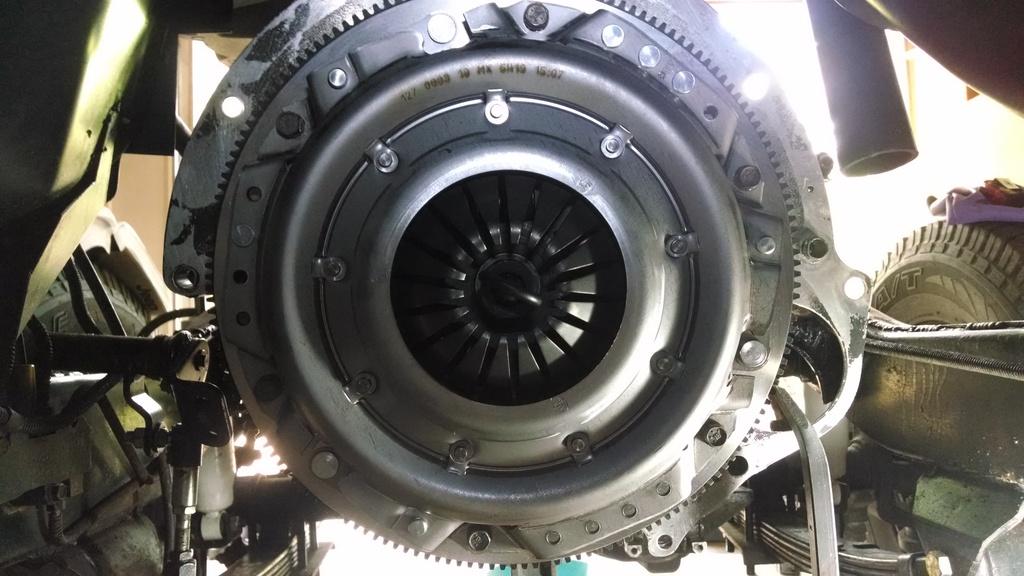
Clutch installed, I used a Luk clutch kit, and a new NAPA flywheel, which was also LUK branded:
Greasing the clutch pivot ball/fork:

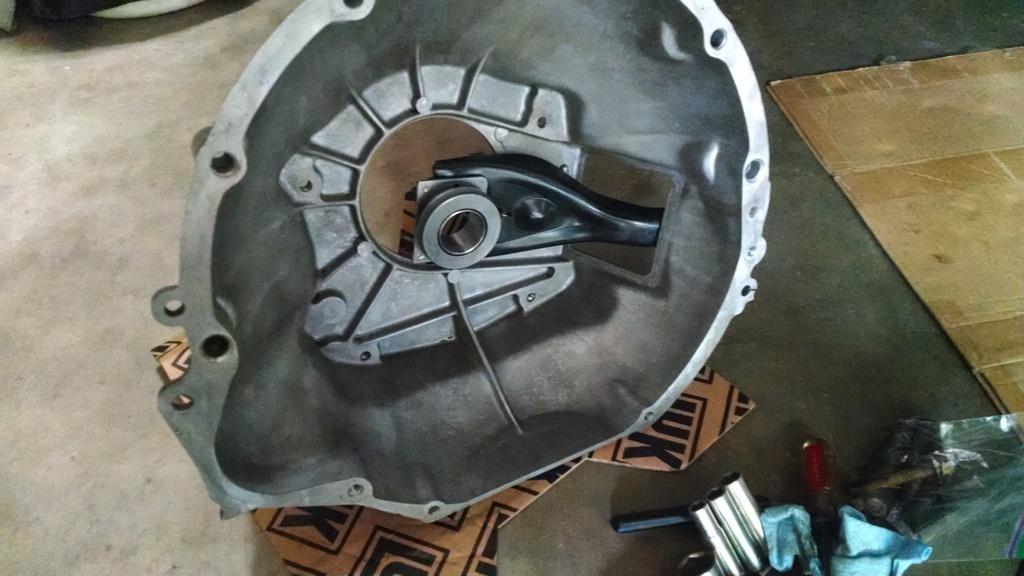
Clutch fork/throwout bearing installed:
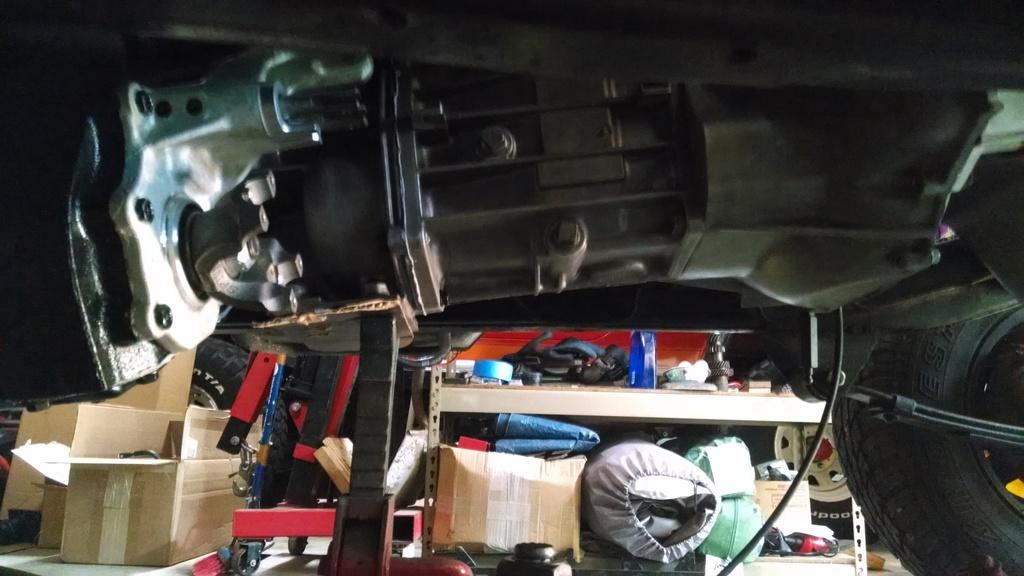
Love to see this, transmission/transfer case successfully installed
I picked up the Red Scrambler's old engine from Hesco, Birmingham, Alabama, last week. They completely rebuilt it. I will have to post up the list of work performed, but suffice to say, it was completely gone through, and broke in on a dyno. It is still basically a stock 258, but with MPI.
Garage cleaned up, ready to install:
Forgot to take an "installed" picture, oh well. I am just going to post up some high lites/interesting stuff.
I used this pilot bushing, and packed it with 30 weight oil, per MySunshine's recommendation:
I used a large pry bar, standing up vertical, plus a ratchet strap, to hold the flywheel/crank stationary to torque to flywheel bolts:
Pilot bushing installed, a bit of excess oil came out after installing it:
Clutch installed, I used a Luk clutch kit, and a new NAPA flywheel, which was also LUK branded:
Greasing the clutch pivot ball/fork:
Clutch fork/throwout bearing installed:
Love to see this, transmission/transfer case successfully installed
Last edited:
- City
- Biloxi
- State
- MS
After installing the flywheel/clutch/bellhousing/transmission/transfer case, decided to tackle some easier work, that did not require rolling around on the ground LOL.
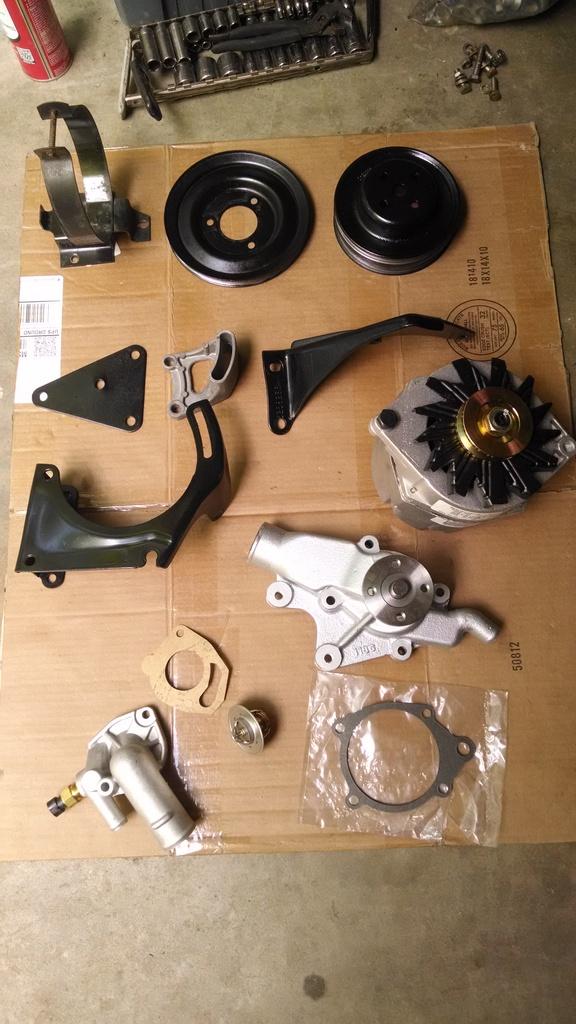
Started on the "front of engine" stuff, wrong alternator pictured:
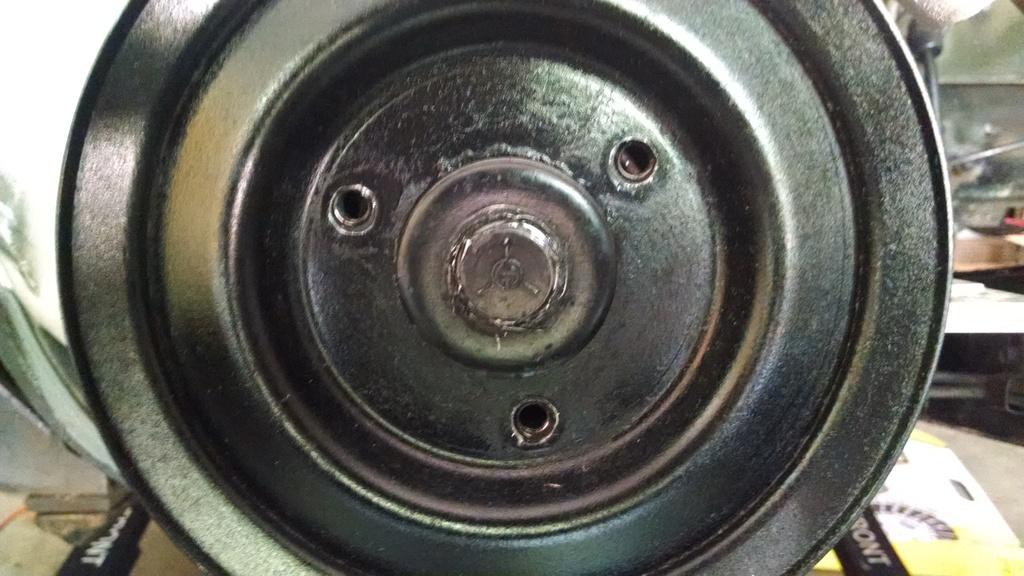
For some reason, my stock crank pulley would NOT line up with the threaded holes in the HESCO harmonic balancer. The holes were close, but no cigar. I used a step bit to drill all three holes out to the next bigger size, worked perfect. This pulley fits tight on the harmonic balancers center hub, so it wont move/vibrate.shake/etc.
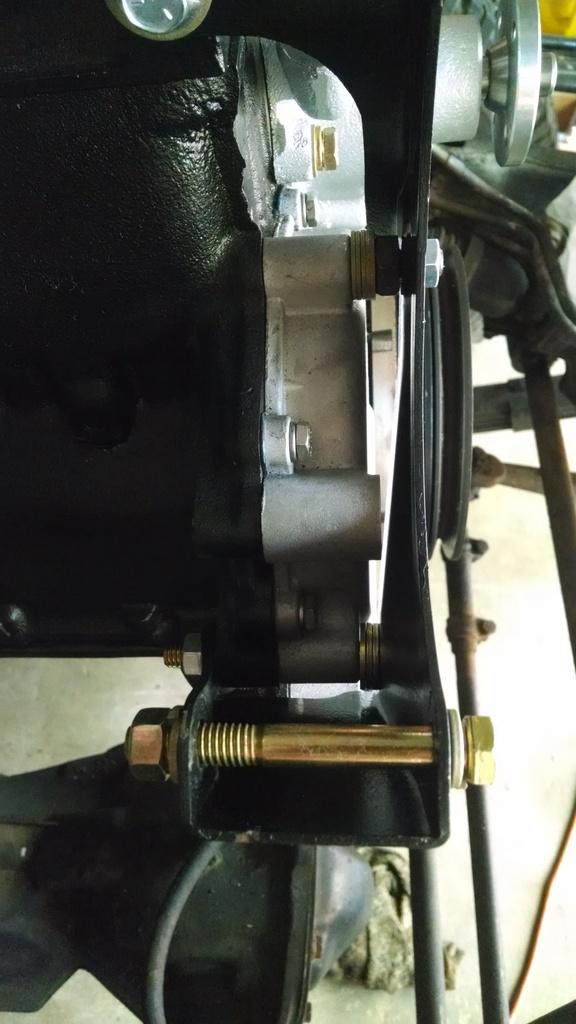
Another slight issue, and I ran into this previously when I swapped the 4.0 engine into my red Scrambler. The original 4.2 timing cover was damaged, so a 4.0 timing cover was installed. There are differences between the 4.2/4.0 covers, with regards to the built in "lugs" that stick out the face, where the alternator brackets bolts. I used a caliper to measure the difference, stacked up washers, works perfect:
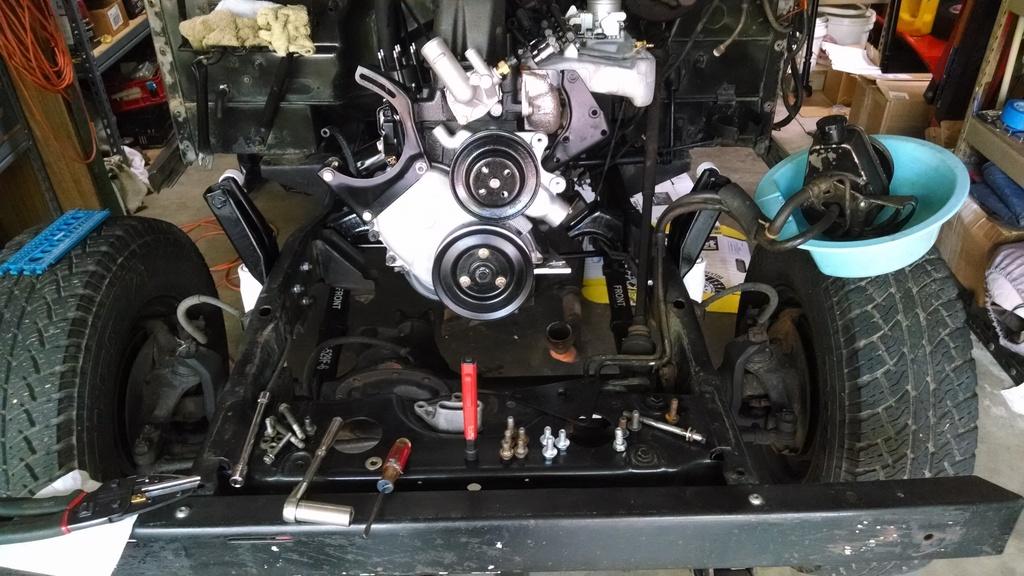
I was able to get the water pump, thermostat housing, lower crank pulley, and alternator brackets installed:
I am going to replace both power steering lines before I reinstall the PS pump and all of its brackets. Also, HESCO does NOT install exhaust manifold/intake manifold gaskets. Not sure, but I probably will, so will need to pull the intake/exhaust off before installing the PS stuff.
All in all, a pretty productive weekend
That's it for now
Started on the "front of engine" stuff, wrong alternator pictured:
For some reason, my stock crank pulley would NOT line up with the threaded holes in the HESCO harmonic balancer. The holes were close, but no cigar. I used a step bit to drill all three holes out to the next bigger size, worked perfect. This pulley fits tight on the harmonic balancers center hub, so it wont move/vibrate.shake/etc.
Another slight issue, and I ran into this previously when I swapped the 4.0 engine into my red Scrambler. The original 4.2 timing cover was damaged, so a 4.0 timing cover was installed. There are differences between the 4.2/4.0 covers, with regards to the built in "lugs" that stick out the face, where the alternator brackets bolts. I used a caliper to measure the difference, stacked up washers, works perfect:
I was able to get the water pump, thermostat housing, lower crank pulley, and alternator brackets installed:
I am going to replace both power steering lines before I reinstall the PS pump and all of its brackets. Also, HESCO does NOT install exhaust manifold/intake manifold gaskets. Not sure, but I probably will, so will need to pull the intake/exhaust off before installing the PS stuff.
All in all, a pretty productive weekend
That's it for now

- City
- Biloxi
- State
- MS

For some reason, my stock crank pulley would NOT line up with the threaded holes in the HESCO harmonic balancer. The holes were close, but no cigar.
I had the exact same issue when I installed MPI on my '84 this past winter. I think it's as simple as it seems... the holes aren't in the same places... I was able to "wobble" one hole on the pulley to get everything back together, and have had no issues at all with it since.
As always, you do great work... enjoying the rebuild...
Cheers,
Bill
- City
- Biloxi
- State
- MS
I had the exact same issue when I installed MPI on my '84 this past winter. I think it's as simple as it seems... the holes aren't in the same places... I was able to "wobble" one hole on the pulley to get everything back together, and have had no issues at all with it since.
As always, you do great work... enjoying the rebuild...
Cheers,
Bill
Appreciate it
As for the pulley, I don't remember having this issue with the first MPI kit/balancer I installed on my red Scrambler, maybe they switched damper manufacturers
 Just glad it was an easy fix
- City
- Biloxi
- State
- MS
I was able to get a bit more complete.
I installed a new PS pressure line, new rubber return line, installed the alternator/PS pump, belts, fan with clutch:
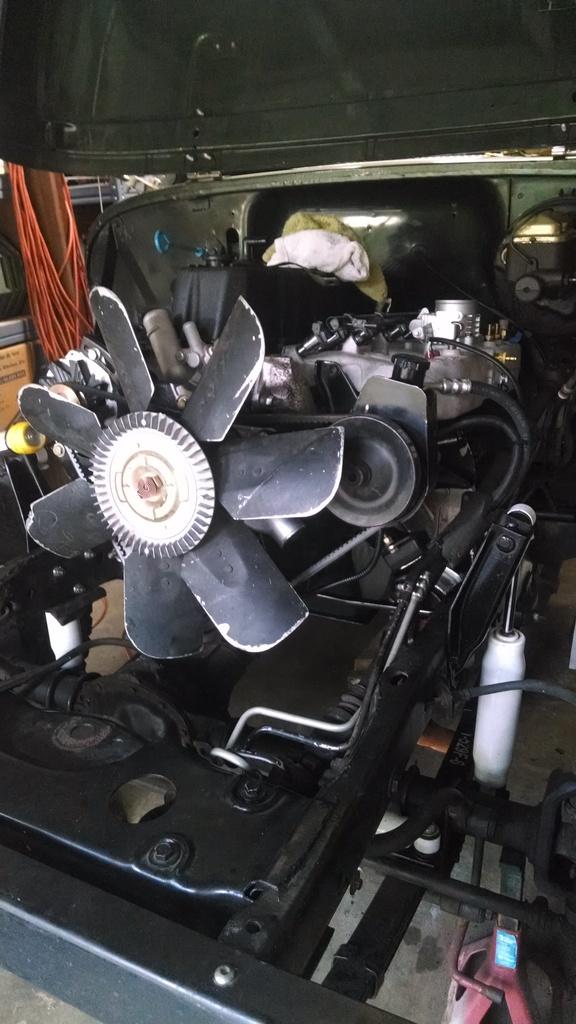
I used a NAPA PS pressure hose. It is "almost" an exact fit. I had to carefully tweak it to get it to fit, but no big deal. Everything else just bolted together.
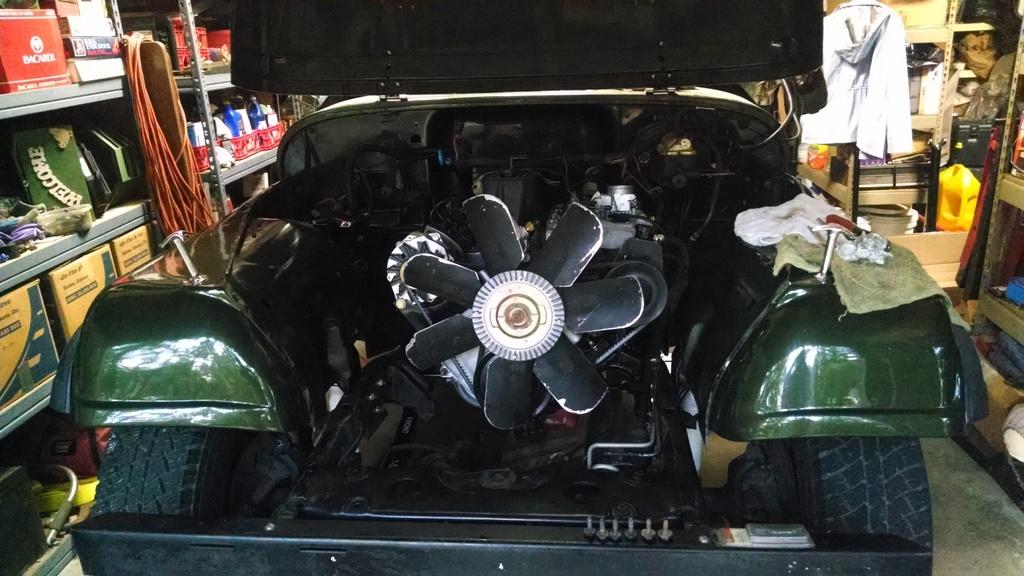
Bolted on the fenders, all the braces, and the battery tray:
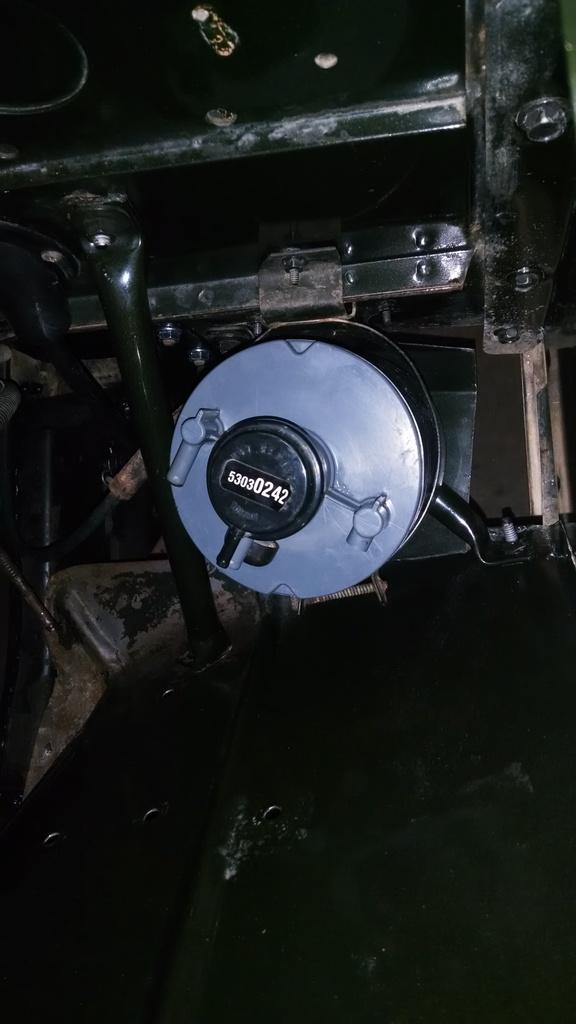
Hesco does not supply a new vapor canister with their kits anymore, or for the last few years. They are about impossible to find new. So, I bought a used 1995 YJ vapor canister off of eBay, this is the same thing that used to come with the kit.
I also installed the grill, radiator, and fan shroud:
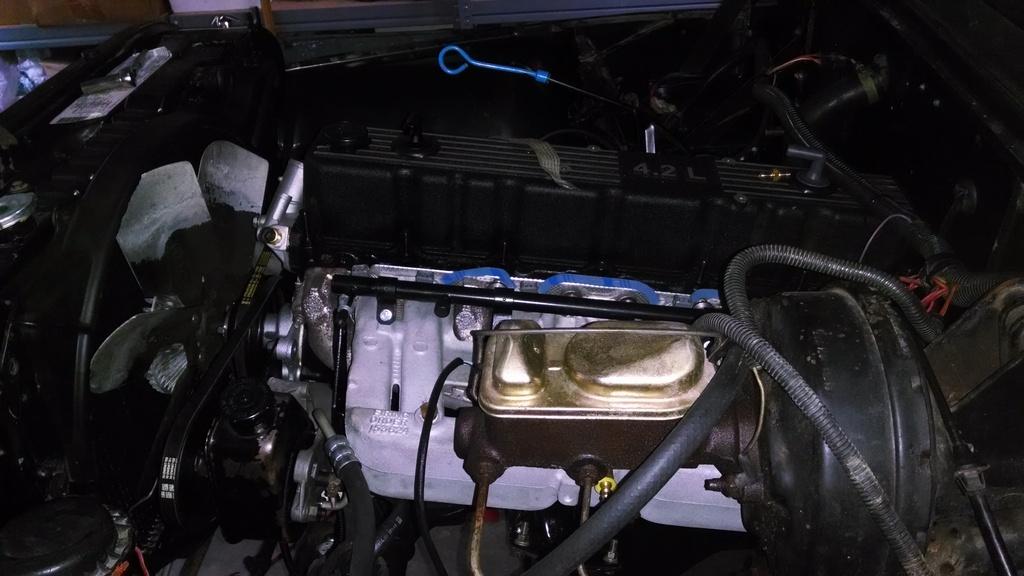
I might need to see if I can find a new fan shroud, my original is cracked in half, and the fan has chewed it up a bit. My standard rotation seven bladed fan also has a chunk missing off one of the blades, so I might/should replace it, too.
Installed a bunch of other easy stuff, too:
spark plug wires
solenoid
wired up alternator
installed jack/jack plate
temp sender
oil pressure sender
I will probably install my new vapor line next, plus work on some of the wiring.
As for the fuel line, I am thinking of doing the following, since I bought a new pre-bent fuel supply line:
Run the line like a stock CJ on the passenger side. Then, make a new line to cross under the engine, then back up to the intake manifold. My regulator is at the filter, which is at the rear of the Jeep, so I only need to run the long supply line. If I run the line this way, it will keep it on the opposite frame rail from the exhaust.
Or, I can make the pre-bent fuel line work on the driver side frame rail. I did this on my Red Scrambler. The only "problem", it will be on the same side as the exhaust. But, it will hook up easier to the Hesco supplied fuel line that bolts on to the intake manifold.
As for fuel pumps, well, I have an interesting "plan", just have to execute
I installed a new PS pressure line, new rubber return line, installed the alternator/PS pump, belts, fan with clutch:
I used a NAPA PS pressure hose. It is "almost" an exact fit. I had to carefully tweak it to get it to fit, but no big deal. Everything else just bolted together.
Bolted on the fenders, all the braces, and the battery tray:
Hesco does not supply a new vapor canister with their kits anymore, or for the last few years. They are about impossible to find new. So, I bought a used 1995 YJ vapor canister off of eBay, this is the same thing that used to come with the kit.
I also installed the grill, radiator, and fan shroud:
I might need to see if I can find a new fan shroud, my original is cracked in half, and the fan has chewed it up a bit. My standard rotation seven bladed fan also has a chunk missing off one of the blades, so I might/should replace it, too.
Installed a bunch of other easy stuff, too:
spark plug wires
solenoid
wired up alternator
installed jack/jack plate
temp sender
oil pressure sender
I will probably install my new vapor line next, plus work on some of the wiring.
As for the fuel line, I am thinking of doing the following, since I bought a new pre-bent fuel supply line:
Run the line like a stock CJ on the passenger side. Then, make a new line to cross under the engine, then back up to the intake manifold. My regulator is at the filter, which is at the rear of the Jeep, so I only need to run the long supply line. If I run the line this way, it will keep it on the opposite frame rail from the exhaust.
Or, I can make the pre-bent fuel line work on the driver side frame rail. I did this on my Red Scrambler. The only "problem", it will be on the same side as the exhaust. But, it will hook up easier to the Hesco supplied fuel line that bolts on to the intake manifold.
As for fuel pumps, well, I have an interesting "plan", just have to execute


