• Notice for iPhone users: DO NOT use the image size reduction option when uploading photos to the forum. This causes portrait images to post as landscape. We have added a warning to the image insert pop-up as well.

Another Scrambler Purchase/Road Trip - UPDATE- BODY ON FRAME AGAIN

spankrjs

Scrambler Junkie
Lifetime Member
SOA Member
City
Biloxi
State
MS
Cleaned the header/intake:

41.jpg

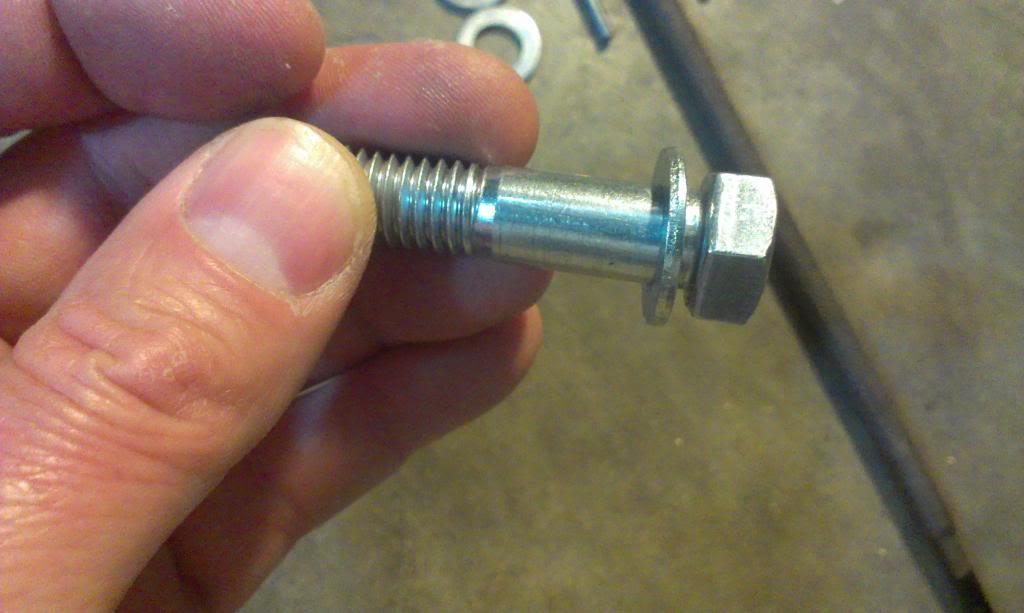
I have had good luck using this stuff on the stainless manifold bolts. They stay tight, but come out easy:

42.jpg

I ended up putting two studs in the head to help install the exhaust manifold:

43.jpg

This PS pump bracket was fine with the old header, no go with the new stock replacement manifold:

44.jpg

I pulled it off, will have to cut off the top part. No big deal, the top part is useless with a 4.0 intake:

45.jpg

Exhaust manifold on:

46.jpg

The intake has these nice "notches" that align the intake with two dowels in the head, makes install/alignment easy:

47.jpg

My rear one has been partially broken since the day I pulled this new manifold out of it's box, but still works fine:

48.jpg

Intake on:

49.jpg

Much easier to get to the lower bolts using a "stock" style manifold vs a "header":

50.jpg
 

spankrjs

Scrambler Junkie
Lifetime Member
SOA Member
City
Biloxi
State
MS
I was missing one of the fancy, thick, stock manifold washers. In a pinch, a plastic valve cover washer could work, but i bought these thick washers from Lowes:

51.jpg

Stacking two together is a 1/4". No way 25 foot pounds on a 3/8" bolt will bow them:

52.jpg

And installed, doesn't look too ghetto:

53.jpg

A stock washer for reference:

54.jpg

Back to the PS pump bracket.

Marked it:

55.jpg

56.jpg

And cut:

57.jpg

I cut it so as to keep both "lips/bends" intact, to maintain strength:

58.jpg

59.jpg

Mocked up, fits fine:

60.jpg
 

spankrjs

Scrambler Junkie
Lifetime Member
SOA Member
City
Biloxi
State
MS
Smoothed the edge, a little paint, done deal:

61.jpg

And back to where i started:

62.jpg

Since the fender is off, a few more chores:

1) paint my never painted Borgeson steering shaft
2) change the rubber fuel lines down by the frame/cowl
3) potentially space/insulate the fuel lines that run down the intake manifold
4) "Might" swap back in a 3 core copper/brass radiator, change all coolant/heater hoses/belts (all this stuff is almost 10 years old)
5) "Might" install a OEM clutch fan and fan shrould
6) do something with the rust bubbles on the driver side fender :( (the only spot the cancer has returned)

Anybody got a stock clutch fan they want to sell/give me, just the fan, not the clutch :fingerscrossed::thumbsup::wave:
 

spankrjs

Scrambler Junkie
Lifetime Member
SOA Member
City
Biloxi
State
MS
Not the best pictures, but some evidence of my exhaust systems "personality".

I have smashed my tailpipe shut, opened it back up with crescent wrenches, too many times to count:

63.1.jpg

In the picture above, the hanger is loose/dropped down to aid in disconnecting the head pipe from the manifold. The tailpipe usually sits 3"-4" higher, tucked up under the rock slider. I like the OEM style side exit tail pipe, and it is as about as high as practical, so just a fact of life :shrug:

My muffler sits behind the transmission/transfer case skid plate, totally exposed:

63.2.jpg

Again, it usually sits up higher, flush with/higher then the bottom of the frame rail. The current muffler has only been on for around 10,000 miles, the rest of the system for 40,000 miles of abuse.

I will probably spring for all new pipe, hangers, maybe a flex joint, once I get it back running.
 

spankrjs

Scrambler Junkie
Lifetime Member
SOA Member
City
Biloxi
State
MS
I have always been a fan of the Borgeson steering shafts, way better/stronger/more precise then the OEM steering shaft. This one has been in service for over 40,000 miles, u-joints/slip shaft still tight like new.

63.jpg

Took it apart to aid in clean up:

64.jpg

I installed it as it came, never painted it. It has held up well, just some slight corrosion. So, might as well clean it up and make it pretty.

Another important discovery: When I initially installed the shaft and tightened the set screws, I never took it all back apart to drill some "set screw dimples". It never came loose, but it is easy enough to take care of this over sight now.

When you tighten down the set screws, it marks the shaft:

65.jpg

Also note the original sticker, held up well.

Anyway, the set screw marks the spot. Next center punch the mark and drill a small starter hole:

66.jpg

I used a 1/4" bit to make a slight depression. This is better then just securing on the "flat":

67.jpg

I did that for all four "u-joint to shaft set screw" locations. I need to look and see if I drilled the steering gear box shaft, and the steering column shaft. Doesn't take much time to do this, cheap insurance.

Took about 45 minutes to clean up all the parts, hanging up in my "Redneck Ray" paint booth:

68.jpg

The paint was a bit shinier then what I was hoping for, bling bling:

69.jpg

I just sprayed the bare metal with some Dupli-Color engine enamel. Came out good, just a hair bit bling bling. Oh well, hard to see once installed, I hope!!!!!!!!!!!

I bought these from the local NAPA, and am impressed:

70.jpg

I used one wipe to clean off the entire firewall, driver side frame rail, vapor canister, passenger side fender:

71.jpg

They work well for general clean up. Not sure how they would work on heavy grease/mud/oil stains, but work great for general clean up/detailing.

Besides the half way broken off intake manifold lower dowel hole locator thing, this vacuum port on my intake always leaked a bit:

72.jpg

The first time I went to Michigan it started to leak a little bit. I kept tightening the fitting, it eventually stripped out. So, I jammed a bolt into the threads, sealed it up with "JB-Weld", been holding up fine for 40k miles. More "Redneck Ray" engineering at it's finest.

This vacuum port was originally for the power brake hose hook up. If I ever upgrade to power brakes,, I still have one unused vacuum port on the intake, or I can Dremel away the JB Weld, install a vacuum fitting, reseal it up.

Or find a new manifold.
 

ag4ever

Average Nut
BENEFACTOR
Gold Member
Silver Member
Lifetime Member
SOA Member
City
Richmond
State
TX
While the original vapor canisters are no longer available, a similar one is. DeLorean Kinda pricey though. I recently got one from a ram charger for $5, with the bracket.

Also, the tub o towels are Great! They work great for cleaning grease off your hands when a sink is not available. Been using them for a few years now.
 

tmancj7

Basic User
City
Denver
State
CO
If you opt for a replacement intake manifold look for the 99-04 4.0 liter horseshoe manifold. Part number 04854036. Bolt on fit and good for at least 50 more hp! OK maybe not, but they look cool.
I’m running one of the DeLorean vapor canisters on the fuel injection conversion after some frustration with a couple different used canisters. If I can get that baby up to 88 miles per hour, poof I’m outta here. Nah man not back in time, my jeep would violently combust with me in it.
 

zr10054

Car and Gun Junkie
Lifetime Member
City
Gonzales
State
La
P
Time for a bunch of spacer/bolt and "machining" information.

As mentioned previously, on the lower two bolts, the clearance inside the bell housing is tight. I needed to make some spacers, so I broke out the Dremel and files, aka "Redneck Machine Shop":

IMAG2986_zpsc9e4e30d-1.jpg


I used 10mm washers that I bought at Lowes. They only needed slight "machining" to get them to fit on the 7/16" bolts.

IMAG2987_zps7ac382c2-1.jpg


IMAG2989_zps134a7abc-1.jpg


Even using my modified metric washers, the clearance inside the bell housing at the lower two bolts it too tight. The way the inside of the bell housing is "rounded" around one side of the bolt holes will not allow the washers to sit flat, causing the bolts to want to "cock" at a bad angle.

The end of the file is pointing at one of the areas around the lower bolt holes that needs "machining":

IMAG2990_zps594c5afc-1.jpg


And again I broke out the "Redneck machine shop", aka Dremel, and used the below pictured attachments to "machine" the bell housing:

IMAG2992_zpsdff25b92-1.jpg


You do not have to remove a lot of material. This is more of a "sanding/polishing" operation. But, you do have to get aggressive to ensure that the surface of the bell housing is flat where the bolt head rests.

The lower hole near the clutch fork opening took the most work:

IMAG2994_zpsfd9ec188-1.jpg


The other lower hole needed some attention, too:

IMAG2995_zps13e55de9-1.jpg


Again, I did not have to remove a bunch of material. My total "machining" time, including making the washers, was around one hour.

A quick picture of my bolts/spacer stacks. Remember, due to the smooth shoulder length of the bolts, the bolt must be spaced back some, or you will mess up the threads inside of the adapter. The two bolts on the left are for the upper holes, the two bolts on the right are for the lower holes:

IMAG2997_zpsa3dc5857-1.jpg


Before you bolt the bell housing to the adapter/front of transmission, make sure you install the clutch fork/spring/ball/throw out bearing!!!!!!

And the bell housing finally installed:

IMAG2998_zpsee2717e9-1.jpg


The lower bolt, nearest to the clutch fork opening in the bell housing, is still a little bit of a PIA to get to. The clearance around the head of the bolt is tight in some places, so you can not use a socket to tighten the bolt all the way down. I was able to start it with a socket, then I had to turn it with a wrench until it was tight. Once the bolt was tightened down with the wrench, I was able to get a 3/8 drive socket on it, to torque it down properly with the torque wrench. A socket headed cap screw would be good to use here, but all the places I went to yesterday did not carry/were out of stock on this size.

NOTE - there is still plenty of clearance inside the bell housing, i.e. nothing that spins will hit the bolt heads.

And a side shot of the installed bell housing:

IMAG3006_zpsa6f336cc-1.jpg


All four bolts are secured with lock washers, and red lock tite, torqued to 45 foot pounds. There is close to 1" of thread engagement in the adapter plate, should be fine. If the lower two bolts were longer, then you could also use a nut on the outside. But, that would take a custom bolt, with the proper shoulder/threaded portion length.

Up next, hopefully soon and trouble free, lets bolt this damn thing to the engine!!!!!!!!!!

That's it for now.
pop CJ
 

spankrjs

Scrambler Junkie
Lifetime Member
SOA Member
City
Biloxi
State
MS
I reinstalled my bling bling steering shaft. When I I first installed it, I DID dimple the steering column/steering box shafts for the set screws.

Hard to see due to the coating of anti seize, but dimple on steering column shaft:

20200327_162425.jpg

Dimple on steering box shaft:

20200327_162522.jpg

I ended up coating all the splines, and the inner part of the steering shaft with anti seize, to aid in movement/future disassembly:

20200327_170652.jpg

Inner shaft coated up:

20200327_170658.jpg

Assembled steering shaft, with red Lock-Tite on all set screws and jamb nuts:

20200327_172045.jpg

And installed:

20200327_182819.jpg

Moving on to exhaust work.

I installed my "previously used for about an hour" exhaust flange gasket. These things are a pain to get on.

20200327_193545.jpg

With the exhaust hanging on the original hangers, the exhaust head pipe meets the header pipe flange like this, a few degrees off form perfect:

20200327_193615.jpg

Originally, all I have is the center support hanger and a tail pipe hanger.

Picture of my center support hanger, back at the parking brake cable frame bracket, a long way from the exhaust manifold:

20200327_193817~2.jpg

Parts that make this bracket/hanger:

20200328_121328.jpg

You can see in the above picture where I have previously "slotted" a pair of the holes so that this hanger worked better for my application.
 

spankrjs

Scrambler Junkie
Lifetime Member
SOA Member
City
Biloxi
State
MS
I used this "mount", listed as a "transmission mount", to replace the original/dried up/slotted rubber mount:

20200328_144241.jpg

My exhaust hanger round pipe fit fine through the "half circle" slot in the new mount.

I also "spaced" this mount upward, to get a better "head pipe to exhaust header flange" angle. I used a part off an old transmission mount, basically a 3/16" thick steel shim, gold in color:

20200328_153502.jpg

20200328_153513.jpg

In the picture above, it is mocked up, need to drill one hole in my "shim".

Better mating angle:

20200328_153541.jpg

I also modified my tail pipe hanger, I had to drill a hole between the two existing holes:

20200329_111045.jpg

Temporarily shimmed outward off the tail armor mounting bracket with an over sized nut;

20200329_111147.jpg

Tail pipe up high and tight against the rock slider:

20200329_111155.jpg

Looking forward at the "middle hanger" assembly:

20200329_111256.jpg

So, my "middle" and "rear" hangers have been modified/repaired, happy with them. But, I want to add a hanger between the engine and the "middle hanger", so that the exhaust header flange is not holding all of this weight up.

My AX-15 transmission has two threaded holes, 7/16", on the driver side. I stuck some bolts in to show where they are at:

20200329_111349.jpg

I want to add a hanger here, halfway between the engine and "middle hanger", like so:

20200329_111857.jpg
 

spankrjs

Scrambler Junkie
Lifetime Member
SOA Member
City
Biloxi
State
MS
I went shopping for some supplies:

20200329_112116.jpg

I had to buy a piece of 7/16" all thread to make my mounting "bolt", Lowe's does not carry much in the way of 7/16" stuff, especially 6" long.

I ended up using this universal hanger, heavily modified:

20200329_112146.jpg

First, I did not need this much "hanging bracket", so i cut it in half. The cut off piece becomes very important later on.

20200329_124259.jpg

And of course, neither existing mounting hole was at the ideal height.

Too low:

20200329_130034.jpg

Too high:

20200329_130203.jpg

So, at first I "enlarged" the lower hole, to see if I could get enough "play":

20200329_131913.jpg

Also note: the lower half does "swivel", but you have to clamp it down to get it to move. It is tight:

20200329_132003.jpg

First trial fit, no go. So I made the hole larger. I used my "unibit" for this, worked perfect:


20200329_134412.jpg

Still no go.

So, what if I use the cut off piece of bracket to make a "sliding hanger", to fine tune the height. Something like this:

20200329_134534.jpg

Still no go, so a larger adjustment slot:

20200329_135229.jpg

The holes in the hanger are 3/8". By using either 5/16" or 1/4" bolts in these two holes, it allows for some fine tuning of the height. I ended up using 1/4" grade 8 bolts, with metal self locking nuts. Not worried about the bolts braking, or the nuts coming loose.

Hard to understand in pictures, but the small/tight hole fits tight to the 7/16" mounting stud. By loosening the two bolts that clamp the hanger to this "held stationary piece", I can slide the hanger up/down to the perfect height. This way, the hanger is holding up the weight, NOT the exhaust manifold.
 

spankrjs

Scrambler Junkie
Lifetime Member
SOA Member
City
Biloxi
State
MS
The finished "Redneck Ray Adjustable Exhaust Hanger Bracket Assembly":

20200329_144736.jpg

I temporarily tightened the head pipe to the manifold, so that the exhaust pipe would be at its "running height". I then adjusted my hanger to fit the pipe at this height:

20200329_145850.jpg

And finished:

20200329_150237.jpg

The pictures make the hanger bracket appear close to the floor pan, it is not even close, just bad pictures.

With the hanger installed/tightened down, it holds the exhaust pipe at this height, hopefully keeping the weight off the hanger. The two bolts that hold the down pipe to the manifold are only to clamp it together now, NOT hold up any wieght:

20200329_150442.jpg

Revisited my rear tail pipe hanger: I used a stud, two nuts, got this hanger adjusted perfectly:


20200329_155252.jpg

And clamped the down pipe to the header:

20200329_161306.jpg

The angle between the two is still not "perfect", BUT it seals tight all the way around. The manifold came with metal self locking flange nuts, which I used.

Hopefully, all of this exhaust hanger work helps out. It should.

Even with all new mounts, I can still hit/push the muffler/tailpipe up some, so everything is not super rigid. I still have some movement.

That's it for the exhaust system modifications.
 

spankrjs

Scrambler Junkie
Lifetime Member
SOA Member
City
Biloxi
State
MS
I also decided to do some fuel line maintenance. I do not have any fuel line issues at this time, but all of my fuel lines have now been in service for over 10 years/40,000 miles. Cheap insurance to install new flexible hose and clamps :twocents:

Currently, I am running the stock 4.0 style fuel lines, with quick connects at the fuel rail. Basically, stainless steel supply/return lines that clamp to the intake manifold.

The stock Hesco/Mopar kit came like this;

20200330_160334.jpg

I robbed another clamp off of a 2.5 liter YJ to better secure the lines:

20200330_184349.jpg

I also spaced the stainless steel lines off of the intake manifold with some brass spacers, to reduce heat transfer:

20200330_184354.jpg

I also spaced them off the intake to eliminate "rubbage":

20200330_184413.jpg

If you go to a junkyard, many stock 4.0's have a bracket that bolts to the intake that drops the fuel lines down a couple of inches below the intake manifold. This will NOT work on a CJ, if you lower these stainless steel lines they will foul on the steering shaft.

Another interesting/PIA thing about these Hesco/Mopar supplied stainless steel fuel lines: they use nylon the last couple of inches to tie onto the quick disconnect fitting at the fuel rail. The nylon is sheathed in some type of rubber line:

20200330_184402.jpg

20200330_184407.jpg

More on this nylon crap in a bit.


I tied these stainless steel intake mounted hard lines to my stainless steel frame mounted hard lines with some short pieces of flexible fuel line. The tie in is in a very bust spot, down near the clutch bell crank/brake proportioning valve. I sheathed these lines in heater hose to protect them from rubbing through. At their nearest point, these rubber lines are still 5"-6" away from the exhaust pipe.

20200330_184422.jpg

20200330_185307.jpg

I figured that while the fender was off/easier access, good time to change these two short pieces of rubber line.
 

spankrjs

Scrambler Junkie
Lifetime Member
SOA Member
City
Biloxi
State
MS
I have been using this rubber fuel line, manufactured by Gates, sold at NAPA and many other auto parts stores:

http://www.napabeltshose.com/~/media/NAPA/Documents/NAPA_Barricade_4 Page Brochure.pdf

Basically, multi-fuel safe, good for 225 psi. I have had good luck with it, and will continue to use it.

Pictures of some new 1/4" hose and its markings:

20200330_192804.jpg

20200330_192813.jpg

20200330_192823.jpg

Manufacture date on the 1/4" hose, been on the shelf for a bit:

20200330_192924.jpg

Pictures of the new 5/16" hose and its markings:

20200330_192845.jpg

20200330_192851.jpg

20200330_192855.jpg

And its manufacture date, a bit fresher:

20200330_192903.jpg

I pretty much only buy and install this stuff, even for carburetor applications. This ensures all of my scrap/spare fuel line is fuel injection rated. This stuff costs a bit more then the lower pressure carburetor rated Barricade hose, but the cost is negligible.
 

spankrjs

Scrambler Junkie
Lifetime Member
SOA Member
City
Biloxi
State
MS
This is the rubber line that I pulled off, it is not the stuff pictured above, but it is some type of high pressure fuel line made by Gates:

20200330_194816.jpg

20200330_194837.jpg

20200330_194844.jpg

Whatever I originally installed held up well. After 10 years, no signs of deterioration. I also used the correct fuel injection hose clamps, two on each end. They were practically bonded to the rubber line, I had to pry them off the rubber lines. All in all, I think this is an acceptable method for short runs of fuel lines. I try to run hard lines everywhere, and short pieces of flexible line where needed.

Another good thing about these fuel lines/clamps: this stuff is available everywhere and you only need common tools to work with it. This stuff is easy to trail repair.


Back to the nylon portion. From the previous picture, it looks like the supply line has a kink in it. Well, last night, getting too rowdy with the return line, I kinked this nylon hose:

20200331_071915.jpg

20200331_071959.jpg


Have these kinks potentially cracked this nylon line? Maybe.

Do I change them out? Yes.

Do I buy the expensive tool to install the nylon hose correctly, or use Barricade rubber hose here? Not sure yet.


I am sure nylon fuel line is good stuff. But, this is the only part of any of my CJ's that use it. Not sure if it worth spending the money on a Nylon fuel line install tool to replace these two short pieces of line.

On my green Scrambler, with the single line fuel rail, I used a quick connect fitting designed for rubber fuel line. I used the above pictured Barricade fuel line here, double clamped, no problems. I am leaning toward doing the same here. Easy future/trail/road side repairs if needed, common/easy to obtain spare parts, no special tools required to install.
 

spankrjs

Scrambler Junkie
Lifetime Member
SOA Member
City
Biloxi
State
MS
This is what I did on my Green Scrambler, single line fuel rail:

1585664771590.png

NAPA/Dorman quick connect fitting at the fuel rail, Barricade rubber fuel line connecting it to the stainless steel intake mounted hard line, in lieu of the nylon fuel line.

Picture from green Scrambler thread showing the Dorman fuel rail fittings (the ones in the packets, NOT the ones on the fuel filter):

1585665107507.png
 

spankrjs

Scrambler Junkie
Lifetime Member
SOA Member
City
Biloxi
State
MS
Back to fuel line stuff.

The "quick connect" disconnect tool(s), shove it in the back, slide the fitting off the line:

20200403_152452.jpg

What the stock 4.0 fuel rail lines look like underneath the connectors:

20200403_152508.jpg

The o-ring inside the connector that seals against the raised ridge on the metal fuel line:

20200403_152657.jpg

I bought these connectors to use, 3/8" on supply side, 5/16" on return side:

20200403_153619.jpg

Part numbers:

20200403_153629.jpg

I cut the nylon lines off the stainless fuel lines, they already have some nice "anti-blow off ridges":

20200403_154433.jpg

When I first installed the MPI on this Jeep almost 10 years ago, I cheated. I cut my frame mounted stainless steel line off, and never put an "anti-blow off bubble" on the end of the line. Figured I would address this issue now:

20200403_162545.jpg

I used my Mastercool flaring tool, and was able to put this bubble on this frame mounted line without removing the line from the vehicle. I love this tool!!!!!!!!!!!

20200403_162509.jpg

20200403_162522.jpg

Kind of an expensive tool, but it performs flawlessly.

I also pulled this bracket/clamp/bolts from a 1995 Jeep Grand Cherokee 4.0. It was in the junkyard. I need to go back and pull some more parts off this thing, it was the only "dual fuel port fuel rail" 4.0 in the entire yard.

20200404_161150.jpg
 
Top