• Notice for iPhone users: DO NOT use the image size reduction option when uploading photos to the forum. This causes portrait images to post as landscape. We have added a warning to the image insert pop-up as well.

1984 SL Restoration

Good afternoon
Awesome write up, curious what drain cock you used to replace cheap plastic one ?
Any part number or size would be greatly appreciated.
Had to dig it out of the trash can, here you go :thumbsup:

20210302_072047.jpg
 
Last edited:
No work on the Scrambler last night, too busy with real job/buying parts for yet another Scrambler "project/step child".

I was glad to see no huge puddles of gear oil, motor oil, power steering fluid, or coolant on the garage floor :fingerscrossed::fingerscrossed:

Sometimes it is the little things :woohoo:
 
Love the detail on your write ups as always..:headbang:

FYI, the reason the overflow nipple points that way is that is not the factory HD radiator style, it would have offset filler and points to driver side for overflow. If standard cooling, the nipple points the other way and just went to the earth, no overflow bottle from the factory, and center fill on the radiator.
 
Love the detail on your write ups as always..:headbang:

FYI, the reason the overflow nipple points that way is that is not the factory HD radiator style, it would have offset filler and points to driver side for overflow. If standard cooling, the nipple points the other way and just went to the earth, no overflow bottle from the factory, and center fill on the radiator.

Thanks :thumbsup:

I remember both of my older '78 models just had the hose dumping to the ground on the passenger side.

I always "assumed" all of the '80 model CJ's had the overflow bottle, standard cooling or HD, but I am probably incorrect. I like the coolant overflow bottles, they tend to kill less cats/dogs!!

I always try to add the overflow bottles now, just to prevent the antifreeze mess on the ground/floor :thumbsup:
 
Thanks :thumbsup:

I remember both of my older '78 models just had the hose dumping to the ground on the passenger side.

I always "assumed" all of the '80 model CJ's had the overflow bottle, standard cooling or HD, but I am probably incorrect. I like the coolant overflow bottles, they tend to kill less cats/dogs!!

I always try to add the overflow bottles now, just to prevent the antifreeze mess on the ground/floor :thumbsup:
I am so with you on that...it was pretty silly they did it that way, and I run bottles all the time as well.
 
Back on this project again.

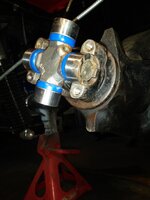
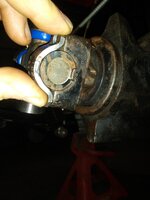
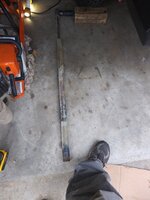
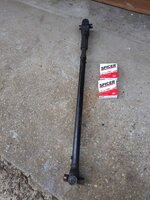
Pulled the front drive shaft out, cleaned it up, installed new u-joints, put a new coat of paint on it (and cleaned/painted my used rear drive shaft, not pictured).

20210313_113916.jpg

Using the Harbor Freight garage as a paint booth:

20210313_150459.jpg

20210313_150445.jpg

In between painting and u-joint removal/installation, filled the master cylinder up and gravity bled the brake system.

20210313_152149.jpg

I always dread adding brake fluid to a freshly painted Jeep!! I had to tighten up the rear brake line fitting at the rear flex line, and one master cylinder line. Other then that, no leaks so far :fingerscrossed:

Finished the day by draining out the transmission and transfer case fluid.

20210313_172153.jpg

I prefer to do this outside, after I have driven the vehicle to warm everything up. But, I needed to drain the transfer case to change the front output shaft oil seal and readjust the front output shaft end play. So, just drained them both.

And it was some old nasty crap:

20210313_172158.jpg

Orangish red stinky fish oil crap. Transfer case was 1/2 empty due to the leaking seal. The T5 was full.

At least I can start tomorrow by not having to deal with that stinking mess first thing in the morning!!!

That's it for now!!!
 
Goofed off some this morning, but still got what I wanted to accomplish today completed.

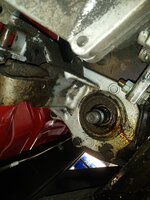
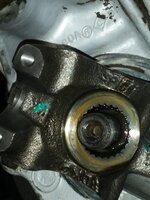
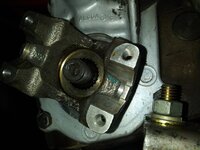
More tools all over the floor, pulling the front output shaft yoke off the Dana 300 to investigate a leak.

20210314_123516.jpg

It has been leaking since way before JeepAddicts purchase, note the cool yellow/red stain on the aluminum from the nasty old gear oil:

20210314_123539.jpg

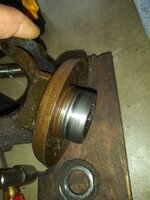
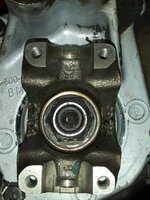
This yoke is grooved too bad to repair. The front yoke is down low, completely submerged in gear oil, so if I even have the slightest doubt about a yoke, I swap in a new one. Cheap insurance on a PIA leak/repair. Also note all the glitter.

20210314_123525.jpg

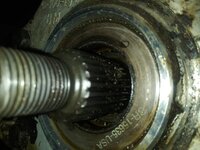
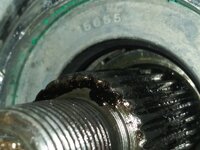
Part number visible on the existing oil seal. I think someone tried to fix the leak, but added more shims on the back side on the output shaft, increasing the end play, causing a bigger leak, due to the yoke plunging in and out so much.

20210314_124947.jpg

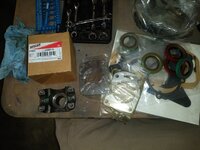
Good thing I keep some inventory!!! I had a new spare yoke, a couple of leftover output shaft seals, and plenty of shims from all the Dana 300's I have rebuilt over the last 10 years!!!!

20210314_123603.jpg

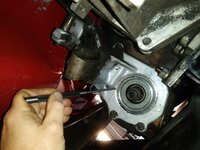
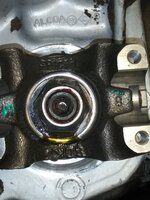
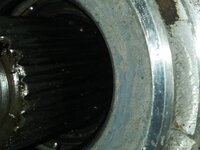
I cleaned the front of the case up, installed the new output shaft seal. A little tricky with the skid plate in the way, but not too terrible. In the below picture, I am pointing at the "circle" that the metal dust shield on the OEM yoke wore into the front of the aluminum housing. The front output shaft had excessive play for awhile, that had to make some racket!! That is where all the "glitter" on the old yoke/grime on the front of the transfer case came from!!!

20210314_133851.jpg


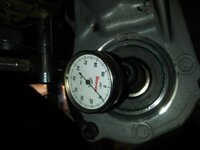
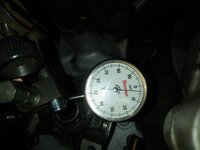
Setting up the dial indicator just to get a base line reading. I already knew the end play was excessive, and it is, at close to 10 thousandths:

20210314_135022.jpg

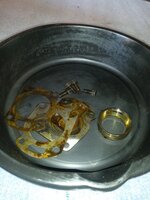
To adjust the front output shaft end play, pretty easy. On the back of the transfer case, below the fill plug, there is a thick steel plate held in position by four bolts. Remove the bolts, the plate/shims/bearing race/and more nasty old gear oil crap falls out.

20210314_140057.jpg

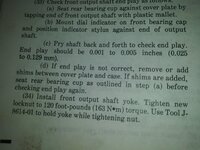
According to the FSM, this is the end play you are looking for. At this spec, there is no "in/out" movement that you can feel with your hand, and the bearings turn smoothly.

20210314_135555.jpg

This transfer case had a 30 thousandths shim and a 6 thousandths shim. I pulled the 6 thousandths out, substituted in a 1 thousandths, and installed the new yoke.

Checking the end play, within range:

20210314_162558.jpg

I went ahead and removed the 1 thousandths shim, sealed it up, done. With approximately 2 thousandths end play, no in out plunge, bearings still spin free.

Not sure why this happens to the front output shaft bearing end play? These bearings feel fine. I have had to readjust the front output shaft end play on numerous Jeeps, including on transfer cases I had recently rebuilt? On the rebuilds, it is usually minor adjustments.

Oh well, easy enough. The rear output shaft feels great, so that made me happy!!!

Refilled the transfer case with gear oil and called it a day.

With this chore complete, I can reinstall the driveshafts, then reinstall the wheel hubs, adjust the rear brakes, a few other odds and ends, then finally put the new wheels and tires on.

That's it for now!!!
 
I remember adding a whale oil additive to the rear of my Scout many moons ago. It was 2wd. What oil did you use in the 300?
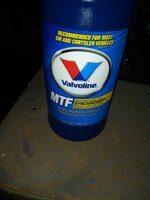
 
Filled up the T5 the other day with the stuff pictured below:

20210315_195707.jpg

I have been using this stuff in T5's the last few years, haven't blown one apart yet with this stuff inside them LOL!!!!!! Thicker then ATF, thinner then gear oil, like motor oil.

While filling thr T5, noticed this:

20210315_175739.jpg

Gear oil leaking out of the freshly installed Dana 300 front output shaft yoke. Specifically, leaking out between the yoke and the splines of the output shaft. I sealed the yoke with the Aviation Sealant stuff, which I have done numerous times with no leaks, so no idea. I did reinstall the yoke and then immediately filled up the transfer case, but no leaks on the back of the case using the same sealant on the bearing shims/rear plate. Maybe because it is completely submerged in gear oil, but so is the back plate which isn't leaking.

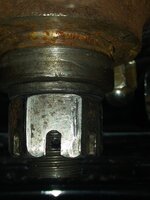
No since crying over spilled gear oil, let's investigate. Since every thing is clean, not too bad. Drained the transfer case, pulled off the yoke washer and nut. First thing I noticed, even though I torqued the nut to 120 foot pounds, I do not think the yoke was bottomed out against the front bearing:

20210315_202715.jpg

You can definitely see the gear oil leaking from between the splines/yoke.

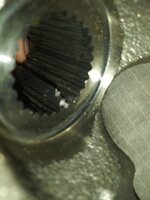
Pulled the yoke off with a puller, the splines on the front output shaft are good, no twists, no sealant left, it all washed out??

20210315_205014.jpg

20210315_205023.jpg

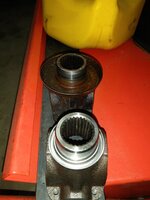
The replacement Spicer yoke matches up perfectly with the yoke I removed, minus the OEM metal dust shield.

20210315_205041.jpg

20210315_205100.jpg

I used the caliper to measure the distance from the end of the front output shaft splines to the outer face of the front bearing inner race. With rhe yoke installed all the way, bottomed out against the bearing as it should be, the yoke splines will protrude past input shaft splines maybe 1.5-2 mm.


20210315_211732.jpg

I had a larger gap at the end, the yoke was not bottomed out all the way, even after being torqued to 120 foot pounds???
 
I have a spare/used/OEM Spicer front output shaft, so I installed the new yoke on it. I used the press, it did not really need to be pressed on, but better then beating it on with a hammer. Again, not really a press fit, little to no effort required.

20210316_180658.jpg

Without a front bearing on the output shaft, the yoke easily slides all the way down to the bottom of the output shafts cut splines.

20210316_180704.jpg

Used a two jaw puller, easily removed the yoke from the spare output shaft.

So, the only thing I found was that the yoke was not bottomed out upon initial installation, and no sealant evident/remaining on the splines.

This time, loaded the splines up with Aviation Sealant, and made sure the yoke was bottomed out against the bearing before installing/torquing the retaining nut:

20210316_183225.jpg

I used an impact socket and a 2 pound hammer, gently drove the yoke down the output shaft splines until it bottomed out against the front bearing. I did NOT have to beat the hell out of it, just some gentle persuasion. I could tell it bottomed out by the sound/feel/bounce of the hammer.

Installed the washer and nut, torqued the nut to 120 foot pounds. Will let the sealant cure 24 hours before I add some gear oil and check for leaks.

I have never had this issue with the Aviation Sealant before, so who knows??? If it leaks again, I will try some Gear Oil Specific RTV. I hope it works this time!!!!!
 
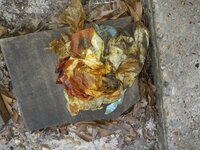
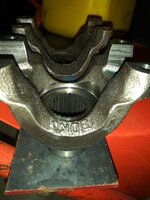
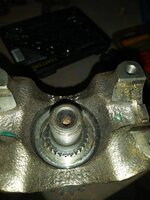
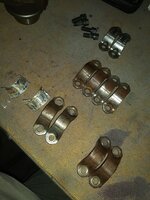
Trying to solve another mystery: When I removed the rear driveshaft/u-joint from the AMC 20 pinion yoke, these home made beer can shims fell out from between the straps/u-joint caps:

20210316_191553.jpg

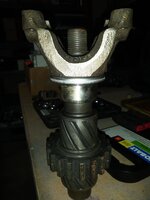
Test fitting a new Spicer u-joint in the original yoke, fits perfectly:

20210316_191250.jpg

Test fitting a new strap on a new u-joint/old yoke, looks good to me:

20210316_191310.jpg

Compared to new yoke/strap/u-joint, looks and feels the same:

20210316_191517.jpg

Who knows?? Maybe the original/old u-joint had the wrong caps on it, or had some strange wear?

Between the beer can shims on the u-joint, busted spider gear inside the rear differential, and excessive play on the Dana 300 front output shaft, this Scrambler might have had a very interesting life before JeepAddict bought it!!

Never know what you are going to find.

That's it for now!!!
 
It’s been a while since I’ve been through a D300. But, I was thinking- if the yoke wasn’t fully seated against the bearing, will that effect the shim pack on the rear plate?
 
It’s been a while since I’ve been through a D300. But, I was thinking- if the yoke wasn’t fully seated against the bearing, will that effect the shim pack on the rear plate?
No :thumbsup:

The front bearing plate holds the front bearing race stationary, trapping the front bearing between the race/large gear.
The opposing rear bearing is held stationary by the removable rear plate.
Shimming the rear plate adds play, removing shims tightens it up, independent of the yoke.

It is not like a pinion on a rear axle where the yoke holds the outer bearing stationary, like an AMC 20 rear axle :thumbsup:
 
spankrjs I'm getting ready to need several u joints for my build, where are you buying your Spicer at ? I bought my tie rod ends at napa an 2 were made in USA and 2 in turkey. Were those made USA ?
 
spankrjs I'm getting ready to need several u joints for my build, where are you buying your Spicer at ? I bought my tie rod ends at napa an 2 were made in USA and 2 in turkey. Were those made USA ?
I buy all my Spicer stuff from the local driveshaft/ring and pinion/spicer dealer, Stan's Powertrain.

I think most Spicer might be overseas, too?
 
Greased and installed both driveshafts:

20210319_171638.jpg

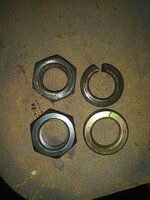
Installed a new pitman arm nut and lock washer:

20210319_185315.jpg

Working through my ever growing/shrinking/changing to do list:

20210319_190925.jpg

Plan to install the rear axle wheel hubs tomorrow. Going to gamble my shim method is good to go. Adjust the rear brakes, then bleed the brakes. Hopefully brake bleeding goes well/easy, I always dread messing with brake fluid and new paint!!!

If the brakes bleed out, I can take this thing off jack stands and put it on it's new wheels and tires, finally.

Knock out some easy under hood stuff, a few easy dashboard items, remove/clean/paint a few exhaust hanger bits and pieces.

After that, prime the oil system, and start fabricating/obtaining/installing an exhaust system.

Maybe fire this mother up and drive it next weekend :fingerscrossed:
 
Got the rear axle hubs reinstalled. The passenger side was the original hub on the original shaft, so basically like this:

20210320_091349.jpg

On the driver side, I installed a NOS hub on the original axle shaft, so a little different, took some man $hit:

20210320_091412.jpg

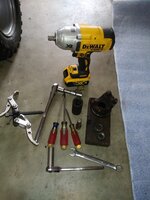
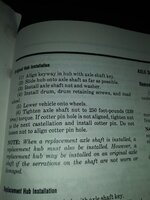
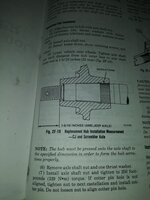
The 1/2" drive DeWalt impact would NOT get the hub down the required 1-5/16". But, the 3/4" drive ratchet with a 5' cheater pipe did the trick, with my 185 pound pushing the pipe down with my leg!!

20210320_134406.jpg

The passenger side lined up at 250 foot pounds on the dot. I have no idea how much torque it took on the driver side to cut the threads into the NOS hub, but more then what the 1/2" impact could deliver.

I was very happy when the driver side got to the 1-5/16" and the cotter pin hole finally lined up.

20210320_102534.jpg

Anyway, with the rear wheel hubs finally installed, knocked out some other non picture worthy stuff:

Adjusted rear brake shoes
Bled master cylinder
Bled out all the brakes

Was very happy the brake bleeding operation did not show/cause/make any leaks, so no stripped paint.

Will try to knock out some more easy stuff tomorrow.

That's it for now :wave:
 
Back
Top