• Notice for iPhone users: DO NOT use the image size reduction option when uploading photos to the forum. This causes portrait images to post as landscape. We have added a warning to the image insert pop-up as well.

Project Panel Replacement

Last set of pics for today.

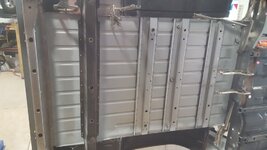
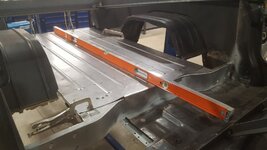
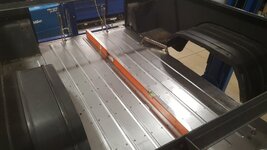
Mostly just proud papa pictures as now the bed sits as it should.
Took most of the day of on/off and trimming, but it fits pretty good.
20211226_162717_resized.jpg

20211226_162723_resized.jpg

Gaps with the old/new panels look pretty close.
20211226_162734_resized.jpg

20211226_162745_resized.jpg

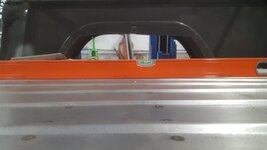
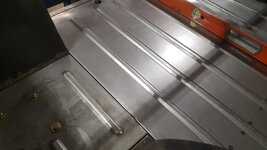
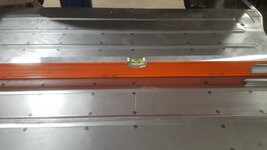
It's level... and actually level, not measuring messed up level.
20211226_162749_resized.jpg

20211226_162758_resized.jpg

The only issue at the moment right now is that there is a slight gap under the level where I will need to jack up the bed floor ever so slightly when attaching to the new wheel wells... other that that, I just need to mark it, drill it, prep it, weld primer it, milk the cows, walk the goats.

Jeez look at the time. I gotta get to bed. I still gotta brush my teeth, feed the hog, still got some homework to do, still got those bills to pay, wash the car...

cb

PS> Last Griswold Christmas reference for the year.
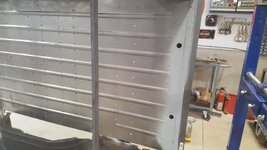
 
The floor is aligned and in the right spot... time for drilling/screwing/welding.
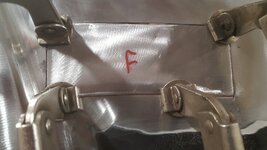
36 holes drilled and screwed... welding hopefully today.

20211227_141319_resized.jpg

20211227_141325_resized.jpg

20211227_141339_resized.jpg

20211227_141350_resized.jpg

It is nice to have the rigidity back in there and it looks just so much better. I was able to save the rear support with a lot of hammering and straightening. All in all, I am satisfied.

Getting closer to the overall level as well... I need more support from the side pieces, not just underneath.

20211227_141820_resized.jpg

20211227_141838_resized.jpg

The gap is closing up and just a little on the right side, while overall being level.
I will get it as close as I can.

cb
 
I got the front area all drilled/screwed and moved onto cleaning up the wheel well... it is in a lot worse shape than I had hoped.

20211228_142147_resized.jpg

I also got the rear rollbar support all spot welded underneath and settled in its final place.
The top welding will wait till the end of the replacement of all panels.

I plan on going back to front on the passenger side and then front to back on the driver side to do the floor... ending up in the back where both rear corner panels need replacing and then finally the tailgate support area on the driver side that was punched in.

This is turning out to be quiet the replacement project.

20211228_152019_resized.jpg

20211228_152030_resized.jpg

Spent hours trying to get the wheel well cleaned up.

20211228_154809_resized.jpg

20211228_154801_resized.jpg

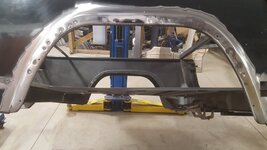
The outside has a lot of thin metal. I need to fix it before the wheel well goes in place.
Also to the right of the artch, there is daylight, the side bed metal where the front rollbar foot goes rotted through as well.

20211228_152014_resized.jpg

20211228_154732_resized.jpg

Anyway, I used the "imagining tool" for any of you fans of Ian Roussel and his belief you have to see it first before you make it a reality.

20211228_154515_resized.jpg

20211228_154508_resized.jpg

Until the next time.

cb
 
Last edited:
Curious to ask if you leave the screws in or are they temporary just to make sure all is good before welding up?.
 
Curious to ask if you leave the screws in or are they temporary just to make sure all is good before welding up?.
I will remove one at a time and weld... I wanted the panels to be tight together, so if I remove one in the middle and weld it, then hop over one to the next, and repeat, it should all stay tight up against the under supports.

cb
 
I will remove one at a time and weld... I wanted the panels to be tight together, so if I remove one in the middle and weld it, then hop over one to the next, and repeat, it should all stay tight up against the under supports.

cb
I thought that may be the case, so you will be essentially spot welding it from above (or below) and sanding it off after, makes sense as the screws can be removed and the panel tweaked if need be before final welding.
Great work as always CB, i still no have no idea how you find the time to do all this work i assume you must have a time machine somewhere or a NH day is different and somehow 32 hours long :unsure:
 
I suspect Craig's shop is heated and ready for him when he gets the time. There's snow on the ground where I am and I don't get much done because my shop is cold.
 
Great work as always CB, i still no have no idea how you find the time to do all this work i assume you must have a time machine somewhere or a NH day is different and somehow 32 hours long :unsure:

It's like this Dave:

We still use Her Majesty's imperial system rather than that cute French system.

Much like the gallon is larger than the litre and the inch is longer than the centimetre; the Imperial Day too is more substantial. This is why we accomplish so much more in 'Murica and why the English accomplished so much more in the 50s and 60s before becoming convinced that the European ways were superior.

One need look no further than the accomplishments of our Australian forefathers before metrification in '74-'78; building such projects as the Snowy River scheme. Compare this to the cafe accomplishments of today's latte-sipping socialist Australians to see the pattern.

You must merely once again observe the Imperial Day and you too will accomplish feats like Craig.
 
Last edited:
I suspect Craig's shop is heated and ready for him when he gets the time. There's snow on the ground where I am and I don't get much done because my shop is cold.

I have a guy coming out in the new year to talk about heat... I need it, it is freezing out there... last night I was working in 40 degree weather... my body is fine for the most part, but my hands are the issue.

cb
 
I thought that may be the case, so you will be essentially spot welding it from above (or below) and sanding it off after, makes sense as the screws can be removed and the panel tweaked if need be before final welding.
Great work as always CB, i still no have no idea how you find the time to do all this work i assume you must have a time machine somewhere or a NH day is different and somehow 32 hours long :unsure:
If I had a time machine, I would go back and buy brand new Scramblers and stock them away in a warehouse and then sell them "like new" these days... it would save a ton of work :)

cb
 
So last night I dug into how bad the arches are... and they were as I expected... rusted and filled with mud... I made a mess with bondo dust and the grinder. Rust can be replaced, and pitting is expected... holes need patching, but when you entwine the mud and the rust/holes, you can't weld to that.

The top middle portion got thicker and thicker with mud, so I gave up and will just cut it out and replace it... the sides have holes that ned patching. The pitting will probably be cut out as well. I want to keep original metal where I can... I can cut this all out and replace with a panel, but the shape isn't quite 100% there, so this will be tedious and replace piece by piece. The other side looks to be in better shape, but I am not holding my breath. This is what lurks underneath paint that looks "good", so keep that in mind when checking out new projects.

20211229_175352_resized.jpg

20211229_175402_resized.jpg

20211229_175410_resized.jpg

20211229_175415_resized.jpg

20211229_175421_resized.jpg

20211229_175426_resized.jpg

So I got mad and moved onto the metal replacement.

20211229_175356_resized.jpg

20211229_182113_resized.jpg

20211229_181956_resized.jpg

It is ready for welding in now... it took a while to fit it up, but it needed to be replaced, there was too much thin metal and rot.

cb
 
Back
Top