• Notice for iPhone users: DO NOT use the image size reduction option when uploading photos to the forum. This causes portrait images to post as landscape. We have added a warning to the image insert pop-up as well.

2tall's Scrambler Journey

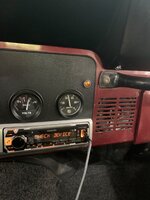
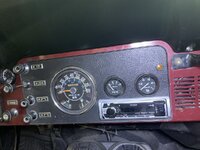
Got tired of the haggard looking factory voltage gauge and mismatched oil pressure gauge, so picked up these Autogage units and copper line kit for the oil pressure from Amazon. Maybe one day I’ll change up the radio situation too.
IMG_6222.jpeg
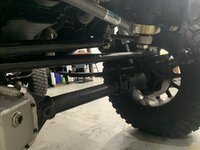
Also got rid of the drop pitman arm in favor of a stock one. The drop one wasn’t necessary with the high steer setup. Really like the Seymour stainless steel paint for its finish and color.
IMG_6224.jpeg
 
Last edited:
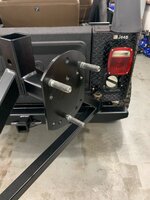
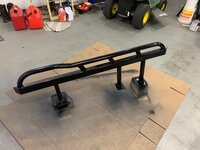
Not much of a project, but fixed one of the hack job fab I did when I initially installed the rear swing out bumper. Originally I just welded on the Barnes 4wd plate to get the 8x6.5 pattern and some too long 9/16 bolts. The bolts were so long I had to put 2 1/2” spacer to get the lugs to tighten up and the tires stuck out from the carrier. Cut those off and found the appropriate studs from a trailer supply place. Reamed out the holes to size and pressed in the studs. Now the spare mounts perfectly against the carrier with just one of the spacers.
IMG_6428.jpeg
 
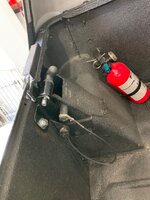
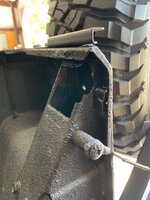
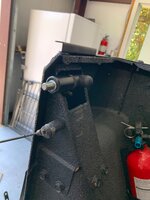
A guy on Instagram posted about these a few weeks ago so I preordered a kit and just got them a few days ago and finished up the install.

IMG_6482.jpeg
Takes a little trimming on the braces to make them fit.
IMG_6479.jpeg
Took off the minimal amount of material possible.
IMG_6478.jpeg
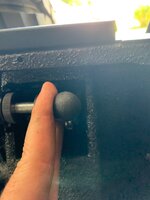
Plenty of room to pull the release handle.
IMG_6480.jpeg
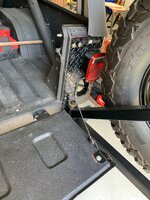
Tailgate side is bolt on.
IMG_6481.jpeg
Now the tailgate just slams shut and pull the spring loaded latches to release.

I’ll definitely be looking into using some of his other products in the future.
 
A guy on Instagram posted about these a few weeks ago so I preordered a kit and just got them a few days ago and finished up the install.

View attachment 116799
Takes a little trimming on the braces to make them fit.
View attachment 116800
Took off the minimal amount of material possible.
View attachment 116801
Plenty of room to pull the release handle.
View attachment 116802
Tailgate side is bolt on.
View attachment 116803
Now the tailgate just slams shut and pull the spring loaded latches to release.

I’ll definitely be looking into using some of his other products in the future.
Never seen them before. Nice looking item/idea. Decent price also, under $100.
 
These are interesting as well:

 
Interesting but I was a hardcore RAM XMount guy until I found the Bulletpoint mounts and they make something like this that I would have gotten for the JKU except that the guy already has another setup.

Nothing saying you couldn’t use this mount with the Bulletpoint, but I’ll never buy another RAM mount.

 
@bigwalton I’ve been contemplating the dash mount and something like the ram mount or stuff you posted to hold a few items. With the LS swap I use a Scangauge 3 for additional gauges/monitoring and a secure phone mount. I’ll take a look at blue point’s offerings.
 
I have the 67 design mount in my JL, the best thing I have done to the vehicle so far. Love having my phone on the dash and charging via the mag mount.
 
A guy on Instagram posted about these a few weeks ago so I preordered a kit and just got them a few days ago and finished up the install.

View attachment 116799
Takes a little trimming on the braces to make them fit.
View attachment 116800
Took off the minimal amount of material possible.
View attachment 116801
Plenty of room to pull the release handle.
View attachment 116802
Tailgate side is bolt on.
View attachment 116803
Now the tailgate just slams shut and pull the spring loaded latches to release.

I’ll definitely be looking into using some of his other products in the future.
I like the idea of it, but wouldn't it be a pain in the butt to open both latches at the same time??? Especially with the back window on...

edit: i see the video on their website... just seems to me that the latches are spring loaded, I would think it would pop back closed unless there is some tension holding it open long enough to open the other latch...
 
I like the idea of it, but wouldn't it be a pain in the butt to open both latches at the same time??? Especially with the back window on...

edit: i see the video on their website... just seems to me that the latches are spring loaded, I would think it would pop back closed unless there is some tension holding it open long enough to open the other latch...
I never use my back window so I can’t speak for the difficulty with it in place. In my case I’m able to release one side then the other without the first side latching back. It’s basically like you said, it opens just enough to not latch back.
 
I like the idea of it, but wouldn't it be a pain in the butt to open both latches at the same time??? Especially with the back window on...

edit: i see the video on their website... just seems to me that the latches are spring loaded, I would think it would pop back closed unless there is some tension holding it open long enough to open the other latch...
Thought the same thing until I watched the video.
 
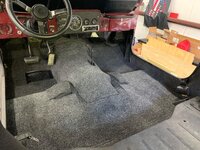
This is something I’ve been looking forward to after helping a friend install a Bed Rug carpet kit in his TJ, and then talking with @spankrjs when I met him a while back about how much carpet helped his Jeeps’ interior heat. I ordered the YJ/CJ Bed Rug carpet kit from Quadratec.


Pulled out everything bolted to the floor, vacuumed, scrubbed, rinsed and dried the front area.
IMG_6517.jpeg
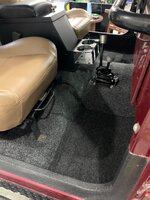
Touched up a few spots with rust reformer paint and also moved the console a few inches forward.
IMG_6519.jpeg
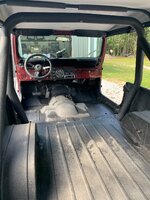
Mostly laid in place and stuck down. Hopefully the tub side Velcro pieces stick to the bedliner or I’ll be revisiting it for a alternative solution.
IMG_6520.jpeg
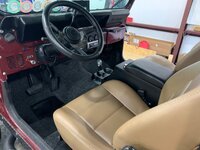
Since none of my seat mounts, console, or shifters are stock I cut holes from everything and bolted down through the carpet.
IMG_6521.jpeg
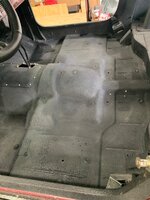
Turned out pretty well in my initial impressions. Hoping it helps with the floor temps. The 2 footwell and center hump pieces included some stick on heat barrier.
IMG_6522.jpeg

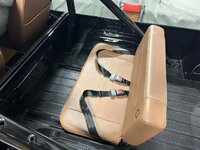
Also considering a universal trim to fit mat for the rear and redoing the mounting for the backseat in the future.

 
Not mine, but something I came across on a Scrambler Facebook group. Thinking something similar to this but bolt down. This would allow me to move the rear seat back for more leg room without drilling a bunch of extra holes. My tub already has the 5 original holes.
IMG_6378.jpeg

IMG_6377.jpeg
 
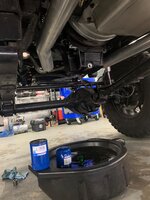
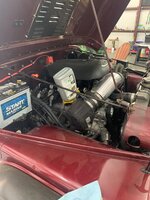
Decided to take care of the annual oil change a little early this year due some upcoming life stuff.
Only managed 260 miles in 11 months, hope to improve that for next year.
IMG_6529.jpeg
Found the larger AC Delco filter in stock at Wally World and swapped to Mobil 1 5w-30 since the rest of the fleet uses it.
IMG_6531.jpeg
Glorious oil pressure. I still get nervous after losing oil pressure years ago and having to rebuild it.
IMG_6530.jpeg

Might take her out for a cruise or carshow this weekend.
 
Decided to take care of the annual oil change a little early this year due some upcoming life stuff.
Only managed 260 miles in 11 months, hope to improve that for next year.
View attachment 117578
Found the larger AC Delco filter in stock at Wally World and swapped to Mobil 1 5w-30 since the rest of the fleet uses it.
View attachment 117581
Glorious oil pressure. I still get nervous after losing oil pressure years ago and having to rebuild it.
View attachment 117580

Might take her out for a cruise or carshow this weekend.
I've been running the big filter for so long I didn't remember it was that much bigger. Big difference!
 
I've been running the big filter for so long I didn't remember it was that much bigger. Big difference!
Yea It’s been a few years since I’ve used one too. Luckily I had a partial quart on hand as I needed an extra half quart to get it on the mark.
 
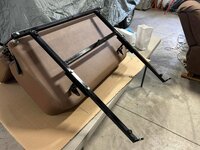
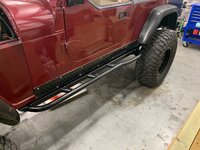
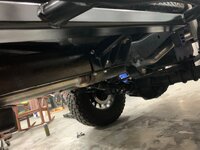
Finally pulled the trigger on something to replace the smittybilt tube steps. Whiteknuckle Off-road frame mounted rock sliders. Took a few weeks to come in as they build after ordered.
IMG_6880.jpeg
Much tougher looking than the poorly installed tube steps
IMG_6878.jpeg
Installs with self threading bolts. Seem pretty secure, but I’ll consider welding if I ever get serious into wheeling it.
IMG_6881.jpeg
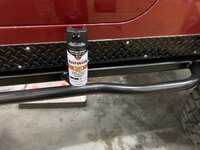
Acid etch primer and this as a top coat, so I remember in the future for touch ups.
IMG_6879.jpeg
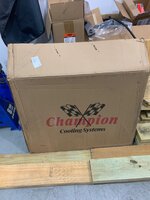
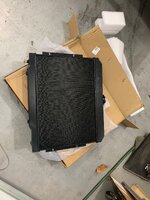
Next project in the queue.
IMG_6882.jpeg
Champion 3 row black aluminum radiator.
IMG_6877.jpeg

Currently bypassing the radiator trans cooler and going straight to an external oil cooler. I’m considering utilizing the cooler in the new radiator. Out of the trans, into rad cooler, out of rad cooler into external cooler, out of external cooler back to trans? Any automatic guys running like this? Or is cooler the better still the thought process?
 
That's how I ran the auxiliary transmission oil cooler when I had my old tan Scrambler, 350 with 700R4.

Radiator cooler, auxiliary cooler, back to transmission
 
That's how I ran the auxiliary transmission oil cooler when I had my old tan Scrambler, 350 with 700R4.

Radiator cooler, auxiliary cooler, back to transmission
Seems to be the way the OEMs design it on all the vehicles with eternal coolers I’ve had experience with. Probably the way I’ll go when I get around to it.
 
Back
Top