• Notice for iPhone users: DO NOT use the image size reduction option when uploading photos to the forum. This causes portrait images to post as landscape. We have added a warning to the image insert pop-up as well.

Another Scrambler Purchase/Road Trip - UPDATE- BODY ON FRAME AGAIN

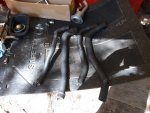
Cleaned up all the other parts for reuse. I will install new fuel/vapor lines, and clamps.
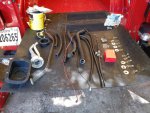
20200927_112532.jpg

I had a spare aftermarket sending unit on hand, just in case. Picture is not too good, but they are pretty close.
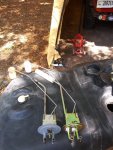
20200927_120810.jpg

Lubed up and reused the OEM sending unit o-ring. It worked fine before, no crap inside the gas tank!!

20200927_121504.jpg

Installed the sending unit, lock ring, and all new rubber fuel/vapor lines and clamps:
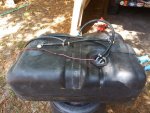
20200927_124404.jpg

Installed my protective sheaths over the fuel supply and return lines:
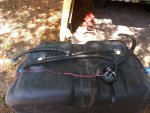
20200927_125157.jpg

Put the rubber protective mats in place:
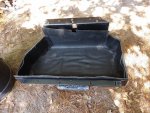
20200927_125653.jpg

Dropped the tank in, strapped it down:

20200927_130336.jpg

Put the heavy assembly on the floor jack, got it up and bolted in place.

I am using regular grade 8 bolts to hold the tank up at the rear lip. The OEM style bolts with the square part that locks it in place to the cross member, with the little round retainer washers, would be better. The grade 8 bolts are stronger, but harder to get tightened since you can't hold the heads with a wrench and keep them from spinning. I have lock washers under the head and nut, which works. But, if you damage the threads on the part of the bolt that is hanging down, it gets fun.
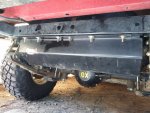
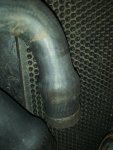
20200927_142259.jpg
 
When I originally swapped in this 20 gallon tank, replacement fill/vent hoses were unavailable. I "temporarily" installed YJ Wrangler 15 gallon tank hoses. This worked OK, but not perfect.

YJ hoses on left, Scrambler hoses on the right:

20200927_142501.jpg

I remember I had to really stretch/heat the YJ hoses to get them to fit over the CJ 20 gallon tank nipples. This did eventually cause them to start cracking at this stress point.

20200927_142515.jpg

20200927_142519.jpg

Besides this self inflected damage, these MTS Hoses faired really well.
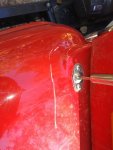
And finished:

20200927_151449.jpg

And of course, no change. Fuel pressure still rapidly drops to zero after key prime.

One potential clue - While the fuel supply line was disconnected from the fuel filter, the fuel leaking back out the fuel filter was brown. Maybe the filter is plugged up from a bad tank of gas in Michigan? The problem did suddenly start? I might not have a "pressure" problem, but a "flow" problem?

So, maybe I did all this for nothing. Well, at least I ruled out some possibilities.

Two hour test drive after all this, no change. Still runs perfect, just will not immediately start up like it should.

I will change the fuel filter next, and report back.

If that does not fix it, I already ordered a one way check valve for the fuel supply line.

I have to get a wisdom tooth cut out Tuesday, so might be down for awhile.

That's it for now.
 
Let's see, had a wisdom tooth cut out of my lower jaw on Tuesday, so changed the fuel filter Wednesday.

The fuel that came out of it was clean, so I think the "dirty fuel" I saw was the gas that was washing dirt/grime off the filter/hose:

20200930_170521.jpg

My "one way check valve" came in yesterday, had a cyst cut out of my back today, so I will install the check valve tonight and report back :eek:

Changing the fuel filter did nothing for my instant fuel pressure drop.

With no visible fuel leaks, my only "theory":

MAYBE the original fuel pump I had been running for 40,000 miles had a check valve built in that worked, but went bad. The new pump does NOT have a check valve, or if it does, it was defective out of the box.

I am going to install the inline check valve and report back.

That's all I got :shrug:
 
Put some line on the outlet of the pump you removed, maybe with a small container/tank on top, fill it with gas and see if gravity bleeds the fuel back through it?

If you’re losing pressure that fast, it would have to be coming through pretty quickly :shrug:
 
Yeah, man, hope you are recovering well. Don't let them take too many parts off you, might have to consider using parts monkey as an organ donor... :P
 
I received/installed the one way check valve on the fuel supply line downs stream from the fuel pump.

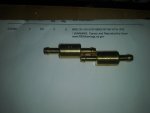
I ordered two valves, one to use and one spare, from US Plastics. They are brass valves with Viton seals:

20201002_170504.jpg

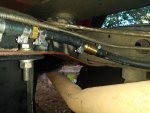
Easy install: I cut the short rubber fuel line that runs between the fuel pump and the stainless frame mounted hard line, two fuel injection clamps, done:

20201002_171710.jpg

Started the Scrambler up, let it run a few minutes to clear out the air in the line, then turned it off. No good, pressure still drops to 0 at the rail fast:

20201002_173047.jpg

OK, so lets assume the check valve works, and the fuel is not leaking back down the supply side. Only other place to bleed off that fast is the return line which comes out of the pressure regulator.

Quick "RedneckRay" test: had someone key prime the pump, when pressure hit 40psi, I clamped off the return line with plyers (wrapped an old piece of rubber hose over the rubber fuel line to protect it). What do you know, rail held 40psi. So, leaks is at the fuel pressure regulator.

I just changed the regulator a few weeks ago, but the regulator itself is not the only component in the assembly that can go bad.

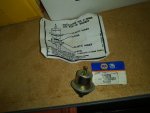
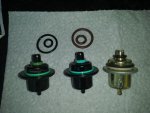
I swapped out the original Mopar FPR for another Mopar FPR. I also have a spare NAPA FPR in the spares box:

20201002_185421.jpg

Part number:

20201002_185435.jpg

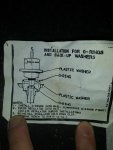
I should have read these instructions FIRST a few weeks ago when I swapped out the FPR:

20201003_121523.jpg

I installed the o-rings on the FPR first, then installed the whole assembly, and it was a bitch. Well, I guess that is why the instructions tell you to put the o-rings in the fuel rail first.

When I pulled the FPR and o-rings out, found my current problem: I tore the inner/smaller o-ring that seals the FPR to the outlet return line, causing the fuel to leak past the FPR one the pump was off.

20201003_121313.jpg

20201003_121354.jpg
 
A quick line up, left to right: original Mopar, replacement Mopar, NAPA replacement:

20201003_121239.jpg

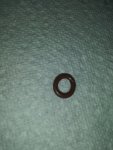
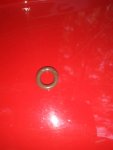
The original o-rings are the loose black ones, they are rock hard. The brown o-rings came on the replacement Mopar FPR, and I tore the small one during initial install. The two Mopar FPR's have green spacer rings. The NAPA FPR has a white spacer at the large o-ring, and no spacer ring at the small o-ring because it is made slightly different and does not require the spacer.

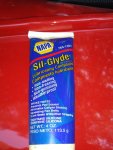
I lubed the hell out of the two o-rings, the FPR, and inside the fuel rail with this stuff:

20201003_122059.jpg

Not the best picture, but inside the rail lubed up wher o-rings in place:

20201003_122110.jpg

With everything lubed up, the FPR install was easy, no drama. This was probably my issue: should have put o-rings in the rail FIRST, then FPR. It went together like butter.

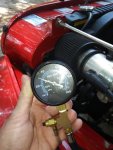
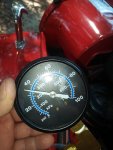
Idle pressure good:

20201003_124148.jpg

Turned off the engine, lose all vacuum, so pressure goes up a bit:


20201003_124211.jpg

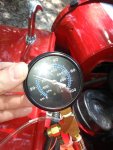
And the best picture, 20 minutes later, no pressure drop at the rail:

20201003_125258.jpg

Scrambler now fires right up like it should, again.

So, at least with the second FPR install the tore o-ring caused the problem. As for the original FPR, I assume it went bad. I might stick it back in there, with new o-rings, see if it is bad.

Word about these o-rings - they are hard to find and expensive. I ordered two Mopar FPR o-ring kits, part# 5013721AB M. They were $19 each. The guy at NAPA is going to call Balkamp and see if he can get the o-rings from them. I could not find these o-rings at any local auto part store?

I will install two new o-rings on the currently installed FPR, keep the other kit in the spares box. I keep one spare FPR, the NAPA one, it is around $85.00. You can get cheaper parts, but I would rather spend a bit more and get hopefully a quality part.

Crown makes these O-rings, sells them cheap, I won't trust them.

Anyway, Scrambler back in top shape, time to rest/heal up, then back to JeepAddicts pile in my garage!!!!
 
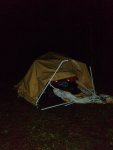
I blame this on complacency - too many false calls/near misses this hurricane season.

NOTE to self - Harbor Freight Garage Canopy's will NOT survive a Cat 2 hurricane!!!!!!!!!!!!!

20201028_211805.jpg

I went out in the middle of the storm and pulled out as many broken poles as I should to avoid too much damage to the Scrambler.

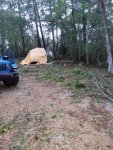
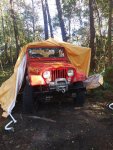
Next day, it looked like this:

20201029_070800.jpg

Pulling poles apart, cutting the fabric, unwrapping the Scrambler:

20201029_085831.jpg

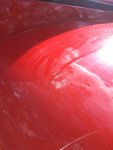
A few minor scratches on the hood/driver side front fender, no big deal:

20201029_090923.jpg

I should have pulled the Scrambler out of the canopy BEFORE the storm, parked it along side the Gladiator (which came through unscathed), then no scratches at all. Complacency....................................
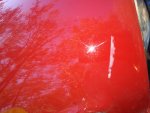
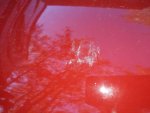
I never screwed the poles together on the Harbor Freight canopy, surprisingly, none of them slipped apart during the hurricane. The thin wall tubing they are made of failed, they basically bent back and forth so much they tore. All the auger are still in the ground. IF I would have pulled the canopy fabric off before the hurricane, it would have survived. Oh well, at least they are "cheap".

I had just finished all my yard work last weekend, ready to get back to "JeepAddicts" project (which is nice and safe inside my garage where my red Scrambler usually lives). After this storm, probably at least 10 days to clean up my 4 acres. Huge mess.

House is good, other Jeeps are fine, a few scratches and a destroyed Harbor Freight garage, I won't complain. No power for awhile, at least it is cool outside.

That's it for now:wave:
 
This storm was a sleeper. Built up to a cat 2 with strong wind. We had some serious gusts here in Baton Rouge but nowhere near the damage. Glad you came out ok.

Here’s the best part for me.
Moab- dented the fender, smashed a rock rail, busted tail light etc -So much fun.
Michgan- blew out a T-5 limped home -Swapped in a spare good to go.
Harbor freight canopy fell down in a cat 2 hurricane and scratched the fender- :banghead::evil::angry::mad::angry::angry: Die harbor freight canopy,die!:rotfl:
 
Just getting back on line here now with the help of a generator. Cable and internet works, but no electricity. We experienced the eye of the storm for 20 minutes. Power will probably be out another week. Thank goodness summer is over. The Jeep was hiding in the garage and safe.
 
Just getting back on line here now with the help of a generator. Cable and internet works, but no electricity. We experienced the eye of the storm for 20 minutes. Power will probably be out another week. Thank goodness summer is over. The Jeep was hiding in the garage and safe.

Glad y'all made it through OK. Still no power here in my neighborhood. Everyone around us has it. No lines or poles down in out subdivision, who knows. About 1/2 way through cleaning up the yard, day light saving time will halt that, dark when I get home from work. At least it is cool outside.
 
Yea we have power all around also, just our little street, nope. Happens every time. Many people in the area also have no power either though. At least the weather is fabulous, clear sky and 60-70s for days ahead. Power grid took a major hit, but because the storm moved through the area in record time, we feel very lucky compared to what could have been. It may sound a little strange, but I was actually able to stand on my front porch, protected from most of the wind and rain, and watch a lot of the storm. It was very interesting to see it happen.
 
Finally finished cleaning up the 4 acres of hurricane debris. So, had time to fix the Harbor Freight canopy. About $40 for some wood dowels, PVC pipe, a few saw blades, some nuts and bolts, good as new LOL.

20201121_103420.jpg

No pictures, but pretty simple repairs needed to get it back together. The whole thing is like a big tent. The poles slip fit together. One end is "swaged' down to fit inside either another pole or connector. About 10 of these "swaged" down ends snapped off. Luckily, 1-3/8" wood dowels fit tight inside the poles. I through bolted the dowels into place with some #10 nuts and bolts. The 1-3/8" dowels are too tight to slide in. So, a bit of sand paper to slightly turn down the OD of the wood, they would then slip fit/friction fit back together, better then new. I sleeved one pole with a piece of PVC on the outside to strengthen it. The "canvas" parts were all good, no rips. This time, I used Gorilla Tape and taped all the joints together. Next hurricane, I'll take the top off. Lesson learned, don't be complacent.

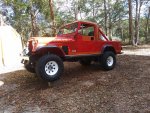
Since the red Scrambler had a home again, went ahead and washed it.

20201121_133958.jpg

I have found if I elevate the front on concrete blocks when I wash it, the bulkhead doesn't leak LOL.
 
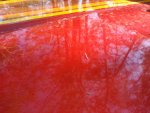
I have been using the Scrambler every day since the storm to clean up the yard. It luckily has not rained much since the hurricane. The dry conditions/daily use had it pretty grungy. The wash revealed the paint damage:

20201121_103426.jpg

20201121_103431.jpg

20201121_103437.jpg

20201121_103457.jpg

20201121_103509.jpg

20201121_103517.jpg

20201121_134005.jpg

20201121_134014.jpg

20201121_134024.jpg

I have not tried yet, but most of the white scuffs will buff out. It is paint from the poles, NOT scrapes through the paint into the primer. A few spots won't buff out, so they will just match all the other scratches LOL.

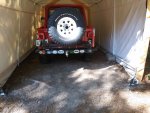
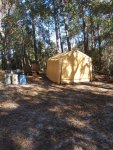
Since the other red Scrambler is currently occupying its home inside the real garage, my red Scrambler is back to tent camping again:

20201122_165730.jpg

The Harbor Freight garage does a great job of keeping the Scrambler dry/out of the weather. I would NOT trust it in snow, which we don't get, or hurricanes, which we do.

Since the weather has been dry and cool, I have been daily driving this one. Too busy at work to enjoy it any other way right now, so I will drive it as much as possible to/at work.

Yard clean, tent garage rebuilt, time to shift on to the other red one for a bit.

That's it for now.
 
And here I was hoping my garage would hold up to the storm. You got a lot of faith in tin poles and cloth. I always drive mine to the NO international airport concrete superstructure. This was the first time I was unable to since my engine/transmission/t-case are out. That is cheap protection. Cost me $20 for 6 weeks storage for H-Katrina because they didn't start charging until they opened back up after the storm.
 
Back
Top