• Notice for iPhone users: DO NOT use the image size reduction option when uploading photos to the forum. This causes portrait images to post as landscape. We have added a warning to the image insert pop-up as well.

Another Scrambler Purchase/Road Trip - UPDATE- BODY ON FRAME AGAIN

That's how they did that back in the day for fuel economy, taxes, etc. They used the bare bones, plain Jane version with no air con, no power steering, etc.
 
Just a quick update.

The Scrambler made it up to Michigan, played for a week, and returned safely home Sunday night. No major issues or problems, just two "notes":

1) On the way up to Michigan, after driving for about 4 hours, the clutch/transmission would not work right. From the sound/behavior, and I am purely speculating, the pilot bushing was seizing on the input shaft. With the pedal depressed, there was a unique high pitched sound. Also, the synchronizers in the transmission would not work correctly. If I double clutched, everything worked OK. This only happened a few times on the way up, only on downshifts, and has not repeated. Once I made it to Tennessee, never have had another recurrence. I will have to measure, but I am assuming that the pilot bushing I used had a tighter ID then the recommended unit. That, coupled with thermal expansion, caused it to bind. I am assuming it has self clearanced, no more problems, noise, or issues. The transmission and clutch action are still perfectly smooth, so I am "assuming" whatever issue there was fixed itself. Hopefully one of those times where something actually needed to "wear in" a bit :fingerscrossed: I had only put about 100 miles on the new clutch/pilot bushing/throw-out bearing/flywheel before this trip, so hopefully the pilot bushing just needed a slight "break in" period :fingerscrossed:

2) Slight power steering pump leak. It might have just been due to me overfilling the reservoir, but I will check the lines. It never leaked enough for me to have to add fluid, so hopefully that is all it is. The fluid is still reading "high" on the little dip stick.

54,000 + miles on her now since the rebuild 10+ years ago, hope for many more :cheers:
 
Nice when things fix themselves. Found a 97 wrangler to power the Scrambler. On its midnight run to bring it home on down hills the gear box or transfer case makes a ratcheting sound. I am guessing back lash..just dont know where. I dont think I am as lucky in the self repairing phenomenon...we will see though.
 
Finished up the last of the post trip maintenance this weekend.

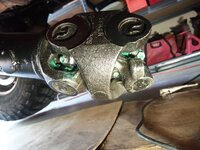
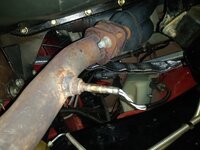
Changed the engine oil, rotated the tires, and hit all the grease fittings. I change the oil every 3,000 miles, rotate the tires and grease everything at least every 6,000 miles. Greasing is easy, EXCEPT for my rear driveshaft CV. I have to disconnect the driveshaft from the Dana 300 yoke to hit all three fittings:

20210815_100516.jpg

A slight PIA, but no way around it.

I also had to repair some "damage" to my spare tire carrier that was caused by a rear end collision when I was up in Michigan by a fellow CJ8 owner who will not be named LOL!!!!!!

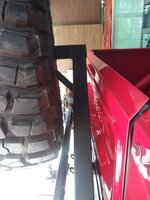
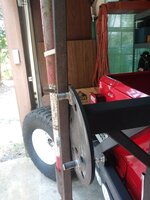
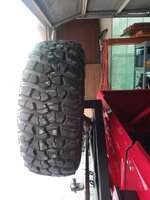
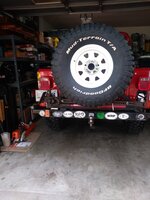
My spare tire took a pretty hard hit, so it is sitting a bit funny:

20210815_104957.jpg

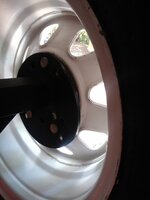
The only damage was to the plate that the tire bolts to:

20210815_105012.jpg

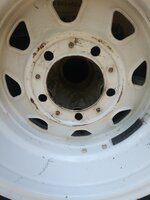
The wheel and tire are fine, no damage:

20210815_105514.jpg

Yeah, just a little "tweak":

20210815_105526_HDR.jpg

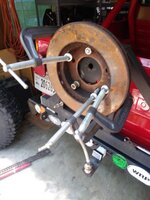
Tried an old rotor and some C-clamps, no way:

20210815_110703.jpg

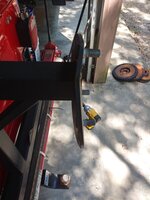
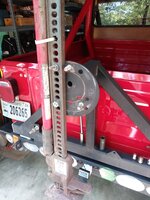
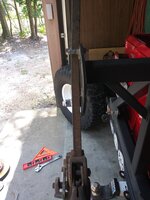
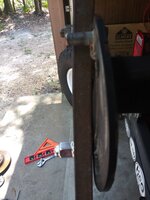
Next, I used some grade 8 bolts and the Hi-Lift Jack Frame, coupled with the impact, to "pull it" straight:

20210815_113547.jpg

20210815_113552.jpg

I was actually bending the Hi-Lift Jack frame!!!

20210815_120732.jpg

20210815_120747_HDR.jpg
 
  • Like
Reactions: SKT
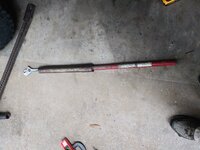
Did a little more tweaking with a crescent wrench and the Hi-Lift Jack handle:

20210815_125857.jpg

It was still a 1/2" out, and I can not get it any better. The plate is bent in the center where it is welded to the square tubing. No way to straighten this out, it would be easier just to cut off the mounting plate and weld on a new one.

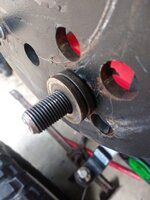
For now, two thick washers on the lower right stud kick the tire back almost perfect, within 1/8":

20210815_164426.jpg

Looks good to me:

20210815_171549.jpg

20210815_171556.jpg

I had to kick out the spare tire on the OEM tire carrier on my now sold tan Scrambler in a similar fashion, so that the Acme Full Hard top lift gate would clear the 33" spare tire. I never had any issues on that Scrambler, so won't be a problem on this one.

In true "Redneck Ray" fashion, I am going to call this fixed for now :thumbsup:
 
Isn't that the second time you got rear ended in this Jeep? Maybe you need a set of those 'Yosemite Sam BACK OFF' mud flaps.
 
I’ve got a “ding” just like that in my tailgate, I don’t even know how or when it happened, but it’s been like that a long time.
 
Did a little bit of work to this one recently. Going wheeling tomorrow, then up to Hot Springs next week.

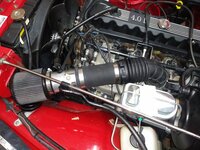
I still haven't swapped in a TJ air box, but I did upgrade the current air intake hose.

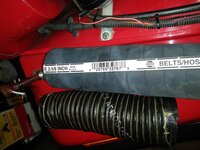
The original MPI kit intake hose was on its last legs, so I swapped in a piece of rubber hose. I used this same hose on my green Scrambler, until I retrofitted the OEM 258 air cleaner onto its 4.0 throttle body.

Anyway, the hose I used:

20211105_141537.jpg

And installed:

20211105_141546.jpg

Pretty simple, but needed. This hose will slide over the MPI kit aluminum intake parts, BUT it is a super tight fit. The clamps are probably unnecessary.

Really need to obtain/modify if necessary/install a TJ air box/intake hose assembly!!!!!
 
I also had to replace my front Ox Locker shift cable. Not a problem with it, more a problem with my driving and lack of securing this cable.

It's hard to find favorable reviews of Ox Lockers. I guess they are not that popular? So, here is my quick review.

I have driven and wheeled with front and rear Ox lockers for almost 12 years, 56,000 miles. In that time, I have NEVER had a problem with them. They always lock and unlock whenever I shift them. I have not broke them, never had to replace any parts. I love the mechanical simplicity of them, and the reliability. If I had to do it all over again, I would choose Ox Lockers.

I have had two TJ Rubicons with the factory air lockers, and my Gladiator Rubicon has the OEM electric lockers. In my experience, I think my Scrambler's Ox Lockers engage/disengage faster/easier.

On my red Scrambler, I have been using the same shift cables since I originally installed them. I love the cables, do not want to "upgrade" to the electric/air shifting options available now. The simplicity/fool proof nature of the cable activation is what drew me to the Ox Lockers to begin with.

With all that being said, I have had two issues with the cables, no fault of their own, or some design flaw:

1) Rear cable, first trip to Moab, I spun the driver side axle tube, pinion went up, busted rear driveshaft u-joint/straps/yoke. When this happened, the shift cable was pulled out of the shifter. I was able to simply reinstall/adjust this cable, haven't touched it since.

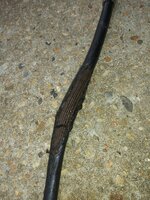
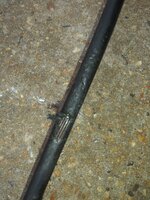
2) Front cable, I have smashed and repeatedly rammed the cable/front axle into rocks, damaging the cables outer sheath. Also, one of the clamps securing the front cable, under the hood, came loose, allowing the cable to contact the exhaust manifold, melting the outer sheath.

The front cable, even with all the damage, has been working. Well, it finally failed the other day, in my yard. The cable would not unlock the front differential any longer. And let me say, it absolutely sucks having the front differential locked into spool mode when you don't want it to be!!! Even in 2wd, with the lock in hubs engaged, absolutely sucks!!!

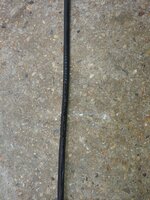
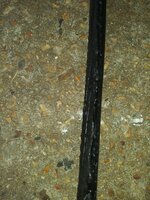
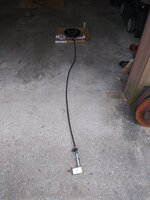
Some cable carnage pictures:

20211104_142126.jpg

20211104_142137.jpg

20211104_142158.jpg

20211104_142208.jpg
 
To change a shift cable you have to pull the differential cover. This is the first time I have pulled a differential cover on this Scrambler in 12 years. The Ox diff covers have drain plugs, so no need to pull the diff covers off to change the axle oil.

20211104_142110.jpg

I left the cable installed in the differential cover and the shifter, removed it all as an assembly.

20211104_135113.jpg

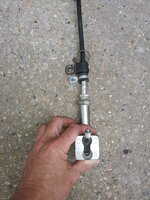
Shifter end of the cable:

20211104_135121.jpg

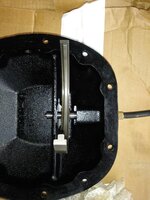
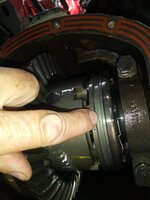
And the diff cover end. The cable threads into the big shift fork. Basically, the cable pushes the shift fork to slide a collar on the outside of the differential, locking it. Shift it back out, cable pulls fork, slides collar, unlocks the differential. Their are springs on both ends of the shift cable, and on the differentials sliding collar, which enables this simple cable to lock/unlock the differential.

20211104_135133.jpg

And the collar on the differential that the shift fork slides back and forth.

20211104_135154.jpg

That's it. Pretty simple, but ingenious. No o-rings to fail, solenoids/wiring issues, air compressors required. Simply shift the little shifter back and forth.

Unlocked:

20211104_162035.jpg

Locked:

20211104_162043.jpg

Simple and fool proof. RedneckRay approved.
 
With all that being said, installing and initially adjusting the cable does take care. It is not rocket science. If you follow the instructions the lockers will work perfectly. This is what I did when I initially installed them over 56,000 miles ago. I never had to go back and readjust or mess with anything.

A few quick pictures. This does NOT take the place of the instructions.

This is the differential end of the shifter cable. The threaded rod attached at the end of the cable threads into the shift fork. Use thread locker here.
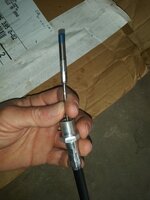
20211104_143328.jpg

The instructions say to thread it in so that one or two threads show. But, the picture shows 3-4 threads showing. I do 3-4 threads sticking out.
20211104_143928.jpg

The shifter end of the shift cable. It has the longer threaded end on it.
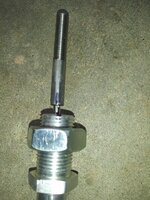
20211104_144058.jpg

After installing the cable into the diff cover, I installed the differential cover, making sure that the shift fork slides into the collars notch. Not hard, but care is needed.

I then route the cable back to where the shifter is mounted, securing the cable as I go. No tight bends, avoid pinch points, hot stuff, stuff that moves, sharp stuff, etc.

Once the cable is back close to where the shifter mounts, I then adjust the other end of the cable and install it into the shifter.

This measurement is critical. I use a caliper to make sure I get this 5/8". Eyeballing it or "close enough" is not good enough here. Take your time, do it right, you will get years of trouble free operation. Do a rush job and you will have problems.
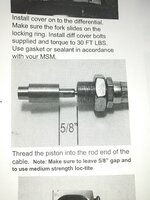
20211104_154752.jpg

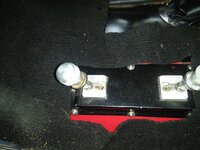
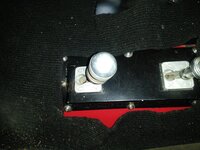
Both of my shifters mount to a steel bracket that is bolted on the driver side of the transmission tunnel, between the gas pedal and AX15 shifter. Not in the way of anything, but very easy to reach. While I do love the location, it does make it a pain to route the front cable and adjust it, since it is above the exhaust and in between the transmission and the side of the transmission tunnel. Even though it is not the easiest location, I am able to properly adjust and route the cable clear of the exhaust. So, because it is a PIA, I make sure I do it right the first time.

Anyway, did the initial adjustment, jacked the front wheels off the ground, locked in the hubs, engage the locker, turned a tire a little bit, locker instantly locked. Shifted to unlock, turned a tire, diff unlocked almost instantly. Repeated this about 20 times, worked perfect every time.

Hope to get 50,000 miles out of this cable!!!!

The front shifts like butter. The rear still shifts great, but not quite as buttery as the front. Damn OCD will probably have me installing a new rear cable soon enough!!!!!!
 
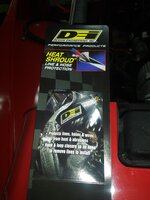
This was probably NOT needed, but I added some heat shield to the front shift cable. The insulation runs from the shifter to the front of the engine.

20211105_155421.jpg

20211105_155539.jpg

Picture does NOT accurately depict reality. This cable is a minimum of 8" from any part of the exhaust.

This cable is stout, and the outer sheath is a thick/heavy plastic. Radiant heat should not effect the cable. The heat shroud stuff is probably pointless in my application. The reason the outer sheath melted on the old cable was because it was in direct contact with the exhaust for quite some time.

Ounce of prevention and all that jazz.

That's it for now.
 
I had a customer with a CJ7 come in that had OX front and back. Asked to convert to the electric motors. We did it and they worked but not like the cables. From experiencing both I’d also stick with cables. Confident shifts in and out, less to deal with (power/part failure) and overall simplicity
 
This is good to hear. Ox has been around pretty long now. Don’t hear of many people using them. Don’t really hear good or bad about them. Was recently looking at front axle lockers and was thinking about the Ox. I like that it has a cable shifter
 
I have been really happy with my OX lockers as well. I haven't had them as long or put as many miles on them as others. I used the new style air actuators.
 
Back
Top