• Notice for iPhone users: DO NOT use the image size reduction option when uploading photos to the forum. This causes portrait images to post as landscape. We have added a warning to the image insert pop-up as well.

FINALLY!!! A Build Thread of My '82 Scrambler!

Thanks CB! All I know is that when I tried to put the rear shocks on they were about 3" short. Their extended length was 21.5 inches and the distance between the mounting locations was about 24 inches. Obviously that distance will get smaller as I add the weight of the gas tank and skid and the tub, etc...but I should still be able to fit the shocks now right?
 
Last edited:
I have been checking part numbers on line and those just don't seem to show up anywhere, stock or lifted... maybe you just got the wrong shocks period... as I said, I have a note to check my part numbers when I get home... you got to write this stuff down or you (I in particular) will forget.

cb
 
So, all the searching and I came up Ford's...

33-185590 F4-BE5-6252-H5 Bilstein 5100 Offroad Racing Unit


Price: $83.32
Quantity
33-185590 F4-BE5-6252-H5 Bilstein 5100 Offroad Racing Unit

Old Part No: F4-BE5-6252-H5

Ford Bronco (Fullsize Model) years 1967 1968 1969 1970 1971 1972 1973 1974 1975 1976
Bilstein 5100 series offroad Racing Shock.


AND THEN

I go to here and it is all Chevy and GMC, but no mention of Jeeps.


http://cart.bilsteinus.com/productsearch/33-185590

cb
 
you would not beleieve what I had to do to find this number.
I of course didn't want the part # to show, so I faced it inwards... just got home, clean clothes, etc.
I tried to get it, couldn't see it, then a mirror, nothing.
Got a see snake out from my buddy's garage and now I see most of it.
From what I can tell it is F4-BE5-A463-H7

and on the Interweb, it says that is a rear shock for 3-4 inch of lift on a ton of rigs, including CJ's.

Hope it helps.

cb
 
BTW, what is your front part #... I can't make the whole ting out as I have to remove the shock to see it, but it looks like a 5125 as well and 6253-H5 is the end of the numbers from what I can tell?

cb
 
Wow CB! Thanks for doing all that work! I will have to check my front ones when I get back up to the shop for the number.
 
BTW, what is your front part #... I can't make the whole ting out as I have to remove the shock to see it, but it looks like a 5125 as well and 6253-H5 is the end of the numbers from what I can tell?

cb

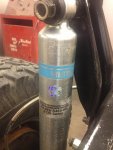
Here is a pic of the front shock:

6-20-13 Final Rubicon Express Lift Install (12) small.jpg
 
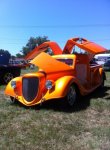
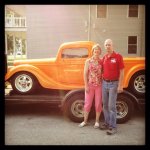
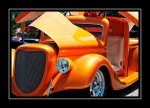
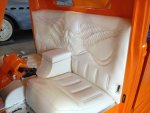
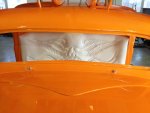
I haven't had much of a chance to work on the Scrambler but I did want to show off my father-in-law's finished '36 Ford Gullwing:
ImageUploadedByTapatalk1377971001.811093.jpg
ImageUploadedByTapatalk1377971045.495831.jpg
ImageUploadedByTapatalk1377971133.639055.jpg
ImageUploadedByTapatalk1377971196.449678.jpg
ImageUploadedByTapatalk1377971225.859153.jpg
 
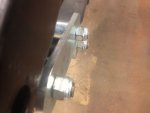
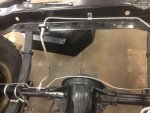
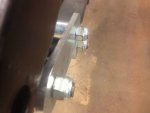
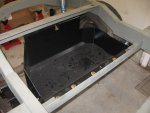
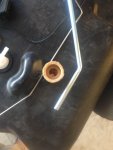
Scheduled a work day on the Scrambler today. Wasn't nearly as productive as I had hoped to be, it just seemed like things were working against me! :banghead: I began with the new (used, thanks Jersey Jeeps!) 20 gal fuel tank. I finished cleaning it out then installed the new check valves. All went very smoothly. I then moved on to the new fuel sending unit from Omix Ada and here is where trouble began. I pulled all the parts out of the box and began putting them together. When I tried to put the in-line fuel filter (sock) on the pick-up tube it just fell off. I could not figure out how to keep it on there. I thought I might be missing a gasket or some other part. After I used my phone-a-friend lifeline I figured out that I have a defective sock. The hole is too big and does not taper down to fit on the tube. I called the person I ordered it from and he has promised to send me a new one. Ok, moving on to the next project, fitting the Genright gas tank skid in the frame. This has been covered previously by spanksrjs in his Red Scrambler build so I was just following his lead. He is running the same gas tank skid and RE 4.5" lift as I am so I figured this would go about the same...Wrong. I trimmed the ends of the shackle bolts to gain clearance by the skid plate like he did however, that still did not give me enough room to install the skid, it was still hitting the bolts on each side. After a bit of head scratching and then using my email-a-friend lifeline the conclusion was reached that I would have to source some skinnier nuts to put on the shackle bolts and then further trim the bolt ends in order to fit the skid. It will be really close but hopefully should fit. Ok, moving on to project 3, installing the new stainless steel brake and fuel lines. Despite the overwhelming mess of stainless brake and fuel line tubing this actually went pretty smoothly...well so far. I got all the brake lines mounted on the frame and connected at all 4 wheels however, I still need to clean up the brass junction block and fit all the lines to it and mount it on the frame. Also, I will have to modify the nicely gusseted engine mounts that my buddy did for me. Turns out the gussets hit the bump stop bracket on the passenger side and they block the brake line routing on the drivers side. Plan is to cut off the bump stop as I don't need it with the lift and to notch the gussets to run the brake lines through. I never even made it to fitting the fuel lines and I figured it would probably be easier after the tank was installed anyway. Saying for the day "there is no such thing as bolt-on"!
9-10-13 Gas Tank and Fuel Lines Install (2) small.jpg
9-10-13 Gas Tank and Fuel Lines Install (3) small.jpg
9-10-13 Gas Tank and Fuel Lines Install (7) small.jpg
9-10-13 Gas Tank and Fuel Lines Install (8) small.jpg
 
Can you flip the bolts around and then grind the bolt head thinner, I think you want to keep those lock nuts
ImageUploadedByTapatalk1378887778.225438.jpg
 
I thought of that but I can't flip the top and bottom ones around because they are greaseable and have a zerk in the head. I could flip the middle one around. I will still use lock nuts, just going to get thinner ones.
 
Last edited:
Not sure how the Gen Right is, I have the Kilby... and an aftermarket frame, but when comparing the stock hole location for the skid vs my virgin undrilled frame, I realized that if I moved it over an inch, the shackles liked it a whole lot more.

A bit hard to see here as I don't have the other one to compare, but the point of the post was to ask if you could move the skid to one side more than the other, or are both side shackles having issues?

IMG_3030.jpg

cb

PS> If you need to phone a friend on the east coast, I can give you my number ;)
 
The skid is hitting on both sides. I talked with sparkrjs and my father-in-law and they both suggested the thinner nuts. I will give that a try and see how it goes. I'm hopeful that will give me enough clearance. If not I will be calling anyone for more ideas!
 
On mine, I was able to just trim the bolt threads flush with the nylon lock nuts and it clears, barely. If you switch to a thinner, metal lock nut (i.e. the type that gets a bit tighter toward the end to keep it tight, like a stock shackle nut) you will gain a bit more clearance:thumbsup:

I will take some pictures of mine and post up. IIRC, one side does fit a bit closer then the other. Instead of drilling the frame, I would just drill out the holes in the skid plate slightly larger so you could slide it a bit side-to-side, if needed:thumbsup:

It is tight, but it will clear:thumbsup:


The Kilby looks like it uses thinner metal for the side pieces, allowing a bit more clearance. It would be interesting to know if the two different skids use different gauge metal for the side pieces.

The factory, thin metal 20 gallon skids fit fine. But, from the factory, the 20 gallon tank equipped CJ's have the rear shackle bolts reversed, i.e. head of the bolt toward the tank, nuts out. The greasable shackle bolts that come with the RE lift wont allow fitment this way, unless maybe if you drilled out the other end of the bolts, sealed the hole in the head of the bolt, and basically reverse the zerk orientation on the shackle bolt:thumbsup::crazy:
 
Last edited:
Instead of drilling the frame, I would just drill out the holes in the skid plate slightly larger so you could slide it a bit side-to-side, if needed

100% agreed... I had the luxury of determining the holes in the frame, but I would definitely clearance the skid, not drill more holes in the frame.

cb
 
1 comment and 2 questions:

I have the 4XDoctor skid plate and have no clearance issues (although I did have other major fitment issues with this skid). I am running MORE shackles and they use "crimp lock" nuts - similar to what spankrjs referred to above. They have a much lower profile than the nylock nuts that are in Jim's picture.

Now for the questions:

1.) Did you sell your first set of shocks yet? I need a set for my 2.5" OME lift and was hoping they would work.

2.) Where did you get the clips for your stainless lines? Did they come with the lines and are they stainless themselves?

Thanks!
 
Last edited:
I just sold the shocks last week, sorry.

As for the clips, I got them with the stainless lines through Inline Tube. You can purchase the clip set separately as well. They are not stainless, but I believe they are galvanized.
 
Back
Top