• Notice for iPhone users: DO NOT use the image size reduction option when uploading photos to the forum. This causes portrait images to post as landscape. We have added a warning to the image insert pop-up as well.

Jeff's Offroad Build

jeepnjeff1002

Basic User
City
Louisville
State
KY
Hi everyone, I started a build thread over on jeepforum.com since I was originally rebuilding a CJ7 but I thought maybe this forum would be more appropriate. :wave:

I started back in the spring of 2010 with my first CJ purchase -- a rusted out 1986 CJ7 with a dana 44 rear axle. I spent the next few months tearing it down. I then bought a 1990 Grand Wagoneer for the AMC 360 engine and stronger rear dana 44 axle. Over the next year I stripped the drivetrain from the waggy, parted out the remainder, and had the engine rebuilt. I also bought a completely rust free CJ7 frame. About five months ago I stumbled across an abandoned CJ8 project and I couldn't pass up the chance to get a Scrambler. I bought a set of CUCV axles since the Scrambler was already setup with GM 3/4 ton axles and SOA.

My current plans are:
1) Rebuild axles, brakes, steering components, suspension
2) Cleanup frame, run brake lines, fuel lines, etc...
3) Install engine, transmission, transfer case
4) Cleanup body, finish cosmetics

I want to finish by the end of summer but we all know how these things usually go!

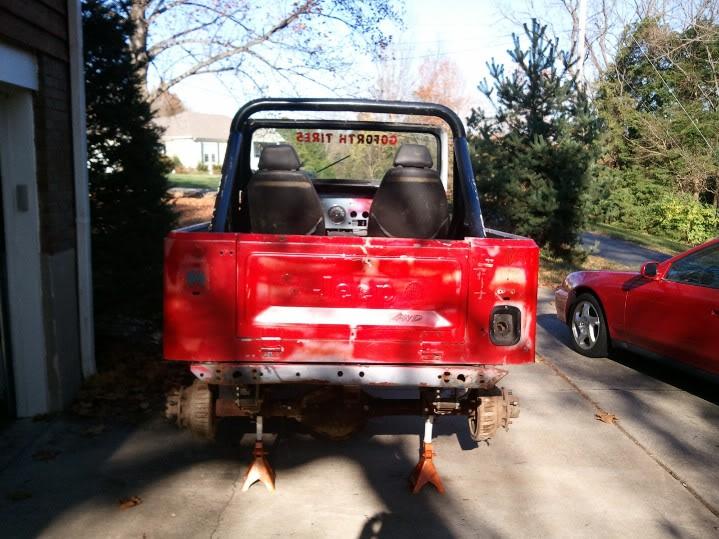
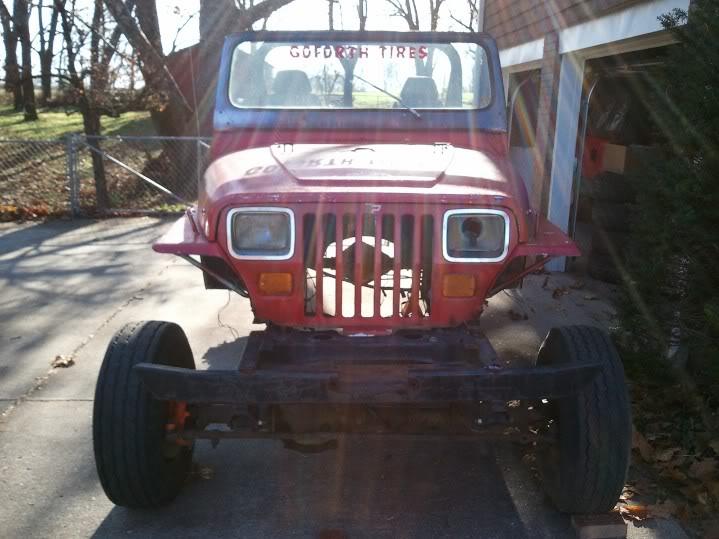
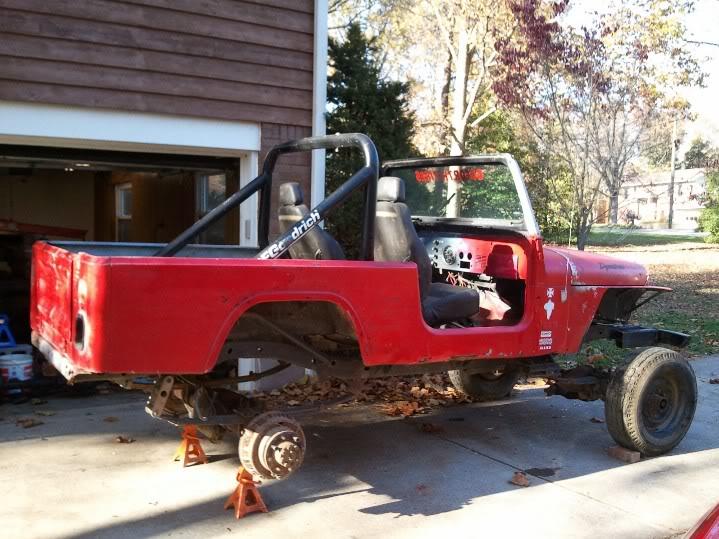
Here are the pics when I first brought it home:
original-2.jpg

original2-1.jpg

original3-1.jpg


Let's get rid of those square headlights. :cheers: I'll be putting a CJ front clip on it.

Here are the CUCV axles when I brought them home:
forum

WP_000097-1.jpg


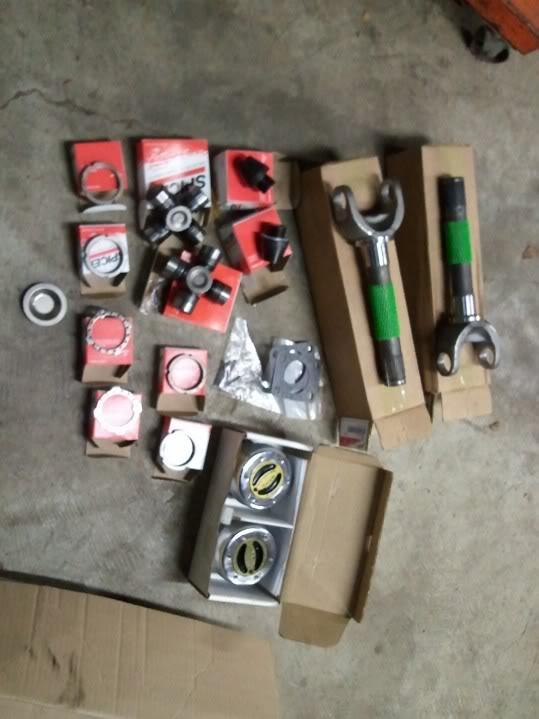
I also picked up a bunch of dana 60 parts off craigslist:
WP_000109-1.jpg


Tomorrow I'll be posting up all the progress I've made over the last months into one big follow-up post and then I'll continue updating the thread as I go.

.
 
Welcome! Looks great, keep the pics coming!
 
Rear axle 1

The rear axle tear down is pretty straight forward so I don't have many pics. I'm doing a disc brake conversion so I removed everything.

Basic steps:
1) Remove the bolts from the hub, helps to have an impact driver for this if yours are stuck on like mine were
2) Pull the axle, be ready for oil to drip out of the axle tubes
3) Remove the key retainer, key, and spindle nut. Some 14 bolt axles will have a different spindle nut setup similar to a dana axle.

Here are my spindle nuts, keys, and retainers:
WP_000170.jpg


4) Pull the hub/brake drum assembly which is very heavy for this axle. I think it weighs like 50 lbs!
5) The drum brake backing plate is held on by four bolts. I had to remove some of the brake components to get to all of them.
6) Remove the wheel studs to separate the hub from the drum. I used a 3 lb sledge to hammer them out. If you plan on re-using the studs you might want to use a brass drift so you don't damage them. I bought all new studs so I wasn't worried about it.

At this point I cleaned the axle, sanded it, and painted it using rustoleum rattle cans. Nothing fancy since it will get scratched on rocks and stuff. :cheers:

Here is the painted axle:
WP_000161.jpg


The spindles have some wear but nothing too bad:
WP_000164.jpg

WP_000163.jpg


I bought the disc brake conversion kit off ebay. Seemed like a good deal since I don't have the fab skills to make/weld the caliper brackets.

Caliper brackets that mount to the existing backing plate flange:
WP_000166.jpg


New rotors and calipers:
WP_000167.jpg


I chose not to pay for the extra emergency brake calipers. I plan on using a transfer case parking brake.

Here is one of the brackets mounted:
WP_000171.jpg

WP_000173.jpg


.
 
Rear axle 2

I removed the wheel bearings from the hubs, inspected, and cleaned them up. A life bathed in gear oil has kept them in good shape. I don't have any pics of this part but here's what I did:
1) I used a hammer and big screwdriver to knock out the inner hub seal.
2) This allows the inner bearing to slide out.
3) I used a couple screwdrivers to remove the snapring on the inside of the hub. I'll get a pic when I reinstall the hub seal and bearings this weekend.
4) This allows the outer bearing to slide out.

I reinstalled both bearings, the inner hub seal, and attached the rotors and hubs.

I used a soft brass drift and small sledge to press the new wheel studs in:
WP_000178.jpg

WP_000176.jpg

WP_000175.jpg


Here is a pic of the snap ring which holds the outer wheel bearing in place:
WP_000177.jpg


Here is the inner wheel bearing:
WP_000179.jpg


Notice it is not seated all the way in. If you don't have a seal puller and you use a hammer and screwdriver to punch out the seal by hitting the bearing race, you'll need to re-seat the race. I used a punch and hammer to lightly tap around the edges of the race to re-seat it.

Here is the seal installed:
WP_000180.jpg


I used a hammer and 2x4 to drive it in. First I turned it in by hand until it was firmly seated in the hub, then I used a hammer to lightly tap one side in, then I lightly tapped the opposite side in, and finally placed the 2x4 on it and drove it in all the way.

I then rubbed a little gear oil on the seal and slid it onto the spindle:
WP_000183.jpg

WP_000182.jpg


Both hubs and rotors installed:
WP_000181.jpg


.
 
Rear axle 3

I reinstalled the spindle nuts, keys, and retainer snaprings.
First, install the spindle nut and torque it down to 50 ft-lbs while rotating the hub:
WP_000198.jpg


In the pic above, notice that the slot on the inside of the spindle nut is not lined up with the index on the spindle. I backed off the nut just a bit to line it up:
WP_000199.jpg


After that the key slides into the slot to prevent the spindle nut from turning:
WP_000200.jpg


Finally, slide the key retainer into place to prevent the key from sliding out:
WP_000204.jpg


Repeat on the other side.

I re-installed the rear axle shafts:
1) First I wire-wheeled the mating surfaces and then used brake cleaner to clean up the axles.
2) I then applied a thin bead of RTV to the hub's mating surface and stuck the gasket on.
3) Next I slid the axle shafts in place and bolted them in place. I torqued them to 115 ft-lbs after the RTV fully cured.

The brake calipers are an easy install:
1) Use a 3/8 hex tool to unbolt the caliper bolts.
2) Place the calipers on the rotor and slide the bolts through the new brackets.
3) Make sure to use the correct caliper on each side, the bleeder screw should be on the top. In the pic below I have a green cap on the bleeder screw.

Pirate 4x4 has a good article on the disc brake conversion

I did manage to get one pic of everything installed:
WP_000205.jpg


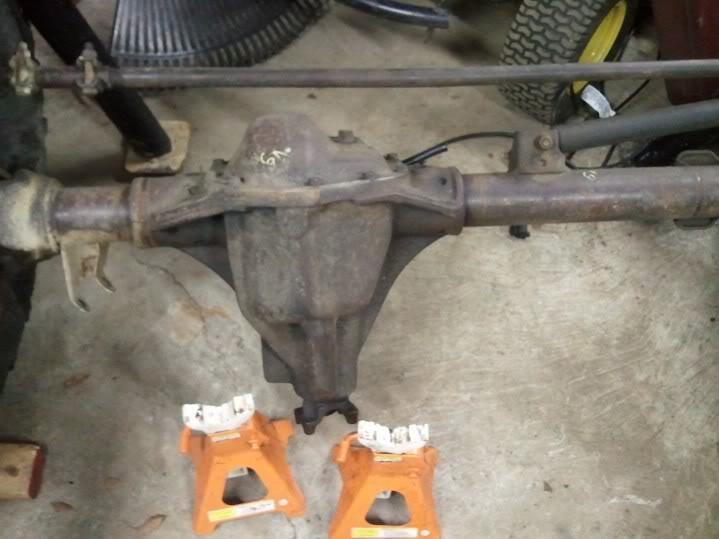
For reference, here's the rear axle when I first got it:
WP_000096.jpg


.
 
Front axle 1

Here is the front axle after removing the hubs, brakes, and knuckles:
WP_000157.jpg


Here are the kingpin rebuild kits:
WP_000192.jpg


The lower arm bearings:
WP_000194.jpg


I'm also going with high-steer arms so I’ll get pics when I get them.

Here are the painted knuckles:
WP_000191.jpg


Painted splash guards:
WP_000190.jpg


Painted caliper brackets:
WP_000189.jpg


I had the rotors turned and bought new calipers:
WP_000168.jpg


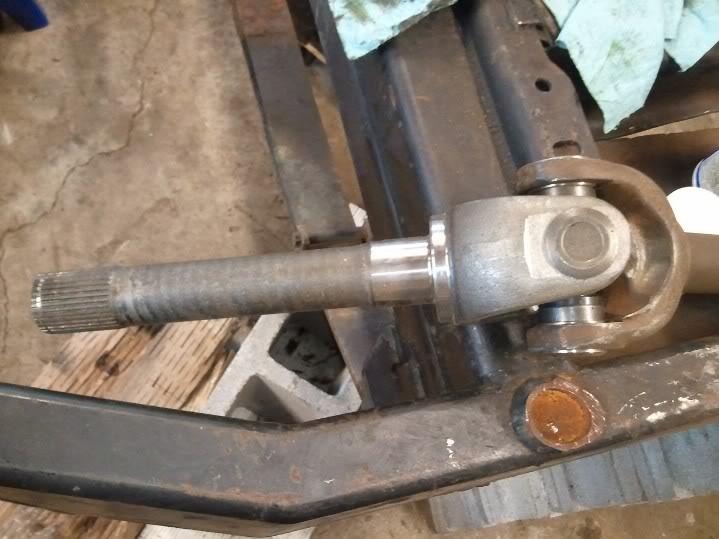
I also separated the outer stub axles and rebuilt them using my new 35 spline outers and 1480 u-joints (seen in my original post):
WP_000188-1.jpg


The long axle side looks the same. The only tools I used were a small sledge and screwdriver. The steps I used to install the u-joints:
1) Remove the caps from the new u-joints.
2) Place the u-joint into the ears of the axle stub.
3) Press on the caps by hand and then gently tap one of them with a hammer until it is seated enough to slip the snapring into place. Be careful not to dislodge the needle bearing inside the caps but mine are non-greasable so they came with enough grease.
4) After the snapring is seated, begin tapping the other cap into place and install its snapring.
5) Repeat the steps above for the other axle shaft.
 
Front axle 2

I managed to get the kingpins removed but I had to use a little trick I read about while searching on the subject:

If you take an angle grinder and cut into the kingpin just above where it meets the inner C, it loosens the kingpin up for easy removal. Don't cut all the way through, just a 1/4 inch or so all the way around. After the cutting, I was able to remove them with no effort.

Here's a pic of where I cut mine:
WP_000206.jpg


Now that the kingpins are out, I will start the full kingpin knuckle rebuild. I put the lower kingpin bearings in the freezer so they would shrink enough to make it easier to drive them in.

I started the kingpin knuckle rebuilds but decided to wait and get high steer arms instead of finishing with the stock upper caps.

I found it easiest to turn the axle upside down for the lower arm install.

Start by placing the dust cap in the arm, securing it with some grease:
WP_000209.jpg


Next drive the bearing race into position:
WP_000210.jpg


Freezing the race and bearing overnight makes it a little easier to drive it in. I used the old race and a punch to drive the new race in.

Grease the bearing and put it in the race:
WP_000211.jpg


Next comes the lower seal. I twisted it in by hand first to get it set:
WP_000212.jpg


Then I used a 2x4 and hammer to drive it in:
WP_000213.jpg


Flip the axle back to its normal position, and install the kingpin:
WP_000214.jpg


I used an impact driver rated for 600 ft-lbs of torque since the CUCV manual calls for 550 ft-lbs of torque when installing the kingpin.

Next comes the upper kingpin seal. There are two different seals included in the kit:
WP_000215.jpg


The taller seal on the right is the Ford seal and the shorter seal on the left is the Chevy one.

Slide the seal over the kingpin with the lip facing up:
WP_000216.jpg


Now the knuckle is ready to go back on:
WP_000217.jpg


.
 
Front axle 3

I chose to re-use my lower bearing caps since the mating surfaces cleaned up well. I also cleaned up the lower and upper mating surfaces of the knuckles.

Grease the lower bearing cap and slide it into place (the bolt holes only allow it to fit one way):
WP_000219.jpg


Torque the bolts to 80 ft-lbs:
WP_000220.jpg


Install the kingpin bushing next:
WP_000226.jpg


It has a ridge on it that fits into a slot in the knuckle, here's a pic of the slot:
WP_000225.jpg


Place the spring retainer on the bushing:
WP_000227.jpg


Place the gasket on the mating surface and the spring on the retainer:
WP_000228.jpg


Place the upper cap on:
WP_000229.jpg


Tighten the bolts little by little alternating each bolt until the cap is all the way on. Torque to 80 ft-lbs.
WP_000230.jpg


After everything is installed pump the upper and lower arms full of grease.

I didn't torque the upper caps since I'm going to get high steer arms. I will probably end up redoing the previous few steps. I'll get pics of the high steer arms when I find the ones I want.

I've got the steering knuckles back on but before I put the axles back in I decided to replace the inner axle seals.
 
Front axle 4

Took the differential cover off:
WP_000247.jpg


Next I removed the carrier. I loosened the bearing cap bolts but left them in so the carrier wouldn't fall out. I then put a rag into the carrier between the ring gear and housing and turned the yoke by hand until the carrier popped loose.
WP_000248.jpg


WP_000249.jpg


There is a lot of gunk in the axle tubes so I need to get some wire brushes to clean them out.
WP_000250.jpg


The seals don't look too bad but since I already had the axle torn down this far it made sense to change them out.

Here's one of the spindles without the bearing:
WP_000253.jpg


I also stopped by the hardware store looking for some wire brushes to clean out the axle tubes.

New spindle bearing install started:
WP_000254.jpg


I used a block of wood and a hammer to start it.

Then I used a socket with the same diameter as the bearing to drive it in the rest of the way:
WP_000255.jpg


Next I used the same socket to drive the seal in:
WP_000256.jpg


I don't know if I like this new seal/washer combo since it's made of plastic. I may go buy just the seal and re-use my old brass washer instead.

.

 
Front axle 5

I also installed the inner wheel bearings and hub seals on the front hubs.

Cleaned up the inner wheel bearing race, greased the bearing and placed it in the race:
WP_000258.jpg


Packed the installed bearing with grease:
WP_000259.jpg


Installed the hub seal:
WP_000261.jpg


For the hub seal I pressed it in place by hand and then lightly tapped it around the edges with a hammer. Same way I did the rear hub seals.

I installed the inner axle seals. I tapped them in using a ball-peen hammer and a socket with the same diameter as the seal, 2.5 inches for the dana 60:
WP_000270.jpg


After the seals were installed, I applied some grease to them so the axles can be reinstalled without damaging the seals.

I then reinstalled the carrier and bolted the bearing caps back in. Torque them to 80 ft-lbs.

The new spindle bearing kit included a newer type of thrust washer and seal for the outer axle stub:
WP_000273.jpg


The original style on the left and the new combo one on the right.

I tapped the seal on to the outer axle:
WP_000271.jpg


Installed the axle:
WP_000272.jpg
 
Front axle 6

Before installing the spindle I greased the bearings and applied some anti-seize to the spindle/knuckle mating surface:
WP_000274.jpg


Slid the spindle on to the axle. The bolt holes only align one way so rotate the spindle until it lines up:
WP_000275.jpg


I also applied anti-seize to the caliper bracket:
WP_000276.jpg


Then slid the caliper bracket on to the spindle:
WP_000282.jpg


I applied anti-seize to the splash shield:
WP_000278.jpg


Slid the splash shield on to the caliper bracket:
WP_000283.jpg


Applied anti-seize to the spacer bracket:
WP_000280.jpg


Slid the bracket on to the splash shield and tightened the locknuts to 65 ft-lbs:
WP_000285.jpg


I installed the hub/rotor assemblies, outer wheel bearings, and spindle nut assemblies.

I already had the inner wheel bearings and hub seals installed. I cleaned up the inner side of the rotors using some brake cleaner before installed them.

The hub and rotor seated on the spindle:
WP_000288.jpg


.

 
Front axle 7

Grease up the outer wheel bearing and insert it into the hub:
WP_000289.jpg


Here is the spindle nut set used by the CUCV dana 60:
WP_000287.jpg


You'll need a four-prong 2.5 inch socket to properly tighten the spindle nuts.

The left nut is the inner nut, it has a little peg on one side that must face outward so the lock nut hole can fit over the peg. Torque it to 50 ft-lbs while rotating the hub (to seat the bearing), then back it off a few turns, then torque it back to 50 ft-lbs.
WP_000290.jpg

WP_000291.jpg


The lock nut also has a tab on the inside that fits into a groove on the spindle so it can only fit one way. You may have to loosen the inner spindle nut to get the peg to line up with the hole on the lock nut:
WP_000293.jpg


The peg is in the hole at the 2 o'clock position in the picture above.

Next, install the outer spindle nut, it's the one without a peg on it. The torque spec on this one is 160 ft-lbs which I can't do until I get the axle mounted on the frame.
WP_000294.jpg


Warn lockout hubs and brake calipers to follow soon...

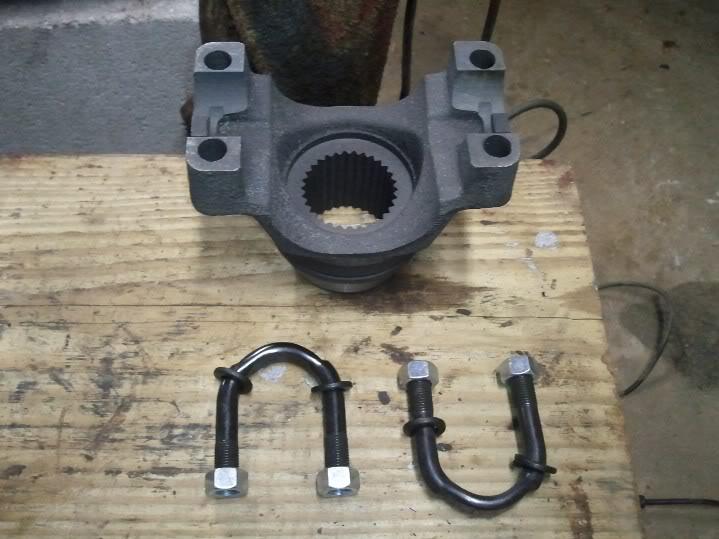
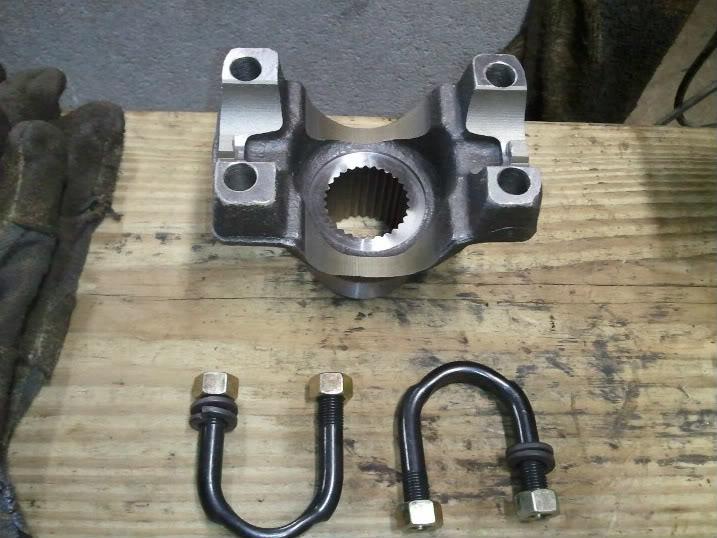
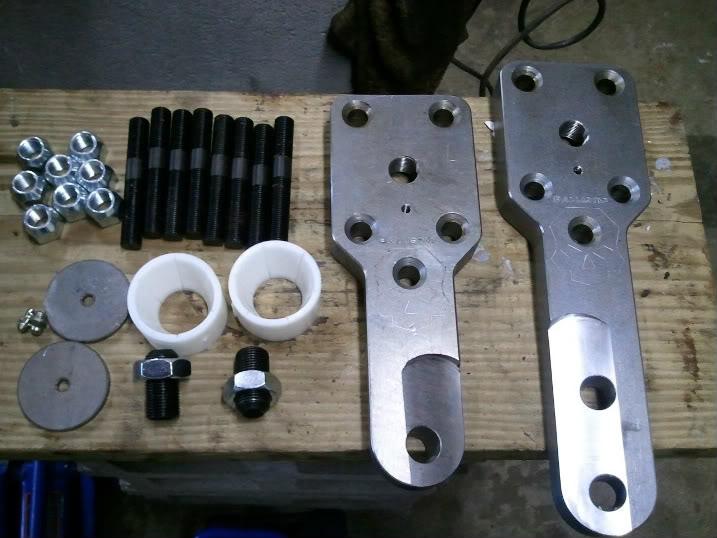
I also made a trip out to Moab Offroad in Louisville and ordered high steer arms, a 1350 u-bolt style yoke for the dana 60, and a 1410 u-bolt style yoke for the 14 bolt. Pics to follow...

.
 
Sorry for all the posts guys but it would only allow me 10 images per post so I tried to break it up logically. This is about a month's worth of work since I only work on the weekends so future posts won't be as long.

I'm heading back out to Moab Offroad to pickup the parts I had ordered last week.

Expect to see posts on replacing the yokes and putting new high steer arms on...
 
The spindle nuts on the Dana 60 are junk. Go to a wrecking yard and get the same ones that you have on the 14 bolt. They are the same threads are the 60 and are way better designed. then they are the same on all 4 corners too. :D
 
Great job with then photo documentation.
 
Awesome detail that I don't think we had on here for the CUCV axles, great thread! :thumbsup:

The loctite on the spindle/shield is key, learned that the hard way on our old XJ.
 
New parts

Picked up some new parts today:

1410 u-bolt style yoke for the 14 bolt axle:
WP_000321-1.jpg


1350 u-bolt style yoke for the dana 60 axle:
WP_000323-1.jpg


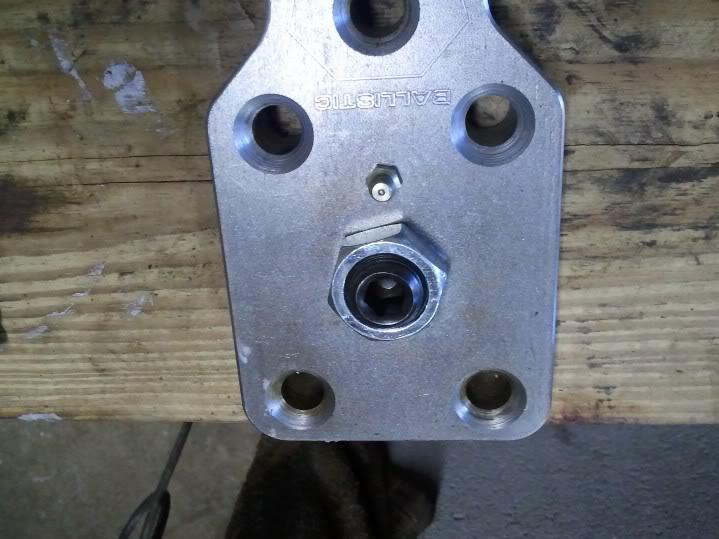
Ballistic Fabrication high steer kit:
WP_000324-1.jpg


I still need to pickup some new pinion nuts and a pinion seal for the rear axle but I will have picks of the install coming soon.
 
High steer arm install

Had a few minutes this morning so I got the high steer arms installed.

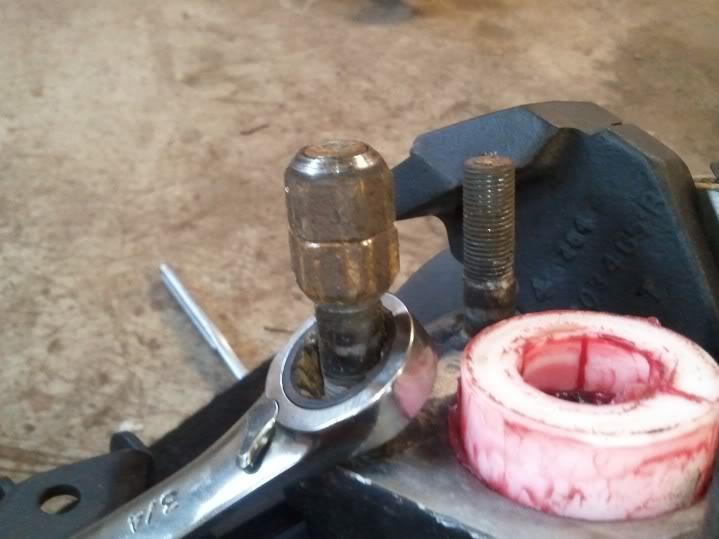
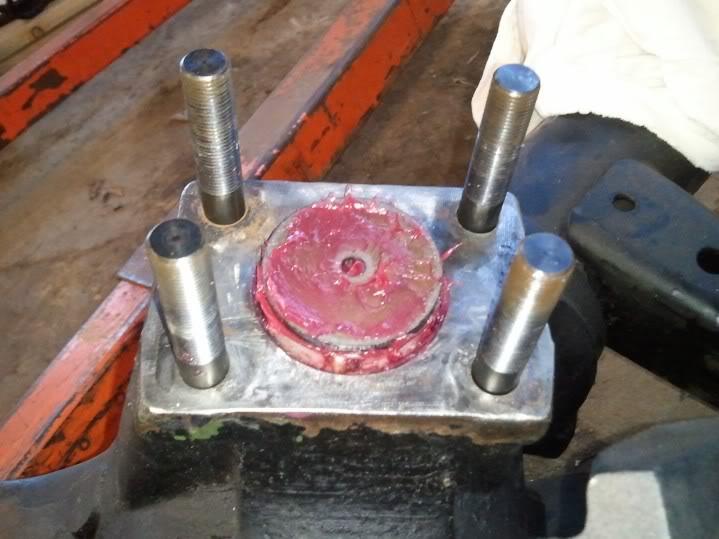
Remove the existing studs using 2 nuts:
WP_000325-1.jpg


Install the grease zerk and adjustment nut:
WP_000328-1.jpg


Install the new ARP studs, place the washer on the kingpin bushing:
WP_000329-1.jpg


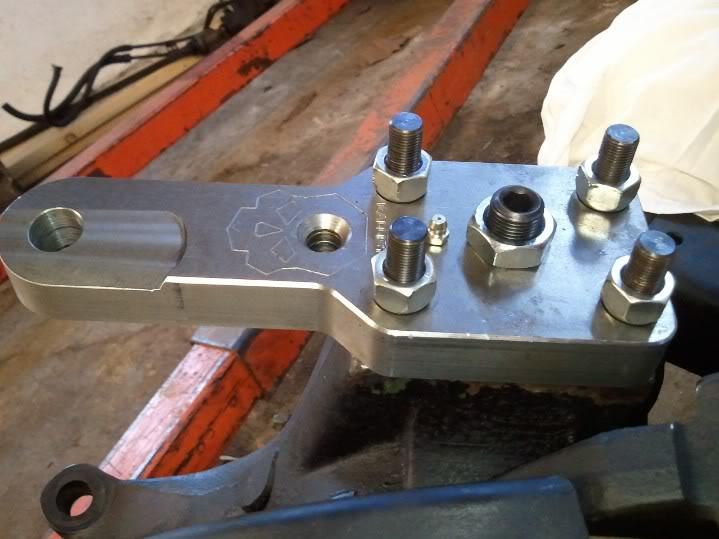
Tap the driver side arm in place and tighten the nuts:
WP_000330-1.jpg


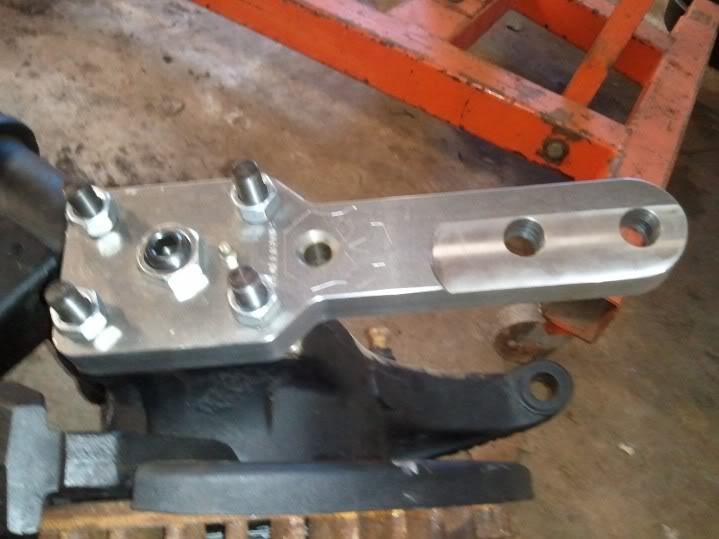
Tap the passenger side arm in place and tighten the nuts:
WP_000331-1.jpg


I will torque everything to spec after I re-attach the axle to the frame. I should be getting my frame back next weekend.
 
Back
Top