• Notice for iPhone users: DO NOT use the image size reduction option when uploading photos to the forum. This causes portrait images to post as landscape. We have added a warning to the image insert pop-up as well.

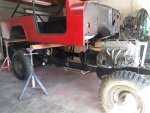
Meet Red, my 81 Restomod Build

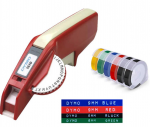
That Dymo label maker is the schiznitz. Have the same one :thumbsup: I got addicted to the printable heat shrink tubing for labels when making up wires where I add my own connectors. Wiped out a cartridge of it when I did the power distribution block under the dash :rotfl:
So is it a regular Dymo label maker or one that labels the shrink tube ?
 
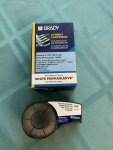
I have the Brady version. Does basically the same thing, and has all kinds of tape options including heat shrink tube.

474B1584-C6A9-4470-B83E-503667A5CD75.jpeg

B975C740-3D73-4705-A089-243FC72F71CD.jpeg

Works just like a Brother Ptouch, but will do heat shrink labels. (Ptouch has more letter features though)
 
That Dymo label maker is the schiznitz. Have the same one :thumbsup: I got addicted to the printable heat shrink tubing for labels when making up wires where I add my own connectors. Wiped out a cartridge of it when I did the power distribution block under the dash :rotfl:
I got that label maker after seeing your post on how useful it was. I’m currently using the tape just to label every connector. Then thin the harness. Once I’m building the fuse panel I’ll switch to the heat shrink.
 
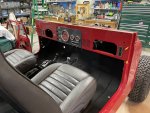
Super8 stopped by with his family and brought some seats! (We also had some good times talking Jeep and drinking some good beers. )
One set of seats was his old ones, the other set was purchased a while back and he was holding them for me. Out of the 4 seats, only one was salvageable. I can’t believe how flimsy the frames are! But- yesterday I called on a Facebook ad, and ended up with a set of 86 ‘7 seats. The pass seat looks like no one has ever sat in it, although the frame is separated at the front corner. The drivers seat is pretty worn but the frame is solid! And the rear seat is great too. They came with a pair of fold-and-tumble bases. View attachment 83808View attachment 83809One of the seats Super8 brought down. I thought it might be garnet but it looks more like chocolate! Date says 1981, but I’ve never seen this color before View attachment 83810View attachment 83811View attachment 83812These are my Facebook score. If I can find another OEM cover to match, I’ll run them that way. I would prefer that. If I can’t find another cover, I’ll carefully remove this one and get a set of the EBay leather Laredo covers. Hopefully if I go that way I can sell the perfect cover to make up some of the costs.

Next on the agenda- I welded in stiffeners between the front shackle plates. I also welded up the slots in the front spring plates and drilled more precise holes.

My 4 bolt box arrived this afternoon, and to my relief it was actually a 4 bolt casting.

It came from back East and the pitting on the front retainer is awful. But, it doesn’t show and as long as it works... I filed the fluid fitting bosses smooth and installed the banjo fittings. View attachment 83814I bolted the box up to the MORE 1” forward mount, and bolted the assembly into the frame. It’s nice not to have to cut the frame to clear the lines. View attachment 83815Last on today’s list- the sway bar. Added some JKS quick release links while I was at it. Thanks CJ7pilot! I also found a Prothane poly kit for the sway bar in my stash. Then- beer ‘30!

 
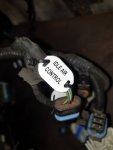
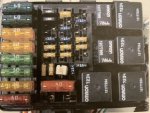
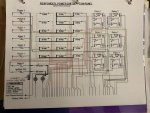
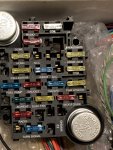
Engine wiring harness all buttoned up. Well, all except for the power leads. But, Carol is happy it’s not in the kitchen any more. I have seen stand-alone harnesses built with 1-2 relays, and as few as 4 fuses. Did some online searching for a panel and remembered I had a spare Delphi responder panel like I used on Copper. It incorporates 6 relays with mega fuse feeds, 16 fuses, 2 mega-fuse pass throughs, and 2 diodes that can be repurposed to pass throughs. So with the one panel I will be able to power the LS harness with individual fuses for each pink lead like factory, and have fuel, starter, a/c, high beam, low beam, and driving light relays. I set up the harness to use the PCM to drive the starter, A/C, and dual or 2 speed electric fans. Not sure if I’m going electric or mechanical on the fans yet.

Responder panel with schematic:
E991D10E-7E71-48C1-9291-811A845B1108.jpegFAF47716-B743-419B-8BA8-3AFD827E9CC3.jpeg

Also a hot-rod style under dash panel/harness.
B76639F5-DF30-49C1-8C0B-E6B0A0EFA0B8.jpeg
 
Last edited:
Well, I have been slacking, both in progress and posting updates. I have been spending most of my time Babysitting our German Shepherd. She had a hip replacement surgery 7 weeks ago, and the first month I didn’t let her out of my sight. Her hip is recovering nicely, but she somehow got an antibiotic resistant bacterial infection in the incision. She had been on antibiotics that should do the trick for about 4 weeks now, but every so often the incision opens a bit and oozes. Saying our prayers...

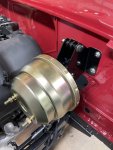
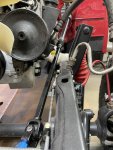
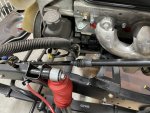
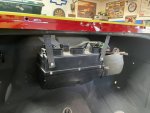
As far as my progress on Red- I have been doing a lot of fitting and mock-up. A lot of my clearances were figured with measurements, and now I’m trying the real thing. First was mounting the brake booster. It’s tight but clears. I’ll probably have to use a bit of heat to clearance the engine cover. 4E319EA9-E6C8-42DF-837C-3E3CAF5BA71D.jpeg072428E2-A1C9-4538-83D1-70619DB3A961.jpeg336E85C0-C1D3-4F64-A2C0-D8677EB7560E.jpegIt’s an 8” booster from A-Team. Looks the same as most of the others out there, and aside from the adjustable pedal link everything fits well. The pedal link has a stacking of tolerances around the pins and the hole on the pedal end. This leaves me with excessive free play and a rattling pedal. I’m thinking that reaming the holes and using nylon bushings will fix that.
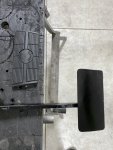
Next was a suitable brake pedal. I was originally going to use the manual pedal but it was just too small looking. I had a CJ auto pedal on Copper, and it felt too big. So- off to the parts store. Found a pedal pad that I liked. Then I built a curved mount plate to match the pad contour, braced the back to make it plenty strong, cut off the old pad mount, and welded the new one on. 460FADB3-5578-4CE1-A432-0955AD69AD93.jpegNext was the steering column. This is my XJ column. I am using a J20 steering box, and it turns out that a YJ intermediate shaft will mate them both together like they were born that way. I was interested in the seat clearance with my stock seats. So in it all went- and I’m pleasantly surprised. The Stock seats fit and feel great, there’s plenty of room with the column installed, and the intermediate shaft clears the power steering pump with room to spare! Of course, I forgot to take a picture up top of the column in place 700AE267-09F6-4692-9AF7-1C3AD4AEC45D.jpegDEA7C1E8-CC8A-4F12-A54D-08E0115F920F.jpeg5D3BB751-DC46-4E63-A23E-CD985E7AC2A3.jpeg15663136-13D9-429C-9FBC-6E136409EAC3.jpegI also finalized the shifter install. Nutserts for the brackets in the floor of the tub, and the trans cover I built was plenty thick to tap. A grommet from a factory Ford cable completed the install. FFB73D06-6D60-4580-87D3-6B7C40A43014.jpeg32A7B9F1-3363-44D6-A685-B104F44DB709.jpeg05CC0351-EEA2-4029-87AC-BD790FF5F974.jpegFinally, I wanted to see the clearances between the Vintage Air unit and the dash and gauges. The A/C bolted right up, and I put a couple of guide rods covered in tape and slid the dash on. Success! Everything clears, plenty of room behind the SpeedHut gauges, and the dash looks sweet! 653544C0-B5EE-444E-BEB3-1E06644E9DBD.jpegA96CA8EF-E6D5-444F-8488-A35131D82F7B.jpeg3018ADC7-3BE1-45D6-8E66-2AC1C1E2B981.jpegE4680B95-C061-4BF2-B84C-40595413B71C.jpeg6BAFF1CE-6787-4C1A-A9E6-27C3B624D0D2.jpegWell, now Im all caught up. It’s about time for some plumbing and wiring!
 
Last edited:
Back
Top