
• Notice for iPhone users: DO NOT use the image size reduction option when uploading photos to the forum. This causes portrait images to post as landscape. We have added a warning to the image insert pop-up as well.

My old 1981 SCRAMBLER returns 25 years later

Went back to working on my t-case. I put in a JB conversion HD front out and a set of JB Fab twins sticks. The shift rails were already modified so I'll have front dig capability.

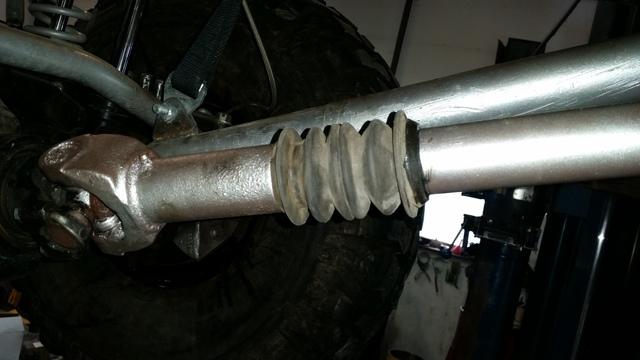
And while I had it out I clocked the t-case flat and made a heavier front driveshaft. The one that was in it will be my spare and "high speed" shaft.

I was planning on some added skid plates, Now that there is room I am going to make a new cross member and one new skid plate that is mostly flat. That will gain me another 2" of clearance.
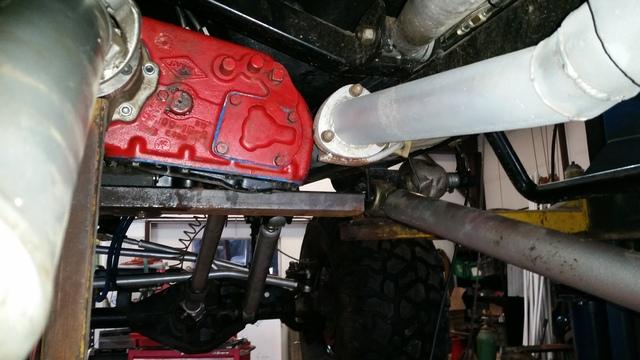


May have to move the exhaust over after clocking.
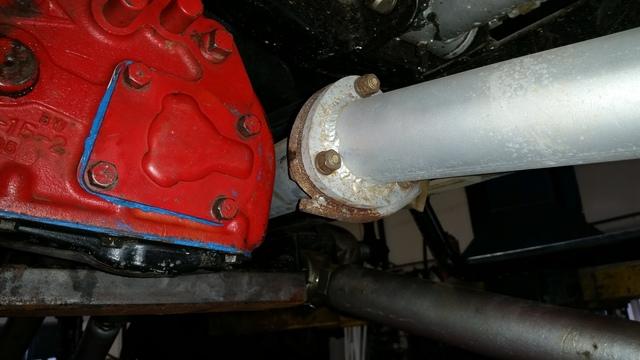

This is what I started with for the front driveshaft.
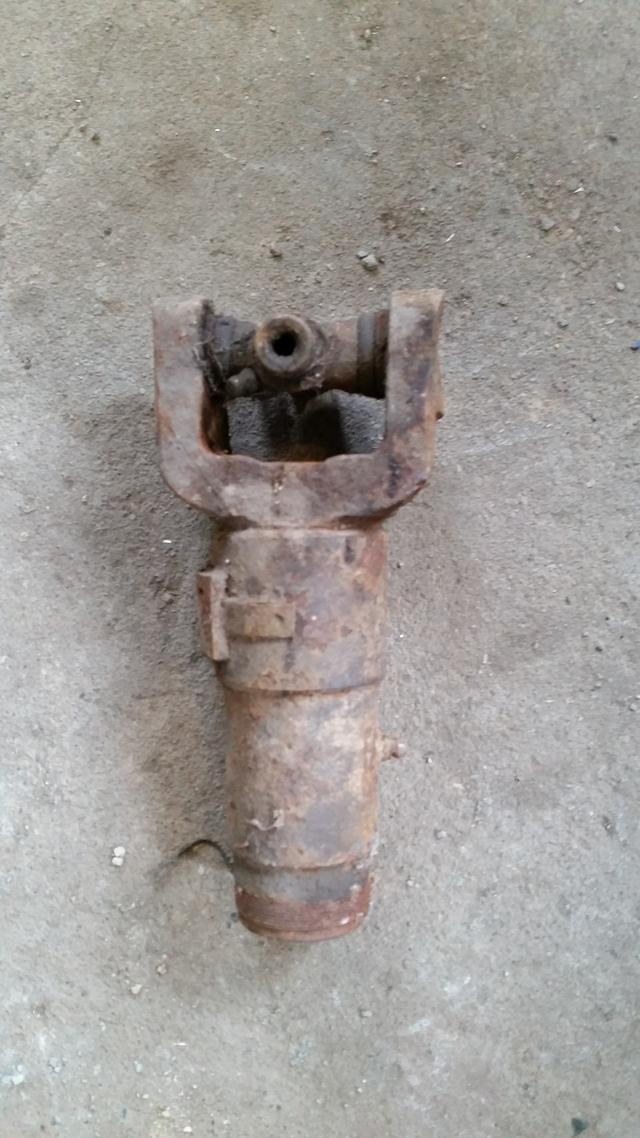


Machined it down, heat shunk it on to a piece of 1.66 O.D. .200 wall tubing, and welded it.
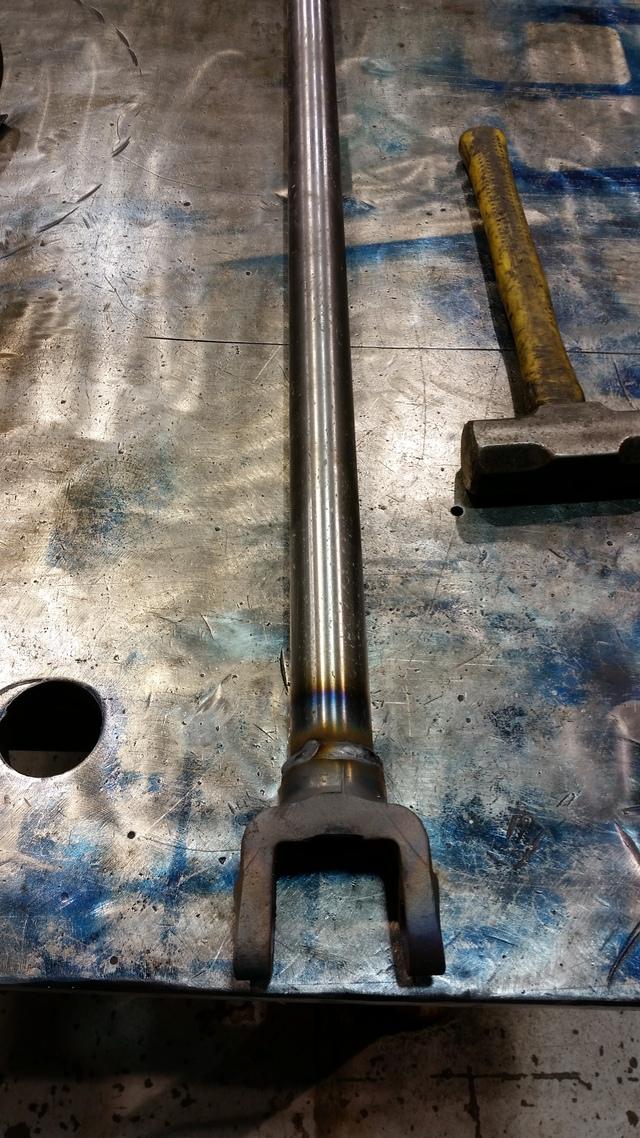

For the bottom I turned down a 2" driveshaft slide, heat shrunk, and welded it inside. Then added a rubber boot.

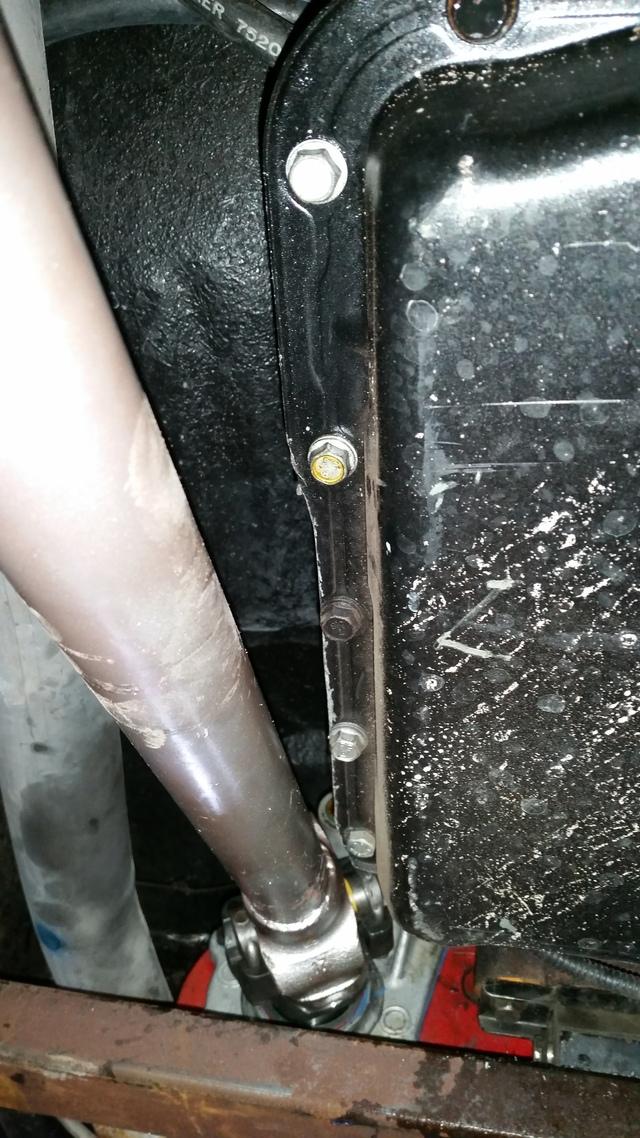
To clear the 700r4 I had to shave the edge of the trans pan

Start of the new crossmember
 
The JB Fab twin sticks are installed.............. :headbang:

Now I just have to get all the fiberglass out of the carpet :crazy:
 
Love my twin sticks. one of the best changes I've done. :wave:
 
Apparently I am a slacker and didn't take any pictures of the finished cross member

Next I moved on to making new skid plates.

since I had no way to bend them.................I started making some dies for my bottle jack press.


Test piece, I can now bend 24" of 3/16" plate at home.


So today I started bending some plates to go form this..................


To this


It's hard to get decent pics on the hoist, but here's a few


Now all the fun of bracing, bolting, nut inserts, stiffeners, trimming, deburring..........
 
Looks great. Love the home brew brake. Also digging the shrink fit and weld on the front driveshaft. Old skool my man, way to go!
 
Headed back to the shop to install the skid plates .............

stopped for a poser shot :wave:


With 20 days to spare. Looks awesome! :thumbsup: :wave:
 
4:10 AM..................your supposed to be drinking coffee at that hour of the day, not surfing the forum :popcorn:

Pulled a muscle and not sleeping to good,lol. Heading up on the 19th to open the house up. I need a "Dune Fix"!
 
Pulled a muscle and not sleeping to good,lol. Heading up on the 19th to open the house up. I need a "Dune Fix"!
Get that muscle healed up, summer's coming.

I could use a dune fix myself, however right now I'm concentrating on getting the jeep ready for windrock the 1st week of May.

Sent from my SM-G900V
 
Are you coming down I-74 to I-75? Possibly meet for lunch or dinner or breakfast? :hijack: :wave:
 
Are you coming down I-74 to I-75? Possibly meet for lunch or dinner or breakfast? :hijack: :wave:
Which is the best way? 74 to 75 or 75 all the way. I think you might have made the trip once or twice?

We will be headed down April 30.

Sent from my SM-G900V
 
31 southt to indy, 465 East to I 74, I-74 to I-275 south to I 75 south. I'm 18 miles from I-74 @ Batesville, IN and 16 miles from I-275 at Lawrenceburg, IN just before you cross over the Ohio River into Kentucky. 6 hous 30 minutes from here to our house at the dunes and about 4 hours from Windrock. I-75 should be opened back up by then. :wave:
 
A update, I've been slacking on keeping this up to date :(
Just been trying to finish up all the little loose ends. I did the seat brackets that I did the how-to thread on.

I put a guard in front of the steering box, There are some tall curbs at the mall. :crazy:


I install the frame tie ins for the front a-pillars on the cage


And I cut up the cj-7 top for a trail top. It nice and light, and don't matter if it gets scratched. With the windjammer it is going to seal up pretty good, and keep me dry if it rains.


This is the only spot left to deal with, I have some rubber strips to bolt in there


And after the top was on, I vacuumed the carpet........Steel and fiberglass in carpet requires several beers and a long time with a shopvac :cheers:
 
Looks good. Interesting idea on the cj7 top. Why didn't you cut the top something like 4" longer (bring it to the soft top mounting rail), it would give some extra strength to the mount and help if your in a wind driving rain (rain coming from the rear of the cj) especially if parked outside and back is facing into the weather. Definitely something I will now consider for the cj7 for Cleveland weather in the end of Oct through mid December.
 
Looks good. Interesting idea on the cj7 top. Why didn't you cut the top something like 4" longer (bring it to the soft top mounting rail), it would give some extra strength to the mount and help if your in a wind driving rain (rain coming from the rear of the cj) especially if parked outside and back is facing into the weather. Definitely something I will now consider for the cj7 for Cleveland weather in the end of Oct through mid December.
That is where the window line is on the original top. I thought about leaving it longer and filling the opening. But this is down and dirty, quick top. Nice thing is 2 bolts and some screws its off. Super light, no seat belts to reroute

Sent from my SM-G900V
 
Bolted the pinion guard back on the 14 bolt tonight.

Charged up the A/C, not that I need it yet, But I didn't like it sitting not charged.

Sealed up the sides of the top a little more.
Made some aluminum angle brackets


Riveted them to the top


Now it's got that race car riveted look (until it gets the next coat of rattle can)


Now I shouldn't get as much mud spray, the only small gap is around the wind jammer, and most of that is blocked by the roll bar.
 
Looking great. :thumbsup:

About time to put it to use. planning on being there the weekend of the 23 & 24th. :thumbsup:
 
Back
Top