• Notice for iPhone users: DO NOT use the image size reduction option when uploading photos to the forum. This causes portrait images to post as landscape. We have added a warning to the image insert pop-up as well.

New To Me 83--Parts Needed

Another "Yard Scrambler" update.

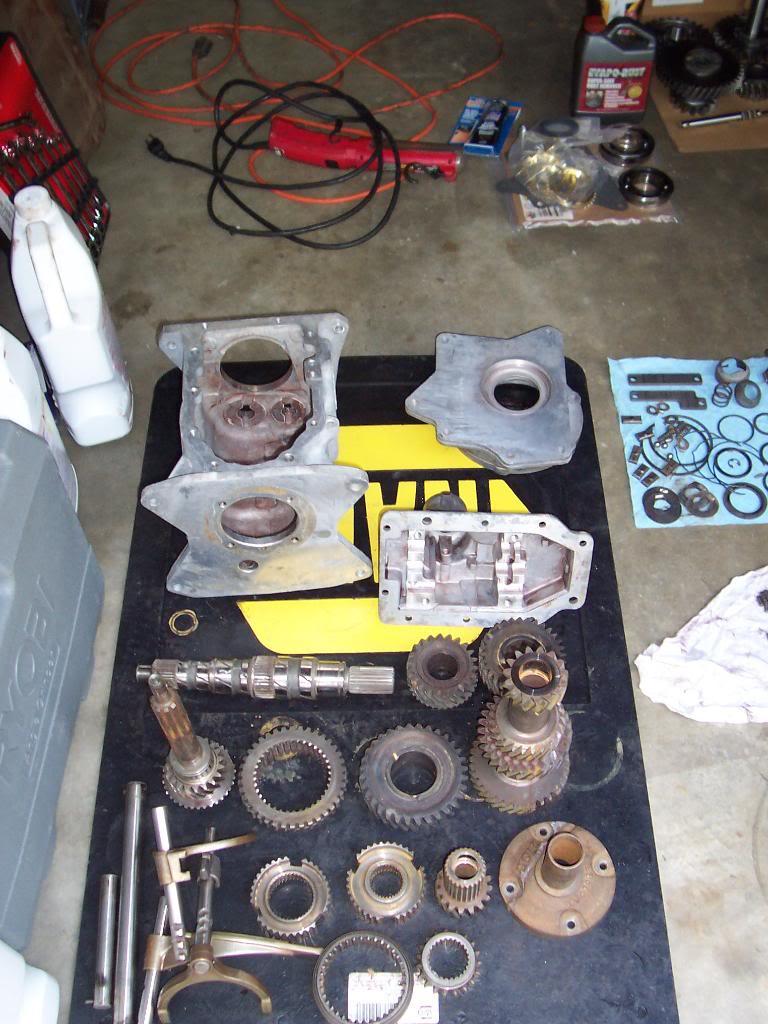
Took the transmission apart, everything is in great shape. No busted or chipped teeth or damage to any shafts. I believe the 80,000 mile reading on the odometer is correct.
0076-1.jpg


0039-1.jpg


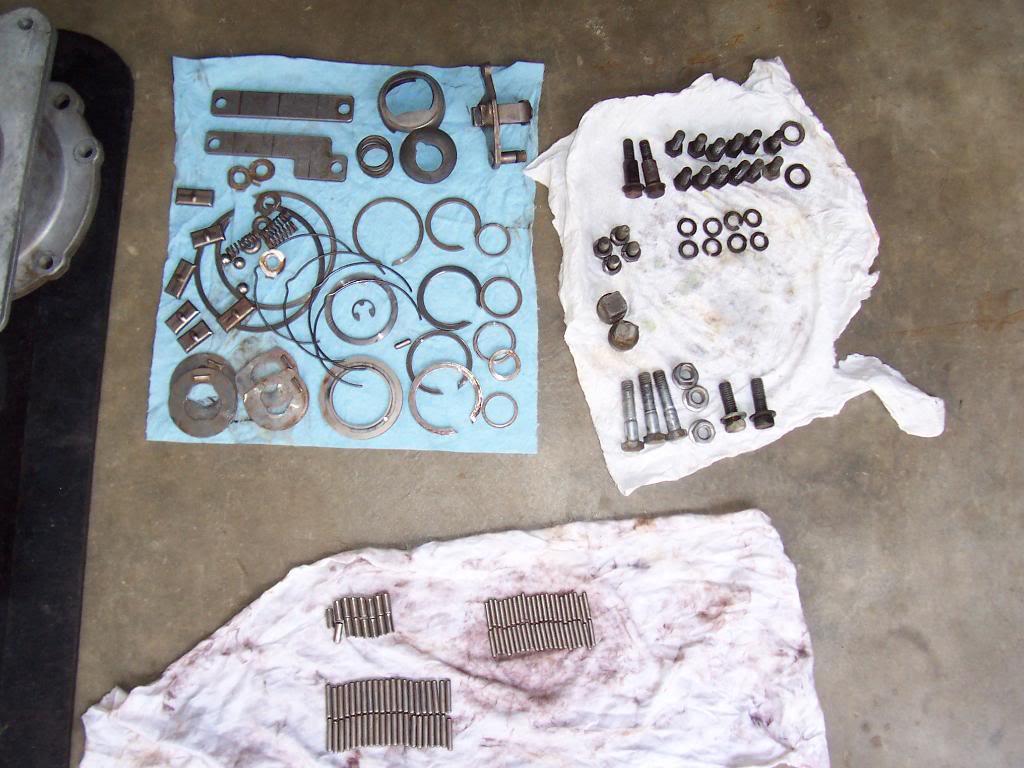
All the transmission small parts. No damage here, not even any wear to the original thrust washers or snap rings.
0047-1.jpg


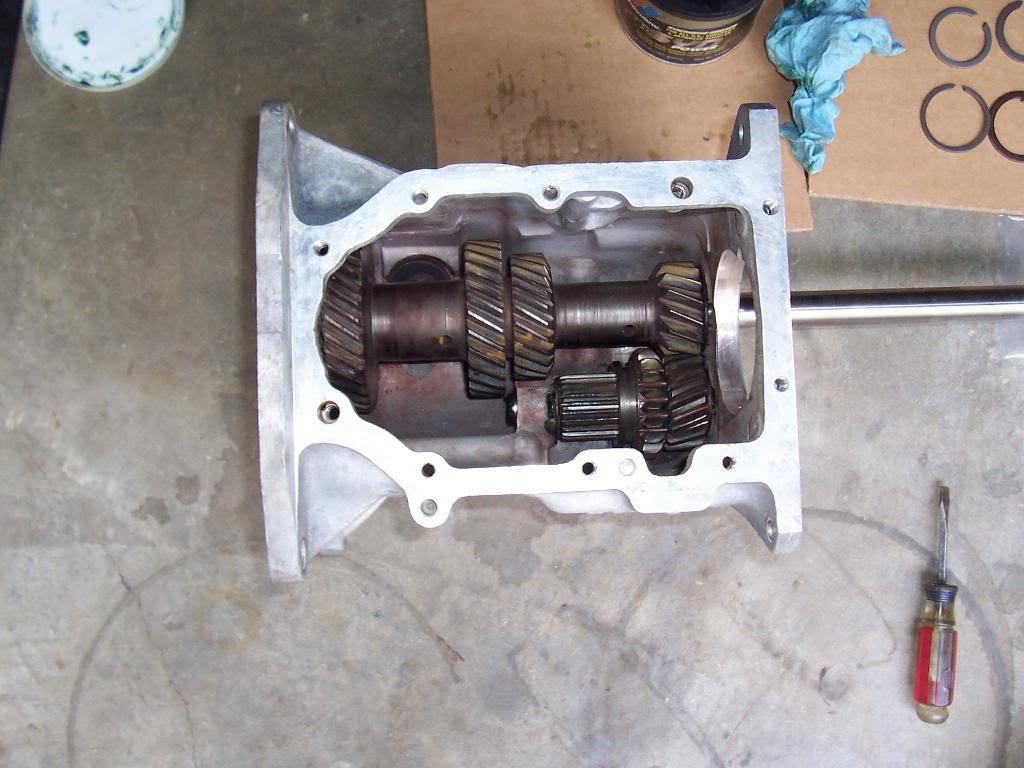
After cleaning and inspecting all the parts, began the reassembly. Used a rebuild kit, so I changed all the roller bearings and the two big ball bearings and snap rings. I reused the factory brass thrust washers because there was no wear on them and I like them better then the rebuild kit supplied plastic washers. Picture of the reverse gear assembly and cluster shaft installed.
0056-1.jpg


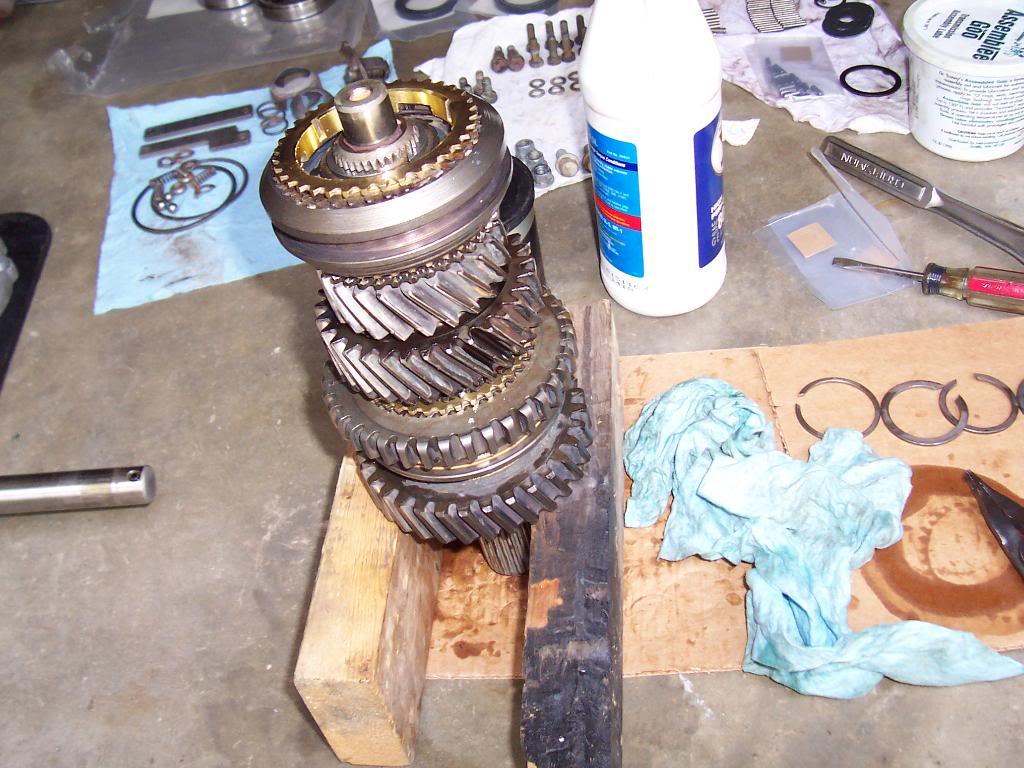
Next up was the main shaft. I installed new synchronizers blocking rings, the shiney brass parts. Main shaft goes back together fairly easy, just make sure you put all the snap rings on, don't forget the thrust washer, and install the syncro hubs on facing the right way.
0067-1.jpg


WORD OF CAUTION ON THE SYNCRO ASSEMBLIES - There are two different size little metal tabs that go in the syncro assemblies, 3 short and 3 long. The long ones go to the 1-2 syncro, the short ones go to the 3-4 syncro. The FSM does not mention this, so be careful. I assembled this transmission, went back and looked at one of my parts pictures, and realized there are two different length tabs. Had to disassemble the transmission and reassemble correctly. I don't think I caught this issue when I put the transmission back together in my red Scrambler, and after driving several thousand miles I have not had any issues. It might not cause a problem, but BE CAREFUL.

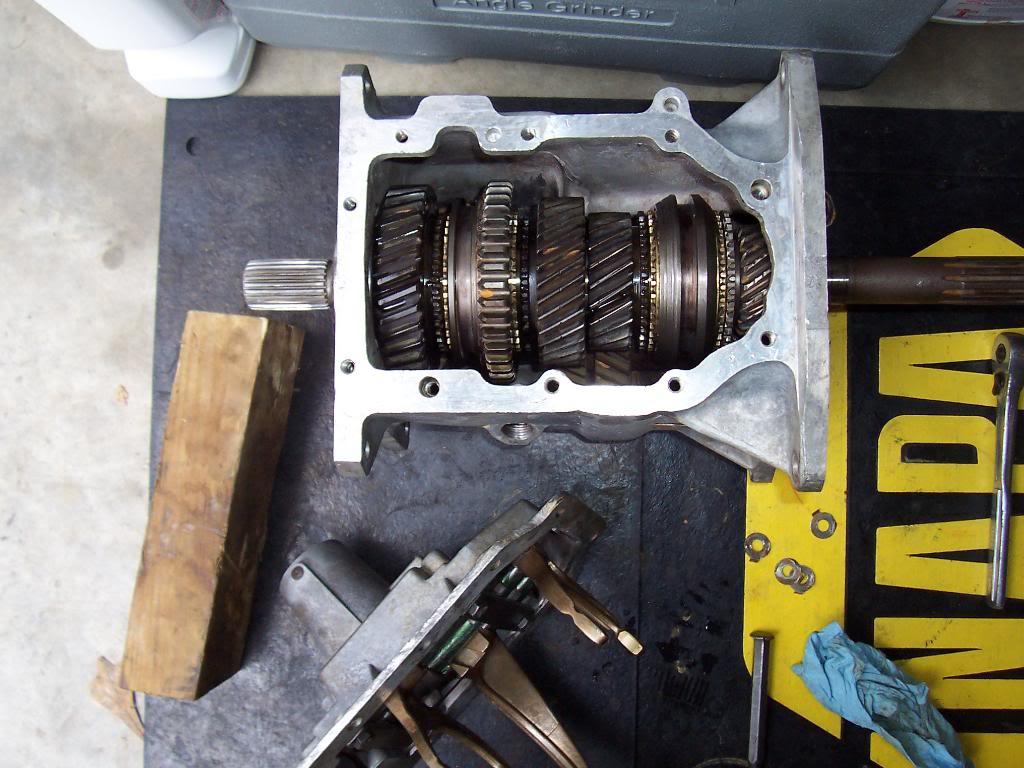
Main shaft, input shaft, and rear adapter housing installed.

0019-1.jpg


The reassembled shift tower assembly.

0029-1.jpg


Only issue I had with this transmission - One of the threaded holes in the front of transmission case that secures the front bearing retainer was stripped out. I re tapped this hole and used a slightly longer bolt to secure the retainer, after making sure the slightly longer bolt would not rub against any moving parts in the transmission. Be careful threading steel bolts into aluminum housings.

0048-2.jpg


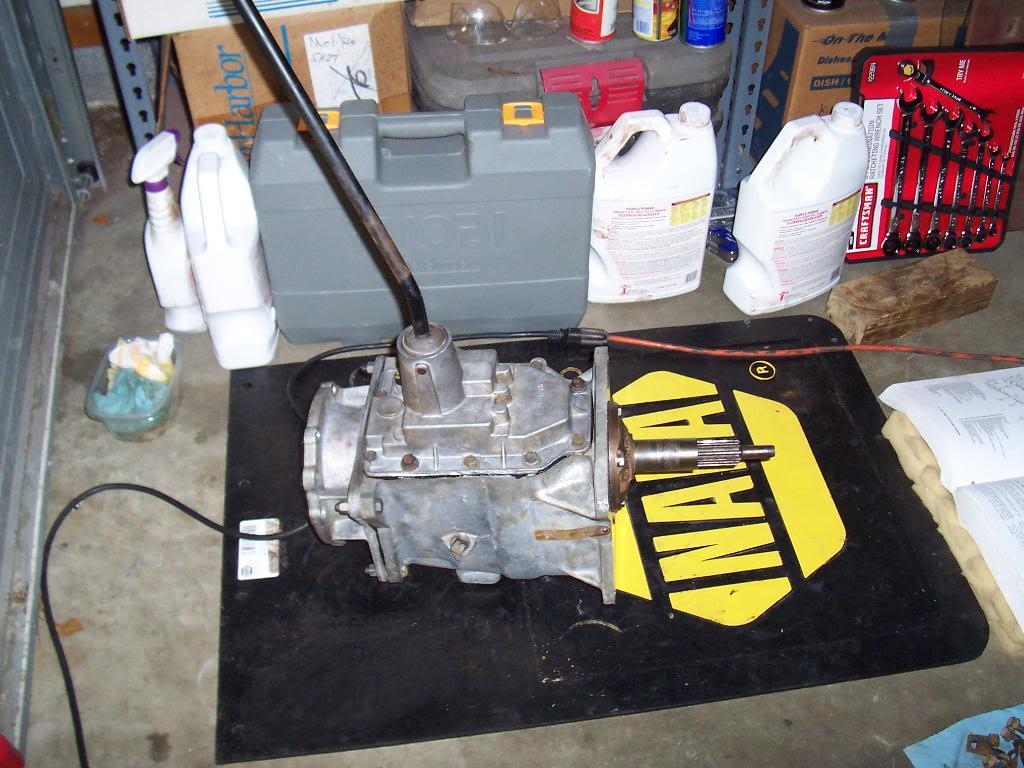
And the reassembled transmission.

00310-1.jpg


That's it for now.
 
I see Santa brought you some ratcheting wrenches early this year.. one of my favorite tool buys for working on the Jeep :thumbsup:
 
I forgot about this one:eek::crazy:;)

I have not done any work to "Yard Scrambler" lately, except I did steal the speedometer head and installed it into my red Scrambler:evil: My red Scrambler had "bouncing speedometer needle syndrome" due to being wore out:shrug:


A recap on the work completed so far:

1) Changed out the leaf springs/shocks and a few suspension hangers with good used parts. Installed all new suspension bushings.

2) Swapped in a good used rear axle. Swapped in axle came with a Detroit Locker and 1-piece axles. I did change the axle bearings/seals, and installed all like new drum brake parts.

3) Rebuilt the front axle, including swapping in a used ring and pinion to match the rear ratio. All new diff bearings, wheel bearings, seals, rebuilt hubs, good used tie rod/drag link, etc. Installed Aussie Locker in front differential, too.

4) The recently rebuilt T176/Dana 300 combo that I just pulled out of my red Scrambler is sitting on the floor of the garage ready to swap in, Painted the skid plate, cleaned up the bell housing and clutch parts. I also have a new Center Force Dual Friction pressure plate and clutch disc that came for free with my T5 acquisition.


The last major work needed: engine and some paint work. The engine needs to be rebuilt, which should be no major ordeal. As for paint, I plan on pulling the tub and blasting the underside and repainting the bottom of the tub and the bed. There is no rust through, but lots of surface rust. This tub is in too good of shape to let it rust away. Going to leave the factory faded green paint on the exterior, though. Has a nice "Patina":D

Probably no major updates until after Moab:(
 
4) The recently rebuilt T176/Dana 300 combo that I just pulled out of my red Scrambler is sitting on the floor of the garage ready to swap in, Painted the skid plate, cleaned up the bell housing and clutch parts. I also have a new Center Force Dual Friction pressure plate and clutch disc that came for free with my T5 acquisition.

:(

The clutch from a T5 work with the T176?

I thought they were different, but would be nice since I have a CF2 clutch in my T5 now and have a T176 to swap in. I figured I'd have to buy a new clutch.
 
The clutch from a T5 work with the T176?

I thought they were different, but would be nice since I have a CF2 clutch in my T5 now and have a T176 to swap in. I figured I'd have to buy a new clutch.

They are the same:cheers:
 
Sweet. Just how hard is that T176 to rebuild? I've got two of them in my shop and figured I'd go through them before I put one in. Just looks like a LOT of moving parts to get back into place, and I don't work well with gears etc.
 
Sweet. Just how hard is that T176 to rebuild? I've got two of them in my shop and figured I'd go through them before I put one in. Just looks like a LOT of moving parts to get back into place, and I don't work well with gears etc.

They are fairly easy to rebuild. The hardest thing about tearing one down is removing the front and rear bearings that are a tight fit in the case. Also, keep the "fingers" with the correct synchronizer hubs. Other then that, piece of cake:thumbsup:
 
Bringing this project back up from the dead;)

I made it back from Moab in one piece, and my red Scrambler and Green Scrambler are currently running great, so I deccided to get back to work on project "Yard Scrambler":thumbsup: I need to get this one finished up so I can take posession of my '84, which jeepaddict is currently holding hostage:angry:

Going to ease back into this project by working on some easy stuff. I am hoping to get all the door functions operational. I replaced the regulator in the passenger side window, so now that window rolls up and down. The passenger door opens from the inside, but not the outside, so I still need to work on that. I plan on working on the driver side door next, then change out the windshield frame.

Basically, I am trying to get all the individual body components back together/functioning before I pull the body tub off to do some surface rust repair/repaint.

I will post some pictures of the damaged door components/windshield in the next few days. Nothing too exciting, but pics are pics:D

My plan is still: repair surface rust/put body back together, rebuild engine, then reinstall engine/trans/transfer case. The axles and suspension are already finished up (minus brake lines and fuel tank), then drive the thing. Easy, simple plan:rolleyes:

That's it for now:wave:
 
Let me know what parts you need. I have a nice tan 84 from dry Cali that I've been using as a parts vehicle. :bacon:
 
Passenger Side Door Repairs

When Tommy picked this Scrambler up, the passenger side door window was inoperative, the outside door handle would not open the door, and the lock did not function.

The window regulator arm was severely bent, thus causing the window not to function. I replaced this regulator with a good used regulator, after thoroughly cleaning the old grease from the regulator and applying new grease. Now, the window functions perfectly, and rolls up and down with minimal effort.

As for the exterior door handle, this took me a little while to figure out. The interior handle would open the door fine, but the outside handle would not. All the linkage was intact, and all the plastic bushings were still in great shape, and no bent rods. After thoroughly cleaning the door latch mechanism with brake parts cleaner, then applying white lithium grease to all the moving parts, then working all the parts by hand, the exterior door handle works perfect. After the cleaning and re-greasing, the interior door lock button works perfectly, too.

All in all, I was pretty happy to get all this stuff functioning again with minimal work, and no parts replacement. Basically, all the linkages/mechanisms were just froze up from not being used for so long. I think the window regulator got bent from people trying to force the window down, with a "dry/stuck" regulator.


Driver Side Door Repairs

The driver side is going to take a little more work. The driver side has a busted vent window, the window will not roll up or down, it is missing the latch post from the body, the interior and exterior door handles are inoperative, and the door lock is inoperative.

Vent window is an easy fix, I have a good used replacement unit. After carefully lowering the window, I did not want to use too much force and break the regulator, I was able to disassemble the door. After a quick brake parts cleaner spray, and a re-grease of the existing window regulator, I now have a perfectly functioning driver side window.

As for the door handles, I have not finished my investigation yet. All the handles are intact, linkage and rods are intact, but everything is froze up. I sprayed everything down with cleaner and re-greased all the moving mechanisms, but beside getting the lock to function, all door opening/latching functions are still a no go. But, I think I know why, but it will be easier to explain with pictures.

I will post some pictures up tomorrow, and hopefully have some more progress.

One more quick comment: I was able to remove every screw/fastener from both doors with out breaking anything/stripping any heads. Also, after I washed out all the old dirt/leaves/pine straw/broken pieces of weatherstripping from inside the doors, it revealed perfect rust free paint. Each door does have the little stress cracks forming near the vent windows, but other then that minor flaw, these doors are structurally sound. This Scrambler may look "a little rough around the edges", but is has actually been quite pleasant to work on, so far:fingerscrossed:
 
Driver Side Door Repairs

I was able to get all functions working on the driver side door. The exterior handle was damaged, so I replaced it with a good used handle. The other issue with this door not functioning had to do with a froze up bushing on the rod that runs downward from the exterior handle. The pictures can explain this better. But, after replacing the exterior handle, unfreezing the stuck bushing, and installing the missing strike post on the body tub, everything functions perfectly on the driver side door, too:woohoo:

Time for some pictures. This stuff might be kind of boring, but it is pictures, and maybe this info will be useful to others?


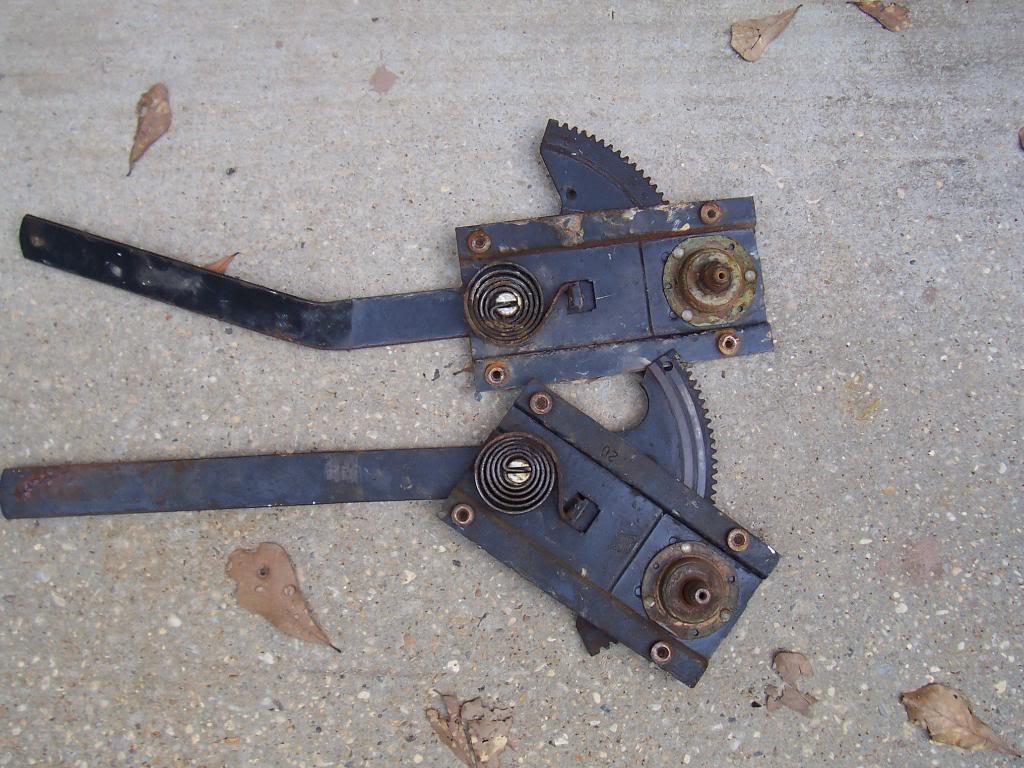
Picture of the damaged passenger side window regulator. The damaged one is on top, notice the bent arm.

00110-1.jpg


Picture of the broken driver side vent window.

00210-1.jpg


Picture of the inside on one of the doors. It is supposed to show how clean/shiny the paint is, but the picture sucks.

00311-1.jpg


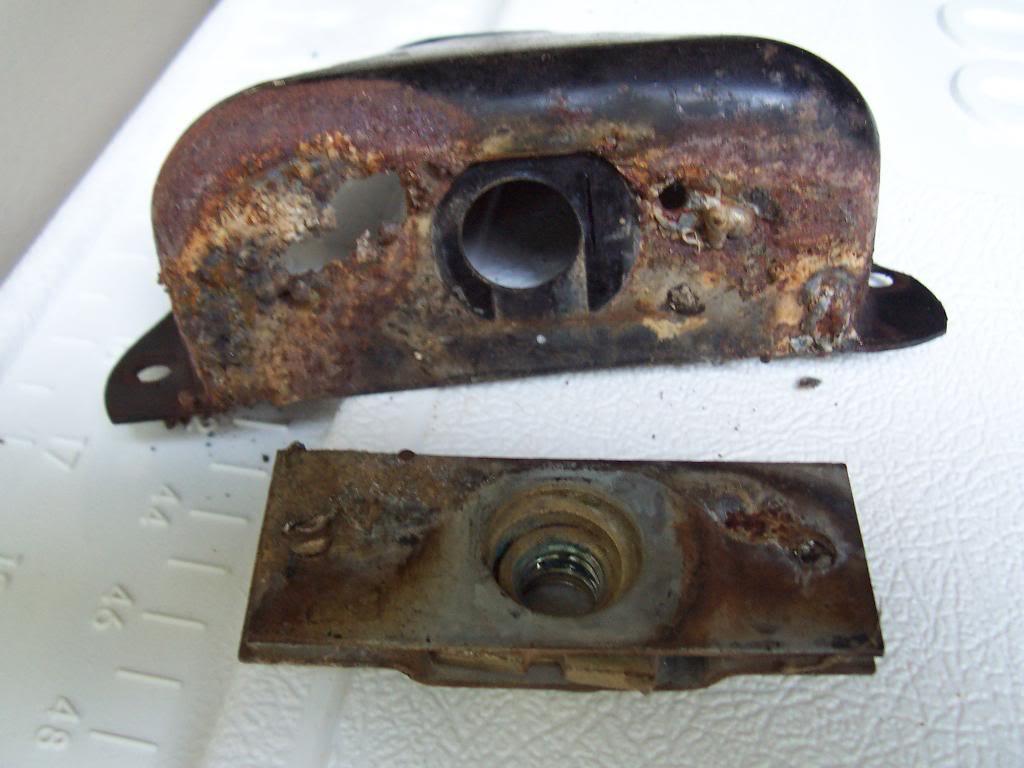
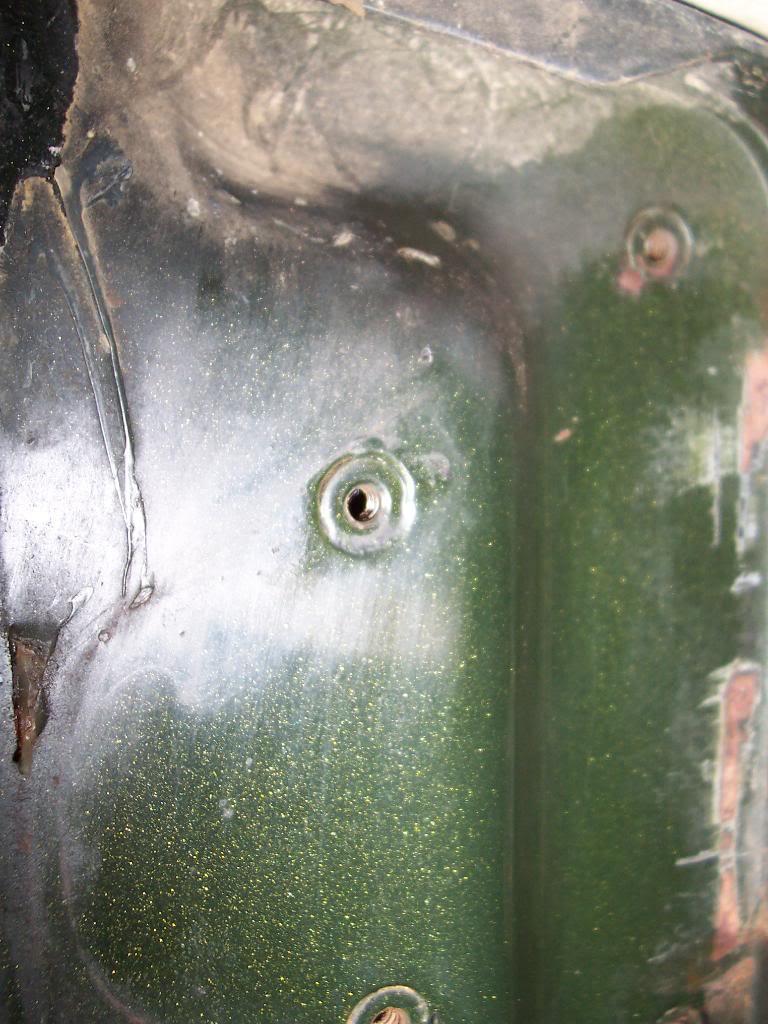
Picture of the damaged driver side strike post assembly. The sheetmetal piece in the fore ground, which contains a captured nut, was originally pop riveted to the inside of the sheetmetal piece in the back ground. The strike post then threads into this assembly. I am speculating that at some point in time, the pop rivets failed. Well, instead of unscrewing the sheet metal piece from the body and resecuring the sheetmetal piece to it with some small screws and nuts, it looks like someone tried to weld it back together. Well, it didn't fix the problems, but it did burn up this sheet metal piece.

0104-1.jpg


Picture of the nice, clean sheetmetal located behind the driver side striker post assembly.

0113-1.jpg


And the replacement striker post assembly. I used new pieces on my red Scrambler, so you can guess where these parts came from.

0143-1.jpg


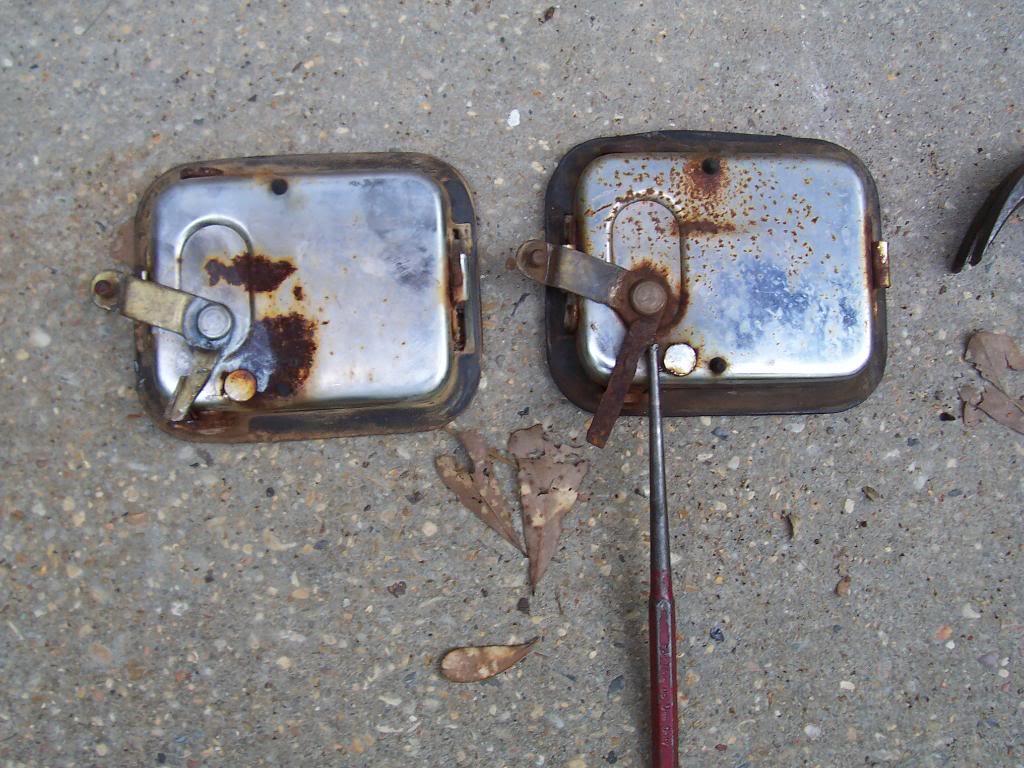
Picture of two driver side exterior door handles. The one on the left is an unmodified factory piece. The little actuating arm is bent/loose/wore out, so when you pull the handle, and the little piece turns, it does not make contact to the other arm, which hold the rod that goes back to the latch mechanism and opens the door. I tried to bend the arm back, but it is still too loose/wore out to reliably work. The handle on the right is one that came off of my red Scrambler. Looks like it had the same problem in the past. But, if you look where the punch is pointing, you can see where someone welded on a piece to repair this issue. It looks butch, but it works perfectly.

0123-1.jpg


Picture of the door latch assembly. The white stuff is white lithium grease. Note how I am using a loose striker bolt to test its operation.

0133-1.jpg
 
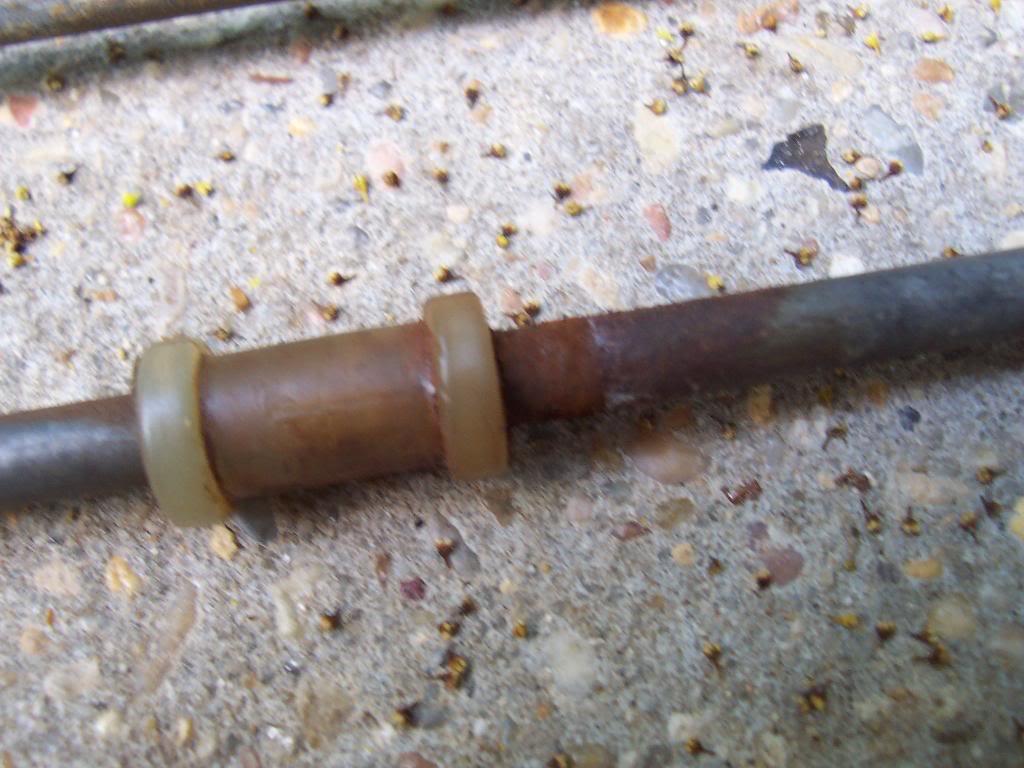
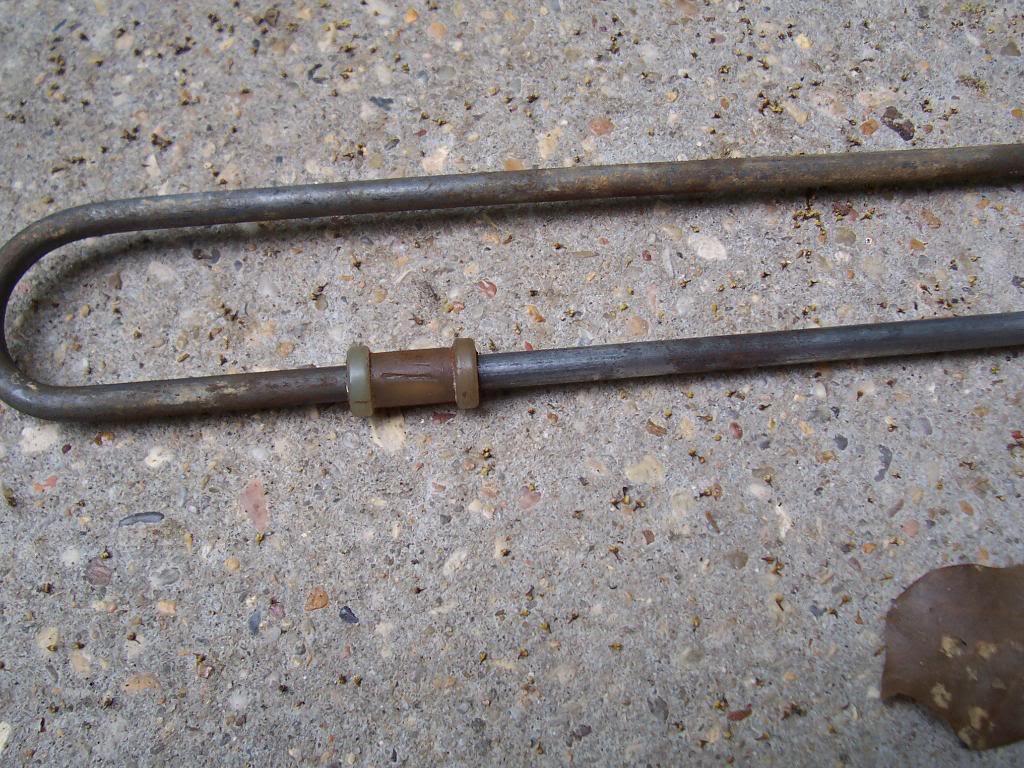
And here is some useful information. On the driver side door, even with the exterior handle removed, and me manually pushing the actuating rod, I could not get the latch mechanism to release. The problem was this little part that I am going to refer to as the "Factory Installed Actuating Rod Bushing", or FIARB for short. Basically, there is a metal strap inside the door that is secured to the rear glass channel. This metal strap has a clip, which hold the FIARB, which is installed on the long, u-shaped exterior door handle to latch mechanism actuating rod. The actuating rod is supposed to run nice and smoothly through the FIARB. I am speculating here, but I believe the purpose of the FIARB is to ensure that the downward motion of the actuating rod remains true, i.e. when you pull the exterior door handle, the actuating rod is pushed downward to release the latch. I believe the FIARB also keeps this lond rod from rattling inside the door. That all sounds nice and good in theory, but over time, the grease on the actuating rod gets hard, the rod rusts, and then the FIARB siezes on the actuating rod. That was the case on this driver side door. I removed the rod, cleaned it up, greased it, and now the FIARB allows the rod to pass smoothly through it.

Some pictures.

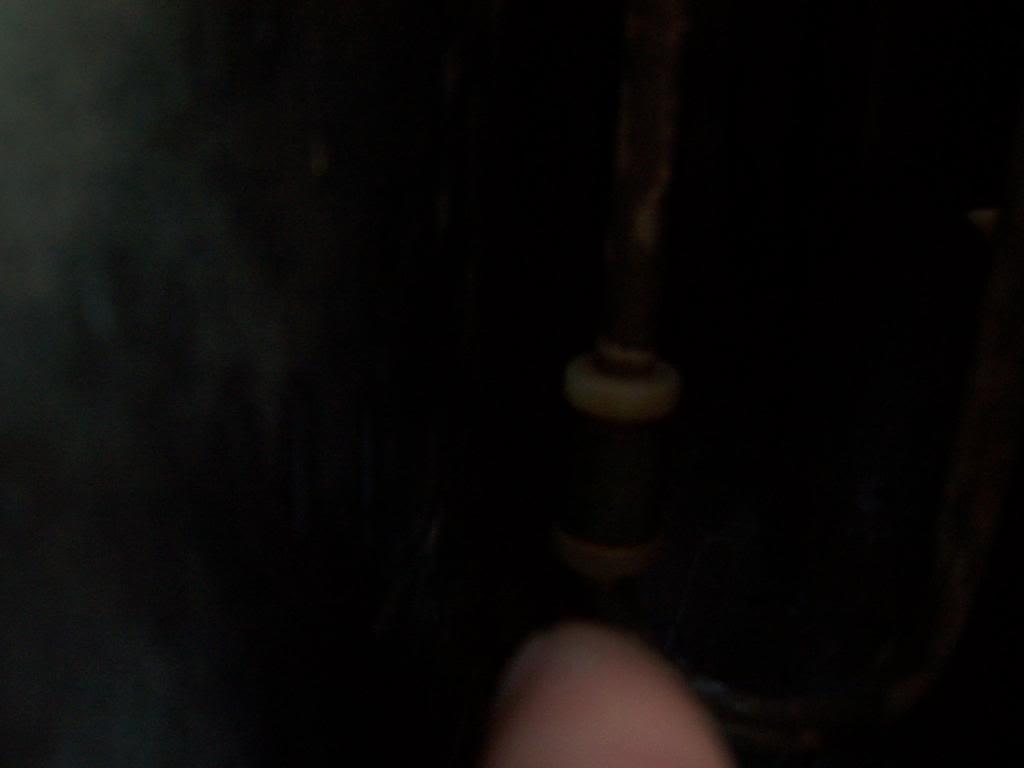
This is a bad picture, but it shows the passenger side door FIARB bushing. On the passenger side door, the FIARB came loose from the clip along time ago and has been resting on the bottom of the rod. I believe this is why I had no issues on the passenger side door, i.e. the FIARB was not in place, so it could not sieze up the actuating rods motion.

0049-1.jpg


Picture of the driver side FIARB, still attached to the clip. This was before I pulled the rod to repair the siezed FIARB.

0057-1.jpg


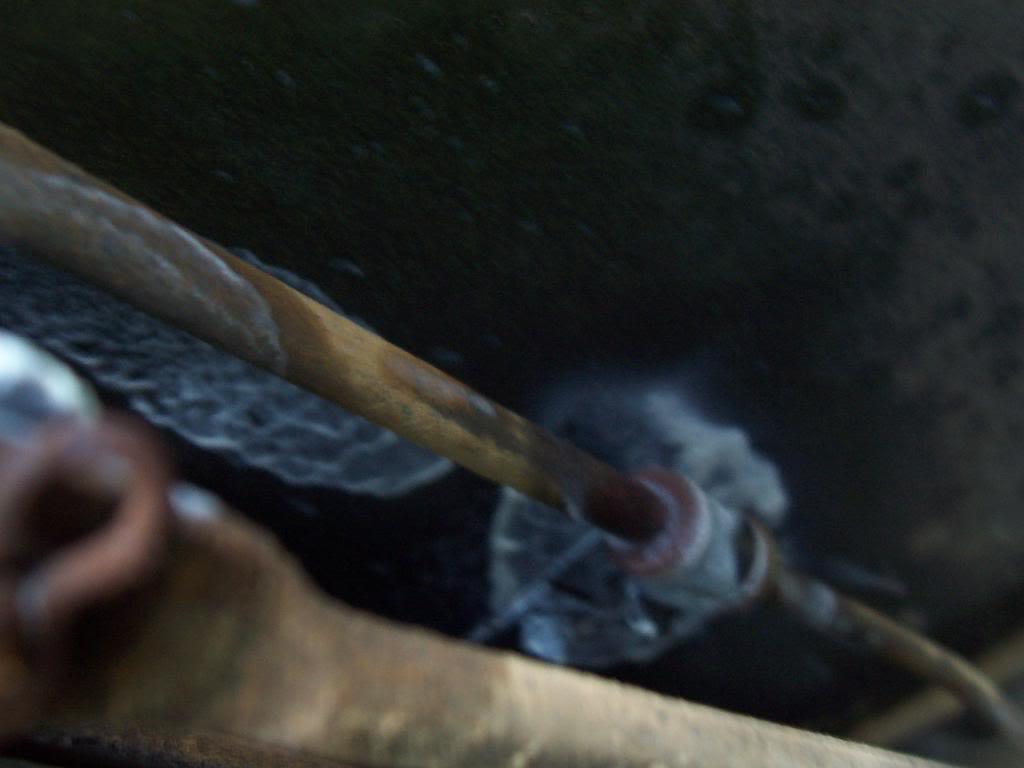
Two pictures of the long, u-shaped actuating rod that runs from the exterior door handle to the latch mechanism. Both pictures are before pictures, i.e. no clean up has been done. Since this rod is so long, and basically runs down from the exterior door handle, makes a "U", then runs back up to the latch mechanism (it makes this "U" to clear the door glass), this lenght is the reason for the FIARB. The FIARB positively locates the rod, keeping it from deflecting, and also keeping the rod from rattling against the door glass/inside of the door.

0077-1.jpg


0086-1.jpg


And a picture of the actuating rod after I polished it up with some emery cloth. After removing the rust ad regreasing the bushing, the bushing slides up and down the rod very smoothly.

0094-1.jpg


A few more words on the FIARB. On my red Scrambler, I didn't pay attention to the FIARB clips and left them loose. My door handles work perfectly, BUT every once in awhile I can hear the rod rattling against the glass. It is a faint noise, but present. The FIARB does not necessarily have to be installed, but it is a nice feature. Now that I understand its purpose, I will fix the passenger side FIARB on this Scrambler, as well as installing them on my red Scrambler. They might not be necessary, but they do eliminate a slight rattle. Also, with the FIARB installed and functioning, very little movement of the exterior dood handle is necessary to open the door. The FIARB ensures that the actuating rods motion remains all vertical, it does not allow for deflection. So, if you have to pull the exterior door handle really far before the door opens, look into the FIARB.


Picture of the passenger door and driver door. Boring, but I am happy with them. It is nice having all the functions on the doors working properly. Sometimes, its the little things that make the biggest difference.

0163-1.jpg


0153-1.jpg


That's it for now.
 
Back
Top